
Kevwood's mods - The H3 build thread


Thread Starter
|
Member
Joined: Jul 2012
Posts: 48
From: A Canadian in Dubai, United Arab Emirates
The next project I had lined up was the audio system, my H3 came with the basic CD player so I wanted to upgrade to something better with navigation. In all my previous project cars I've used eXcelon systems, fantastic products but this time I thought I'd use a system that didn't require a dash kit as to keep with the very strict OEM looking theme. I found a multi-system that check off all the boxes I needed;
Navigation
CD
DVD
Bluetooth
iPod in
Reverse camera in
Aux audio in
Onboard equalizer
Triple pre-outs
At the same time I decided I would also install a starter/alarm combo. No winters here to need a warm up but when it's 50*C and humid outside, a startup with cool down is sure nice to have. Here is what I ended up going with;
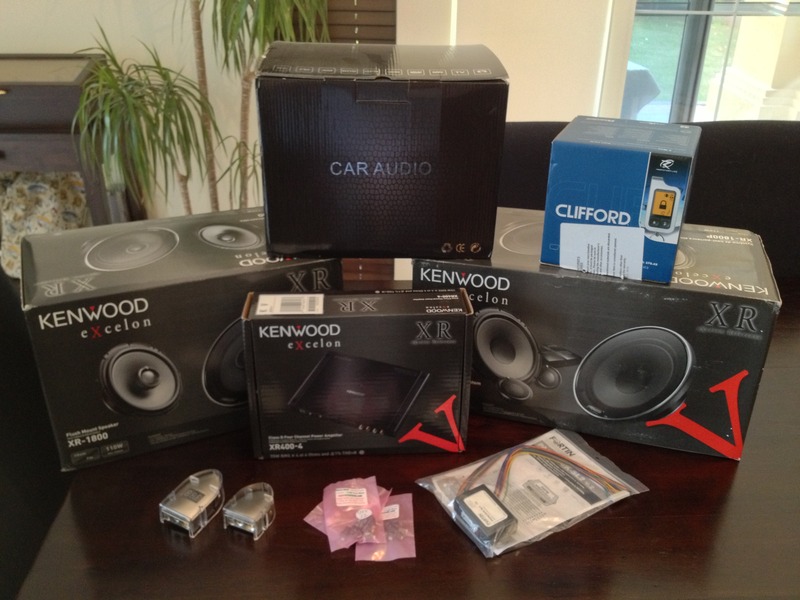
-Multifunction head unit made for the H3
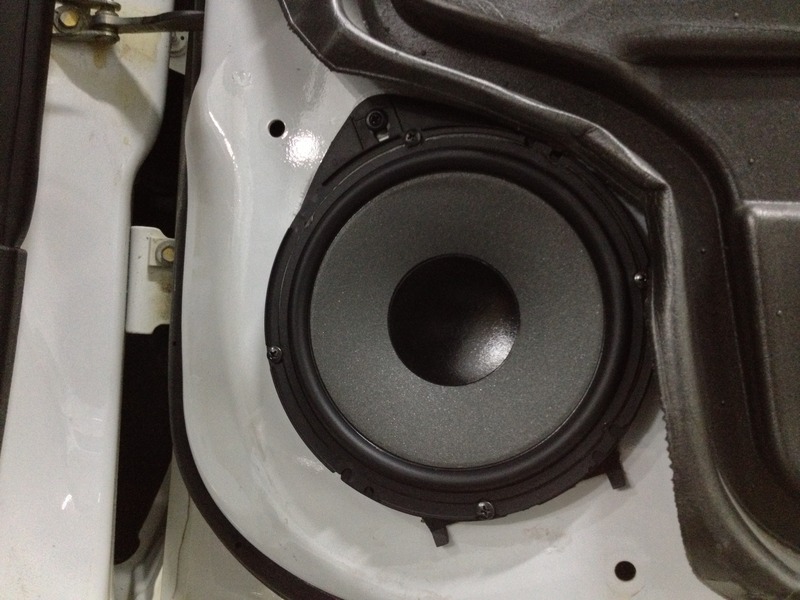
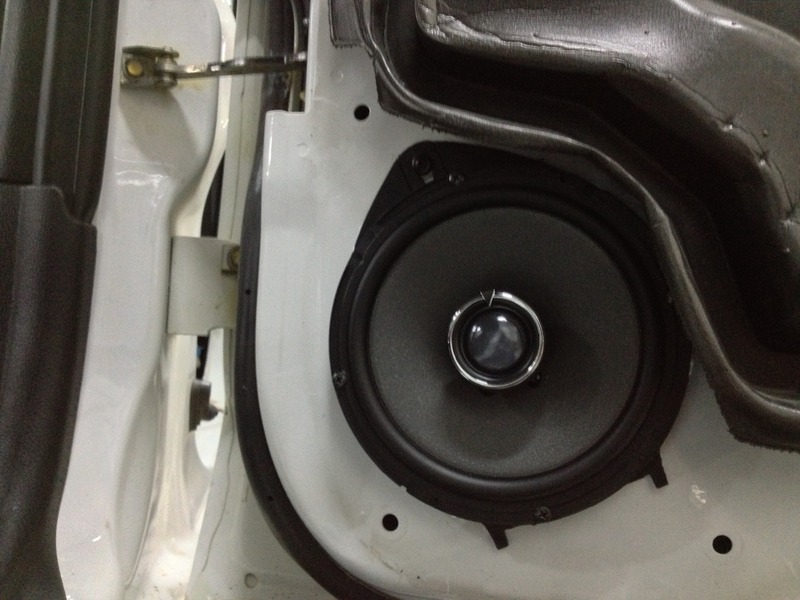
-eXcelon 7"/1" components for the front stage
-eXcelon 7" coaxials for the rear stage
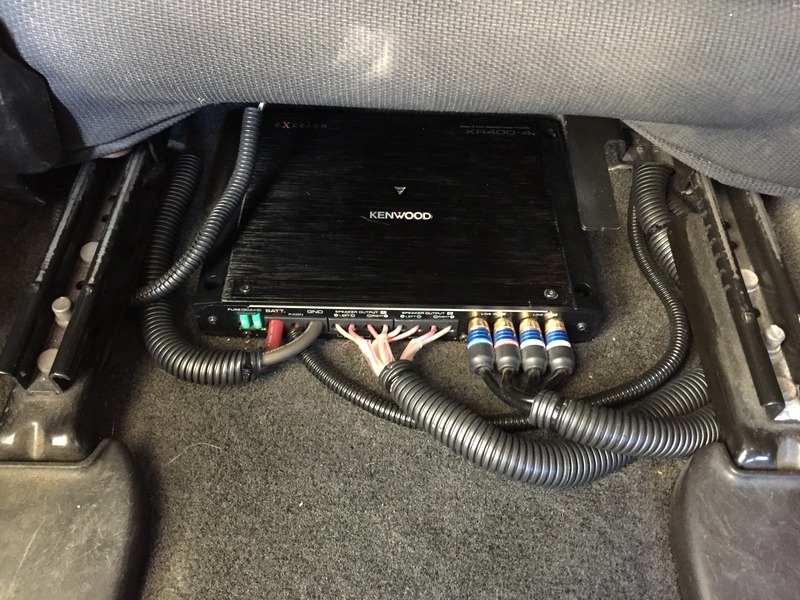
-eXcelon digital amp (tiny amp, big power, low heat)
-Clifford starter/alarm combo (1 mile range, 2 way LCD remotes)
-Bypass module
-Digital voltage battery blocks
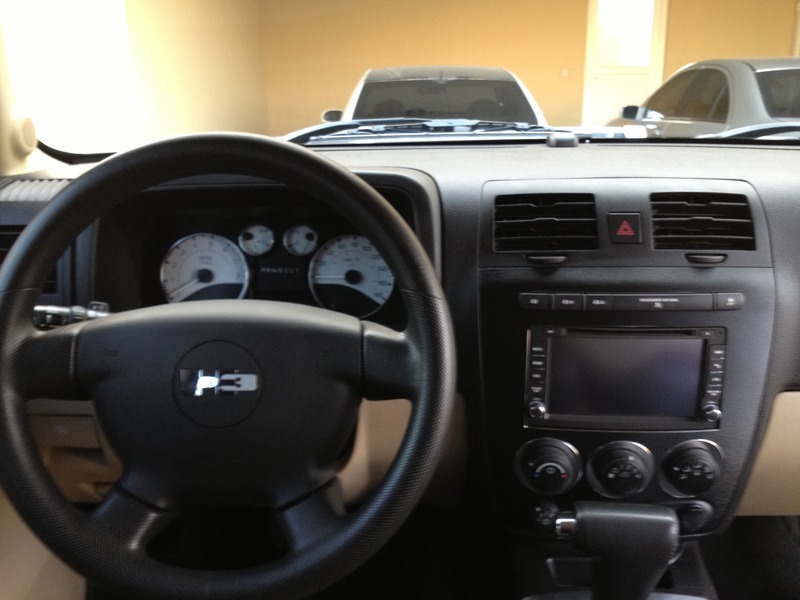
While doing this I figured it would be the opportune time to do some interior facelifting. I've always like the exterior of the H3, angular, stout and unique amongst brands, what I didn't know until I bought one was how much I'd like the interior. It's not flashy, it's simple but not plain, doesn't look new or old, as the vehicle age increases it doesn't look dated at all. The only thing I didn't like was the ugly finish to the center stack cover & gauge bezel - it looks entirely out of place IMO. So, I decided I would change it but try to do something that would not only go with the facelift but also look like it belonged there along with the other interior textures. I decided against paint and went with vinyl, a black brushed steel look;
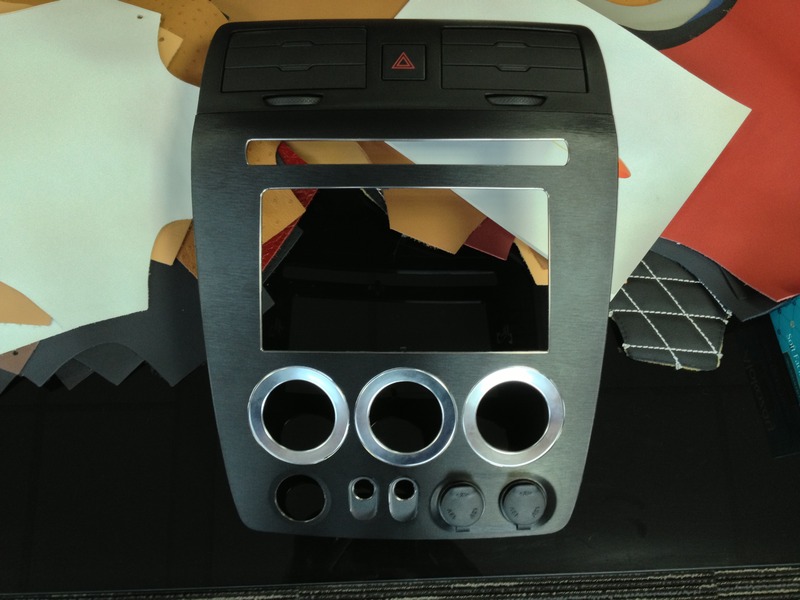
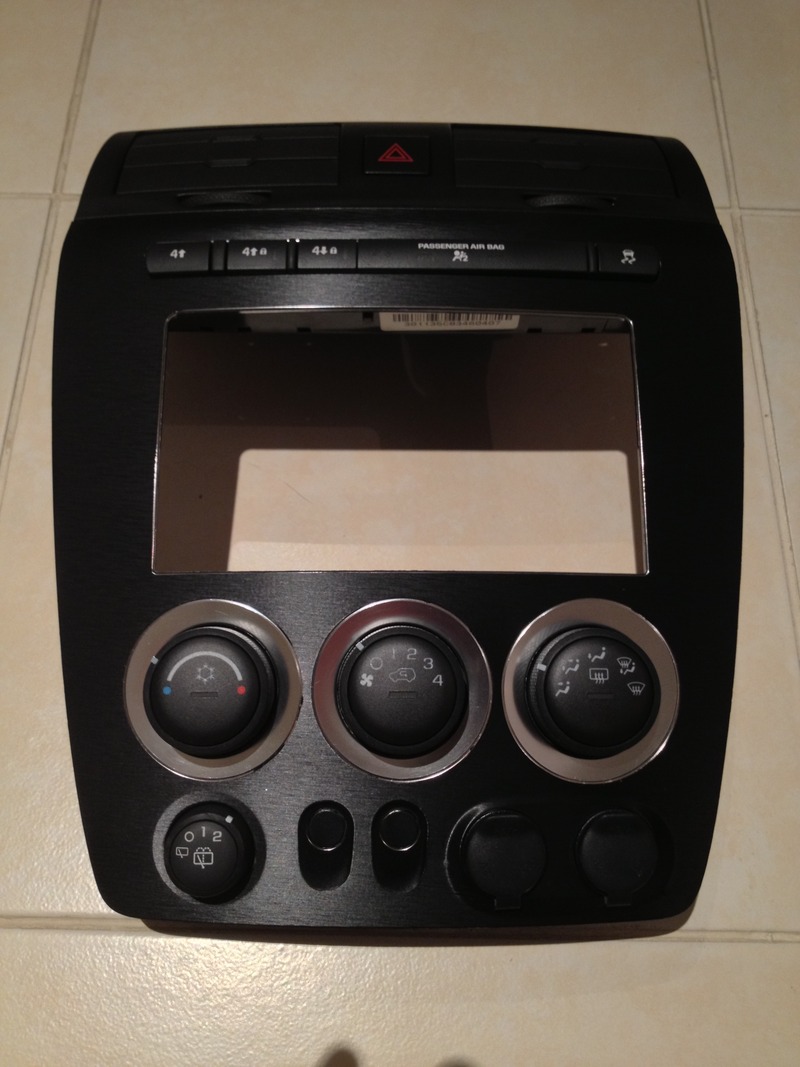
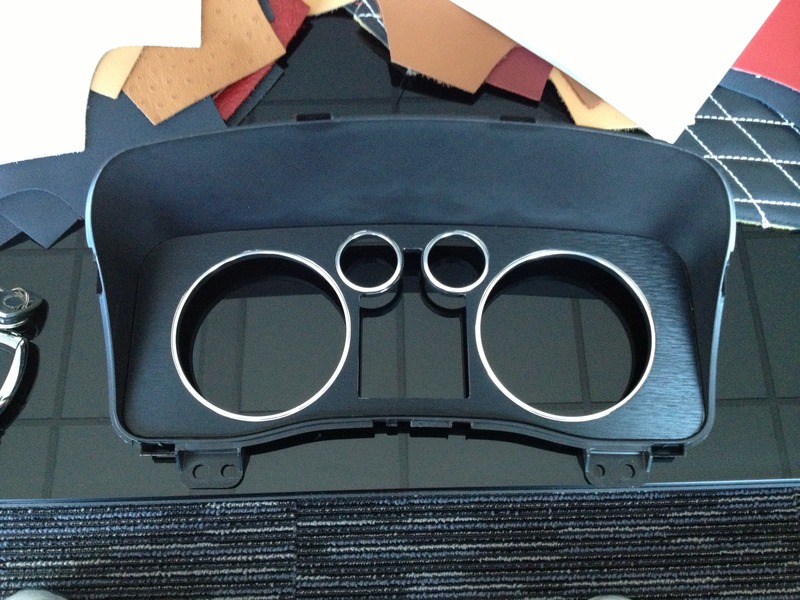
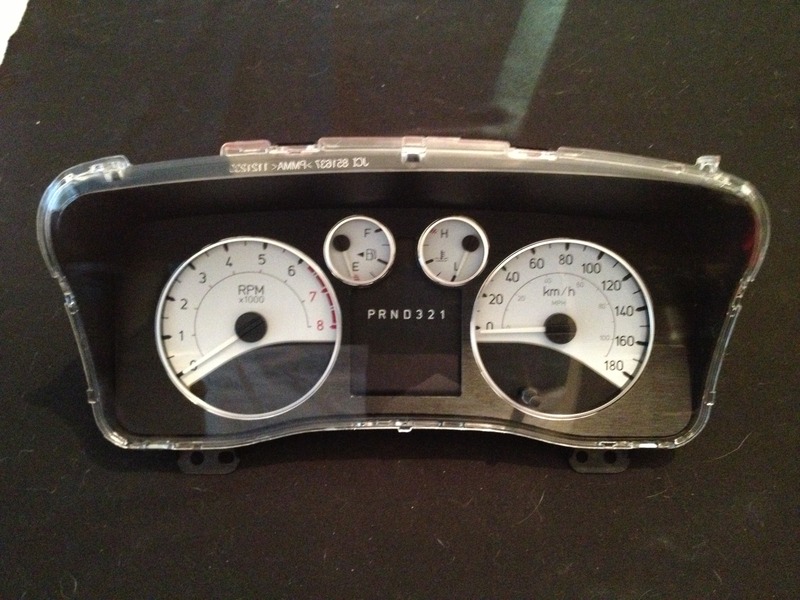
As you can see, I left the silver rings exposed around the climate controls to go with the shift bezel surround, I also left the silver ring around the gauges silver to lend a bit of contrast. As for the gauges themselves, I ditched the black and went with a fresh looking white set;

With that done it was back to installing the new AVN system.
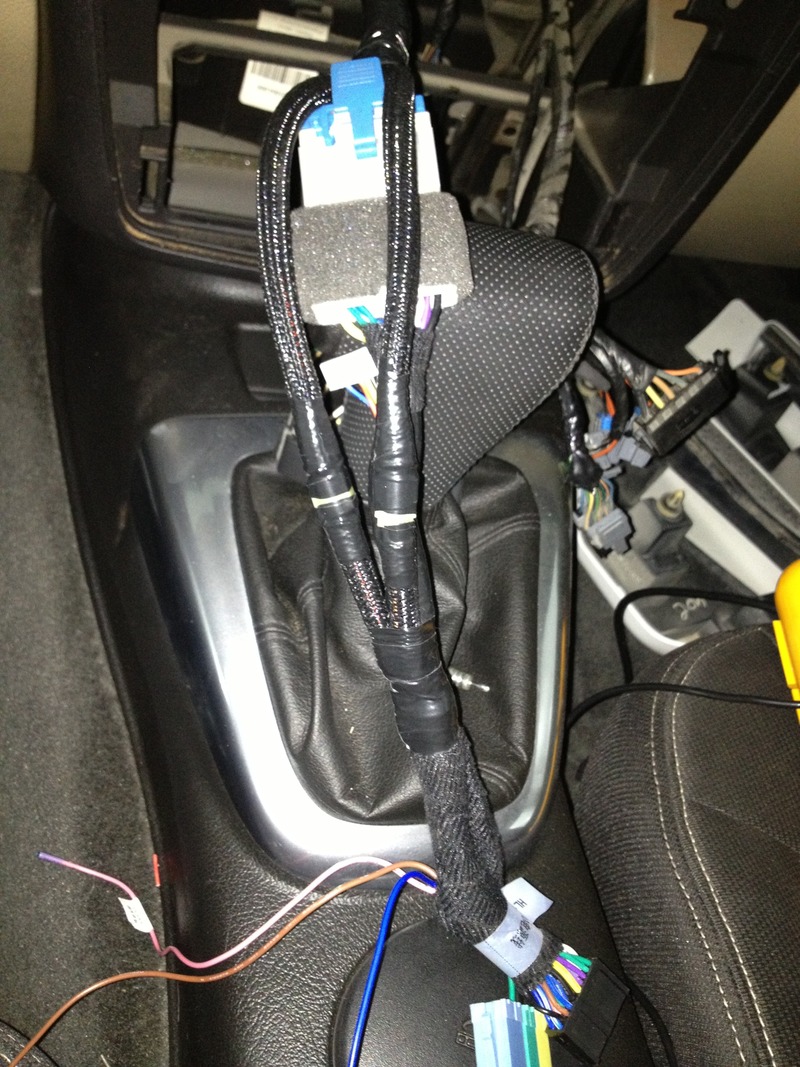
The system came with a plug and play harness for the H3 but again like the HID headlight conversion, I found that some of the wiring in the South African produced H3 is different than the American made model. I had to add a new illumination and accessory wire. Instead of soldering I used insulated spade connectors so they could easily be unplugged along with the main harness if need be;

As for installing the unit itself, it fit like a glove after I removed the tab behind the OEM unit. The aftermarket one is just slightly deeper;
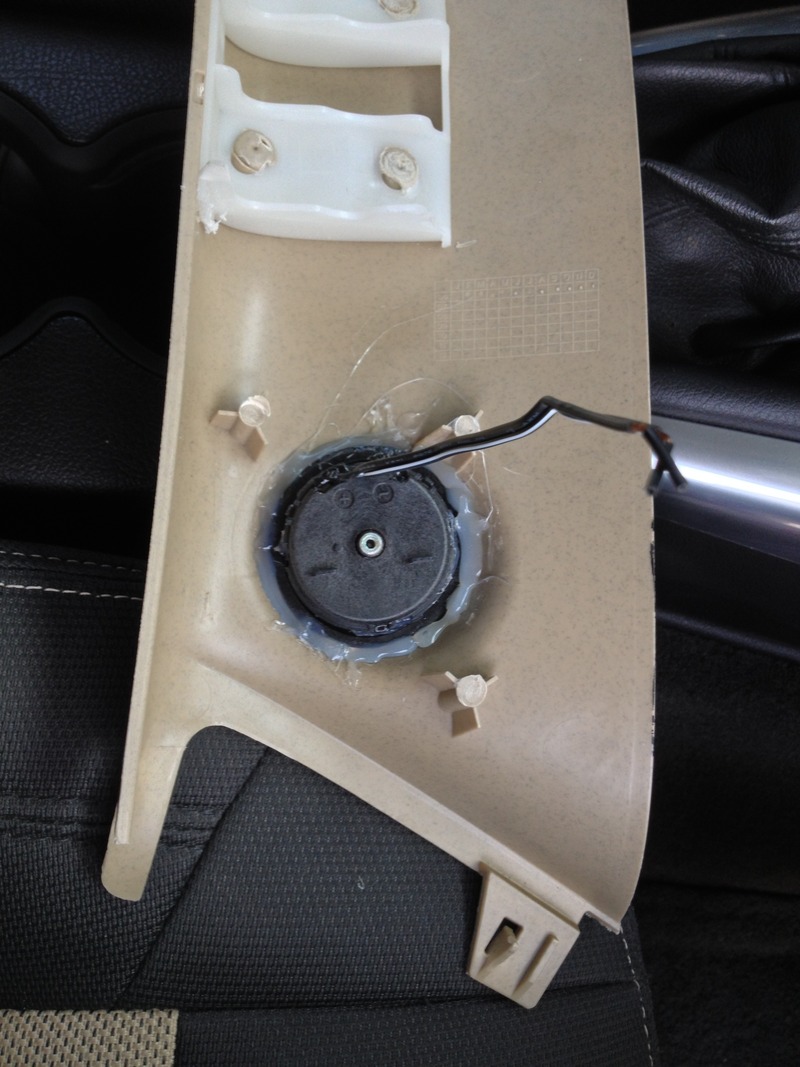
The component crossovers sat neatly underneath the AVN unit, tons of room in there. In fact, I could have actually installed the digital amp in that space if I was pressed for installation locations. The 1" component tweeters were installed into the pillars, I roughed them up with coarse sandpaper to give the high strength hot glue mechanical adhesion;
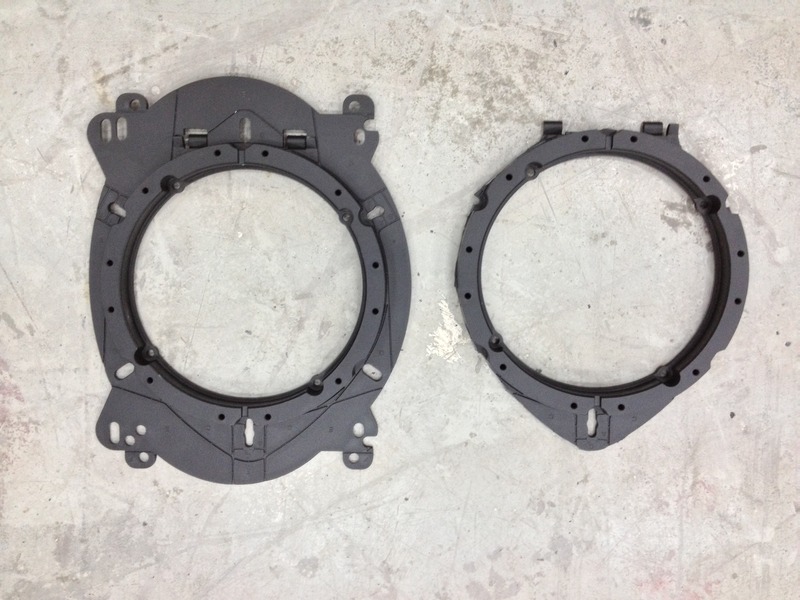
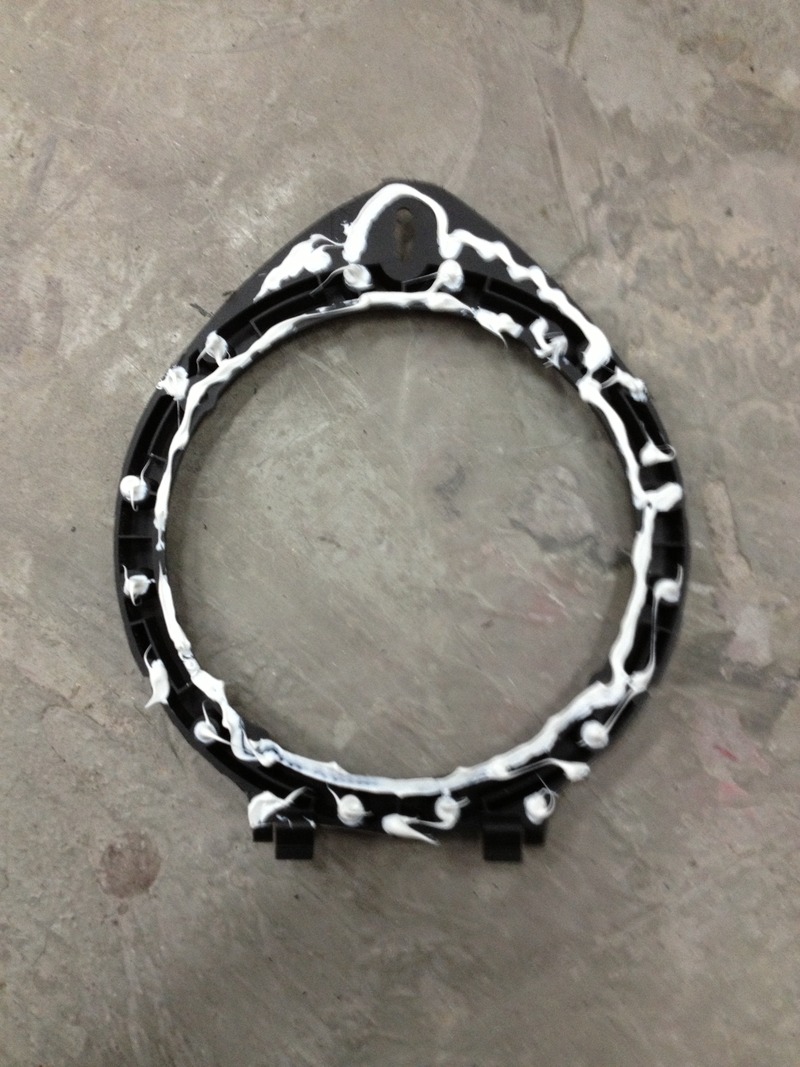
As for the speakers, I used the eXcelon included speaker rings, good thick plastic. I removed the access tabs, sanded them down smooth so they would lay flat them applied body adhesive before installing to ensure they were solid and would not rattle;
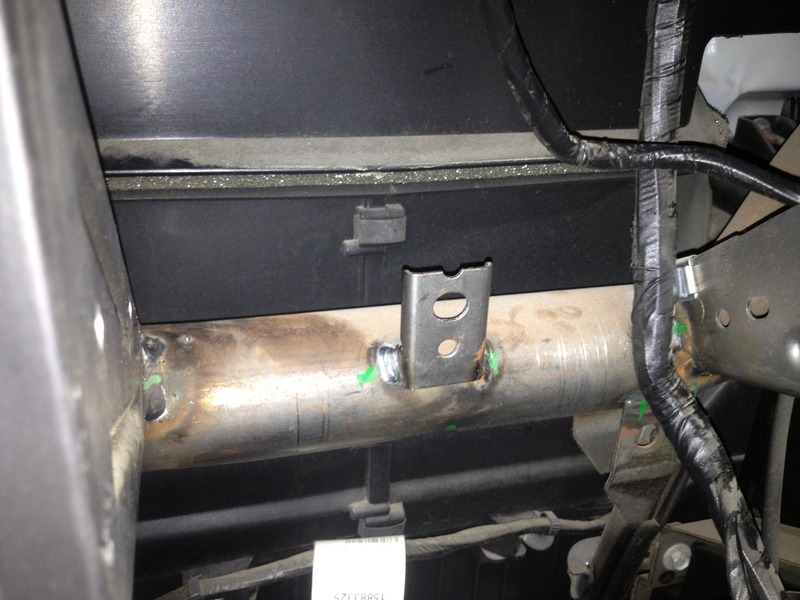
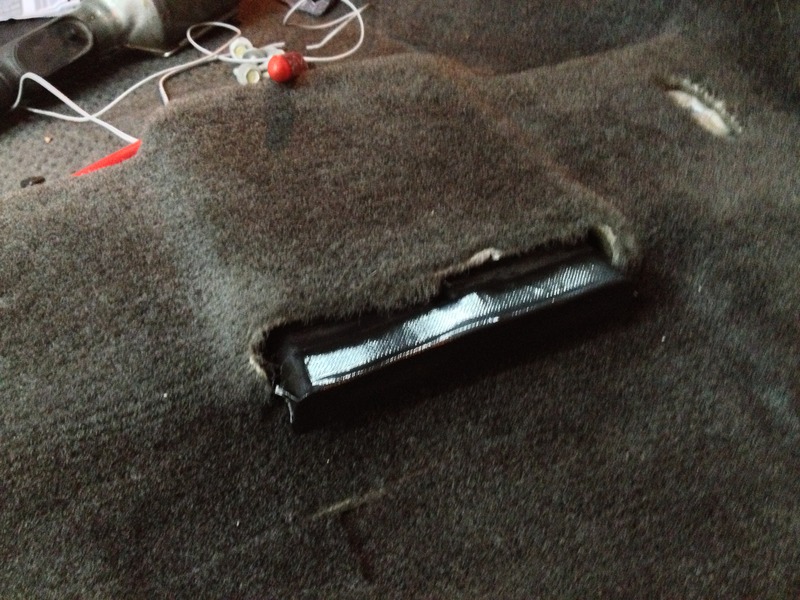
I installed the amp under the drivers seat, the small recession was more than enough room. I blocked off the vent with duct tape and ran the RCAs and speaker wires under the console down to the amp;
The AVN system sounds fantastic with the upgraded speakers and amp, the touch screen interface is excellent, iPod control is fast and easy to use and the iGo Primo maps are better than the Garmin system I had been using. As an unexpected bonus, the iGo even has a large amount of offroad trails in its database.
With it all put back together it looks great, fresh and I kept up the OEM facelift theme;
Navigation
CD
DVD
Bluetooth
iPod in
Reverse camera in
Aux audio in
Onboard equalizer
Triple pre-outs
At the same time I decided I would also install a starter/alarm combo. No winters here to need a warm up but when it's 50*C and humid outside, a startup with cool down is sure nice to have. Here is what I ended up going with;
-Multifunction head unit made for the H3
-eXcelon 7"/1" components for the front stage
-eXcelon 7" coaxials for the rear stage
-eXcelon digital amp (tiny amp, big power, low heat)
-Clifford starter/alarm combo (1 mile range, 2 way LCD remotes)
-Bypass module
-Digital voltage battery blocks
While doing this I figured it would be the opportune time to do some interior facelifting. I've always like the exterior of the H3, angular, stout and unique amongst brands, what I didn't know until I bought one was how much I'd like the interior. It's not flashy, it's simple but not plain, doesn't look new or old, as the vehicle age increases it doesn't look dated at all. The only thing I didn't like was the ugly finish to the center stack cover & gauge bezel - it looks entirely out of place IMO. So, I decided I would change it but try to do something that would not only go with the facelift but also look like it belonged there along with the other interior textures. I decided against paint and went with vinyl, a black brushed steel look;
As you can see, I left the silver rings exposed around the climate controls to go with the shift bezel surround, I also left the silver ring around the gauges silver to lend a bit of contrast. As for the gauges themselves, I ditched the black and went with a fresh looking white set;
With that done it was back to installing the new AVN system.
The system came with a plug and play harness for the H3 but again like the HID headlight conversion, I found that some of the wiring in the South African produced H3 is different than the American made model. I had to add a new illumination and accessory wire. Instead of soldering I used insulated spade connectors so they could easily be unplugged along with the main harness if need be;
As for installing the unit itself, it fit like a glove after I removed the tab behind the OEM unit. The aftermarket one is just slightly deeper;
The component crossovers sat neatly underneath the AVN unit, tons of room in there. In fact, I could have actually installed the digital amp in that space if I was pressed for installation locations. The 1" component tweeters were installed into the pillars, I roughed them up with coarse sandpaper to give the high strength hot glue mechanical adhesion;
As for the speakers, I used the eXcelon included speaker rings, good thick plastic. I removed the access tabs, sanded them down smooth so they would lay flat them applied body adhesive before installing to ensure they were solid and would not rattle;
I installed the amp under the drivers seat, the small recession was more than enough room. I blocked off the vent with duct tape and ran the RCAs and speaker wires under the console down to the amp;
The AVN system sounds fantastic with the upgraded speakers and amp, the touch screen interface is excellent, iPod control is fast and easy to use and the iGo Primo maps are better than the Garmin system I had been using. As an unexpected bonus, the iGo even has a large amount of offroad trails in its database.
With it all put back together it looks great, fresh and I kept up the OEM facelift theme;
Last edited by Kevwood; Jan 27, 2016 at 10:29 PM. Reason: added amp picture

Senior Member
Joined: Aug 2007
Posts: 997
From: Reno, NV
I'm a few pages late here on this post, but to make the STARR projection HID's work on a foreign H3 is very impressive.
This build of yours is quite remarkable and looks like you are doing everything the right way.
Very inspiring, thanks for sharing
This build of yours is quite remarkable and looks like you are doing everything the right way.
Very inspiring, thanks for sharing
Last edited by wfturner; Jan 12, 2016 at 07:23 AM.
Thread Starter
|
Member
Joined: Jul 2012
Posts: 48
From: A Canadian in Dubai, United Arab Emirates
Thanks. Hopefully other owners will be able to get some info out of this thread as I have from theirs over the years. Still lots more to come, I'll get some more posted over the weekend.
Thread Starter
|
Member
Joined: Jul 2012
Posts: 48
From: A Canadian in Dubai, United Arab Emirates
The next phase of the project was to start getting it ready for long haul trips and self contained camping. To get everything to fit that I had planned I needed to add a roof rack, I decided to go with the Gobi Stealth, shipping costs to have it sent over from the US is something I'm still trying to forget...
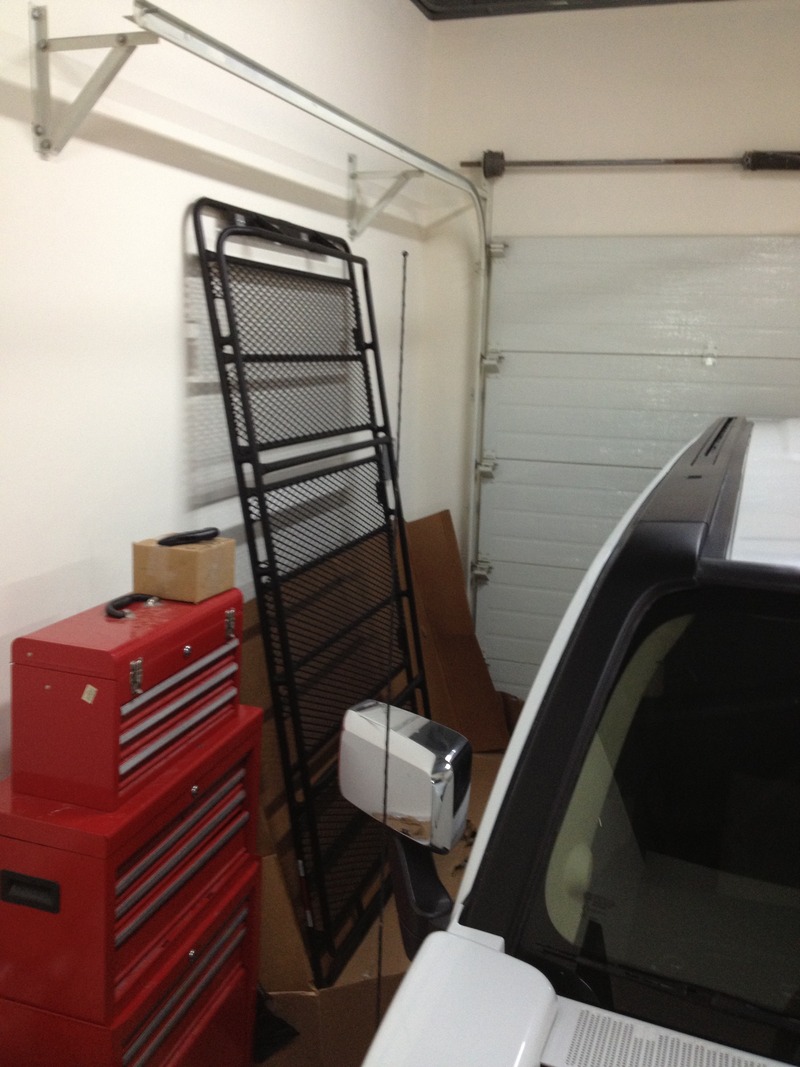
Another thing I'm trying to forget is installing it by myself - an extra set of hands would have made it a whole lot easier.

After installing the rack at home I took the truck into the shop to get working on installing the lights.
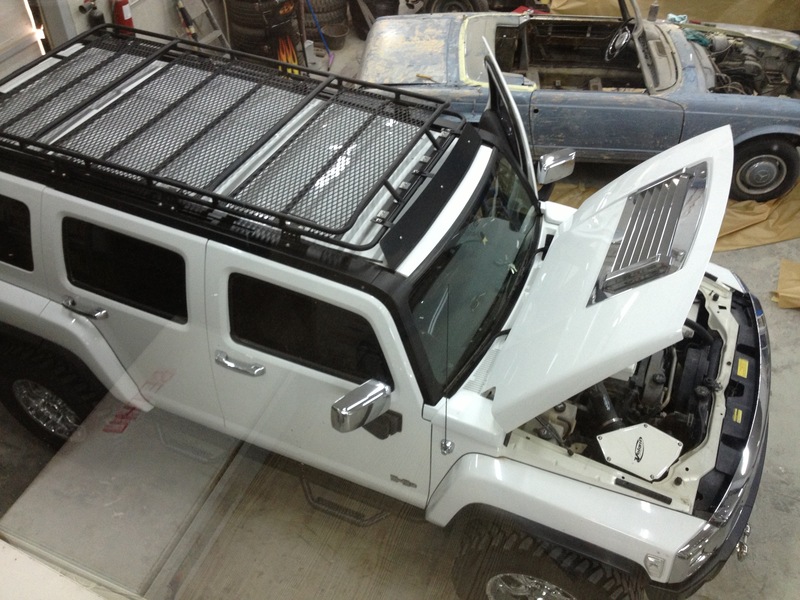
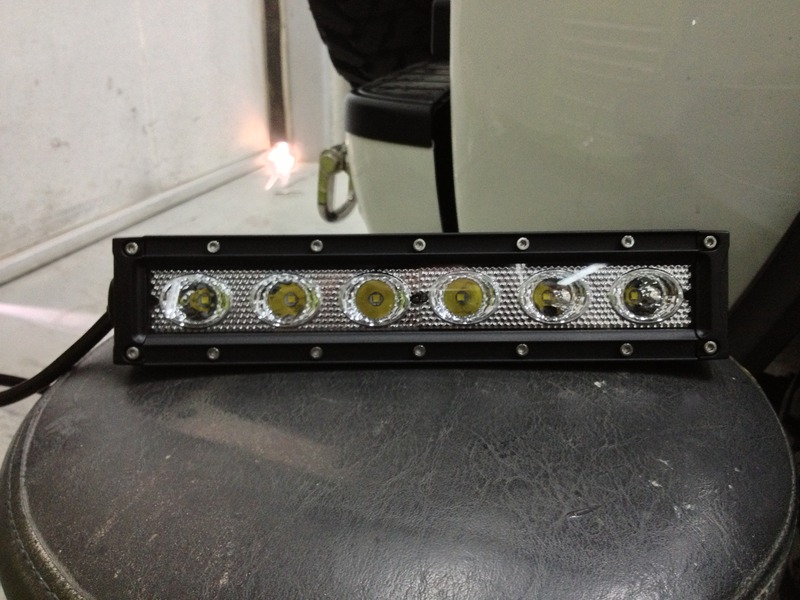
The lights I chose to go with were 35w HID with the ballast contained within the housing, the problem with that is they ended up not fitting on the rack due to the design on the front bars - the light housing was too deep.
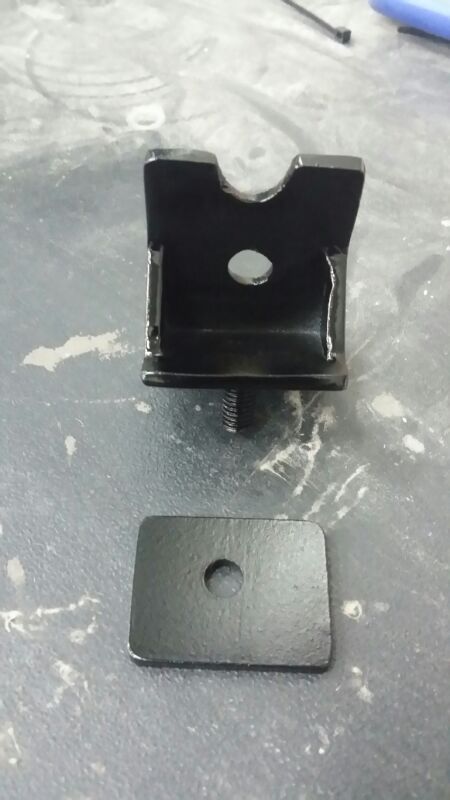
So, we ended up making individual brackets for the lights, with these the lights sat up and forward enough to clear the bar.
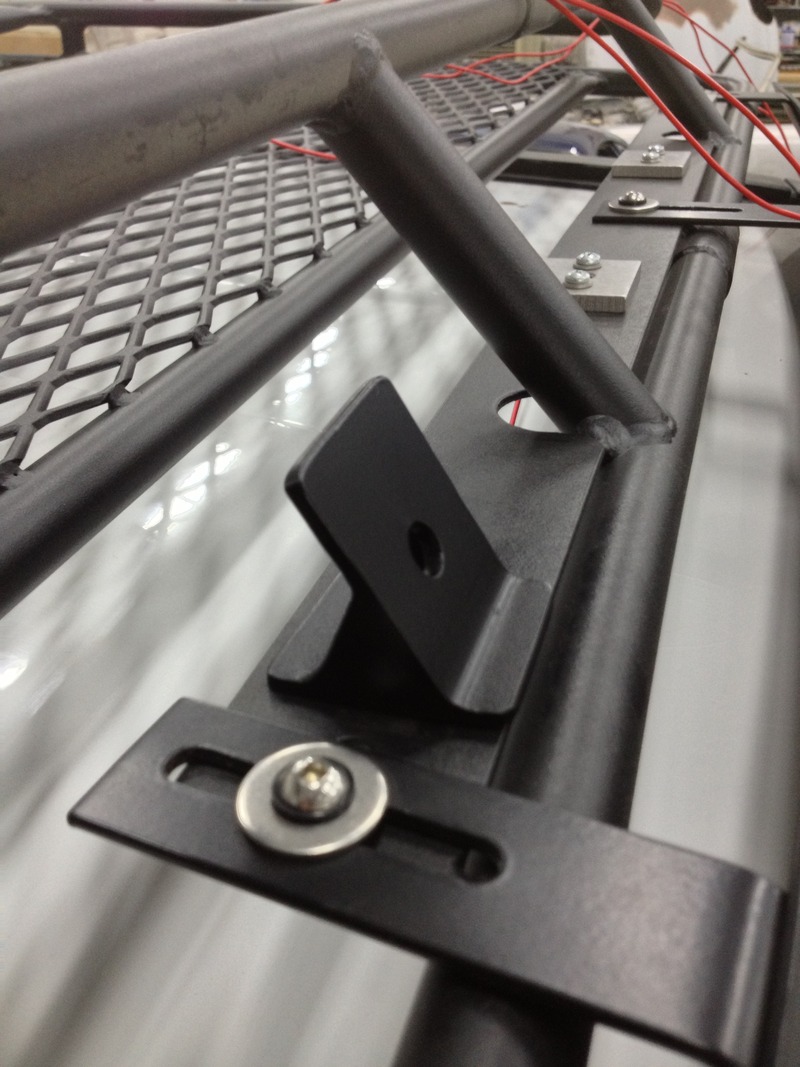
After a test fit we changed them up a little, instead of having them held down with a bolt and nut, we welded studs onto them and made a notch at the top of the bracket for the HID light wire to nicely sit on.
Everything worked out perfectly and all the lights were installed without any issues.

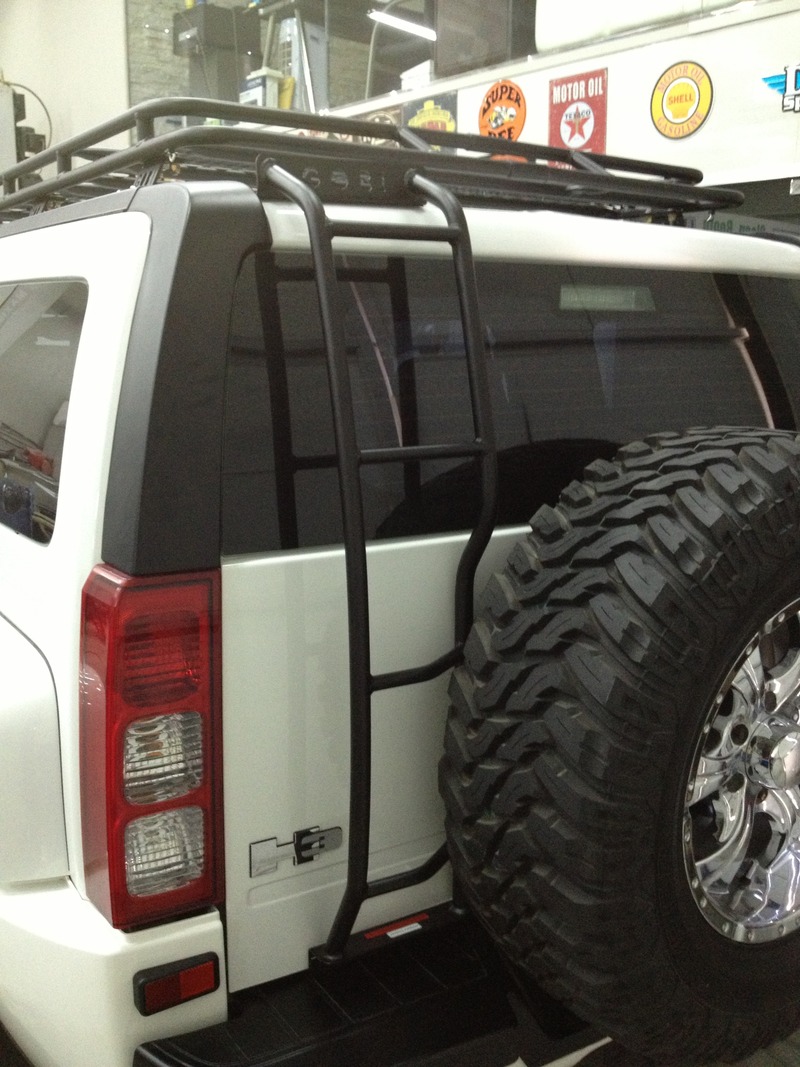
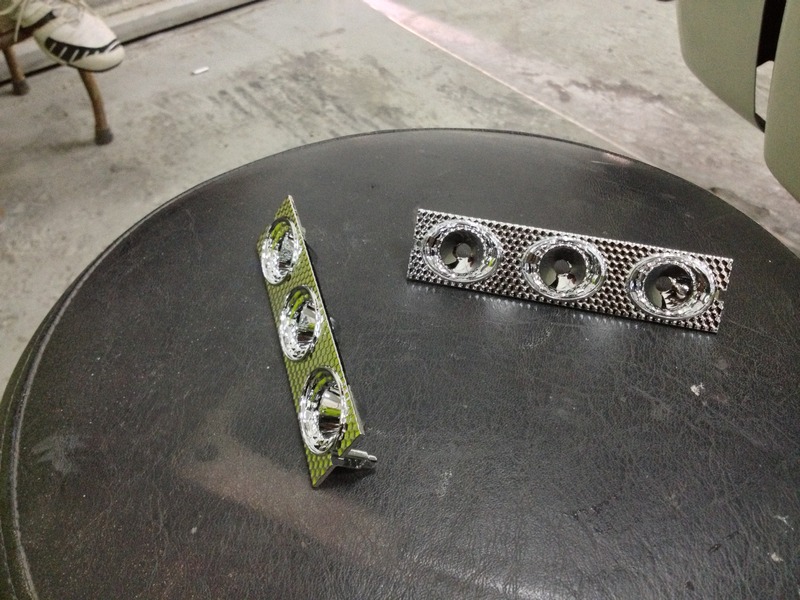
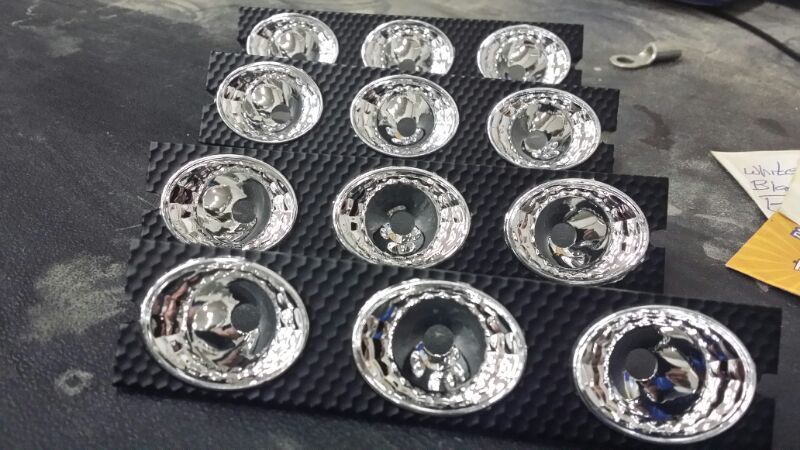
For the rear lights, I went with a pair of rectangular housed LED's, they fit the roof rack recession perfectly and the low profile wont have them getting in the way as I'm getting up and down on the roof rack later on.
I thought the chrome surround was a bit too much so I disassembled them and painted it black to better blend in with the trucks theme.
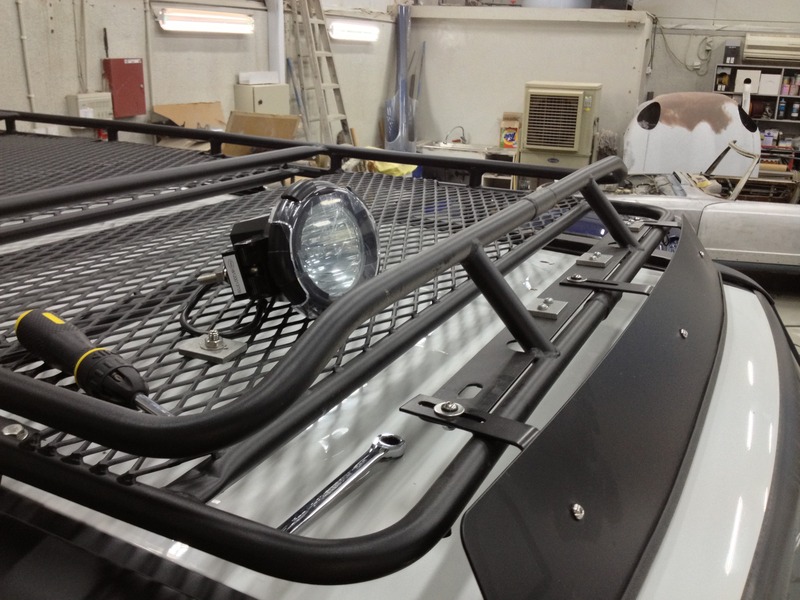
After getting the lights all mounted I decided to throw away the "wire harness" that came with the HID lights and make my own. It consisted of very thin wires, lights were paired and simple ground straps. Instead, I went with a heavier gauge wire and a positive and negative lead for each light individually.
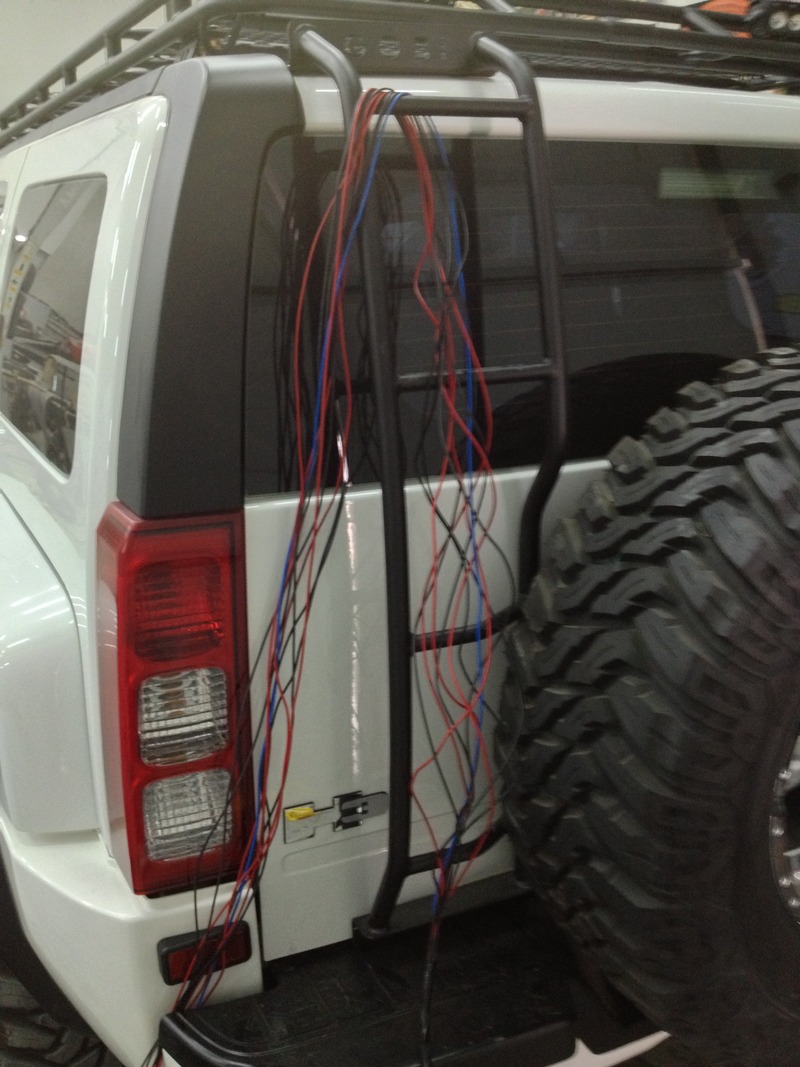
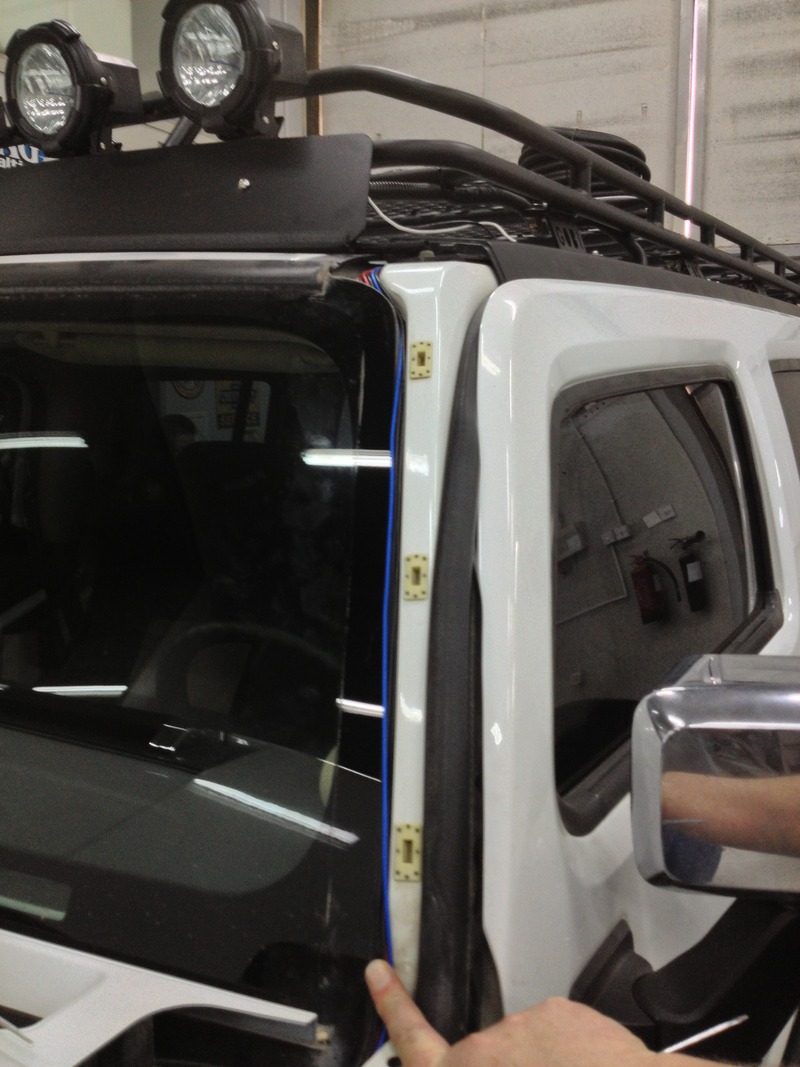
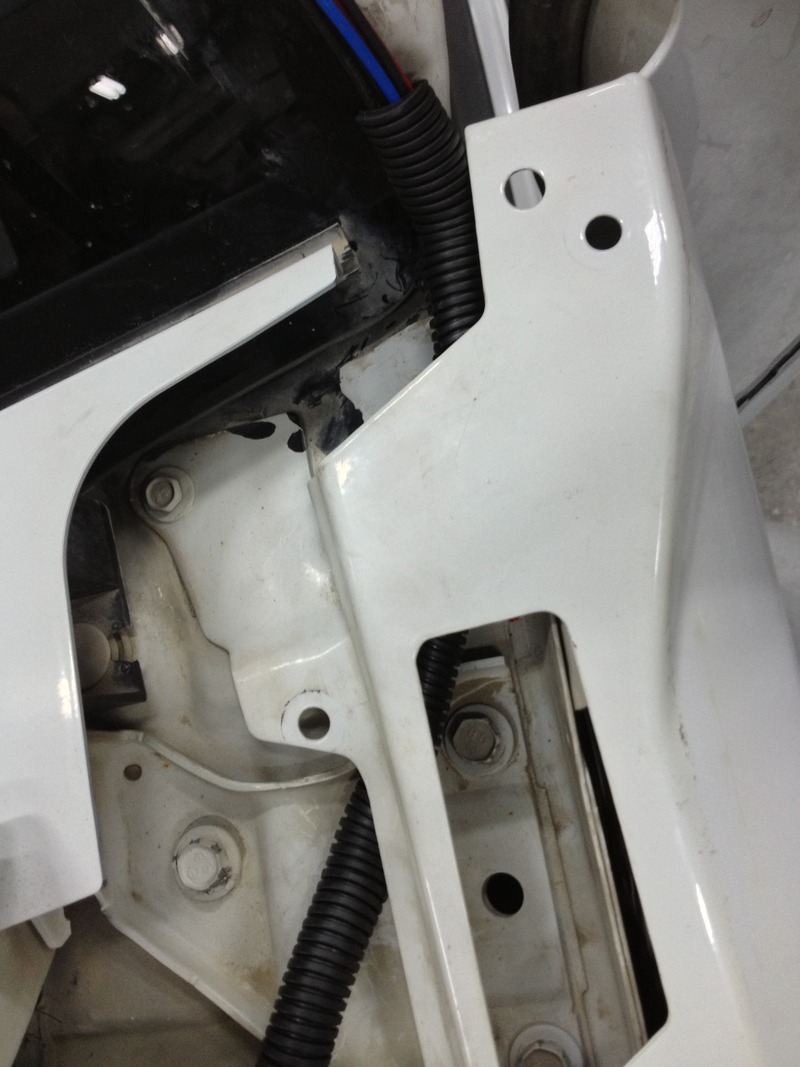
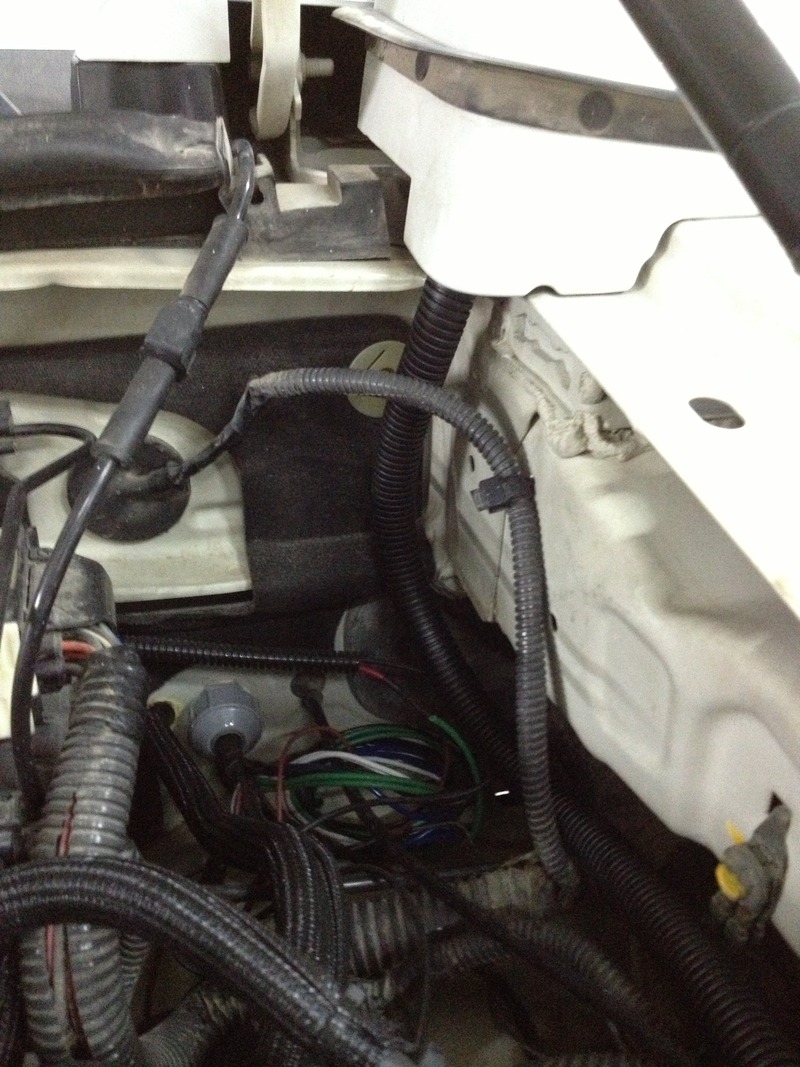
All the wires were routed along the windshield and down into the engine bay.
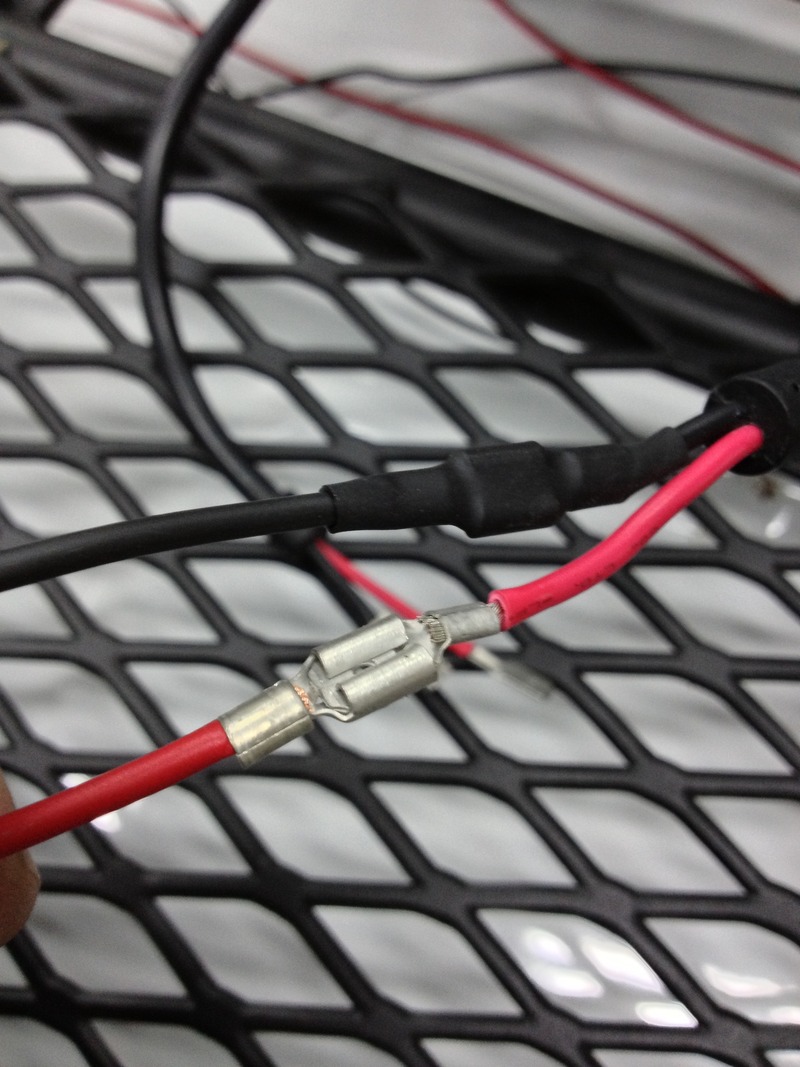
When connecting the lights, instead of soldering everything together I used spade connectors and heat shrink. I did this in case any of the lights needed to be changed out, it makes the task far easier.
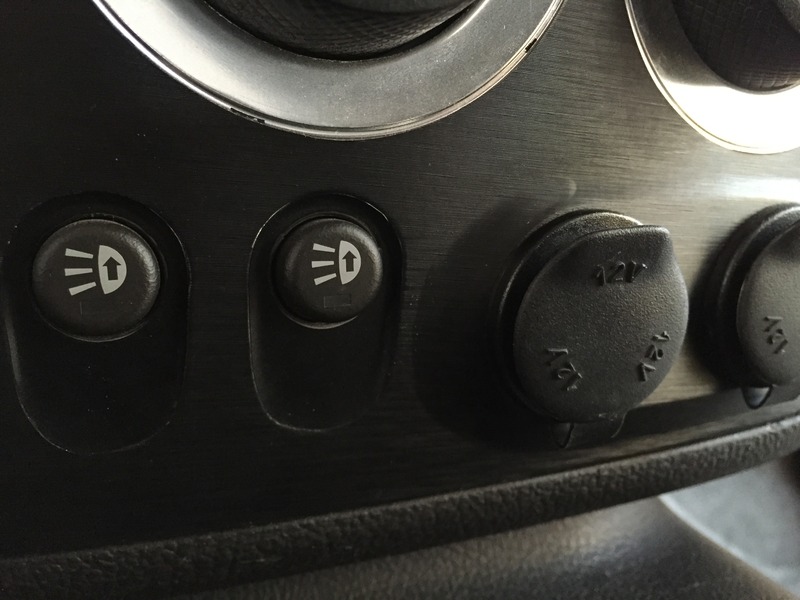
As for the switches, I ordered the OEM ones with pig tails and installed them in the factory locations to continue the OEM theme.
With them hooked up temporarily (relays and inline fuses - permanent electrical project comes later), this project came to a close, extremely happy with the light output both on the front and rear sets.

Another thing I'm trying to forget is installing it by myself - an extra set of hands would have made it a whole lot easier.
After installing the rack at home I took the truck into the shop to get working on installing the lights.
The lights I chose to go with were 35w HID with the ballast contained within the housing, the problem with that is they ended up not fitting on the rack due to the design on the front bars - the light housing was too deep.
So, we ended up making individual brackets for the lights, with these the lights sat up and forward enough to clear the bar.
After a test fit we changed them up a little, instead of having them held down with a bolt and nut, we welded studs onto them and made a notch at the top of the bracket for the HID light wire to nicely sit on.
Everything worked out perfectly and all the lights were installed without any issues.
For the rear lights, I went with a pair of rectangular housed LED's, they fit the roof rack recession perfectly and the low profile wont have them getting in the way as I'm getting up and down on the roof rack later on.
I thought the chrome surround was a bit too much so I disassembled them and painted it black to better blend in with the trucks theme.
After getting the lights all mounted I decided to throw away the "wire harness" that came with the HID lights and make my own. It consisted of very thin wires, lights were paired and simple ground straps. Instead, I went with a heavier gauge wire and a positive and negative lead for each light individually.
All the wires were routed along the windshield and down into the engine bay.
When connecting the lights, instead of soldering everything together I used spade connectors and heat shrink. I did this in case any of the lights needed to be changed out, it makes the task far easier.
As for the switches, I ordered the OEM ones with pig tails and installed them in the factory locations to continue the OEM theme.
With them hooked up temporarily (relays and inline fuses - permanent electrical project comes later), this project came to a close, extremely happy with the light output both on the front and rear sets.


Thread Starter
|
Member
Joined: Jul 2012
Posts: 48
From: A Canadian in Dubai, United Arab Emirates
After sanding down every piece and cleaning it with wax & grease remover, we preped it with DuPont plastic primer, let it flash for 45 minutes then hit it with black base coat, then a second base coat. After it had set we hit it with DuPont clear that had been matted to a satin finish, two coats. All products used are DuPont automotive.

Thread Starter
|
Member
Joined: Jul 2012
Posts: 48
From: A Canadian in Dubai, United Arab Emirates
Thanks, it's just a hell of a lot of fun to be able to spend weekends building something different. I'll get a lot more stuff posted in the next week, the real fun begins with those mods.

Thread
Thread Starter
Forum
Replies
Last Post
Gunner_45
PRIVATE For Sale / Trade Classifieds
12
Jul 12, 2007 07:20 PM
AbadR1
PRIVATE For Sale / Trade Classifieds
6
Nov 18, 2006 10:43 AM