
Ucp
#31
 03-02-2012, 04:01 PM


"I did the install today and took pictures. You are right about the tight fit. I put them on at took them off a couple of time to see where the issue was. It turns out that the smaller rear UCP is the issue. The rear "L" bracket is straight, but the cross member has a small bulge where the upward bend occurs. I found that if you leave these bolts out and loosely install the rest of both racks, you can thread all of the bolts by hand. Then with upward pressure (floor jack was helpful), push the rear in place and everything lines right up"
This is a pretty easy install with no drilling required. The cross members are threaded at the factory. All of the bolts that you remove are reused in different locations. The existing transfer case shield get removes and disgarded: (remember to hang on to the bolts to reuse them)

Loosen up the front factory shield and remove the rear bolts. Hang on to these bolts for later use. Here's what you get from GM. The smaller UCP gets installed in the rear. The use of a floor jack to support the weight while installing these makes life a lot easier. These are heavy duty and weigh a lot. Using a jack to support the weight, line up the rear smaller UCP front bolts and finger tighten them.

Let the weight down and support the front UCP. Install the front UCP under the the front factory shield.
Heres the tight spot (over on the right) that seemed to be binding all of the bolt holes. The instructions want you to bolt this side up first, but I found if you wait till last and jack it into place, everything goes right on. There is a small bump in the cross member where the bend up occurs. The UCP is stright. After everything is lined up and finger tight, the jack pressure flexes the mounting plate just enough to line these bolt hole correctly:

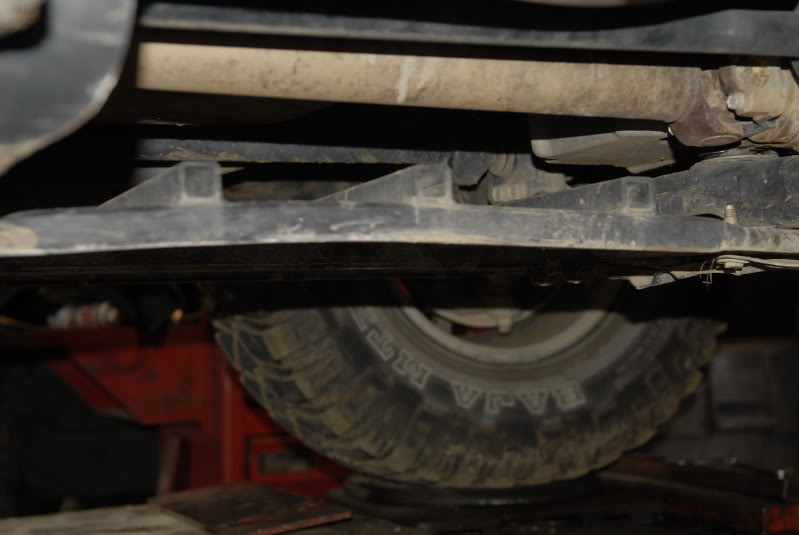
Ground clearance and middle row of bolts for both UCP's:

Back to front view:

Front to back. Drop the rear of the existing shield and slide the new front UCP between it and the cross member. The right side gets a spacer and both bolts get replaced. The bolts you remove get used in the rear of this UCP:

Complete protection for the drive train:

This is a pretty easy install with no drilling required. The cross members are threaded at the factory. All of the bolts that you remove are reused in different locations. The existing transfer case shield get removes and disgarded: (remember to hang on to the bolts to reuse them)
Loosen up the front factory shield and remove the rear bolts. Hang on to these bolts for later use. Here's what you get from GM. The smaller UCP gets installed in the rear. The use of a floor jack to support the weight while installing these makes life a lot easier. These are heavy duty and weigh a lot. Using a jack to support the weight, line up the rear smaller UCP front bolts and finger tighten them.
Let the weight down and support the front UCP. Install the front UCP under the the front factory shield.
Heres the tight spot (over on the right) that seemed to be binding all of the bolt holes. The instructions want you to bolt this side up first, but I found if you wait till last and jack it into place, everything goes right on. There is a small bump in the cross member where the bend up occurs. The UCP is stright. After everything is lined up and finger tight, the jack pressure flexes the mounting plate just enough to line these bolt hole correctly:
Ground clearance and middle row of bolts for both UCP's:
Back to front view:
Front to back. Drop the rear of the existing shield and slide the new front UCP between it and the cross member. The right side gets a spacer and both bolts get replaced. The bolts you remove get used in the rear of this UCP:
Complete protection for the drive train:
Last edited by 58Bisc; 03-02-2012 at 04:10 PM.

#34
03-02-2012, 09:52 PM
was not as easy as I thought. Two people would be alot easier. Myself and the jack did it in about an hour.
Havent figured out this photo thing yet....
Havent figured out this photo thing yet....
Last edited by cddutt; 03-02-2012 at 09:55 PM.
#35
03-02-2012, 10:26 PM

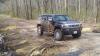
This was sort of a last minute install in place of some mods to the OEM UCP awhile back like the day before I was going to some fairly rough trails.
I want to clean it up and change it a bit so I cut it off and will try to make it partially bolt on in the future for people that need it that way.
My fab shop is maxed out right now and so complete redesign is not possible. Updating however is possible for those that already have some.
The BA design uses round tubing rails with square cross pieces. I will fishmouth a few mods on the transfer case skid and see how that goes.
If it works out I may pre-cut some for people that can't do that and they can just have them welded in.
OEM foreground BA background.
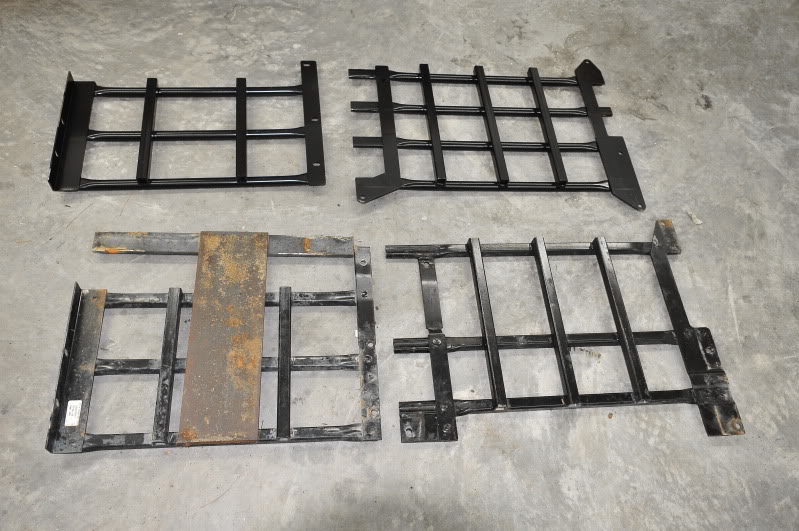

I managed to "mod" a set of the OEM but it flattened out in a press.
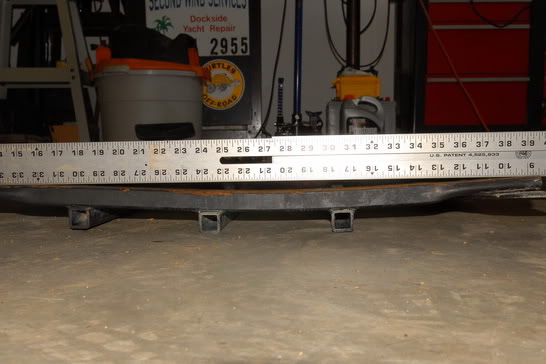
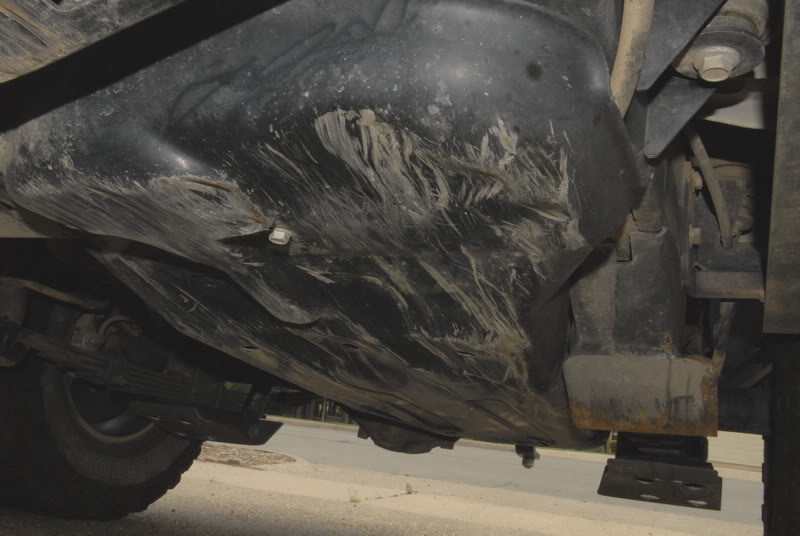
This is not mine but was a fear I have had for a long time and why I added the pieces under the transfer case.
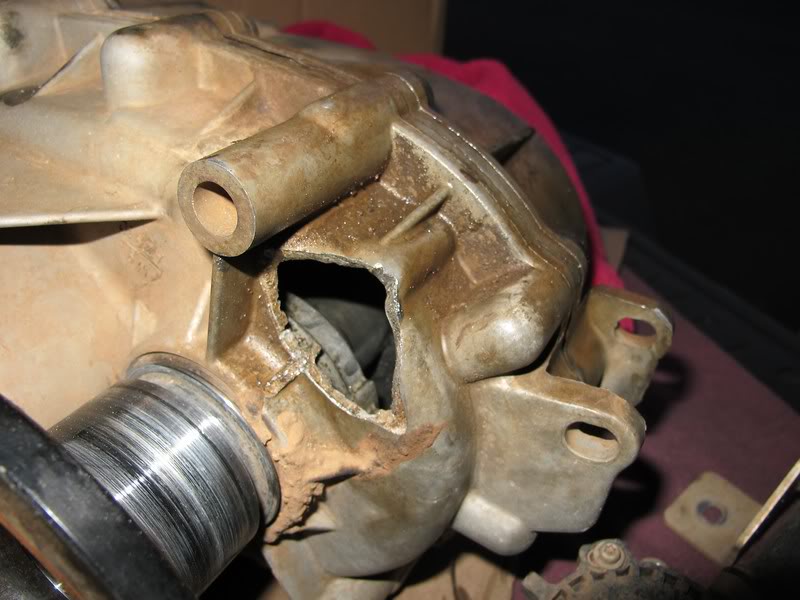
The roads around here are really rough.
I want to clean it up and change it a bit so I cut it off and will try to make it partially bolt on in the future for people that need it that way.
My fab shop is maxed out right now and so complete redesign is not possible. Updating however is possible for those that already have some.
The BA design uses round tubing rails with square cross pieces. I will fishmouth a few mods on the transfer case skid and see how that goes.
If it works out I may pre-cut some for people that can't do that and they can just have them welded in.
OEM foreground BA background.
I managed to "mod" a set of the OEM but it flattened out in a press.
This is not mine but was a fear I have had for a long time and why I added the pieces under the transfer case.
The roads around here are really rough.
Last edited by Hunner; 03-02-2012 at 10:47 PM.

Thread
Thread Starter
Forum
Replies
Last Post
SundownAudioNY
PRIVATE For Sale / Trade Classifieds
4
08-28-2011 12:33 PM
Bigunit
PRIVATE For Sale / Trade Classifieds
6
08-09-2010 05:49 PM