Overhead Center Console LED Add-On Project
#1

Laid eyes on this product in action, stood amazed at how little it is with the detailed lighting effect it produced. Had to get one to opening it up knowing the products were still on the shelfs in all local retail stores in my area. If you have used diode lighting the RGB LEDs inside this for the low price listed is shocking. 32 built-in Micro RGB LED lights, programmable 18 color modes, 8 ‘Equalizer’ patterns with an adjustable brightness level that allows for a change in how the lights move up and down the bar. The use of a Bluetooth app to customize the effect to incoming sound that also lets you control gain and brightness - this item as a stand-alone unit offers way more options than each of the larger WS28XX LED Controllers I’ve purchased in the past - adding the price difference to what I had installed, to say WTF did not over state my new discovery to a new cheaper option applying Inside Vehicle LED effects going forward. (If supplies last)
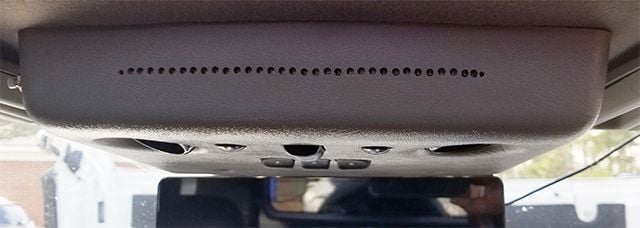
Installer Skill Level: (4+) with 10 being the highest. Time: less than 24hours. See Disclaimer at end.
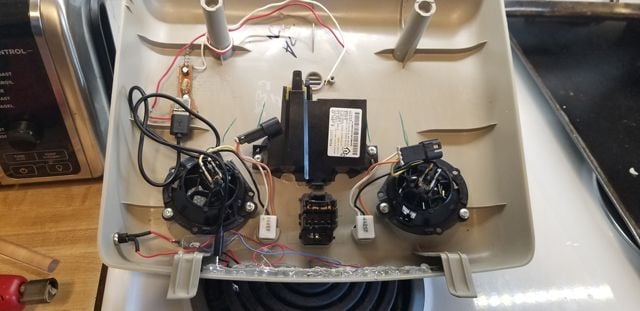
Use a razor to get under the display cover, once it’s off the guts just fall out.
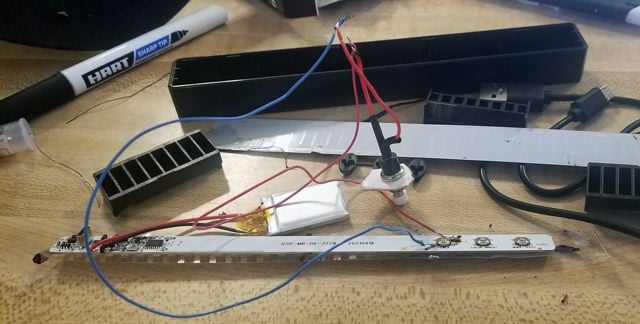
Power on /Mode Button:
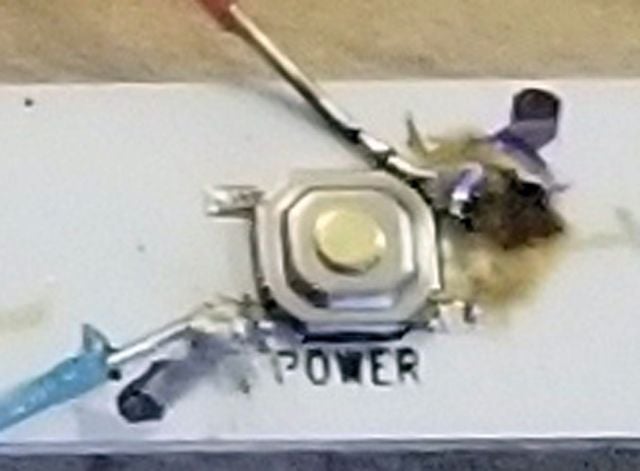
Place solder on the wire you want to attach first (important), then tap solder it onto the button lead as pictured. Make sure your placed solder does not touch the power button itself just the leads coming from it.

Attach a monetary switch to the leads. > I found one at a retail store that sold outdated LED lights ( Ollie’s) at 2- 4 bucks – didn’t need the LED but the switch used to momentarily turn on the light cost way more when shopping online or at an local electric shop for the one switch alone. I’ve added six units to the one switch with no issues.
Cannot us vehicle ground to switch, have to run two wires to each unit in series, does not work parallel.
Vehicle Accessory Power:
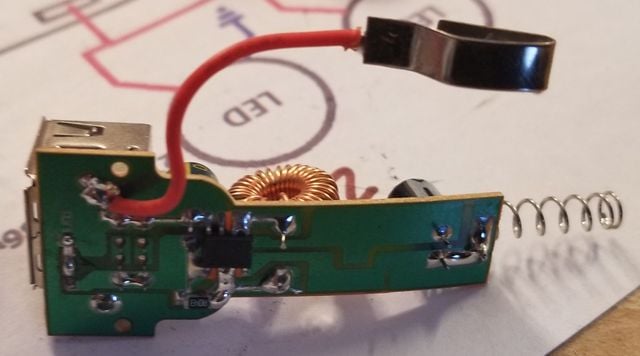

1.) I used a Dollar Store Lighter USB Charger {two stacks} to clear the plastic ribs inside the cover of the center console. Look for embedded inline fuse in the description on charger.
> Again, get solder to stick to the wire first - then solder it to the power board of the USB Charger.
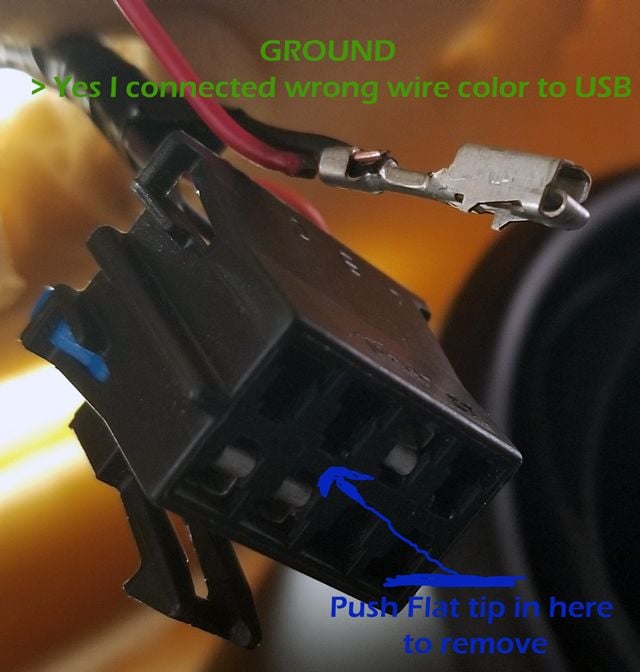

2.) Sun Roof Connector: 18 Gage Black Negative wire and 20 Gage Orange Positive wire. Stick a jeweler’s flat tip in under the bottom of the pin to remove by pushing. I chose to open up the lead’s connector trainer and slide the power wires in and re-squeeze to retain. I used old GB Wire Guard Twist-on Connectors between the sunroof and the USB Charger. Any connector of preference can be used but I do not recommend running the wires striate to the USB because you may want to remove the cover some day in the future. No power is applied to the leads without Key in Vehicle Turned to On or Run. After power off > Wires do retain power with key out - Until a door is opened.
Drilling the View Holes:

BLUF:
· I used a large felt tip marker, ending up not helping. At the end wished I had used fine tip marker to better align the points. Wanted it to look like it can with the Vehicle, my attempt does not.
· Appling template marking to the outside makes for better uniformity in drilling, alinement and death in appearance. I applied mine inside; the plastic ribs did get in the way (not uniformed and striate). If I find a used console cover I’m willing to purchase I’ll do this part again.
1.) User scotch tape to cover LEDs
2.) On the tape mark the middle and end of the unit for alinement points.
3.) On the tape mark each LED’s center. Take your time and try to be precise, one dot over the center of each LED.
4.) Take off the marked tape and place it on the location.
5.) Use a heated needle to indent each point into the plastic.
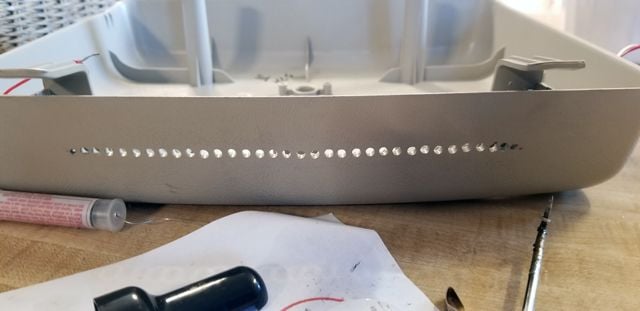
6.) Use drill bit to open each hole.
7.) Test fit board, adjust to fit.
Mounting RGB board to location:
- · Hot Glue (placing clear glue inside each hole - keeps dust out and improves lighting brightness effect.)
PROS:
1) Mic Gain.
2) Adjustable Brightness.
3) Remembers last user configuration witch is retained when install with the battery supplied with the unit. My old LEDs had to be told what setting I prefer each time I start the vehicle. L
4) Price – Currently not hard to find on shelfs.
5) Number of Units Controlled by Bluetooth (Use Amination) No Stated Limit! Currently working six with no issues. > Each indivisibly configured. > Wakeup activation from one point to all. Bluetooth does control standby operation per unit.
6) Security Deterrent – using 3-5 hours of battery backup - When I exit the Beat with a unit running I place the sound gain on max – active to all sounds – illusion of sound active security monitoring – at night it lights up the cabin talking around it – when asked what it is…I Lie (smile)! Point to my cell and say “a computer never get tired of informing and recording”.
7) Does not affect Vehicle Battery Life.
CONS:
1.) Active Power points are not covered on the board. Touching around the area of the board where the Processing Chip is shorts contacts causing the unit to fail. I did this when testing the fitness to my drilled holes, all the lights came on steady and bright – it would not power down or react to Bluetooth or the on board buttons – I left the unit to drain power and then recharged the battery – it did power up with options but I no longer can produce a white color on any setting. Cut the battery or hot glue the back of the board or use gloves > Before / when handing the board <.
2.) 2-5V DC Power Required to function.
No-responsibility Disclaimer!
Not an endorsement for Extreme LIT
Information provided is for general informational purposes only and should not be construed as advice. Do not attempt modification if you are unsure. Link is Not to endorse the content of any linked website or make any representations regarding them; you access them at your own risk. I do not have any liability whatsoever arising from this post.
Thread
Thread Starter
Forum
Replies
Last Post
Hummer Aficionado_VT
PRIVATE For Sale / Trade Classifieds
2
08-18-2010 12:07 PM
JWSchmidt3
PRIVATE For Sale / Trade Classifieds
15
06-02-2007 12:57 PM


