LOG IN
REGISTER
Forums
Hummer Forums - General
New Member Area
Off Topic
Sights N Sounds
General Hummer Talk
Ride of the Month
Meets, Events, and Shows
Hummer Lineup
Hummer H1
Hummer H2
Hummer H2 SUT
Hummer H3
Hummer H3T
Hummer Concepts
Hummer EV
Brand Reviews
Audio Visual/Interior Modifications
Detailing
Drivetrain Area
Tire and Wheel
Sponsoring Vendors & Classifieds
Member Group And Special Buys
PRIVATE For Sale / Trade Classifieds
Private 'Wanted' Classifieds
Other
Hummer Forums Help & Suggestion Center
Marketplace
Vendor Directory
Become a Vendor
New Posts
Tools
Car Payment Calculator
Tire Rim Calculator
Recalls
Technical Service Bulletins (TSBs)
Members List
Live Feed
Gallery
View Dark Mode
Please register or login to enable Dark Mode.
Log In
Register
Threads
Google
Threads
Posts
Advanced
Dark Mode
Please register or login to enable Dark Mode.
Log In
Forgot your Password?
By logging into your account, you agree to our
Terms of Use
and
Privacy Policy
, and to the use of cookies as described therein.
Recent
Commented
Albums
My Pictures
Spanovich008's Photos
View Profile
Sort:
Commented
Most Recent
Most Comments
Albums
Photos
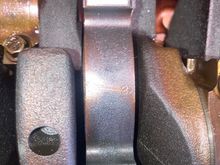
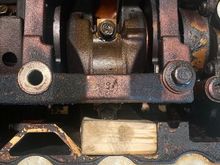
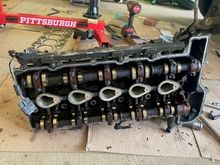
Bearing Caps: Pay Attention to the number, as well as the direction of which way to install them. The arrow is pointing towards the FRONT of the engine.
0
2025/04/26 17:55:05
Spanovich0
Bearing Caps: Pay Attention to the number, as well as the direction of which way to install them. The arrow is pointing towards the FRONT of the engine.
0
2025/04/26 17:55:04
Spanovich0
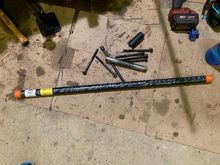
WOW! What a beast of a bolt! Bigger than one of my fingers. Unfortunately, obtaining a new one (as far as I know) is impossible. I have no choice, this one will have to be re-used.
0
2025/04/26 16:40:27
Spanovich0
0
2025/04/26 16:40:26
Spanovich0
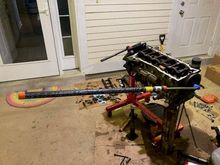
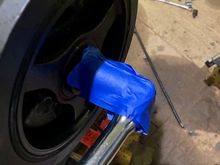
This is the setup I used to remove this stubborn bolt. Wow!
0
2025/04/26 16:40:25
Spanovich0
0
2025/04/26 16:40:24
Spanovich0
Tape (as protection) in case the breaker bar drive decided to explode on me.
0
2025/04/26 16:40:23
Spanovich0
Then slide it down in deeper.
0
2025/04/26 16:40:21
Spanovich0
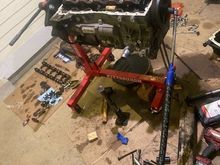
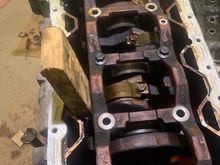
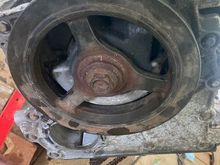
Wedging wood up against the crankshaft to hold it in place.
0
2025/04/26 16:40:20
Spanovich0
Harmonic Balancer Bolt - The tightest bolt I've ever encountered as a DIY'er.
0
2025/04/26 16:40:19
Spanovich0
0
2025/04/26 16:40:18
Spanovich0
Hard to believe that this was once used to contain oil. Gross stuff.
0
2025/04/26 16:40:16
Spanovich0
0
2025/04/26 16:40:15
Spanovich0
0
2025/04/26 16:40:14
Spanovich0
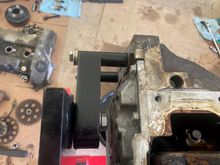
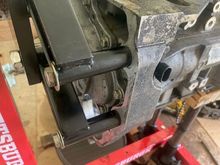
See how these are not attached to the oil pan? This will work!
0
2025/04/26 16:40:13
Spanovich0
Before removing the oil pan, ensure that the engine mount is NOT attached to any of the threads that are attached to the oil pan. Otherwise, when you remove the oil pan, bad things will happen.
0
2025/04/26 16:40:11
Spanovich0
0
2025/04/26 16:40:09
Spanovich0
Draining the old oil. Look how nasty that stuff looks! LOOK AT THAT!
0
2025/04/26 16:40:08
Spanovich0
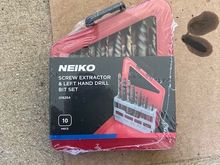
Broken Water Pump Bolt - use a #2 left handed drill bit (from my kit listed previously) then the #3 bolt extractor and you will get this little guy out.
0
2025/04/26 16:40:07
Spanovich0
0
2025/04/26 16:40:06
Spanovich0
Water Pump Housing - Looks clean!
0
2025/04/26 16:40:05
Spanovich0
Water Test (3).
0
2025/04/18 22:28:32
Spanovich0
Water Test (2)
0
2025/04/18 22:28:30
Spanovich0
Water Leakdown Test - LOT of water draining from the intake valves. Adds another layer of confidence to the compression-leakdown test.
0
2025/04/18 22:28:28
Spanovich0
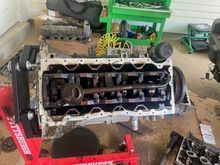
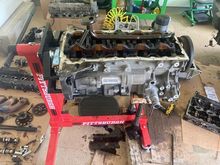
Head Removed, and ready to be rebuilt.
0
2025/04/18 22:28:25
Spanovich0
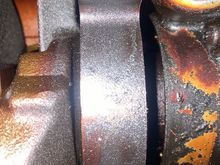
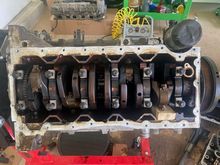
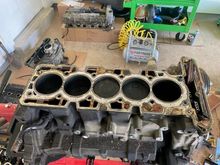
Another shot of the cylinder walls.
0
2025/04/18 22:28:23
Spanovich0
Cylinder walls look okay! Might be able to get away with re-using these.
0
2025/04/18 22:28:21
Spanovich0
0
2025/04/18 22:28:19
Spanovich0
Nasty, nasty looking head gasket.
0
2025/04/18 22:28:17
Spanovich0
0
2025/04/18 22:28:15
Spanovich0
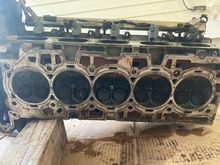
Head off, broken studs removed. First glance, lot of carbon build up in the pistons.
0
2025/04/18 22:28:13
Spanovich0
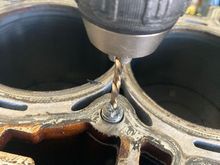
Here is the drill I used; recommend cordless (to not overspeed/break the bits). Take your time, and be patient, and don't apply too much pressure to the broken bits.
0
2025/04/18 22:28:12
Spanovich0
Great Success! Got them all out!
0
2025/04/18 22:28:10
Spanovich0
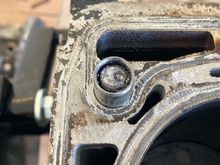
If the dowel pin gets in your way, removing the broken stud can be a little tricky, but still doable.
0
2025/04/18 22:28:09
Spanovich0
0
2025/04/18 22:28:07
Spanovich0
Start out a punch, then with a #2 drill bit (from the kit), then work up to a #3 drill bit. Be careful not to drop (too much) metal in the cooling passages.
0
2025/04/18 22:28:05
Spanovich0
This is the kit I used to remove the broke studs. Not the best, not the worst. But it works, and it's cheap!
0
2025/04/18 22:28:04
Spanovich0
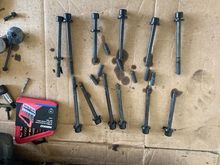
Out of the 12 head bolts, only 5/12 of them survived. Hey, thats 0.4166, which is at least a better average than most MLB players for their batting averages :-D
0
2025/04/18 22:28:02
Spanovich0
0
2025/04/18 22:28:01
Spanovich0
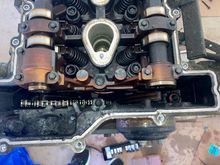
Timing Chain Area.
0
2025/04/18 22:27:59
Spanovich0
First
Page
5 of 9
Last
Go To
Page
1
2
3
4
5
6
7
8
9
5 of 9
Go To
GO
Go to page
of 9
pages
1
2
3
4
5
6
7
8
9