LOG IN
REGISTER
Forums
Hummer Forums - General
New Member Area
Off Topic
Sights N Sounds
General Hummer Talk
Ride of the Month
Meets, Events, and Shows
Hummer Lineup
Hummer H1
Hummer H2
Hummer H2 SUT
Hummer H3
Hummer H3T
Hummer Concepts
Hummer EV
Brand Reviews
Audio Visual/Interior Modifications
Detailing
Drivetrain Area
Tire and Wheel
Sponsoring Vendors & Classifieds
Member Group And Special Buys
PRIVATE For Sale / Trade Classifieds
Private 'Wanted' Classifieds
Other
Hummer Forums Help & Suggestion Center
Marketplace
Vendor Directory
Become a Vendor
New Posts
Tools
Car Payment Calculator
Tire Rim Calculator
Recalls
Technical Service Bulletins (TSBs)
Members List
Live Feed
Gallery
View Dark Mode
Please register or login to enable Dark Mode.
Log In
Register
Threads
Google
Threads
Posts
Advanced
Dark Mode
Please register or login to enable Dark Mode.
Log In
Forgot your Password?
By logging into your account, you agree to our
Terms of Use
and
Privacy Policy
, and to the use of cookies as described therein.
Recent
Commented
Albums
My Pictures
Spanovich008's Photos
View Profile
Sort:
Commented
Most Recent
Most Comments
Albums
Photos
Note to all: this is a RIGHTY-LOOSEY bolt.
0
2025/04/26 18:09:54
Spanovich0
To remove this.....bearing thingy?, first use an allen key to hold it into place.
0
2025/04/26 18:09:53
Spanovich0
Not here (on this broken piece).
0
2025/04/26 18:03:00
Spanovich0
Pry HERE...
0
2025/04/26 18:02:59
Spanovich0
0
2025/04/26 18:02:58
Spanovich0
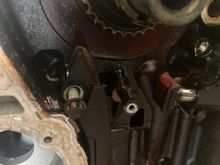
.....then take a rubber mallet and give the crankshaft a few whacks while you are trying to pull the chain off the crankshaft gear. After a few whacks, I was able to break it loose. All of this can be avoided by waiting to remove the bearing brace/caps until AFTER this balance shaft chain is removed.
0
2025/04/26 18:02:57
Spanovich0
With the bearing brace/caps not installed (a mistake on my end), there is still too much tension on this chain. Take one hand (not shown due to working the camera) and try to pull the chain off the crankshaft.....
0
2025/04/26 18:02:56
Spanovich0
0
2025/04/26 18:02:55
Spanovich0
0
2025/04/26 18:02:54
Spanovich0
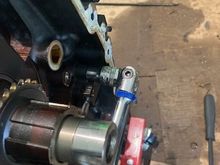
Removal of the balance shaft chain tensioner.
0
2025/04/26 18:02:52
Spanovich0
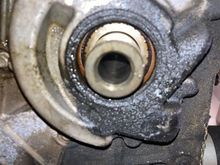
Gross.
0
2025/04/26 18:02:51
Spanovich0
Pry the cover off here.
0
2025/04/26 18:02:50
Spanovich0
0
2025/04/26 18:02:49
Spanovich0
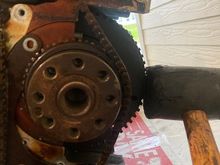
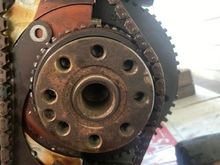
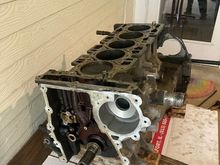
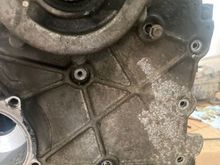
Rear Cover Removal; oh the trouble begins.....
0
2025/04/26 18:02:48
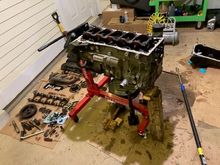
Spanovich0
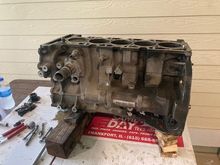
Engine on work bench; wood underneath ensures the weight of the block is not applying pressure on the crankshaft.
0
2025/04/26 18:02:47
Spanovich0
Engine on work bench; wood underneath ensures the weight of the block is not applying pressure on the crankshaft.
0
2025/04/26 18:02:46
Spanovich0
Engine on work bench; wood underneath ensures the weight of the block is not applying pressure on the crankshaft.
0
2025/04/26 18:02:45
Spanovich0
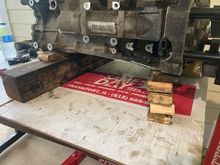
Rotating the engine in order to set it on a work bench.
0
2025/04/26 18:02:44
Spanovich0
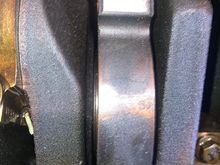
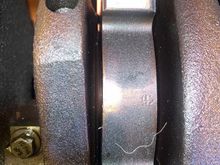
Front Timing Chain Tensioner; very little tension on this little guy!
0
2025/04/26 18:02:43
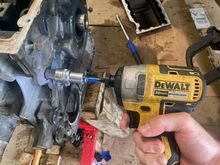
Spanovich0
Timing Chain Tensioner Bolts - I used a breaker bar. They were pretty tight, enough that an impact driver couldn't loosen them.
0
2025/04/26 18:02:42
Spanovich0
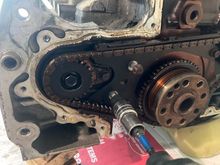
Front Timing Area
0
2025/04/26 18:02:40
Spanovich0
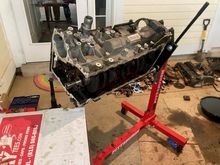
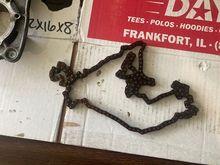
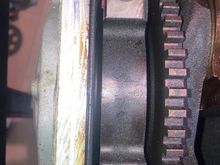
Old Timing Chain
0
2025/04/26 18:02:39
Spanovich0
More grossness! What the heck kind of oil did this person run in this engine?
0
2025/04/26 17:55:27
Spanovich0
Good pry location for the front timing cover
0
2025/04/26 17:55:26
Spanovich0
On the front timing cover, these two bolts are longer than the rest.
0
2025/04/26 17:55:25
Spanovich0
0
2025/04/26 17:55:23
Spanovich0
"REAR" indications on the bearing brace.
0
2025/04/26 17:55:22
Spanovich0
0
2025/04/26 17:55:21
Spanovich0
Bearing brace! Recommend not removing this until AFTER removing the rear timing cover, balance shaft chain, and the balance shafts. By keeping this installed, it helps keep the crankshaft tight, which helps to loosen the balance shaft chain.
0
2025/04/26 17:55:19
Spanovich0
0
2025/04/26 17:55:18
Spanovich0
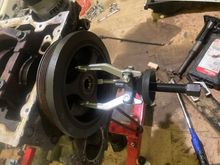
No damage to the crankshaft from the socket!
0
2025/04/26 17:55:17
Spanovich0
Hoorah! It works!
0
2025/04/26 17:55:16
Spanovich0
Does it work?
0
2025/04/26 17:55:15
Spanovich0
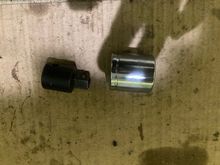
Socket Assembly
0
2025/04/26 17:55:14
Spanovich0
0
2025/04/26 17:55:13
Spanovich0
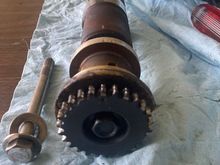
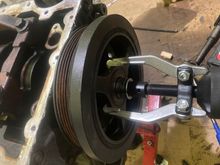
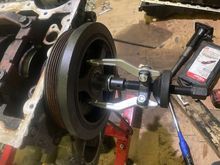
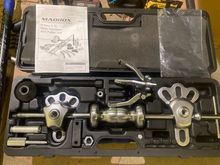
Maddox Puller (used the claws to remove the harmonic balancer)
0
2025/04/26 17:55:11
Spanovich0
Bearing Caps: Pay Attention to the number, as well as the direction of which way to install them. The arrow is pointing towards the FRONT of the engine.
0
2025/04/26 17:55:10
Spanovich0
Bearing Caps: Pay Attention to the number, as well as the direction of which way to install them. The arrow is pointing towards the FRONT of the engine.
0
2025/04/26 17:55:09
Spanovich0
Bearing Caps: Pay Attention to the number, as well as the direction of which way to install them. The arrow is pointing towards the FRONT of the engine.
0
2025/04/26 17:55:08
Spanovich0
Bearing Caps: Pay Attention to the number, as well as the direction of which way to install them. The arrow is pointing towards the FRONT of the engine.
0
2025/04/26 17:55:07
Spanovich0
First
Page
4 of 9
Last
Go To
Page
1
2
3
4
5
6
7
8
9
4 of 9
Go To
GO
Go to page
of 9
pages
1
2
3
4
5
6
7
8
9