REVIEW: Outfitter Design H3 Heavy Duty Tie Rods & Steering Rack Reinforcement Kit

Thread Starter
|
Senior Member
Joined: Sep 2008
Posts: 6,126
From: SE Michigan
INSTALL & REVIEW: Outfitter Design H3 Heavy Duty Tie Rods & Steering Rack Reinforcement Kit
Steerign Kit
http://www.outfitterdesign.com/steer...ement-kit.html
HUGE Tie Rods
http://www.outfitterdesign.com/humme...e-rod-kit.html
INSTALL;
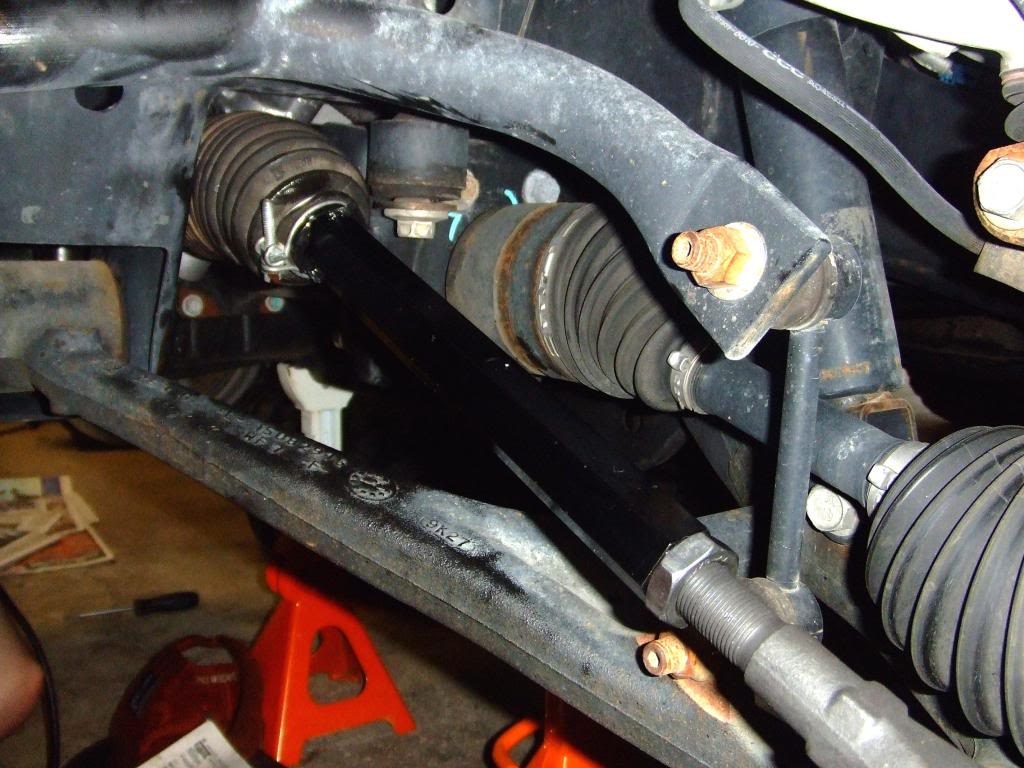
As you can see there is a difference in the size of the rod for the Tie rods. Stock is 16MM (14MM for some) and 25.4MM (1") for the upgraded units. Since there is such a HUGE difference I will call them Outfitter Design HUGE Rods for the remainder of this thread. See pix below.
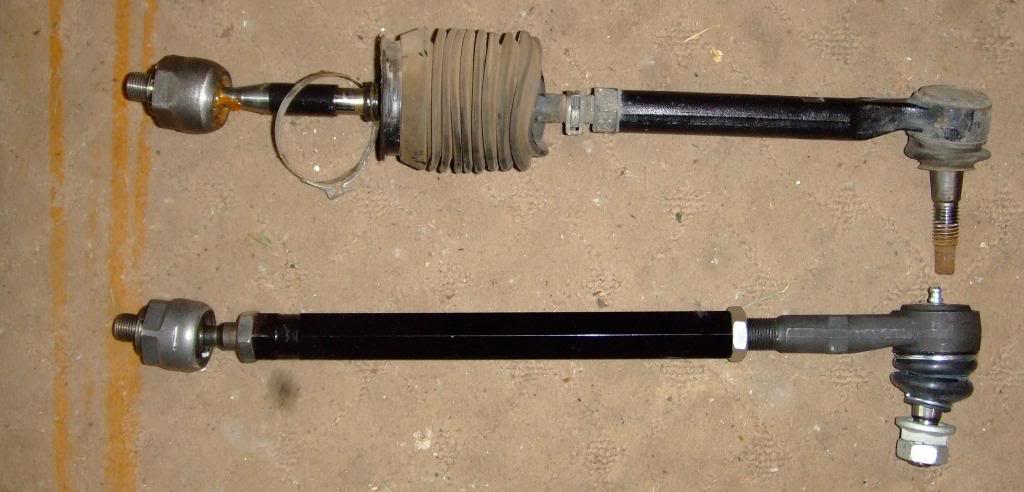
You will also notice that they use the same threads for the inner portion with a larger inner rod with less milling/taper. No sloppy heim joints, NICE!
The use of the Larger tie rod outer WITH grease fittings is a nice touch also!!

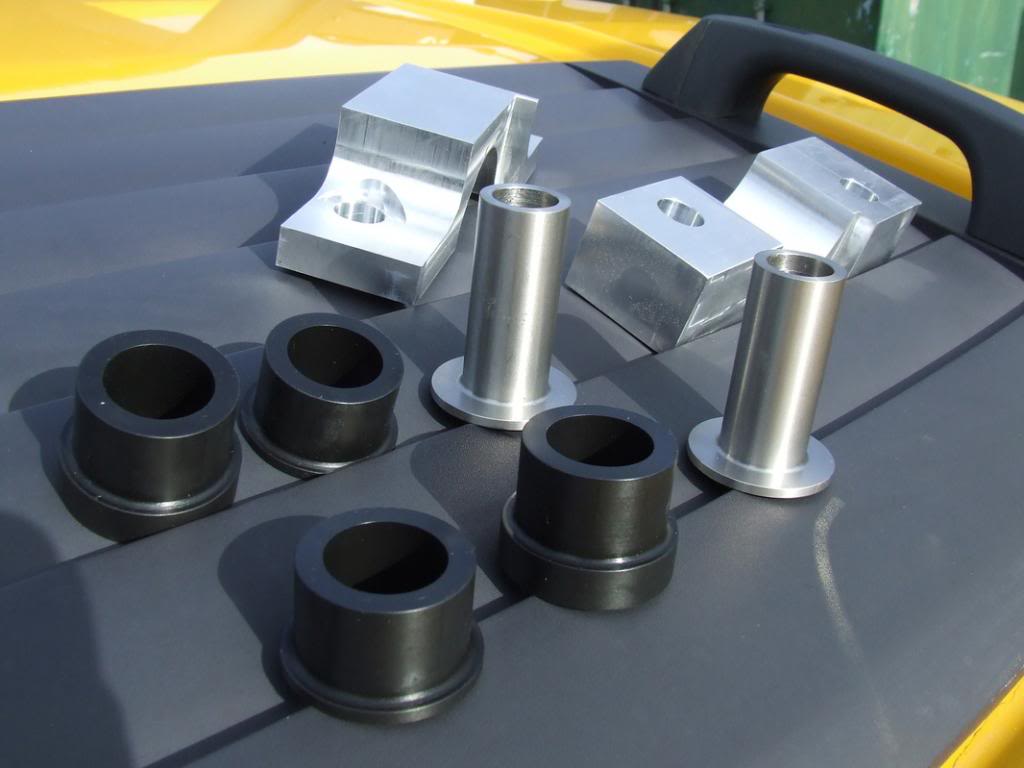
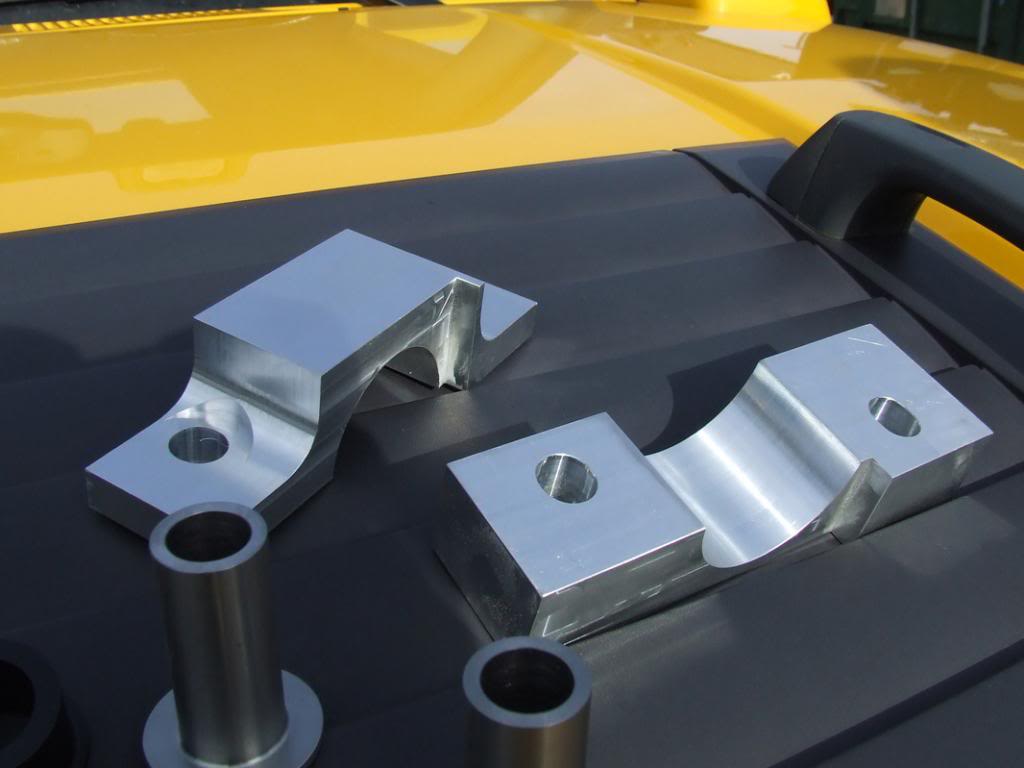
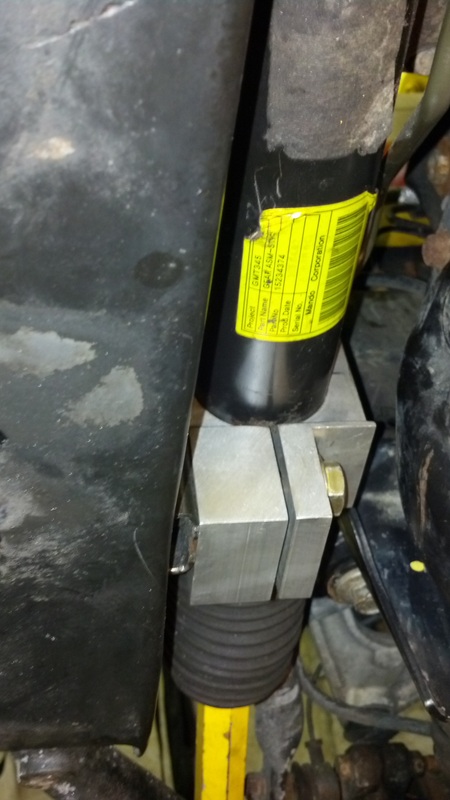
The Outfitter Designs Steering Rack Reinforcement Kit is the same as you have seen in previous install posts:
On to the install tips.
Well I really like the Outfitter Design products, but their directions and photos for the steering bracket support and bushings are not very good. Sorry, Outfitter Design guys. It is a pretty stright forward install but some of us like to read directions before starting a project in order to have the proper tools at hand.
I wrote down notes on the original directions but I am unable to locate them. Maybe they are still over at my buddies place not sure.
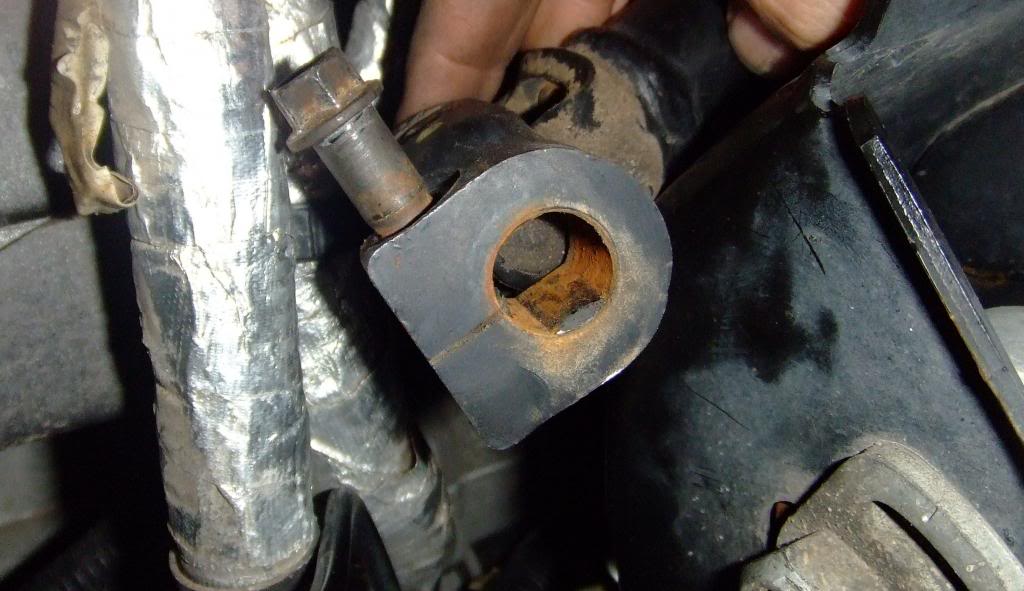
1st. Before you even open the package for the steering rack kit take a photo of the bushings and make sure you have the steel sleeve with the lip in the correct bushing (can't remember if its sleeve w/lip on the small side or sleeve w/lip in the large side. Also take a look at the steering rack you have removed and take photos of each bushing so you can press in the new bushing the same exact way with the sleeve w/lip in the correct locations. We did not do that and had to remove the lower bushing because the upper bushing would not line up with the bolt hole.
2nd. The bolt sizes (I wrote those down also on the same directions, oops) are not what they are in the directions (I believe they list thread size????). Anyway, get the proper sizes before you wedge everything back up inside there. :headbang:.
3rd. Measure, measure, measure. First center the steering wheel and secure it with a ratchet strap to the brake pedal. Measure: Outside front tire to tire, outside rear (of the front tire) tire to tire, driver and passenger steering rack to tie rod bolt center point, tie rod center bolt point to tie rod bolt center point. These measurements will aid in getting really close to your original alignment specs and have a straight steering wheel.
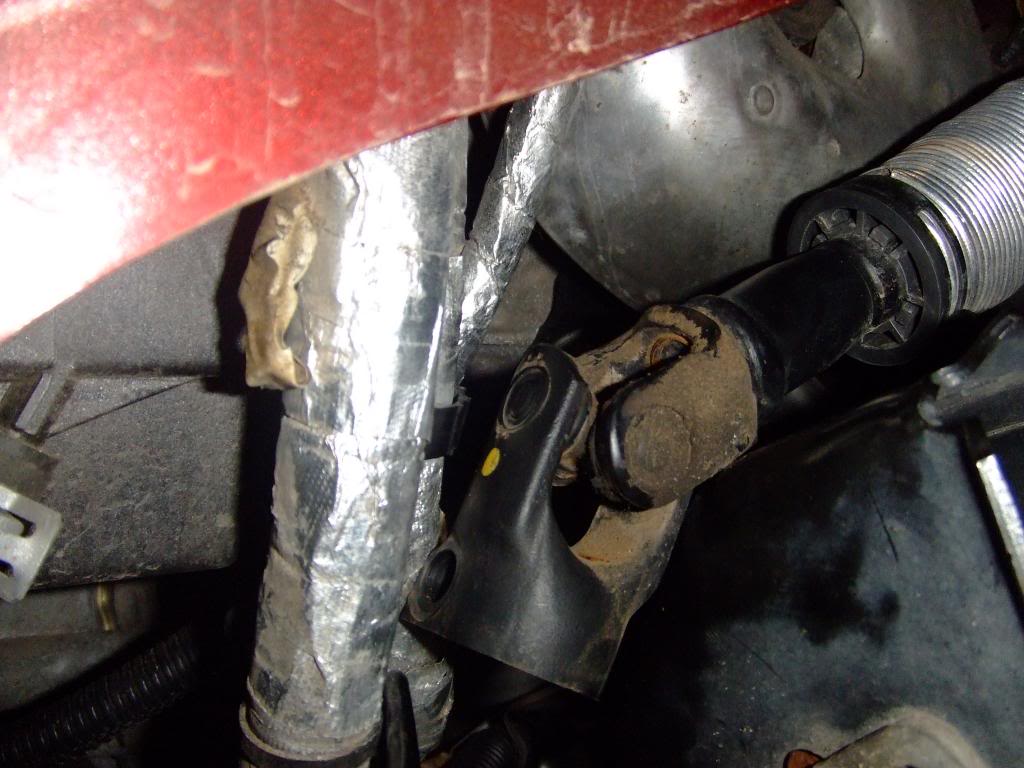
4th. Removal of the driver side wheel well plastic liner will help greatly in removal of the lower steering link bolt.
5th. If you don't know how to remove a tie rod you probably shouldn't be doing either one of these upgrades by yourself. No special tools just basic knowledge.
Whack with a large mallet here, that should release the tie rod end.
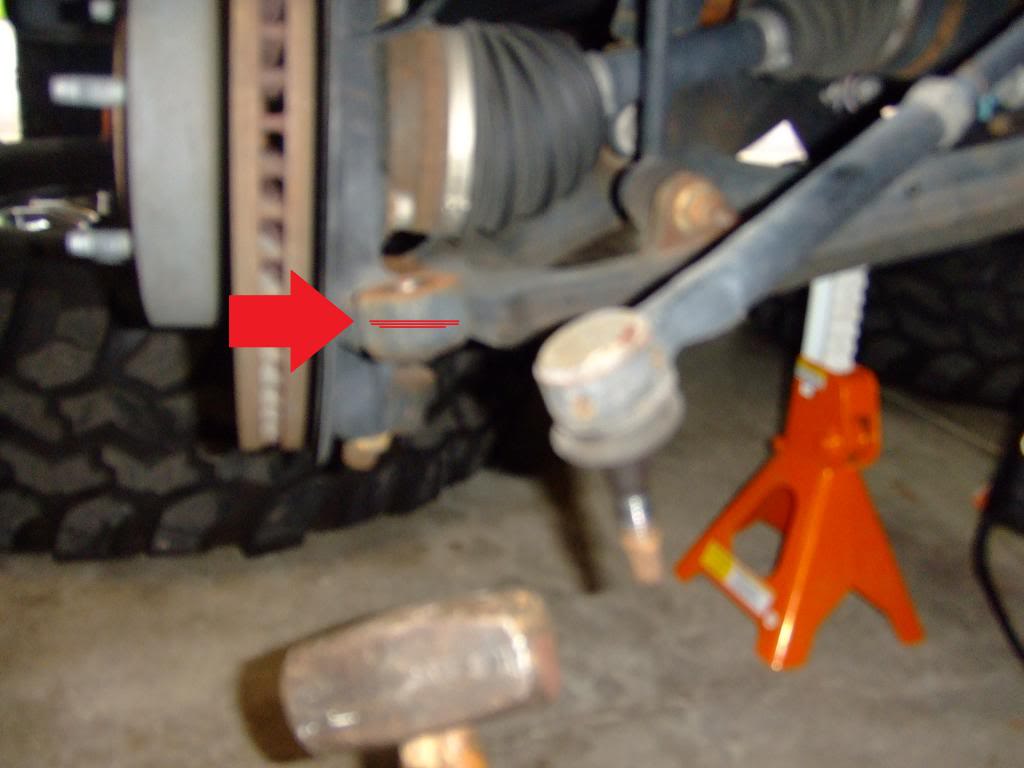
Pix of the lower steering link and bolt (you can actually see them in these pix)
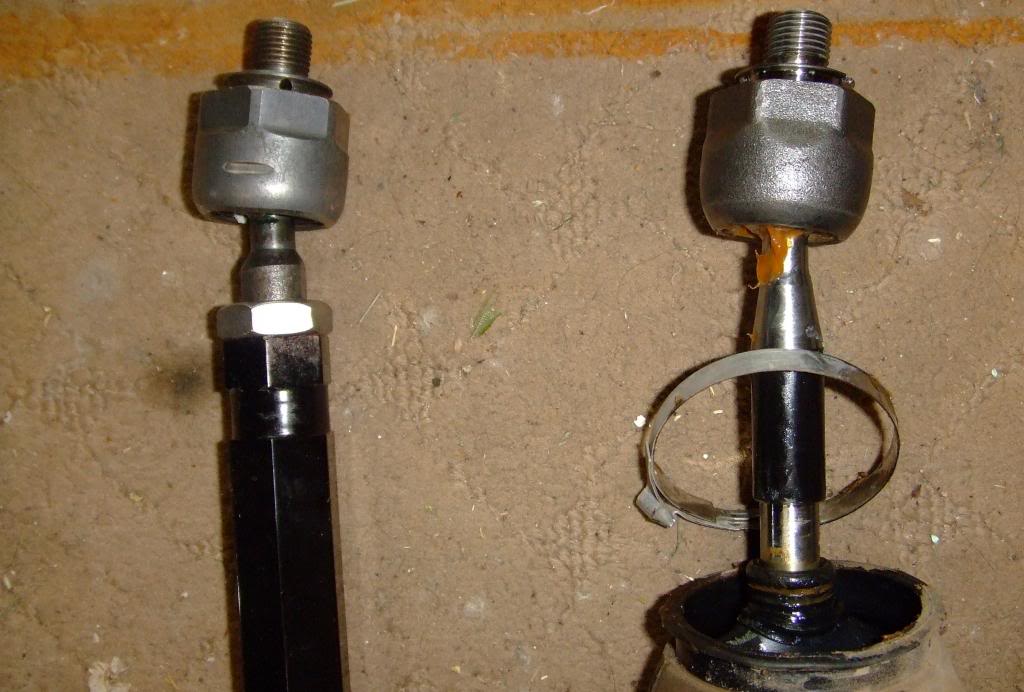
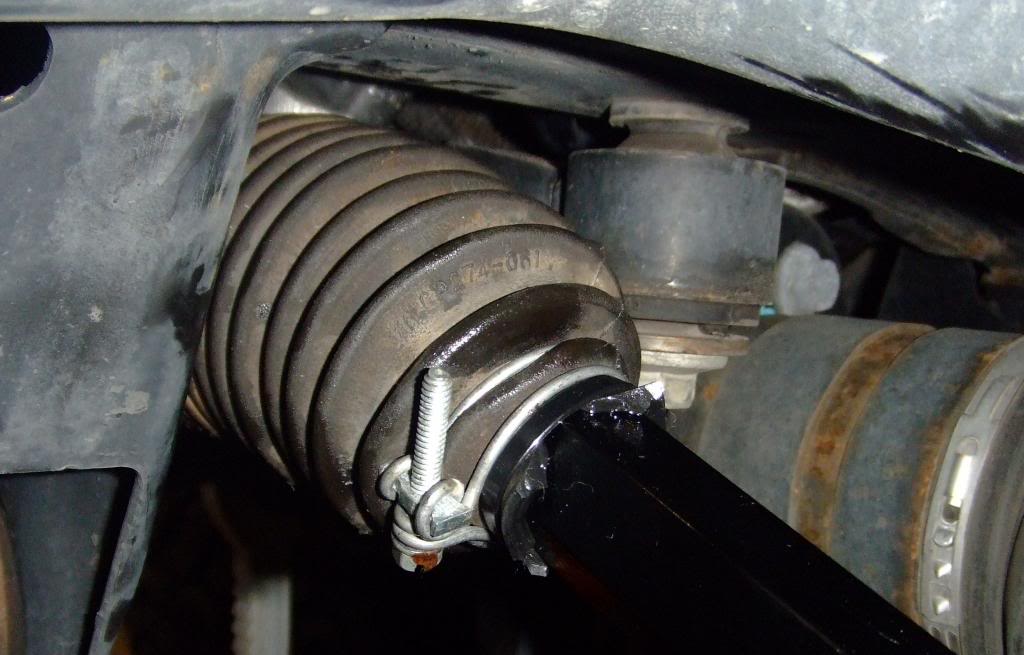
Outfitter Design HUGE Rods can use the original boots but you must cut them at the smaller nipple end.
We had to use some clamps and zip ties since the original clamps would not fit on the Outfitter Design HUGE Rods.
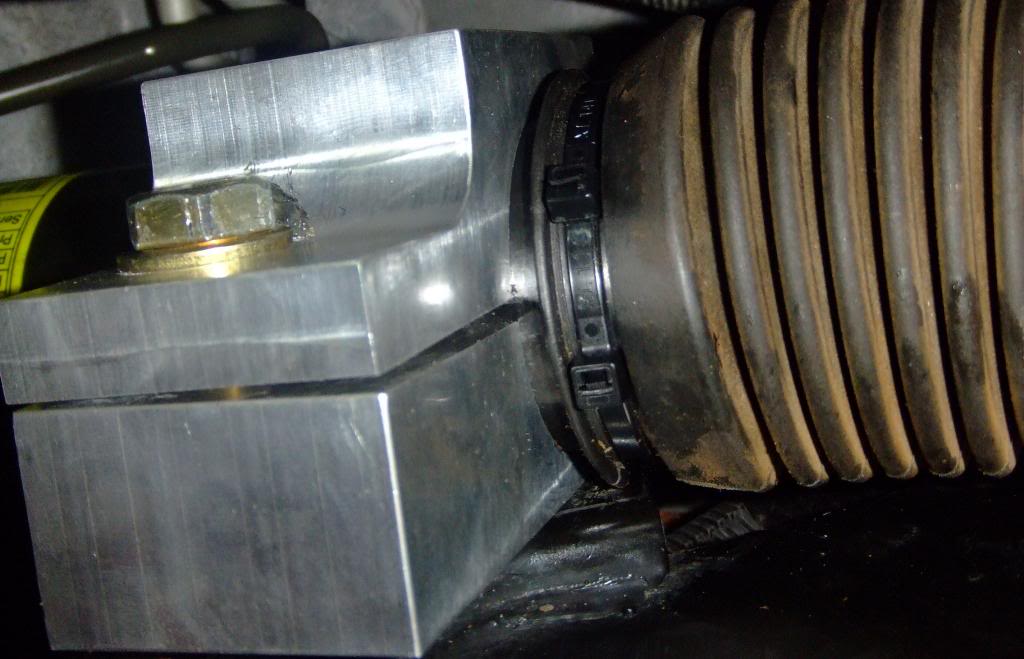
I am sourcing steel clamps, when I find them I will post them here.
Almost the same size as the half shaft!!
REVIEW;
The upgrade of the Outfitter Design Huge Rods as well as the OD Steering bracket AND bushings has changed the entire way H3 handles. No more slop! You will have to "relearn" how to drive your rig. Slight motions in the steering wheel will actually make the wheels turn now!!! Still a great ride just more feedback at the steering wheel and the reduction in bump steer is amazing. Not totally gone but greatly reduced.
I had a few people ask me if I thought they are worth the price.
Steering bracket and bushings-YES!
OD HUGE Rods-YES! Especially when you think about the cost of a complete set of OEM 16MMs. Definitely worth it.
After a month or two I will revisit this post and continue with the OnRoad/OffRoad observations.
The past weekend the Outfitter Design HUGE Combo really shined. I pressed the driver tire (37") against a large rock and nothing on the passenger side with no pigeon toe!! Also, for the first time in a while I haven't had to get an alignment after wheeling rocks. Steering wheel is still straight and XXLH3 still tracks straight down the highway.
THANKS OUTFITTER DESIGN FOR 2 OUTSTANDING PRODUCTS FOR H3 AND H3T OWNERS!!!!!!!!
Steerign Kit
http://www.outfitterdesign.com/steer...ement-kit.html
HUGE Tie Rods
http://www.outfitterdesign.com/humme...e-rod-kit.html
INSTALL;
As you can see there is a difference in the size of the rod for the Tie rods. Stock is 16MM (14MM for some) and 25.4MM (1") for the upgraded units. Since there is such a HUGE difference I will call them Outfitter Design HUGE Rods for the remainder of this thread. See pix below.
You will also notice that they use the same threads for the inner portion with a larger inner rod with less milling/taper. No sloppy heim joints, NICE!
The use of the Larger tie rod outer WITH grease fittings is a nice touch also!!
The Outfitter Designs Steering Rack Reinforcement Kit is the same as you have seen in previous install posts:
On to the install tips.
Well I really like the Outfitter Design products, but their directions and photos for the steering bracket support and bushings are not very good. Sorry, Outfitter Design guys. It is a pretty stright forward install but some of us like to read directions before starting a project in order to have the proper tools at hand.
I wrote down notes on the original directions but I am unable to locate them. Maybe they are still over at my buddies place not sure.
1st. Before you even open the package for the steering rack kit take a photo of the bushings and make sure you have the steel sleeve with the lip in the correct bushing (can't remember if its sleeve w/lip on the small side or sleeve w/lip in the large side. Also take a look at the steering rack you have removed and take photos of each bushing so you can press in the new bushing the same exact way with the sleeve w/lip in the correct locations. We did not do that and had to remove the lower bushing because the upper bushing would not line up with the bolt hole.
2nd. The bolt sizes (I wrote those down also on the same directions, oops) are not what they are in the directions (I believe they list thread size????). Anyway, get the proper sizes before you wedge everything back up inside there. :headbang:.
3rd. Measure, measure, measure. First center the steering wheel and secure it with a ratchet strap to the brake pedal. Measure: Outside front tire to tire, outside rear (of the front tire) tire to tire, driver and passenger steering rack to tie rod bolt center point, tie rod center bolt point to tie rod bolt center point. These measurements will aid in getting really close to your original alignment specs and have a straight steering wheel.
4th. Removal of the driver side wheel well plastic liner will help greatly in removal of the lower steering link bolt.
5th. If you don't know how to remove a tie rod you probably shouldn't be doing either one of these upgrades by yourself. No special tools just basic knowledge.
Whack with a large mallet here, that should release the tie rod end.
Pix of the lower steering link and bolt (you can actually see them in these pix)
Outfitter Design HUGE Rods can use the original boots but you must cut them at the smaller nipple end.
We had to use some clamps and zip ties since the original clamps would not fit on the Outfitter Design HUGE Rods.
I am sourcing steel clamps, when I find them I will post them here.
Almost the same size as the half shaft!!
REVIEW;
The upgrade of the Outfitter Design Huge Rods as well as the OD Steering bracket AND bushings has changed the entire way H3 handles. No more slop!
You will have to "relearn" how to drive your rig. Slight motions in the steering wheel will actually make the wheels turn now!!! Still a great ride just more feedback at the steering wheel and the reduction in bump steer is amazing. Not totally gone but greatly reduced. I had a few people ask me if I thought they are worth the price.
Steering bracket and bushings-YES!
OD HUGE Rods-YES! Especially when you think about the cost of a complete set of OEM 16MMs. Definitely worth it.
After a month or two I will revisit this post and continue with the OnRoad/OffRoad observations.
The past weekend the Outfitter Design HUGE Combo really shined. I pressed the driver tire (37") against a large rock and nothing on the passenger side with no pigeon toe!! Also, for the first time in a while I haven't had to get an alignment after wheeling rocks. Steering wheel is still straight and XXLH3 still tracks straight down the highway.
THANKS OUTFITTER DESIGN FOR 2 OUTSTANDING PRODUCTS FOR H3 AND H3T OWNERS!!!!!!!!
Last edited by TAINTER; Jun 29, 2013 at 07:55 AM.
Thread Starter
|
Senior Member
Joined: Sep 2008
Posts: 6,126
From: SE Michigan
If you have any questions about the install or the products just ask. I'll try to do my best with what I have seen, felt and read.
I'm not affiliated with the Outfitter Design guys but they do answer emails and PMs so it is easy to get a hold of them and they don't restrict the sale of their items to certain forums like the other guys do. They will sell to anyone!
I'm not affiliated with the Outfitter Design guys but they do answer emails and PMs so it is easy to get a hold of them and they don't restrict the sale of their items to certain forums like the other guys do. They will sell to anyone!

Junior Member
Joined: May 2012
Posts: 6
If you have any questions about the install or the products just ask. I'll try to do my best with what I have seen, felt and read.
I'm not affiliated with the Outfitter Design guys but they do answer emails and PMs so it is easy to get a hold of them and they don't restrict the sale of their items to certain forums like the other guys do. They will sell to anyone!
I'm not affiliated with the Outfitter Design guys but they do answer emails and PMs so it is easy to get a hold of them and they don't restrict the sale of their items to certain forums like the other guys do. They will sell to anyone!

Senior Member
Joined: May 2012
Posts: 2,005
always the skeptic,i must ask what is the next part in the "chain" that is likely to break as these take more abuse. where they screw in all else is stock huh?
i guess since i never broke a stock rod so i dont know what breaks them.
i guess since i never broke a stock rod so i dont know what breaks them.

Senior Member
Joined: May 2008
Posts: 221
From: Shrewsbury, MA
Nothing. We have not broken anything else in the steering since we designed this kit. Our powersteering pump started to go with 108,000 miles with 50,000 of those on 35's and alot of offroad abuse/ hauling trailers etc.
Thread Starter
|
Senior Member
Joined: Sep 2008
Posts: 6,126
From: SE Michigan
They don't break, they bend. The stock 14mm will bend in a U shape. The stock 16mm will bend in a "J" shape.
We have been wheeling/daily driving these O.D. products (Steering Bracket, Bushings & Huge Azz Tie Rods) for almost a year now and not a single issue.
Thanks, Outfitter Design!
We have been wheeling/daily driving these O.D. products (Steering Bracket, Bushings & Huge Azz Tie Rods) for almost a year now and not a single issue.
Thanks, Outfitter Design!
Last edited by TAINTER; Jun 3, 2014 at 09:12 PM.
Junior Member
Joined: May 2012
Posts: 6
They don't break, they bend. The stock 14mm will bend in a U shape. The stock 16mm will bend in a "J" shape.
We have been wheeling/daily driving these O.D. products (Steering Bracket, Bushings & Huge Azz Tie Rods) for almost a year now and not a single issue.
Thanks, Outfitter Design!
We have been wheeling/daily driving these O.D. products (Steering Bracket, Bushings & Huge Azz Tie Rods) for almost a year now and not a single issue.
Thanks, Outfitter Design!


Here is my first one after installation:
To answer your question: the next weakest link might be CV half Shaft - but you really need to do something extra-ordinary :-)