
How-to for front speaker replacement


Thread Starter
|
Junior Member
Joined: Aug 2008
Posts: 27
From:
I didn't see this anywhere, and while it certainly isn't difficult or complicated, I figured that since I was doing it, I'd document it in hopes that it might assist someone. I've worked on cars as a hobbyist for about 20yrs and perform all of my own mods, but I've explained the speaker swap as basically as possible for those who might be nervous about tackling this themselves.
I noticed I didn't hear my "ding-ding" anymore after locking my truck. As it turns out, the driver-side door speaker is the one that relays that sound, and mine was putting out nothing - no radio, CD, or chime. While I like my music, I am certainly no audiophile and had no desire to spend any real money on speakers, figuring any brand name replacement will be an "upgrade," if you will.
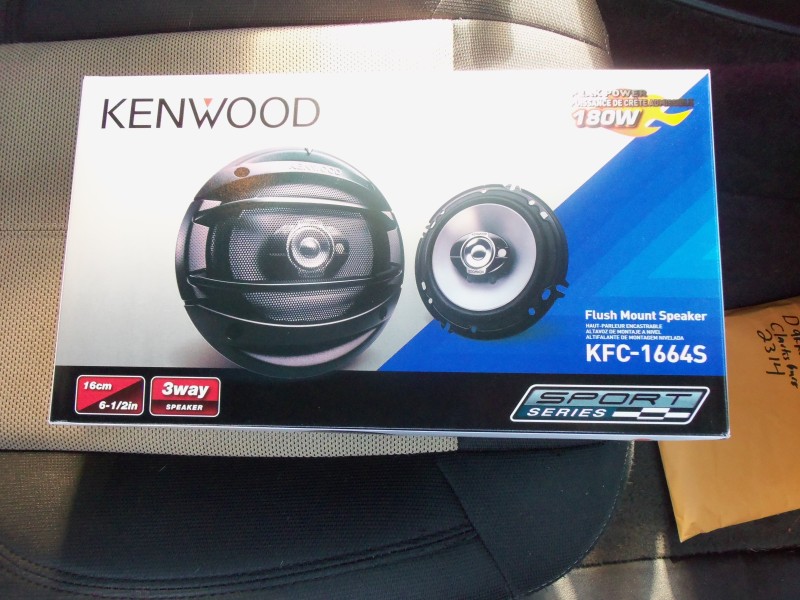
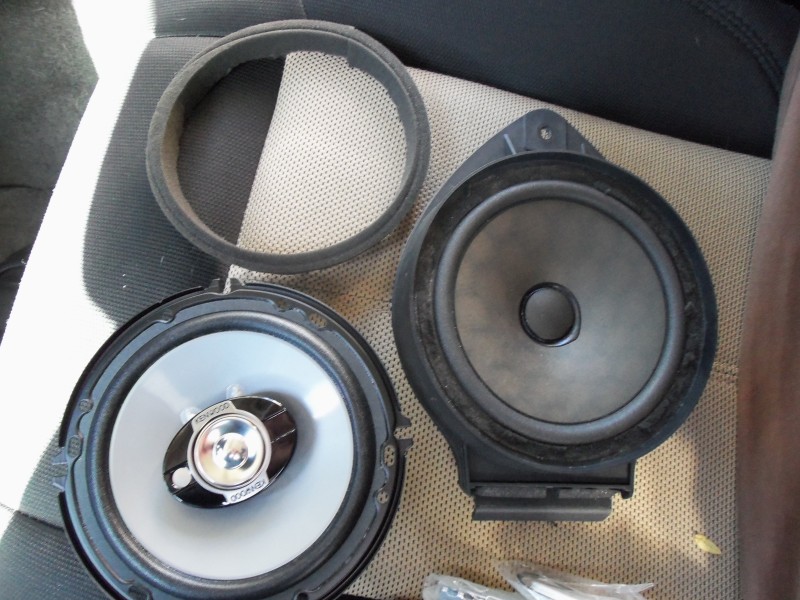
I bought these Kenwood KFC-1664S 6.5" speakers for around $35 shipped. Super-cheap!
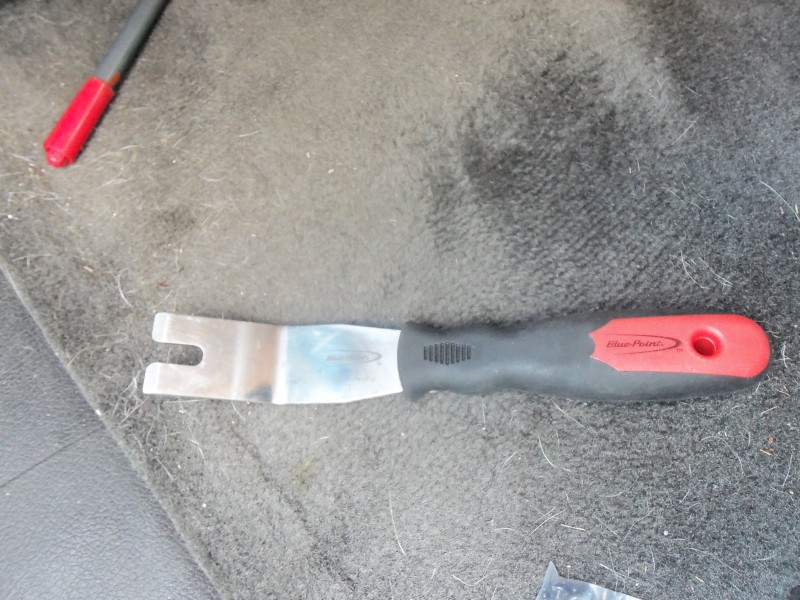
This tool (or similar) will come in handy when removing your door panels.
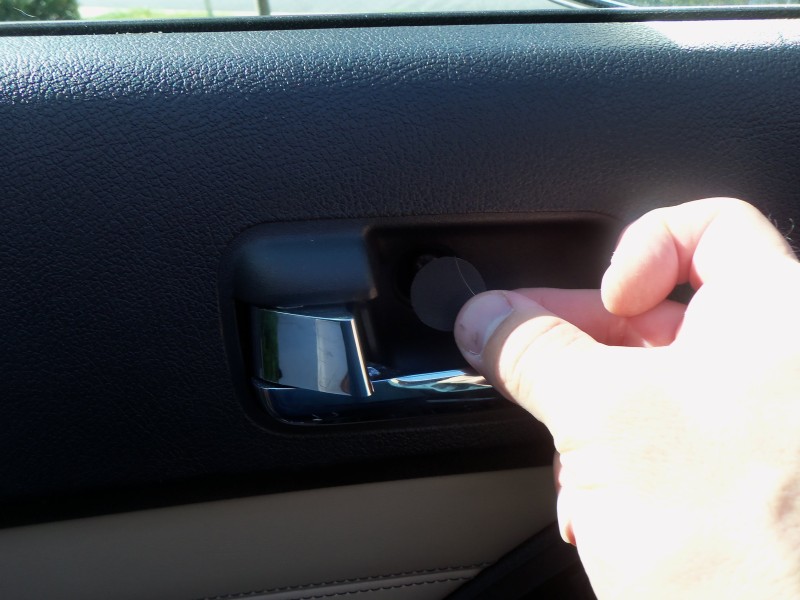
There are THREE torx head bolts that need to be removed. The first is behind a small plastic circle behind the inside door handle. It is easily popped off with a small screwdriver.
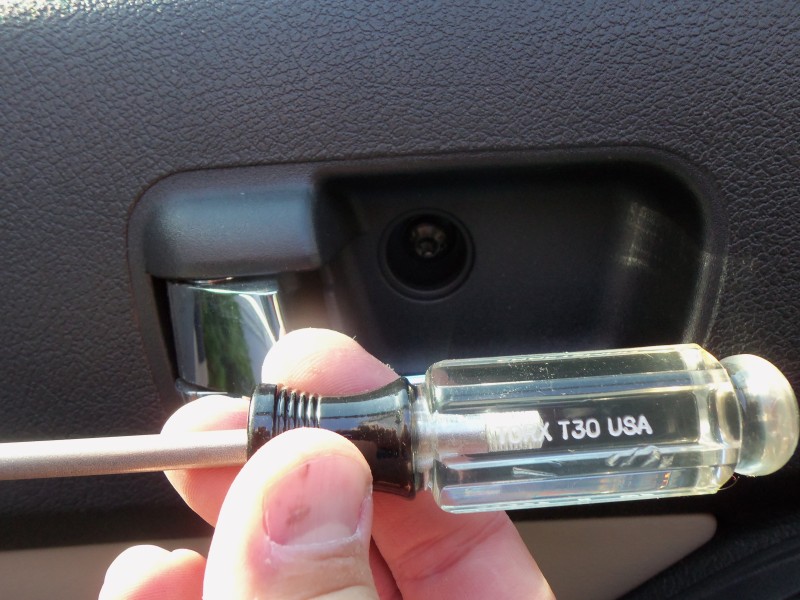
Use a torx head T30 to remove this and the other two bolts that will be shown in the next step.
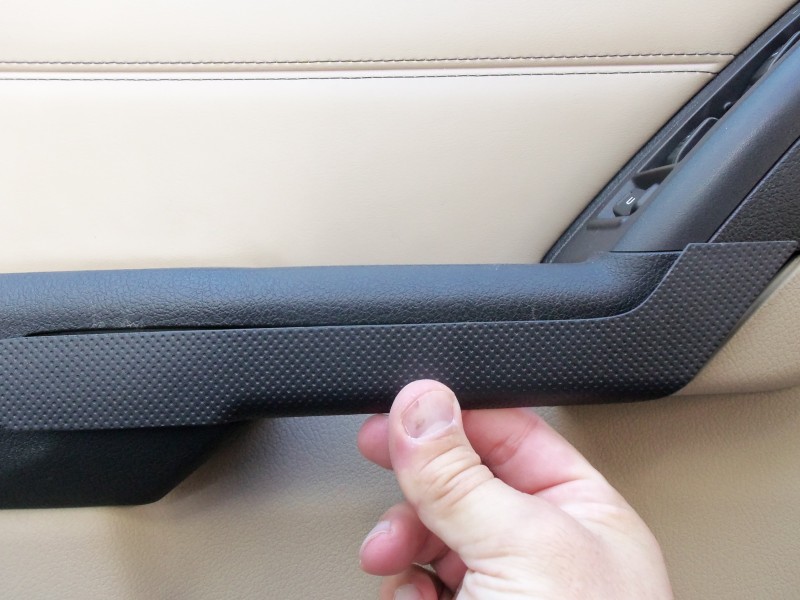
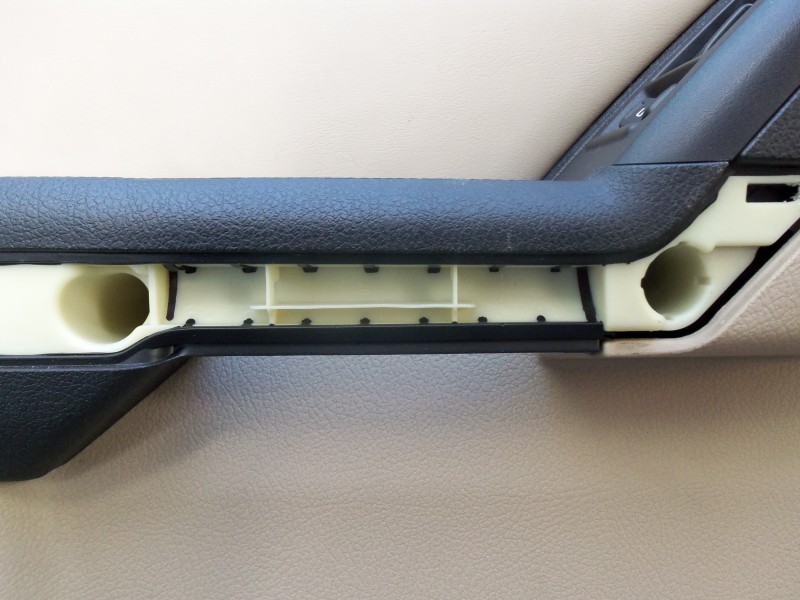
Again, using a small flathead screwdriver, pry off the trim piece on the door-pull handle as shown below.
Once it is removed, remove the final two torx head bolts.
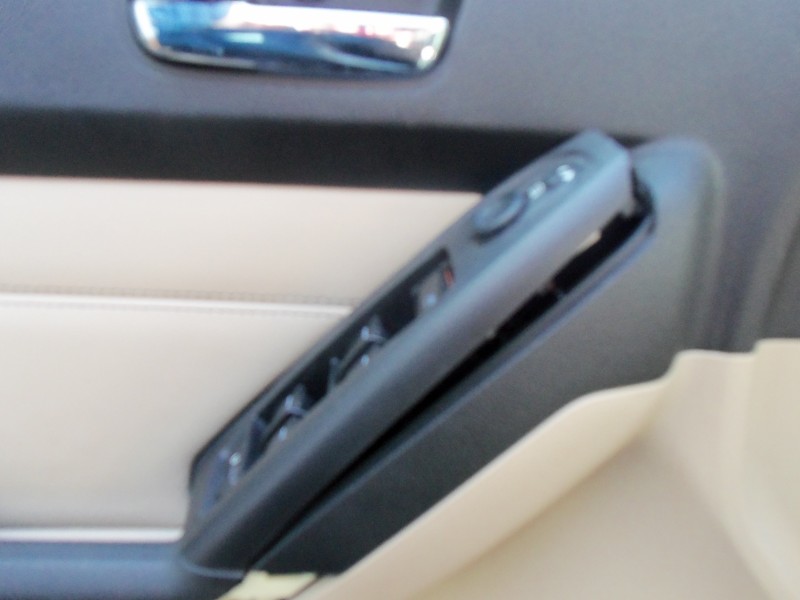
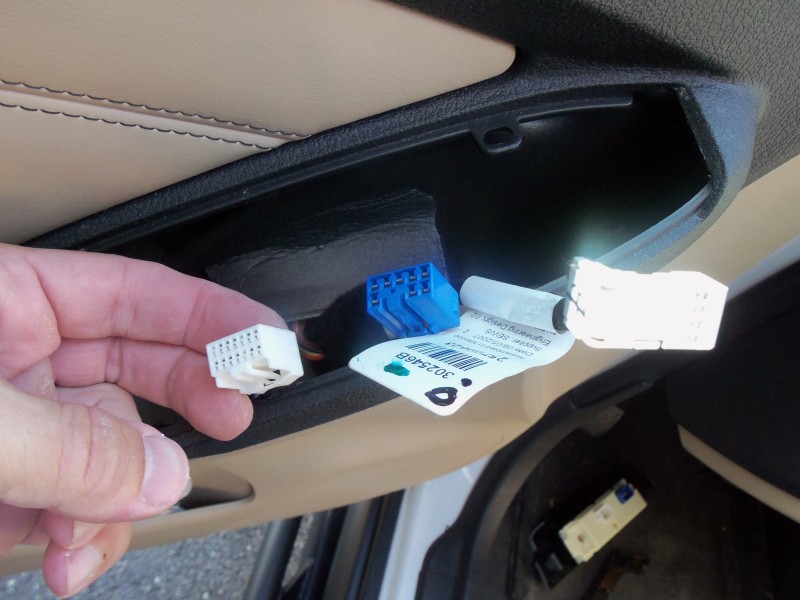
GENTLY pry up the trim panel that contains the window/mirror/door lock controls. It's easy to start at the front of the piece, as there are really only two main clips (at the ends) that retain it.
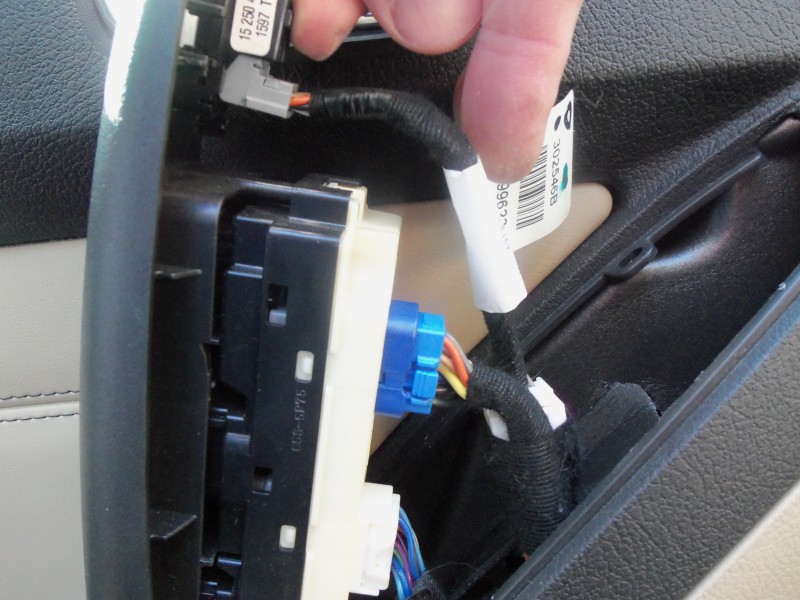
Once free, you'll see that there are 3 switch harnesses (gray, blue, and white) that need to be unclipped. If you look at them, you'll see how they are retained. There is a small type of spring clip that holds them in. DO NOT PULL ON THE WIRES TO TRY TO REMOVE THEM, and you are NOT removing the switches from the panel itself. See below.
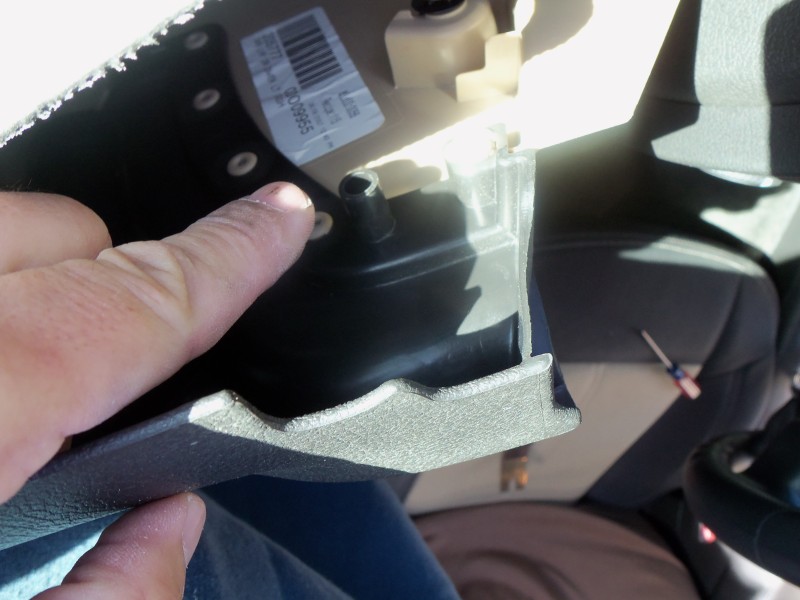
Next, you need to pry off the door panel, which is retained by several push-pin type of retainers that stay in the door itself and poke into the panel. Sorry, I forgot to take a pic of the inside of the panel to show, but you'll see once you pop it off using some sort of flat pry tool that is WIDE. I wouldn't use a screwdriver for fear of damaging the door panel, though I'm sure it can be done without doing so. I started prying the panel off at the bottom rear. It is held on pretty tight and it will sound like you broke something ("POP!") when the first retainer lets go, but keep going slowly around the edge of the entire panel until you feel it sort of hang free. Now gently LIFT the panel up off the lip that it's hanging by, but BEFORE removing it, there are TWO pushpin retainers, one on each end of the top of the panel that hold the moisture barrier/insulation material to the door panel. See where my finger is pointing below. Remove these.
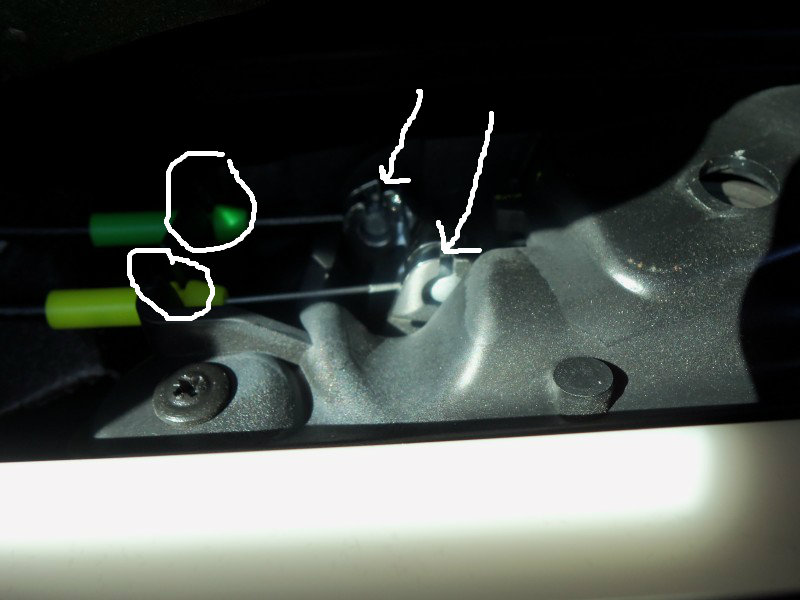
While holding the panel and NOT pulling it away yet from the door, push the three switches through the flap in the material, and also remove the two wires for the door handle/lock. These are the yellow and green things in the pic below. Pull them off the panel and pull the "ball" at the end of the wire out through the space.
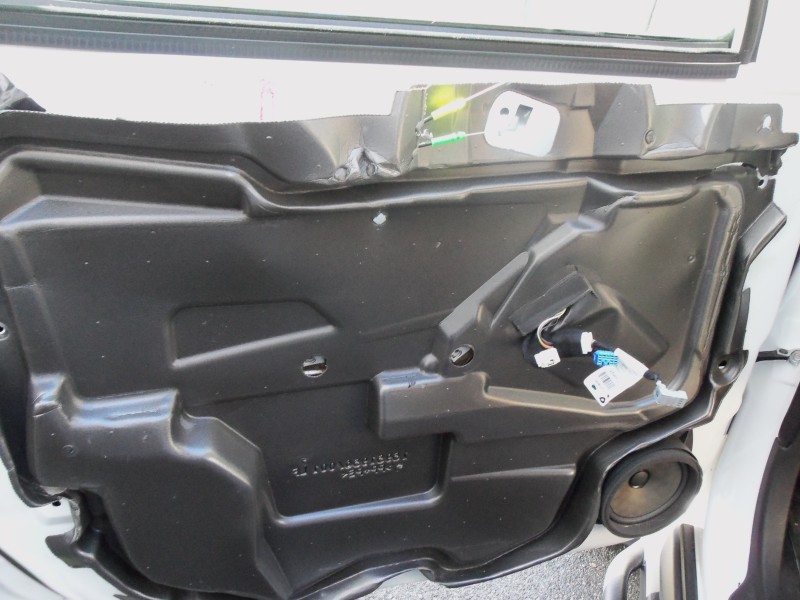
Once the panel is off, this is what it looks like.
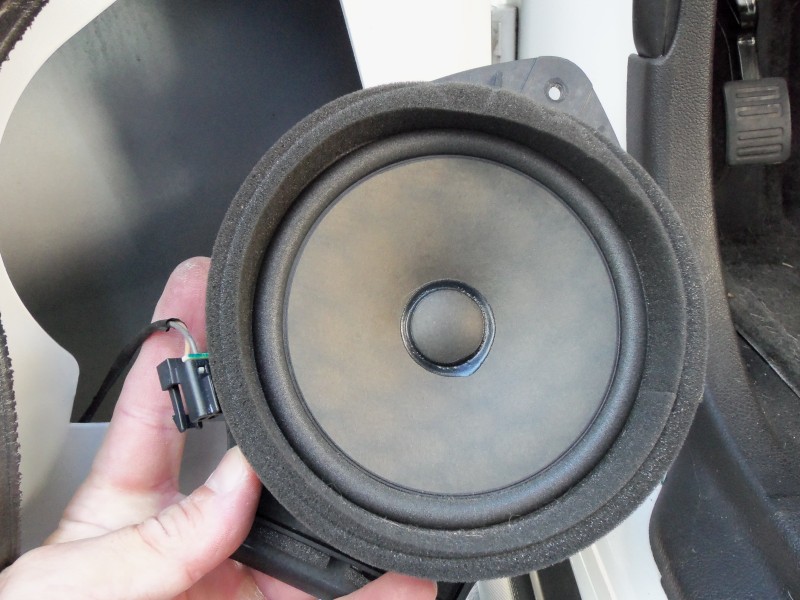
Remove single bolt holding speaker.

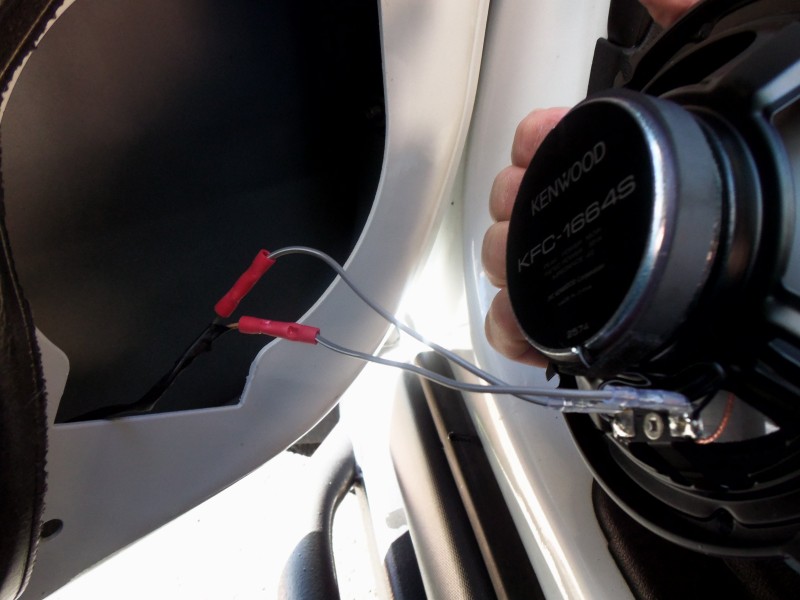
Remove harness on back of speaker.
I cut off the foam ring around the stock speaker and glued it to the new one. Probably unecessary, but I hate rattles and had spray adhesive already.
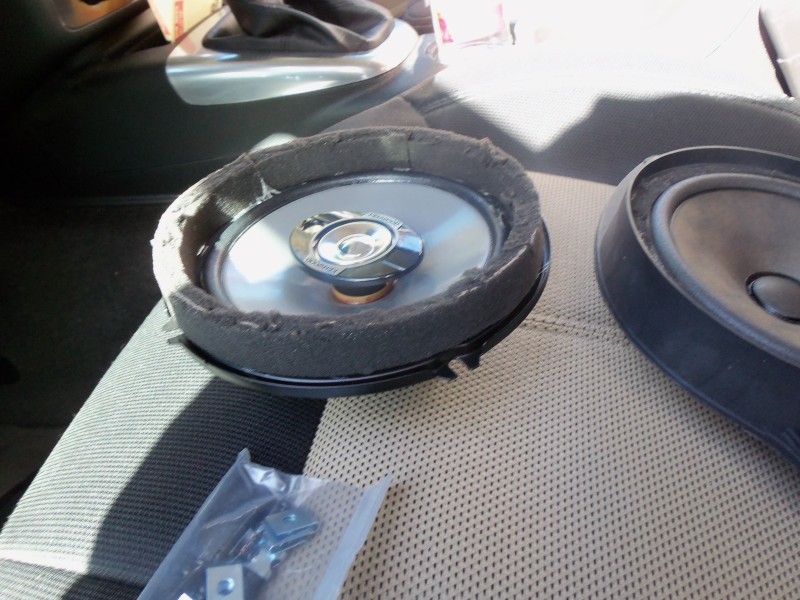
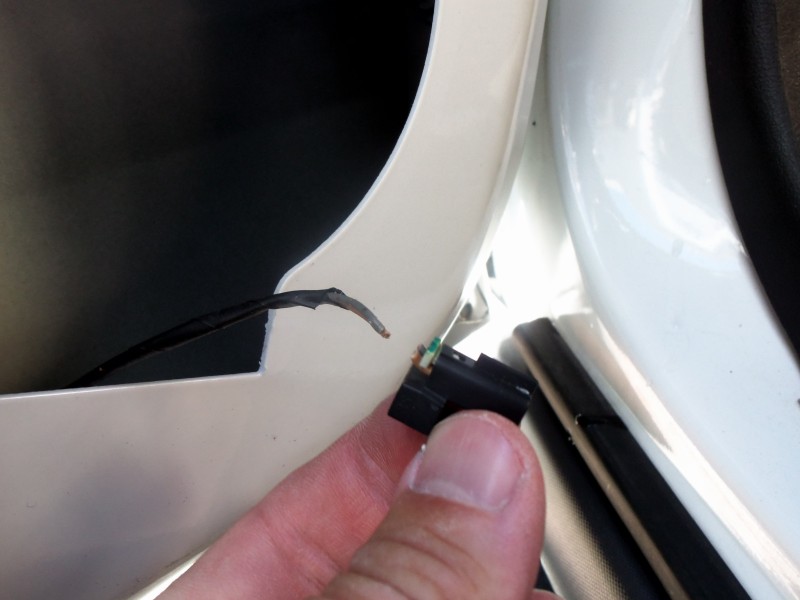
Cut off stock speaker harness end and splice in new speaker wire. Connect the other ends to the new speaker.Yes, I know it would be a cleaner installation if I soldered and heatshrunk the connections. TEST THE SPEAKER to make sure sound comes out!
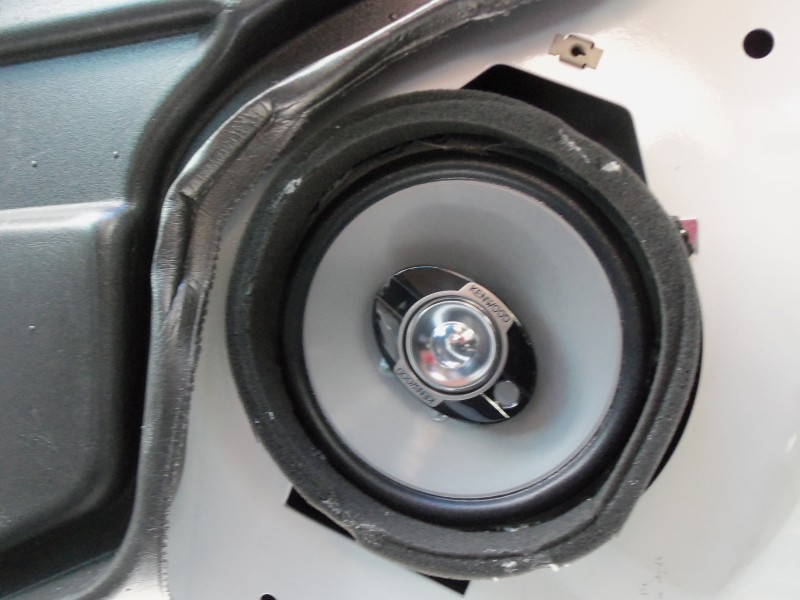
I drilled 4 small holes to retain the speaker, using a marker to indicate the spots to drill. My speakers came with some clips to fit around the opening that let the screws grab something other than the door's sheetmetal.
Of course, I just realized my passenger side REAR door speaker quit, too...
I noticed I didn't hear my "ding-ding" anymore after locking my truck. As it turns out, the driver-side door speaker is the one that relays that sound, and mine was putting out nothing - no radio, CD, or chime. While I like my music, I am certainly no audiophile and had no desire to spend any real money on speakers, figuring any brand name replacement will be an "upgrade," if you will.
I bought these Kenwood KFC-1664S 6.5" speakers for around $35 shipped. Super-cheap!
This tool (or similar) will come in handy when removing your door panels.
There are THREE torx head bolts that need to be removed. The first is behind a small plastic circle behind the inside door handle. It is easily popped off with a small screwdriver.
Use a torx head T30 to remove this and the other two bolts that will be shown in the next step.
Again, using a small flathead screwdriver, pry off the trim piece on the door-pull handle as shown below.
Once it is removed, remove the final two torx head bolts.
GENTLY pry up the trim panel that contains the window/mirror/door lock controls. It's easy to start at the front of the piece, as there are really only two main clips (at the ends) that retain it.
Once free, you'll see that there are 3 switch harnesses (gray, blue, and white) that need to be unclipped. If you look at them, you'll see how they are retained. There is a small type of spring clip that holds them in. DO NOT PULL ON THE WIRES TO TRY TO REMOVE THEM, and you are NOT removing the switches from the panel itself. See below.
Next, you need to pry off the door panel, which is retained by several push-pin type of retainers that stay in the door itself and poke into the panel. Sorry, I forgot to take a pic of the inside of the panel to show, but you'll see once you pop it off using some sort of flat pry tool that is WIDE. I wouldn't use a screwdriver for fear of damaging the door panel, though I'm sure it can be done without doing so. I started prying the panel off at the bottom rear. It is held on pretty tight and it will sound like you broke something ("POP!") when the first retainer lets go, but keep going slowly around the edge of the entire panel until you feel it sort of hang free. Now gently LIFT the panel up off the lip that it's hanging by, but BEFORE removing it, there are TWO pushpin retainers, one on each end of the top of the panel that hold the moisture barrier/insulation material to the door panel. See where my finger is pointing below. Remove these.
While holding the panel and NOT pulling it away yet from the door, push the three switches through the flap in the material, and also remove the two wires for the door handle/lock. These are the yellow and green things in the pic below. Pull them off the panel and pull the "ball" at the end of the wire out through the space.
Once the panel is off, this is what it looks like.
Remove single bolt holding speaker.
Remove harness on back of speaker.
I cut off the foam ring around the stock speaker and glued it to the new one. Probably unecessary, but I hate rattles and had spray adhesive already.
Cut off stock speaker harness end and splice in new speaker wire. Connect the other ends to the new speaker.Yes, I know it would be a cleaner installation if I soldered and heatshrunk the connections. TEST THE SPEAKER to make sure sound comes out!
I drilled 4 small holes to retain the speaker, using a marker to indicate the spots to drill. My speakers came with some clips to fit around the opening that let the screws grab something other than the door's sheetmetal.
Of course, I just realized my passenger side REAR door speaker quit, too...
Last edited by chimazo; Oct 22, 2012 at 06:55 PM.

Senior Member
Joined: Oct 2011
Posts: 1,653
From: Wisconsin
Thanks for the write up.... you can also find it here....
https://www.hummerforums.com/forum/h...h3-base-27765/
Chris
https://www.hummerforums.com/forum/h...h3-base-27765/
Chris

Thread Starter
|
Junior Member
Joined: Aug 2008
Posts: 27
From:
I think all H3's have the door speakers and separate tweeters in the A-pillars, don't they?
Seems like the door speakers are the ones that go bad. Like I said, no sooner had I done the fronts that I realized one of my rear door speakers had gone kaput.
Sorry HH, I didn't see that thread as I searched "speaker," rather than "speakers." If I had, I wouldn't have bothered with mine! Oh well, no damage done, except redundancy...

Thread Starter
|
Junior Member
Joined: Aug 2008
Posts: 27
From:
The grill is actually a GM Accessory part #19156164 that came in white. It doesn't appear to be painted (vs molded in color), as it hasn't chipped at all since I bought it about 4yrs ago. I don't believe they are available any longer, but GM used to sell a matching grill for virtually all of the stock colors. Best bet is calling around and trying to find one sitting on a (former) dealer's parts shelf...
Last edited by chimazo; Oct 24, 2012 at 10:20 AM. Reason: Typo

Senior Member
Joined: Apr 2012
Posts: 275
I think you would have better results if you replaced splits with splits, or just replaced the woofer in the door with a speaker with similar frequency response as the original.
Thread Starter
|
Junior Member
Joined: Aug 2008
Posts: 27
From:
Now you have me confused?? Did you disconnect the factory tweeter when you fitted the three way door speakers?? Three way speakers do not work with separate tweeters, or are you still running them through the splitter and as such rendered the door tweeter useless.
I think you would have better results if you replaced splits with splits, or just replaced the woofer in the door with a speaker with similar frequency response as the original.
I think you would have better results if you replaced splits with splits, or just replaced the woofer in the door with a speaker with similar frequency response as the original.
There is somewhat less bass now, but it is also a more "clear" sound, too. Again, I'm not into spending $$ on the sound system, though I am thinking of adding a powered subwoofer. First I'll see how things sound once I swap out the door speakers, since one of them is broken anyway. I'm replacing them with the same model I used on the front doors.