


Gpcalero's "The Duke" H3T Alpha Build

Thread Starter
|
Senior Member
Joined: Mar 2012
Posts: 295
From: SW Florida

I think you about nailed the cam selection. You do not want the LH8 to get soggy down low so the ballpark is 215ish duration and appx .050ish lift. Exactly where you went. Do you happen to know where the intake valves close on that TSP cam? Is it somewhere about 40 ABDC? Just curious. Sounds great.
I am on that same trail, but seriously thinking of adding a F.A.S.T. Intake to the mix, again to keep low end AND boost the top a notch (small notch). I was not looking at the TSP cam, but it is now on the radar for when parts start moving in my direction.
You can tune out the TC with HP tuners, but we saw that you should leave in some very small amount or the system starts to have erratic glitches. I was at a local tuner with a customer and his 09 RWD Colly LH8 as a spectator. A lot less weight than a H3/T, but almost as FUN!
Anyways, keep up the good work. KUDOS!
I am on that same trail, but seriously thinking of adding a F.A.S.T. Intake to the mix, again to keep low end AND boost the top a notch (small notch). I was not looking at the TSP cam, but it is now on the radar for when parts start moving in my direction.
You can tune out the TC with HP tuners, but we saw that you should leave in some very small amount or the system starts to have erratic glitches. I was at a local tuner with a customer and his 09 RWD Colly LH8 as a spectator. A lot less weight than a H3/T, but almost as FUN!
Anyways, keep up the good work. KUDOS!
I will check the cam card on that and see if i can give you more details on it possibly. I have it around here somewhere. I would deff pick up the cam on these Alpha H3’s & H3T’s, it really helped me love it even more and picked up power all throughout the RPM band.
Thread Starter
|
Senior Member
Joined: Mar 2012
Posts: 295
From: SW Florida
Doc,
Here's the cam card with all the info I have on the camshaft for you and any others that might find it appropriate. I saved this one but didn't save the new cam card specs for the 6.2L LS3 build and don't know why haha.
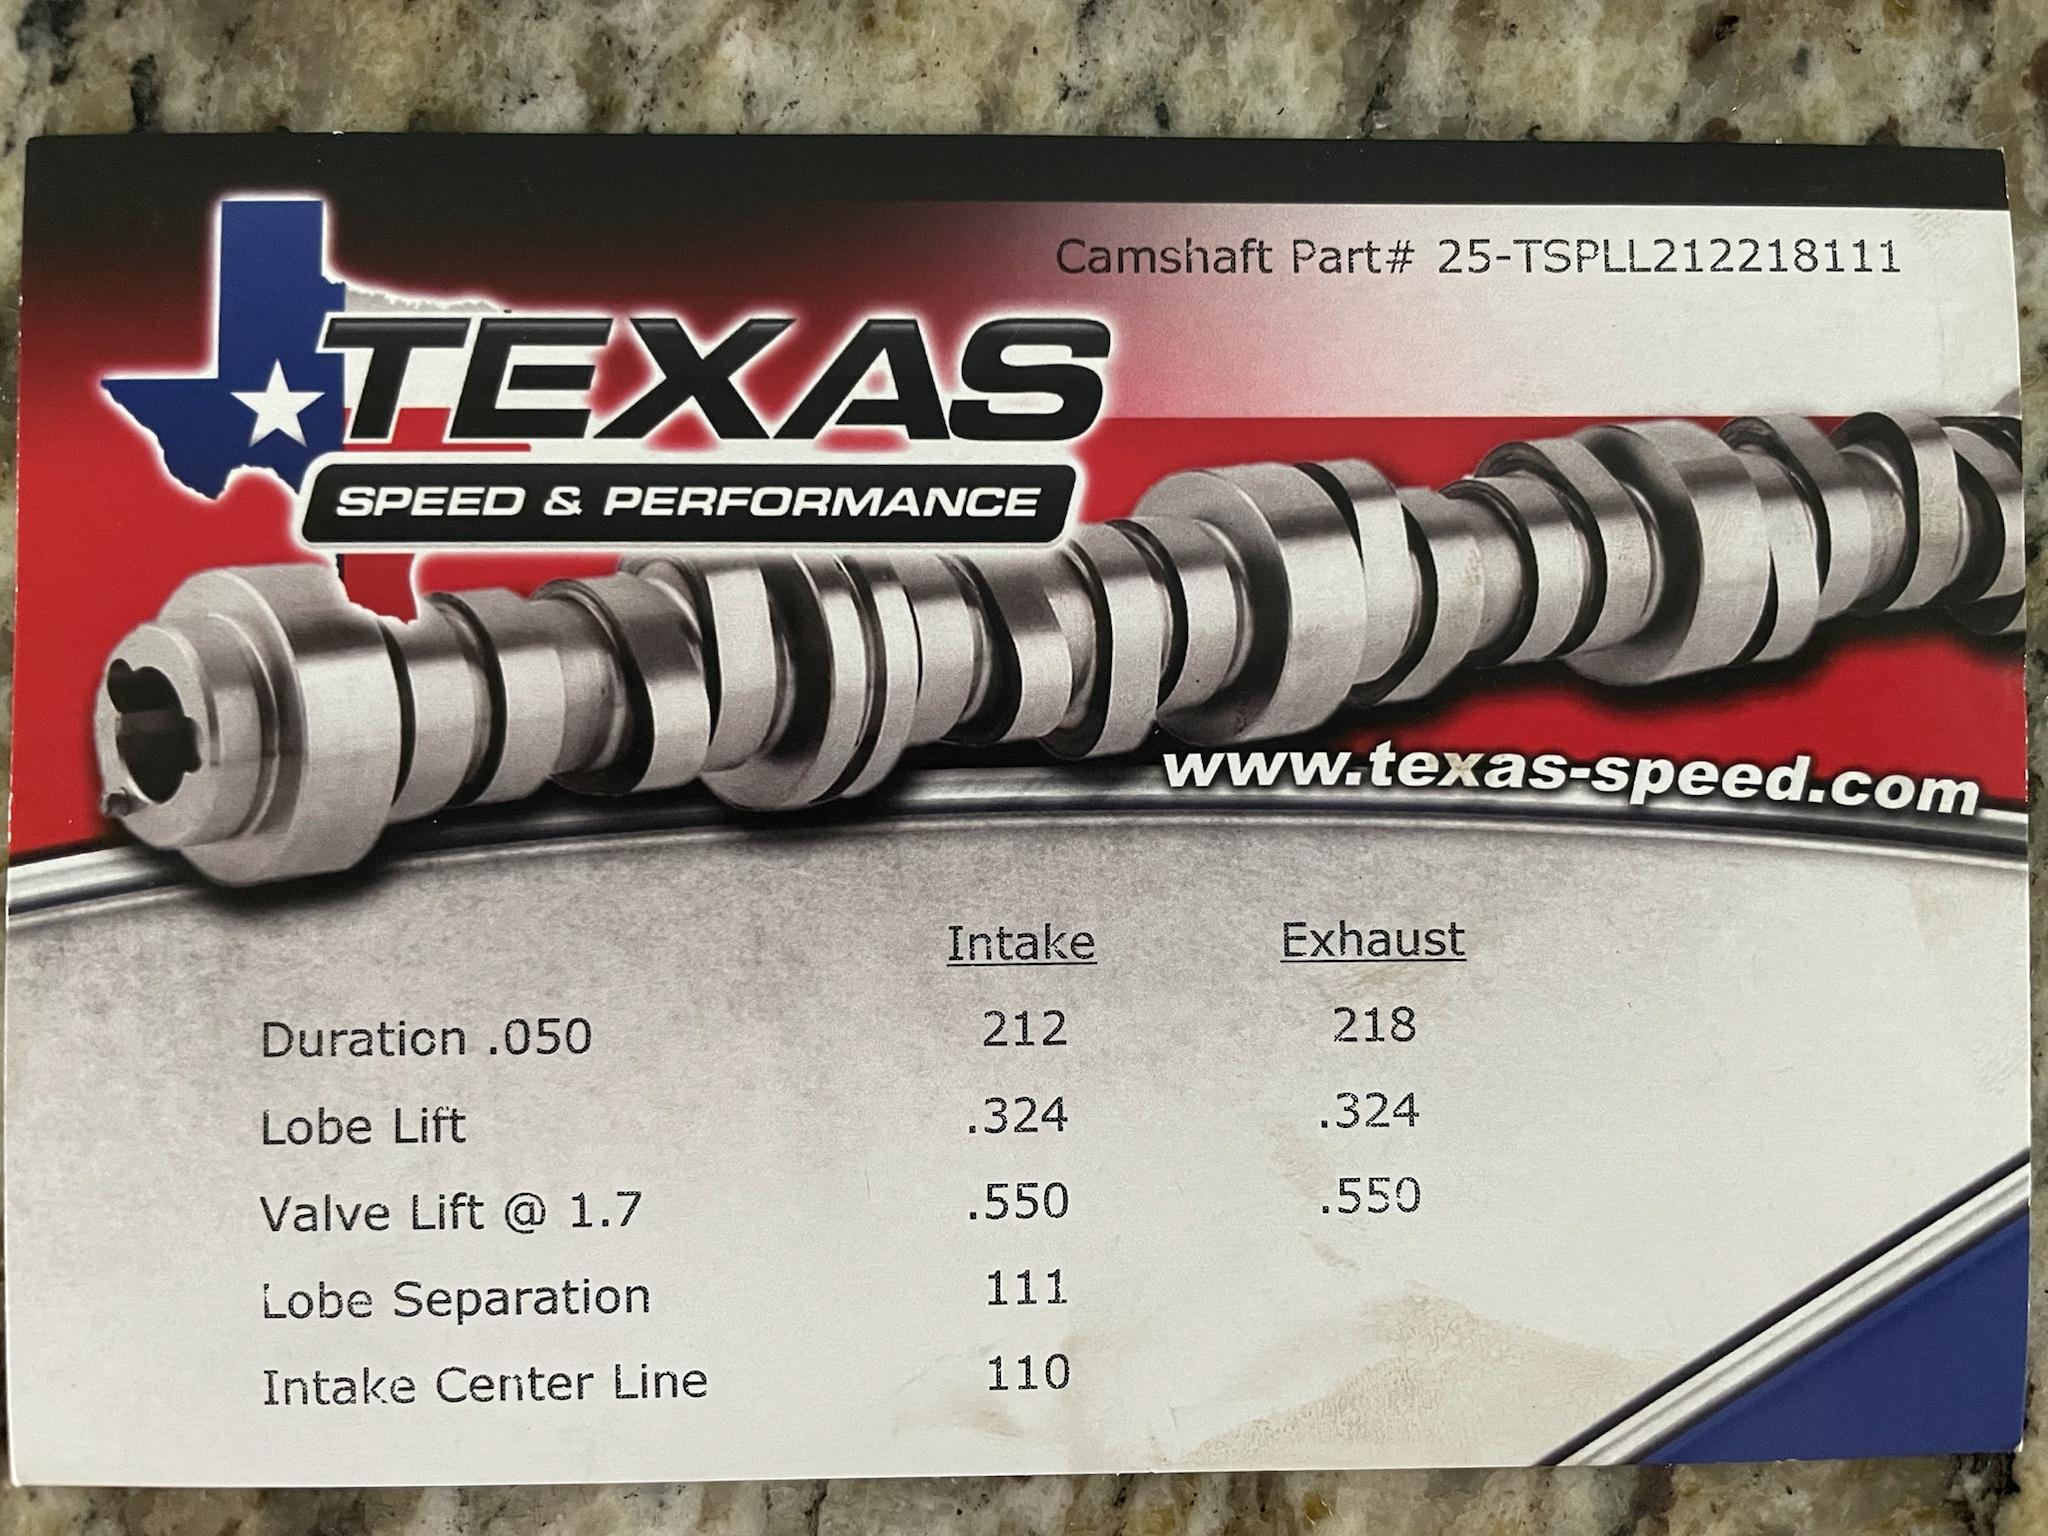
Here's the cam card with all the info I have on the camshaft for you and any others that might find it appropriate. I saved this one but didn't save the new cam card specs for the 6.2L LS3 build and don't know why haha.

Super Moderator
Joined: Jul 2007
Posts: 13,111
From: Boat Town USA MI
Thanks for the info!
Compare to stock LH8 Camshaft specs:
Duration @ .050 in. (int./exh.) 191°/190°
Valve Lift (int./exh.) 0.457 in./0.466 in.
Lobe Separation Angle 114°
Cam Gear Attachment 1-Bolt
Compare to stock LH8 Camshaft specs:
Duration @ .050 in. (int./exh.) 191°/190°
Valve Lift (int./exh.) 0.457 in./0.466 in.
Lobe Separation Angle 114°
Cam Gear Attachment 1-Bolt
Thread Starter
|
Senior Member
Joined: Mar 2012
Posts: 295
From: SW Florida
 Rancho Lift Kit Install!
Time to finally install the Rancho 4" lift kit.
I was sitting on this kit for about a year and a half before I finally got off my rear and decided to start working on installing it late last year in August. And I should've done it sooner because it completely changed the truck, I love the way The Duke turned out.
I did this mostly by myself and with a help of a buddy for the first few hours. Really wasn't too difficult to install.
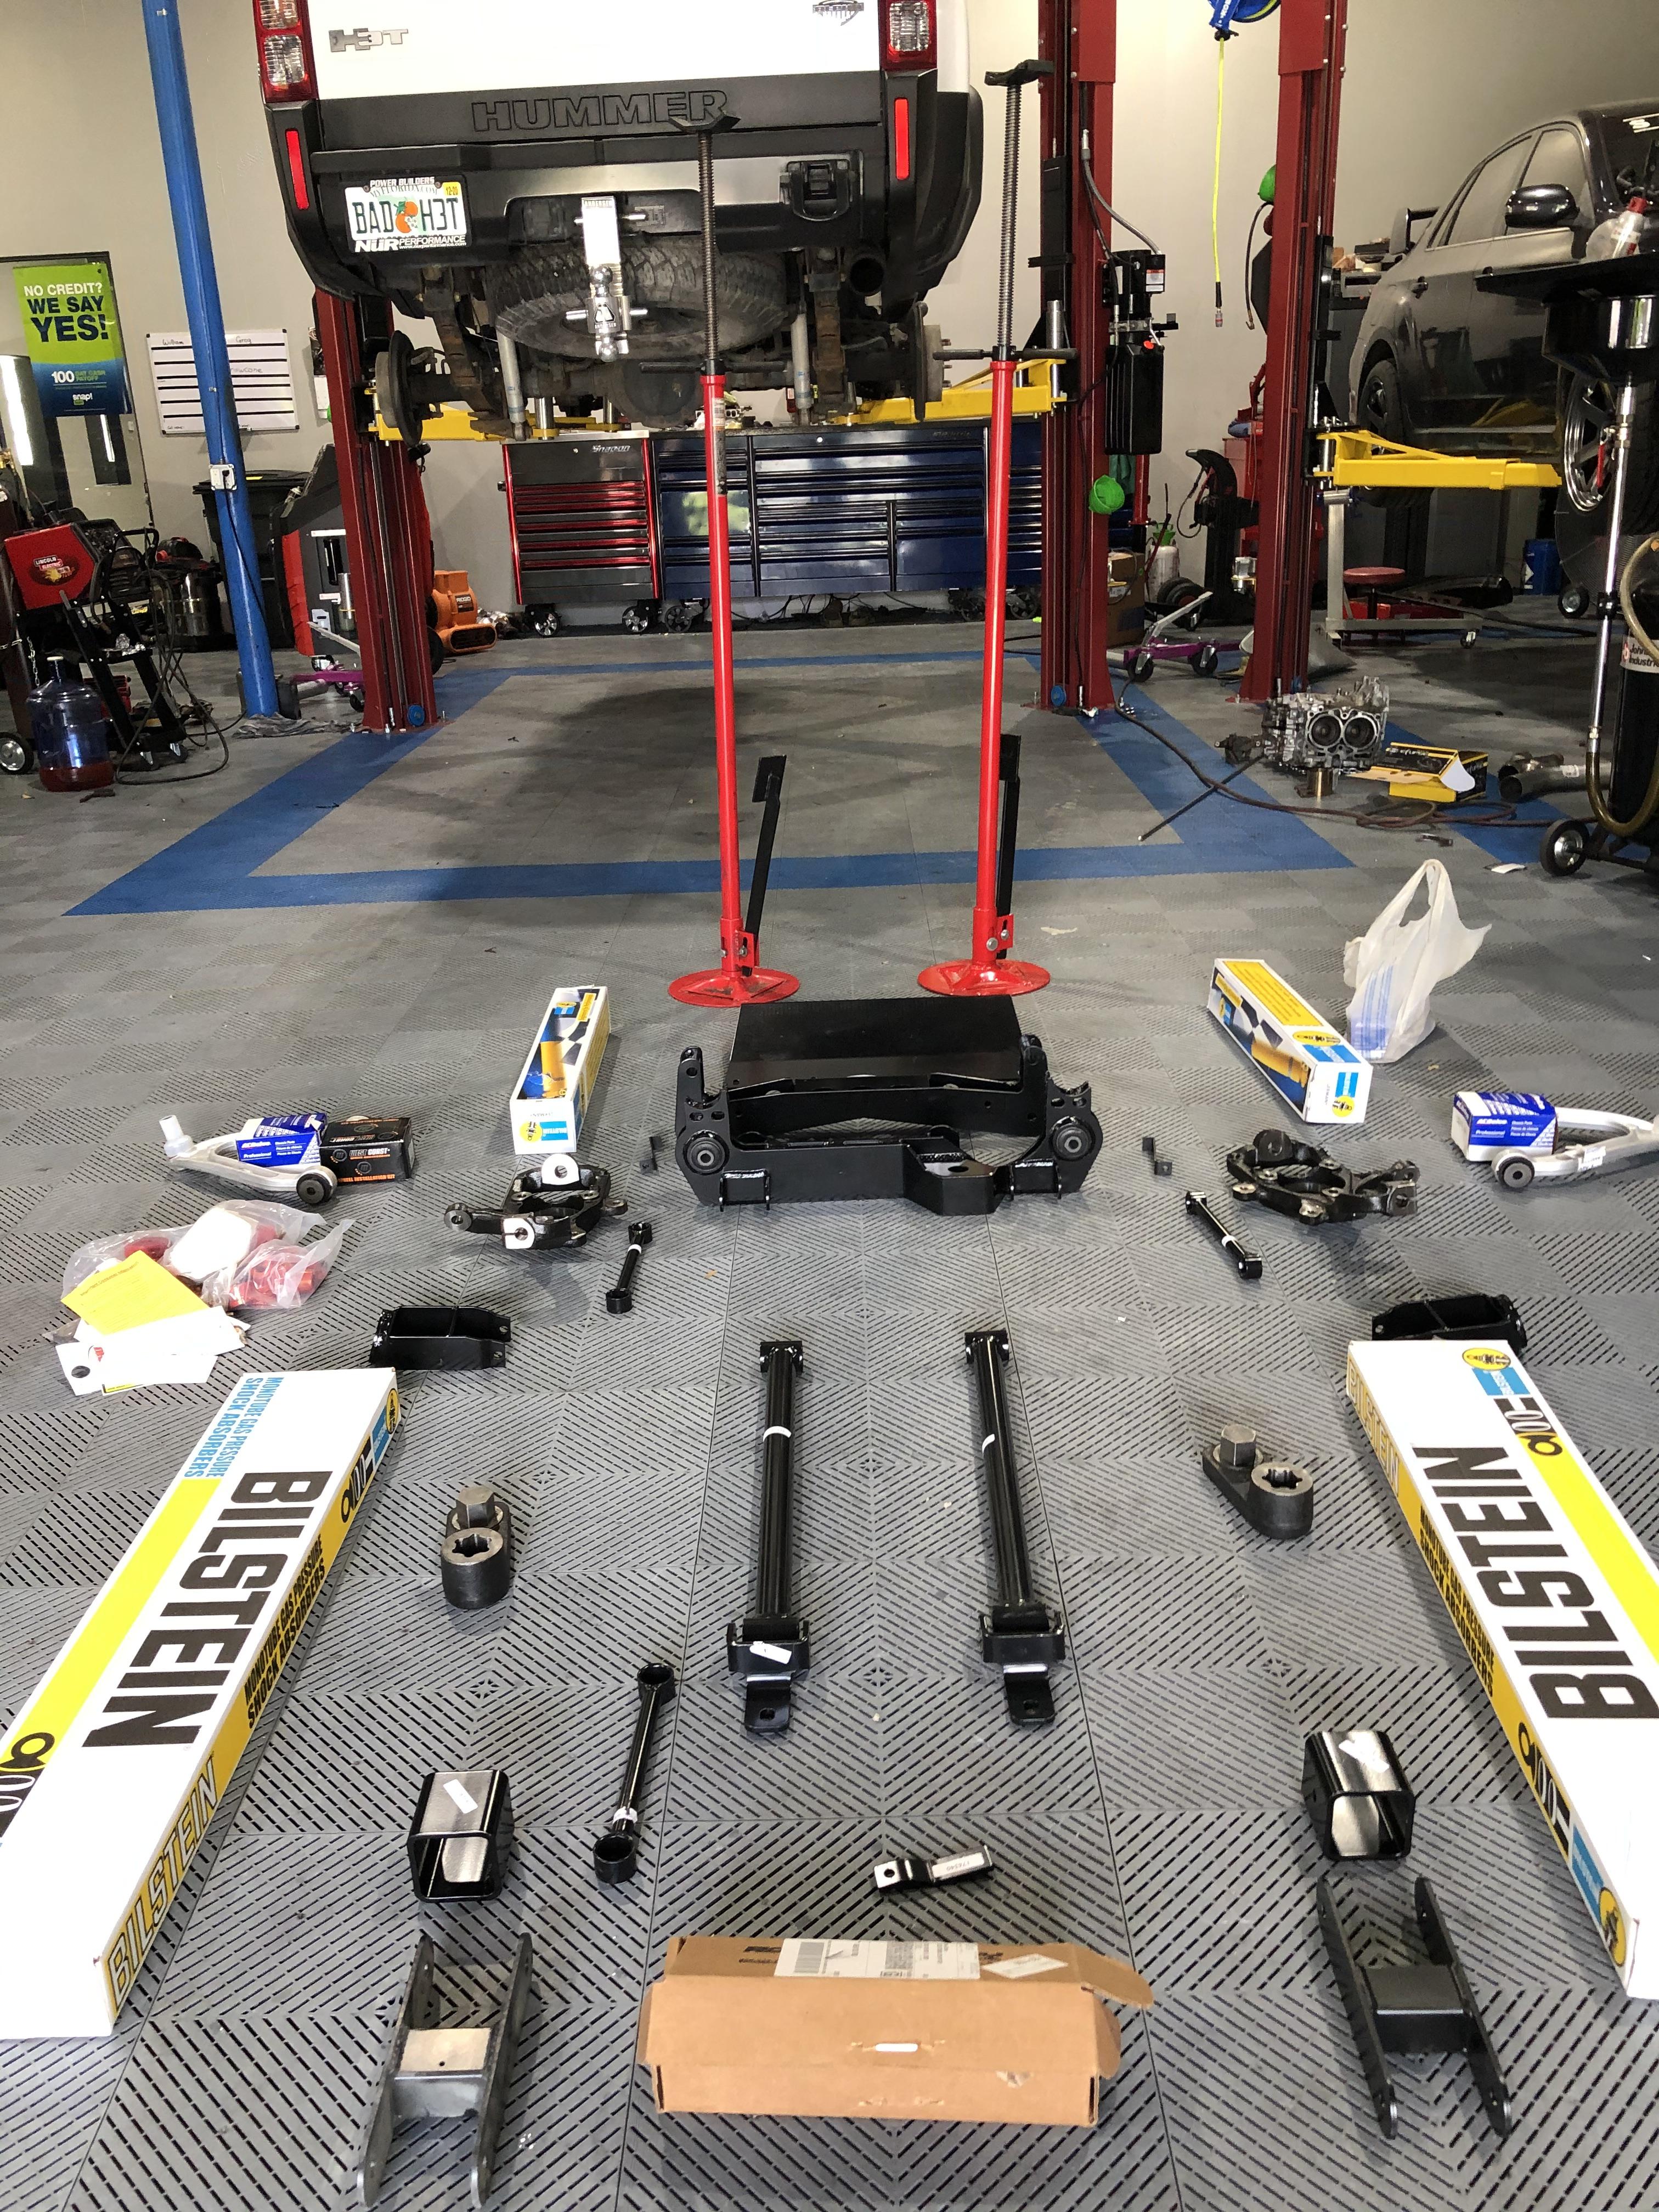
First thing was to lay out all of the parts get the truck on the lift & remove the wheels & tires.
In the kits that were found, they supplied longer shackles and an add a leaf to lift the rear (more on that later).
Non-Rancho items that I used were Bilstein shock absorbers with reservoirs on all 4 corners, new rear brake pads, new upper control arms, new ball joints for the lower control arms that are serviceable, and some Jeep shock mount adapters to adapt to the eyelet mounts on the new shocks.
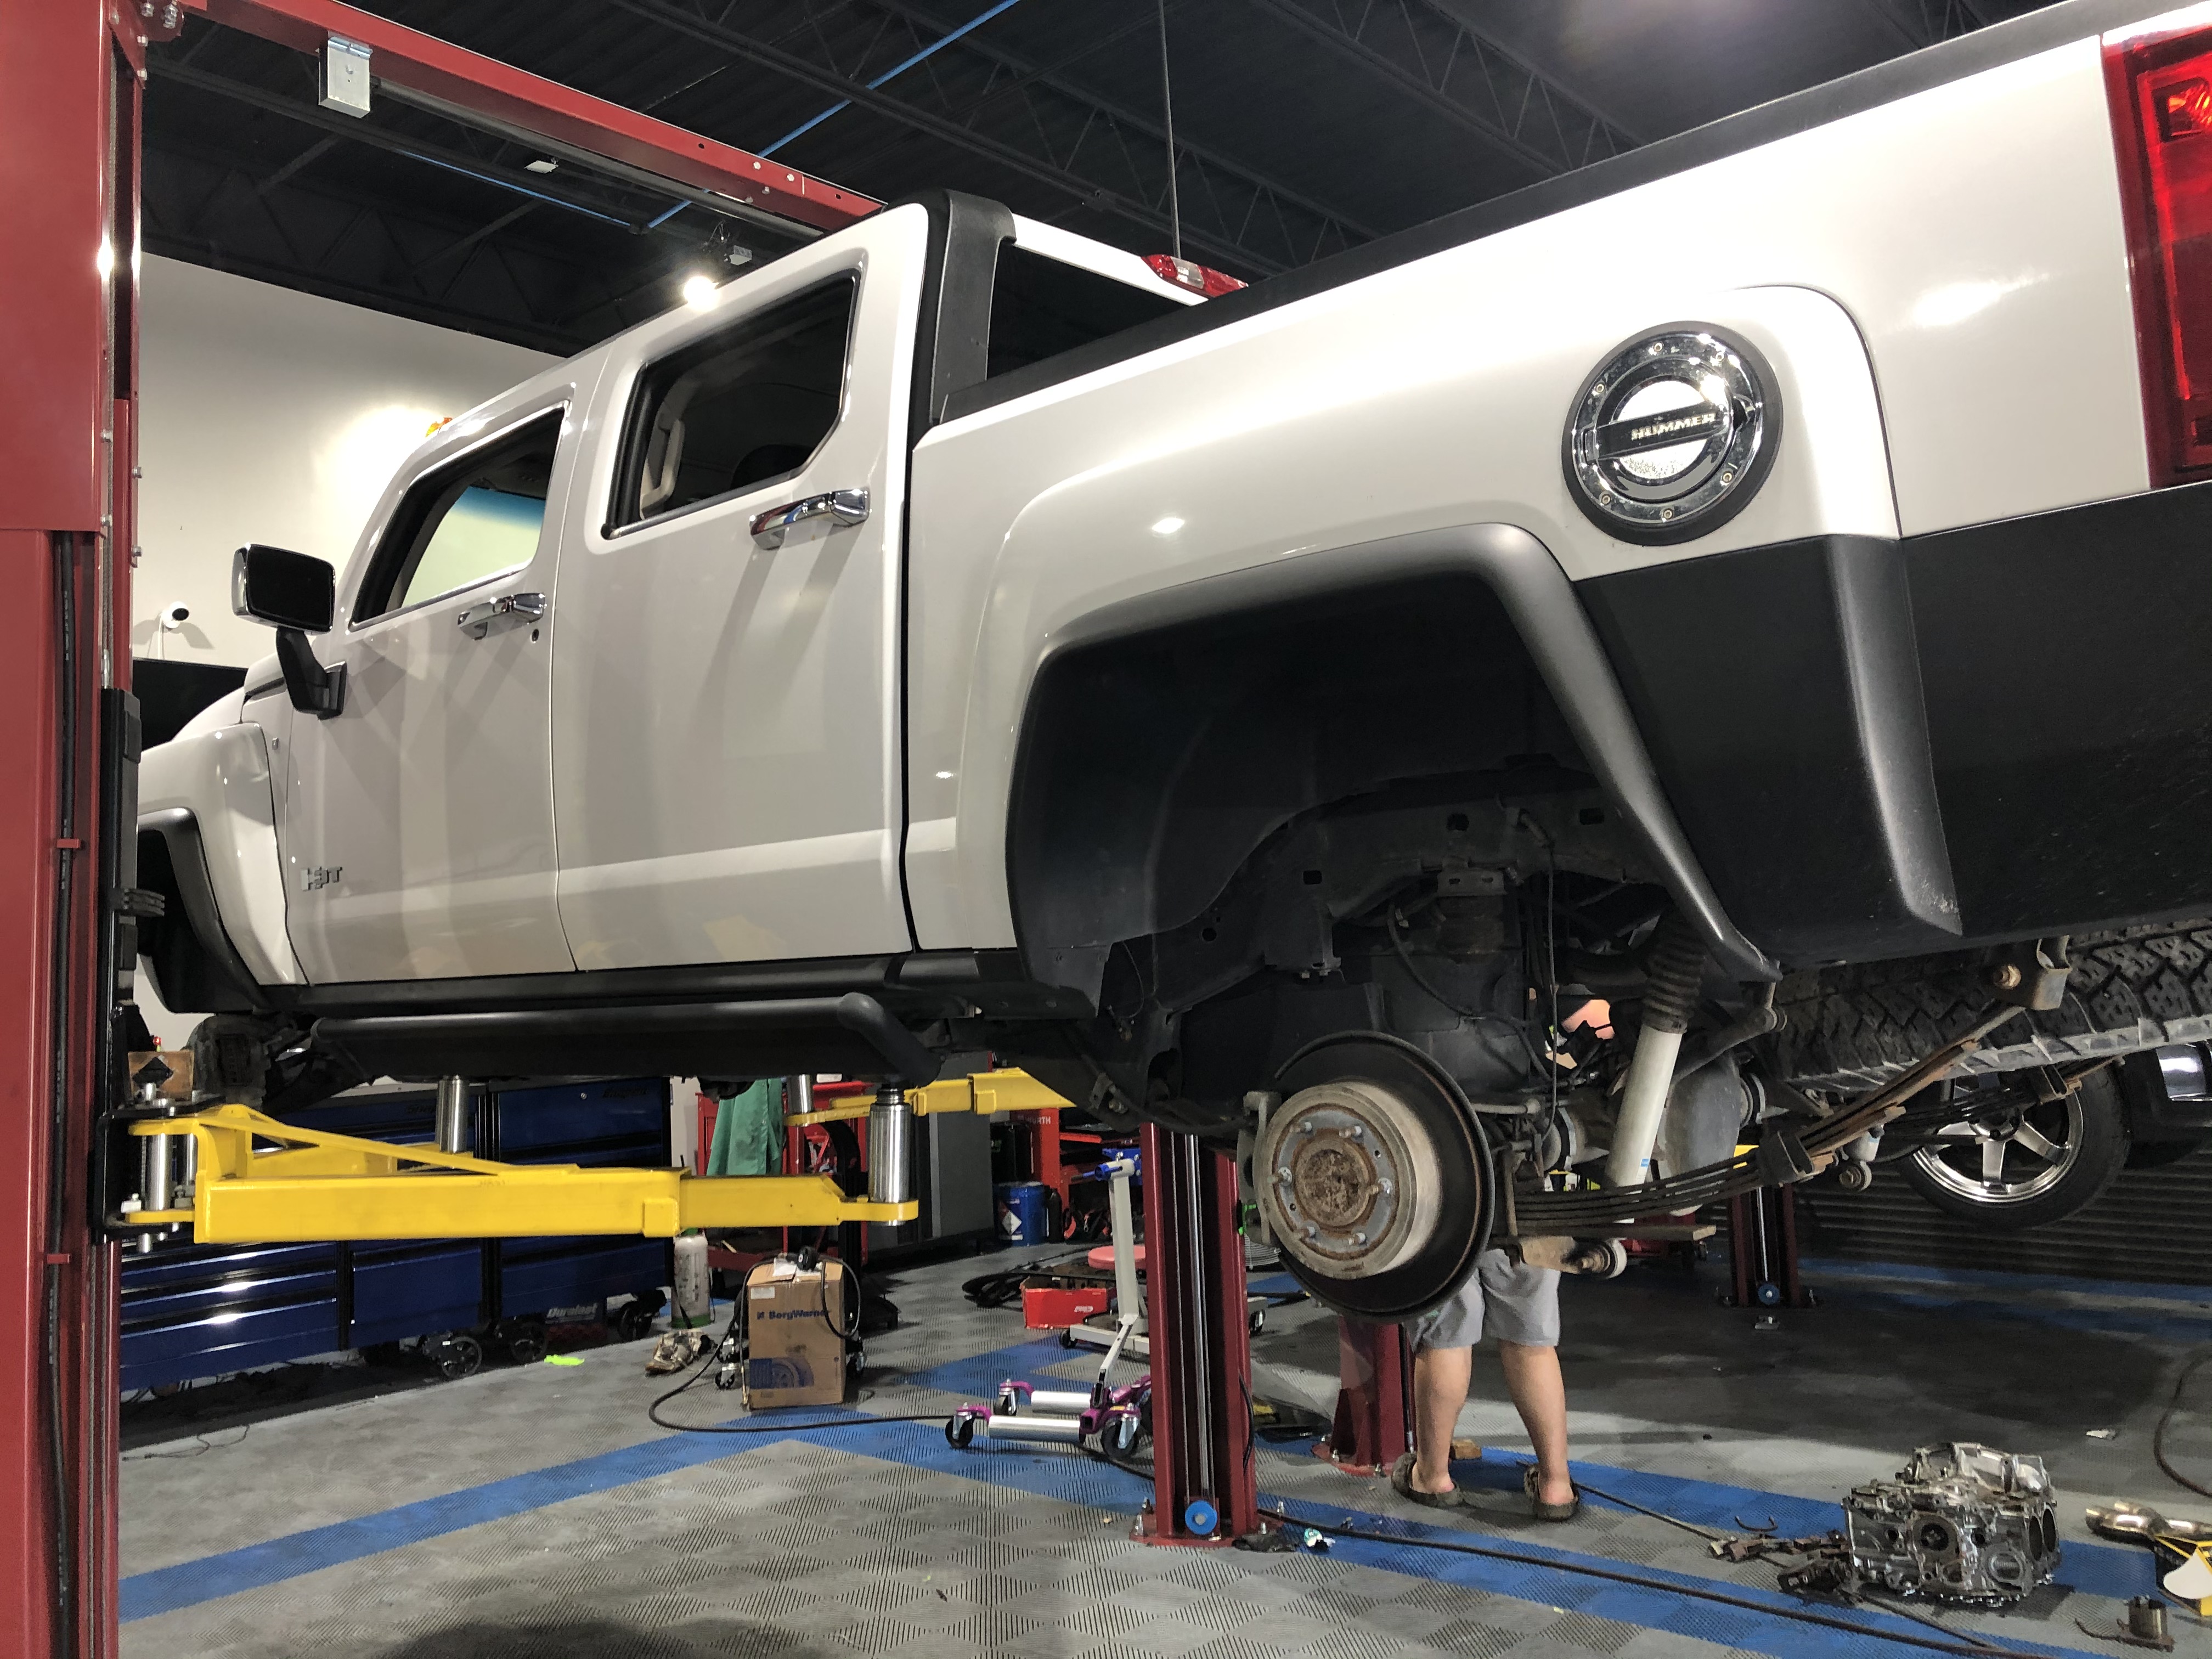
Started on the rear first to knock it out of the way since it is the easiest thing to tackle. Lowered and removed spare wheel/tire to gain more working room. Inspected the spare tire and it was showing signs of aging so I just threw the whole thing in the garbage. Have no use for that lol. On the positive note, the wheel had barely any rust on it.
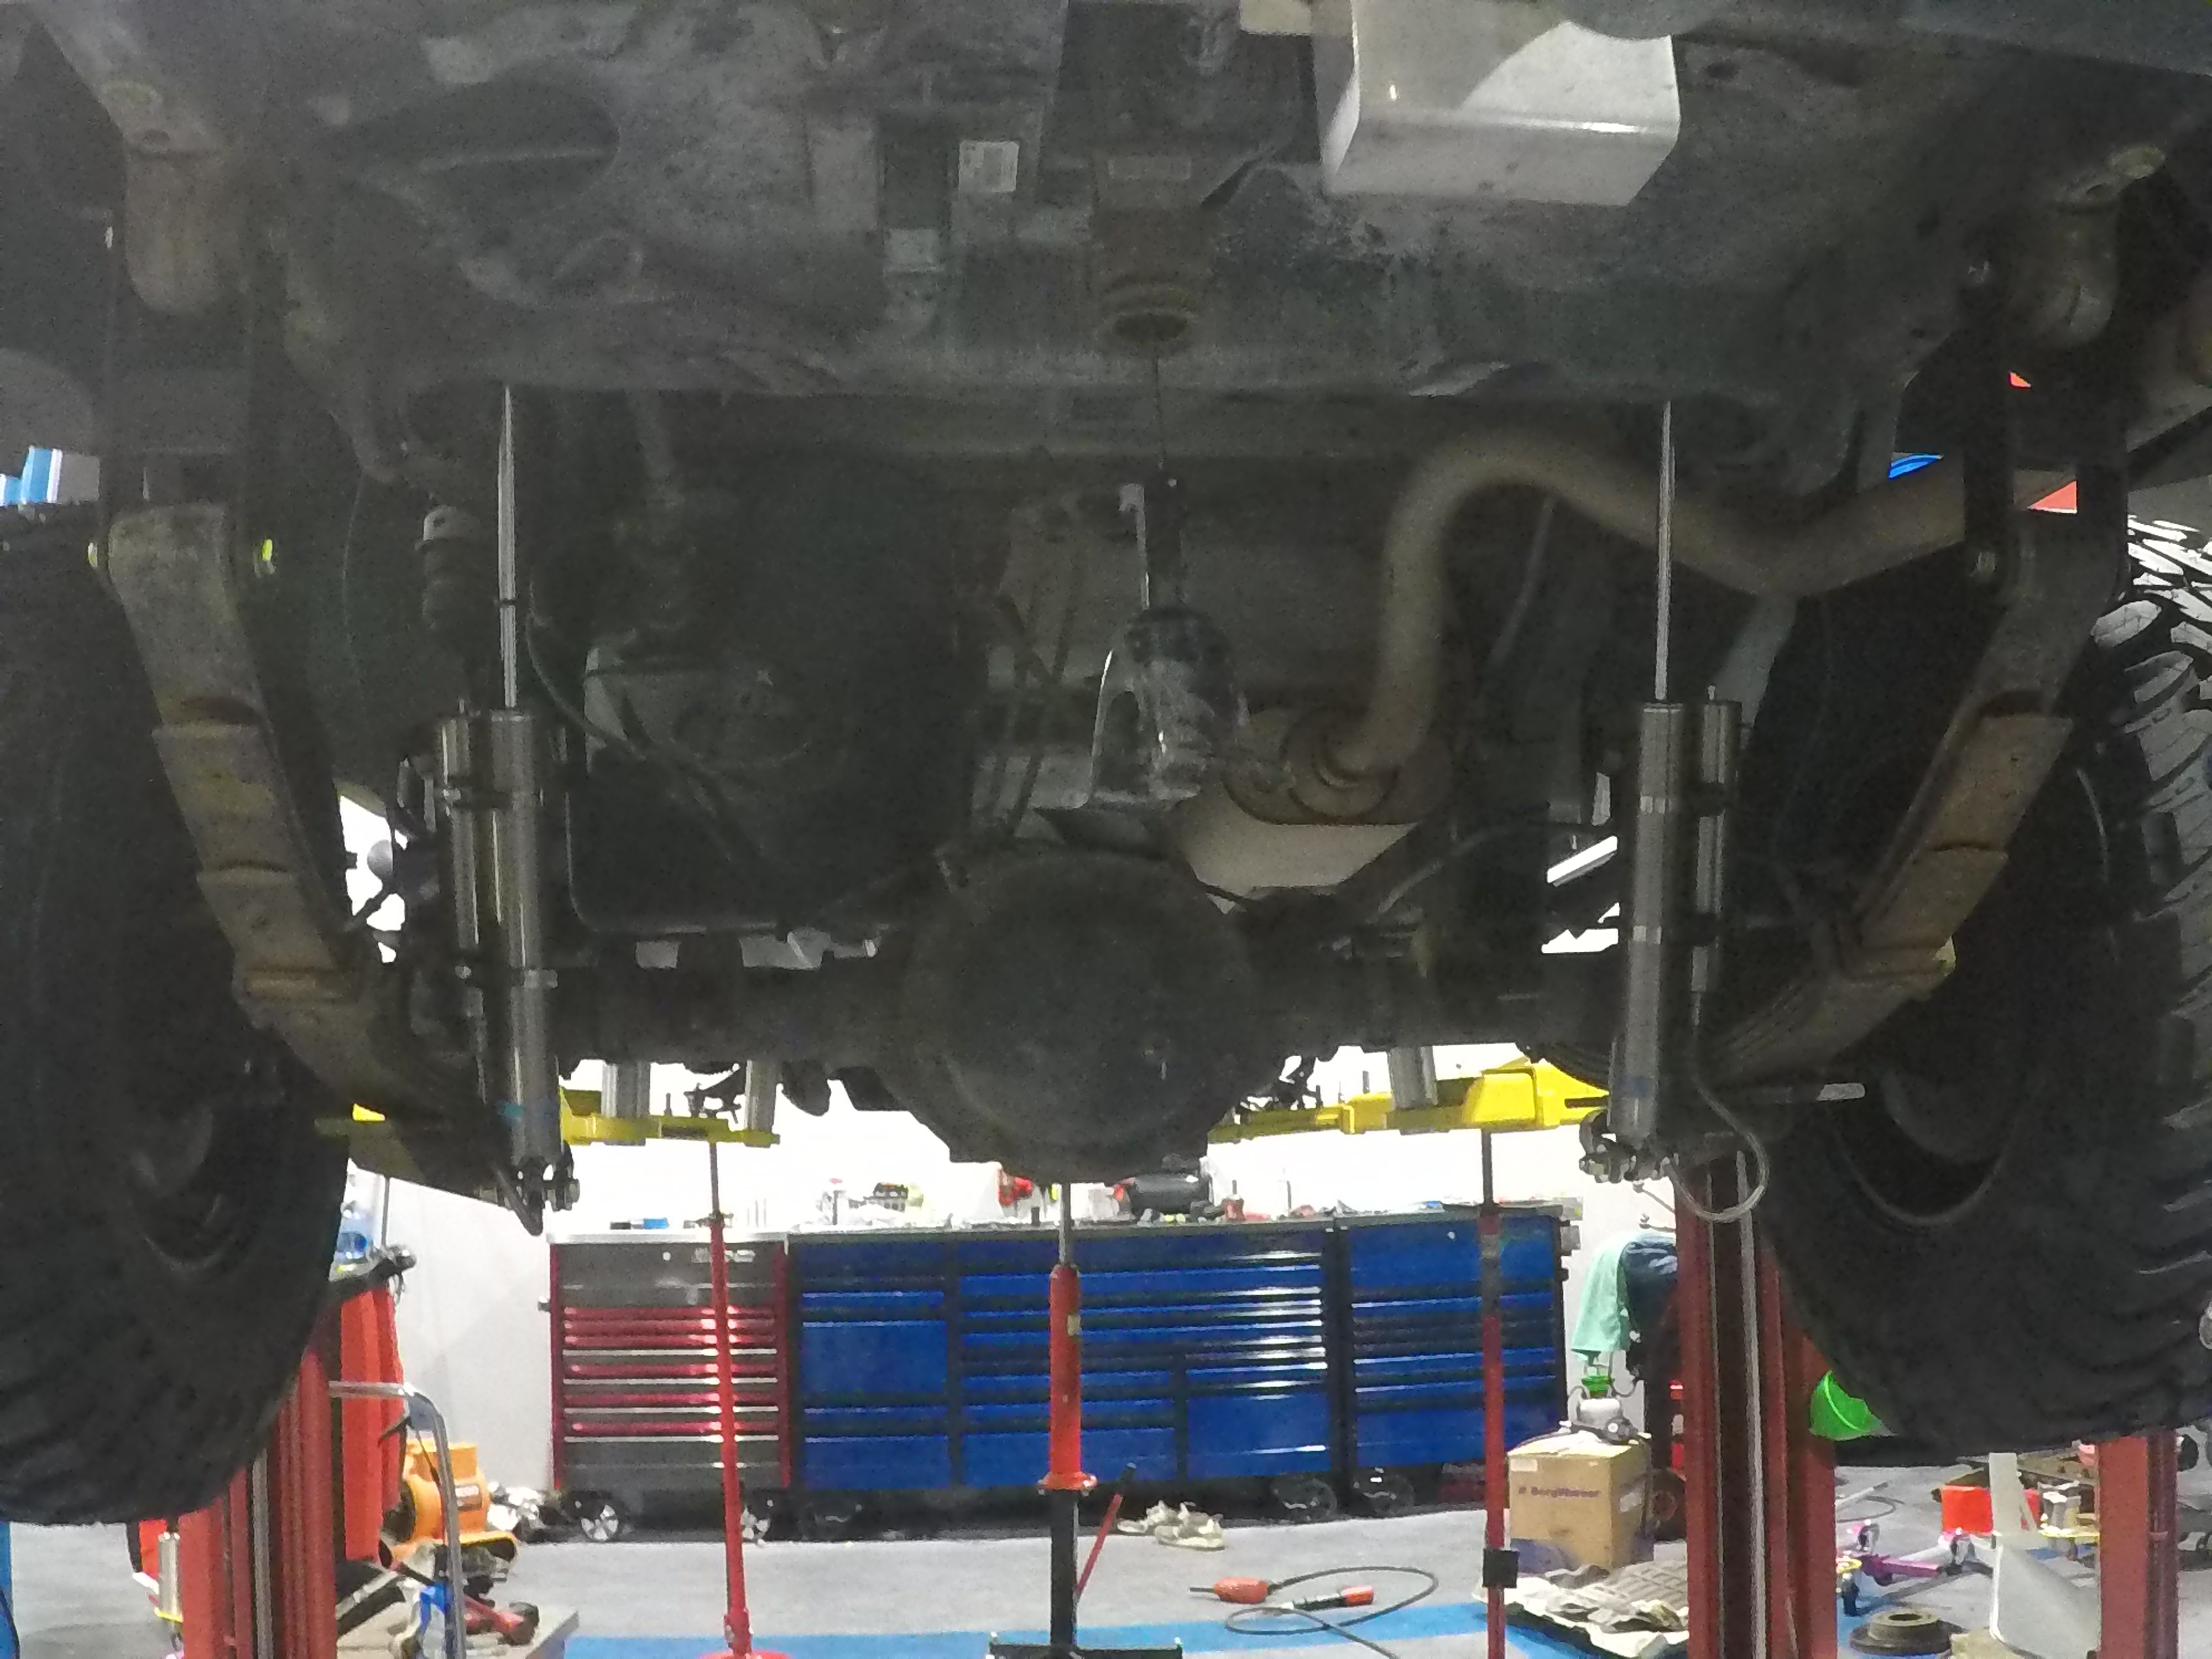
I didn't take photos of every step (not that my photos are any good) but here is the rear finished*. New extended shackles installed, bump stop extensions done and rear shocks mounted. Here is where I ran into my first gripe. I ordered these shocks based off of my forum research and what reservoir shocks our fellow Hummer enthusiasts said would work. Do you see the issue here? Annoyingly, the placement on the reservoir lines prevented me from flipping them and mounting them the other way because the lines hit the frame's shock reinforcement metal. As you can imagine, I wasn't too happy about that and couldn't return them because I bought them not long after buying the lift kit 298178298 weeks ago. The only way to run these was to have the lines dip down about an inch from the bottom of the shock which is going to be a BIG issue when off road. For the sake of finishing the install, I said screw it and will run these until they break, then buying the correct ones. Thank you to Shawn Townsend for getting me the part number for the correct shocks for when these break! And yes, they are bound to break at some point with my adventures.
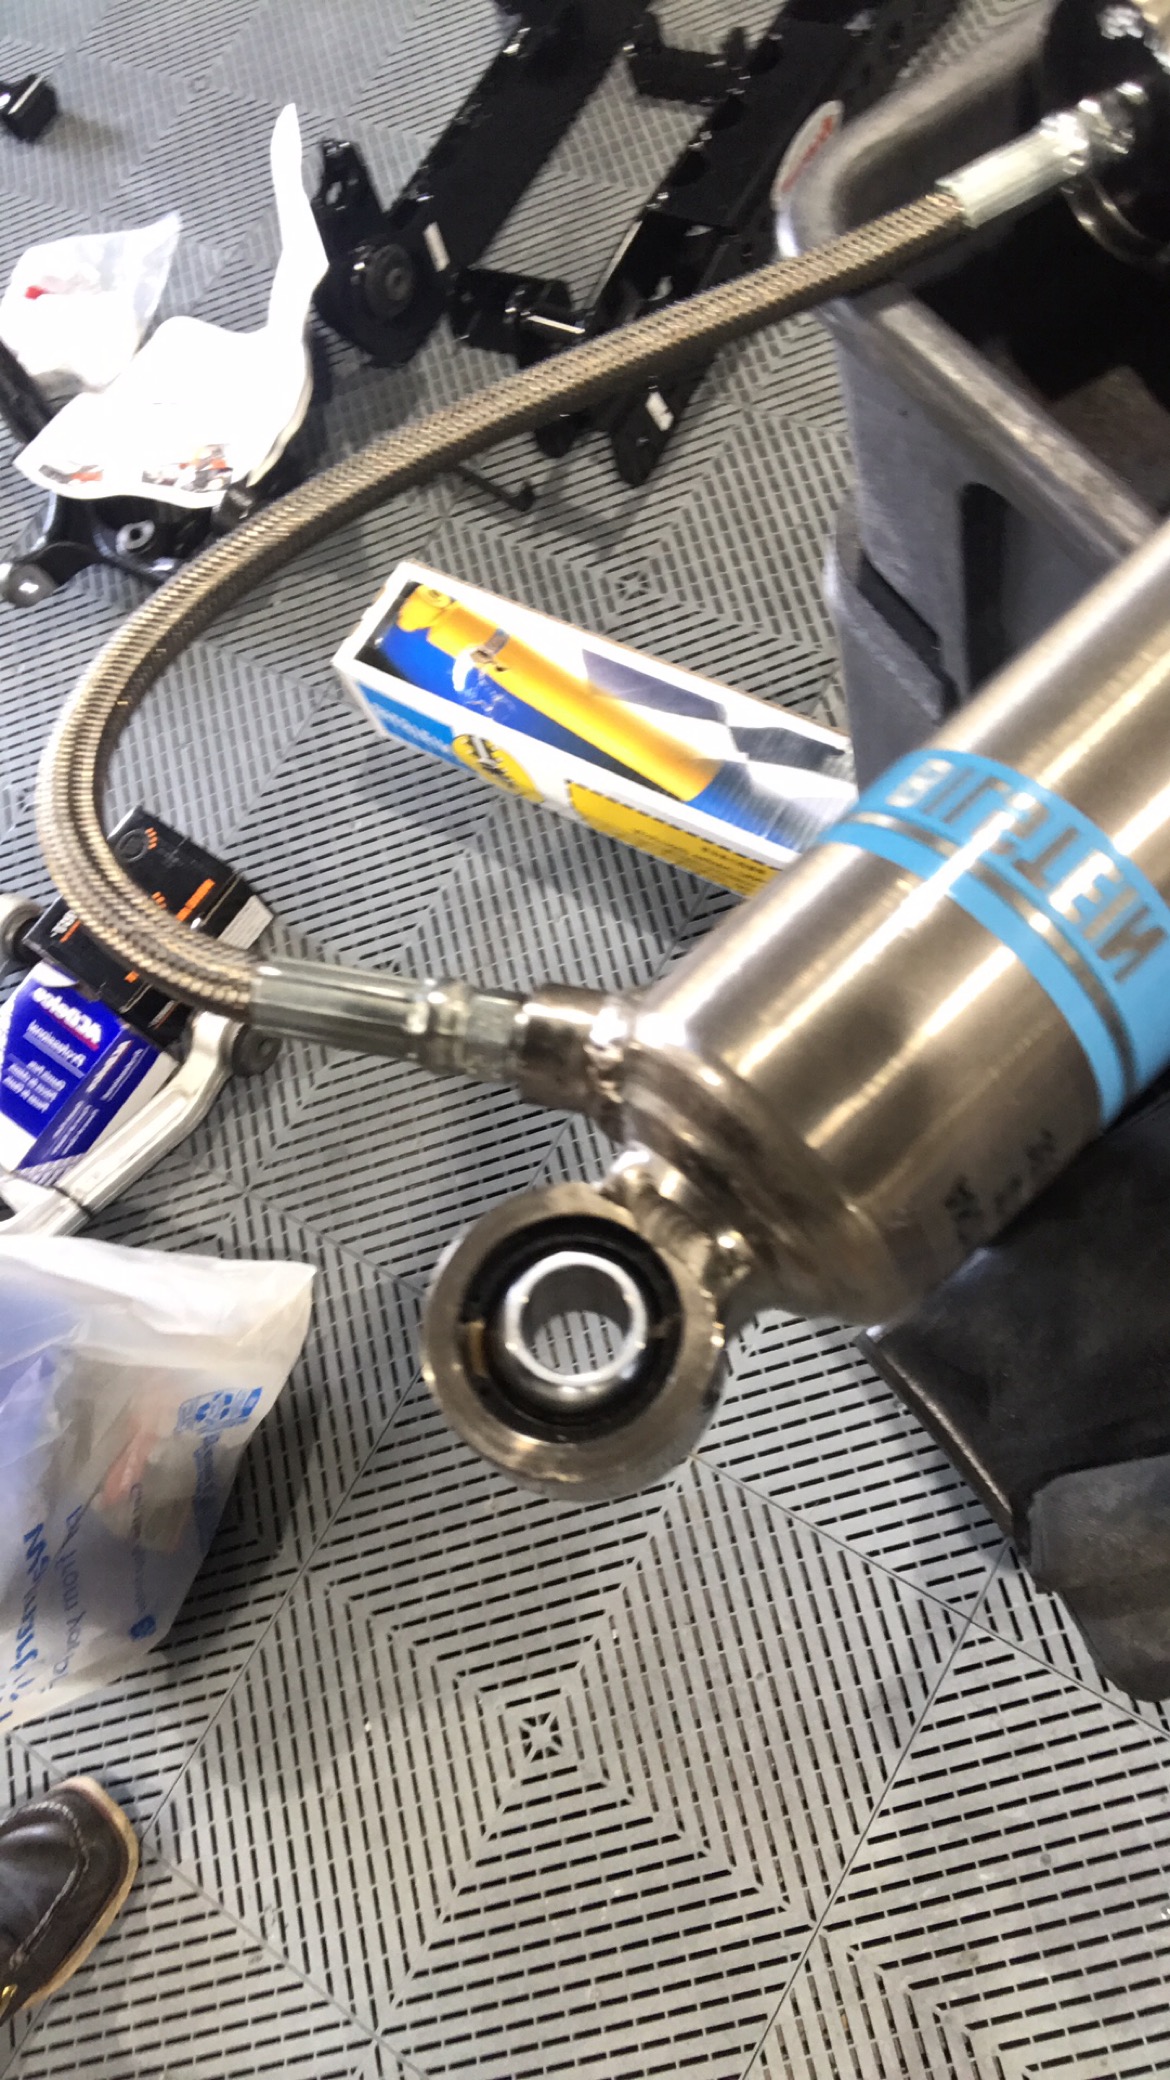
View of the shock. Instead of coming out perpendicular and then 90 parallel to the shock body, these just exit at a 45 degree angle and straight.
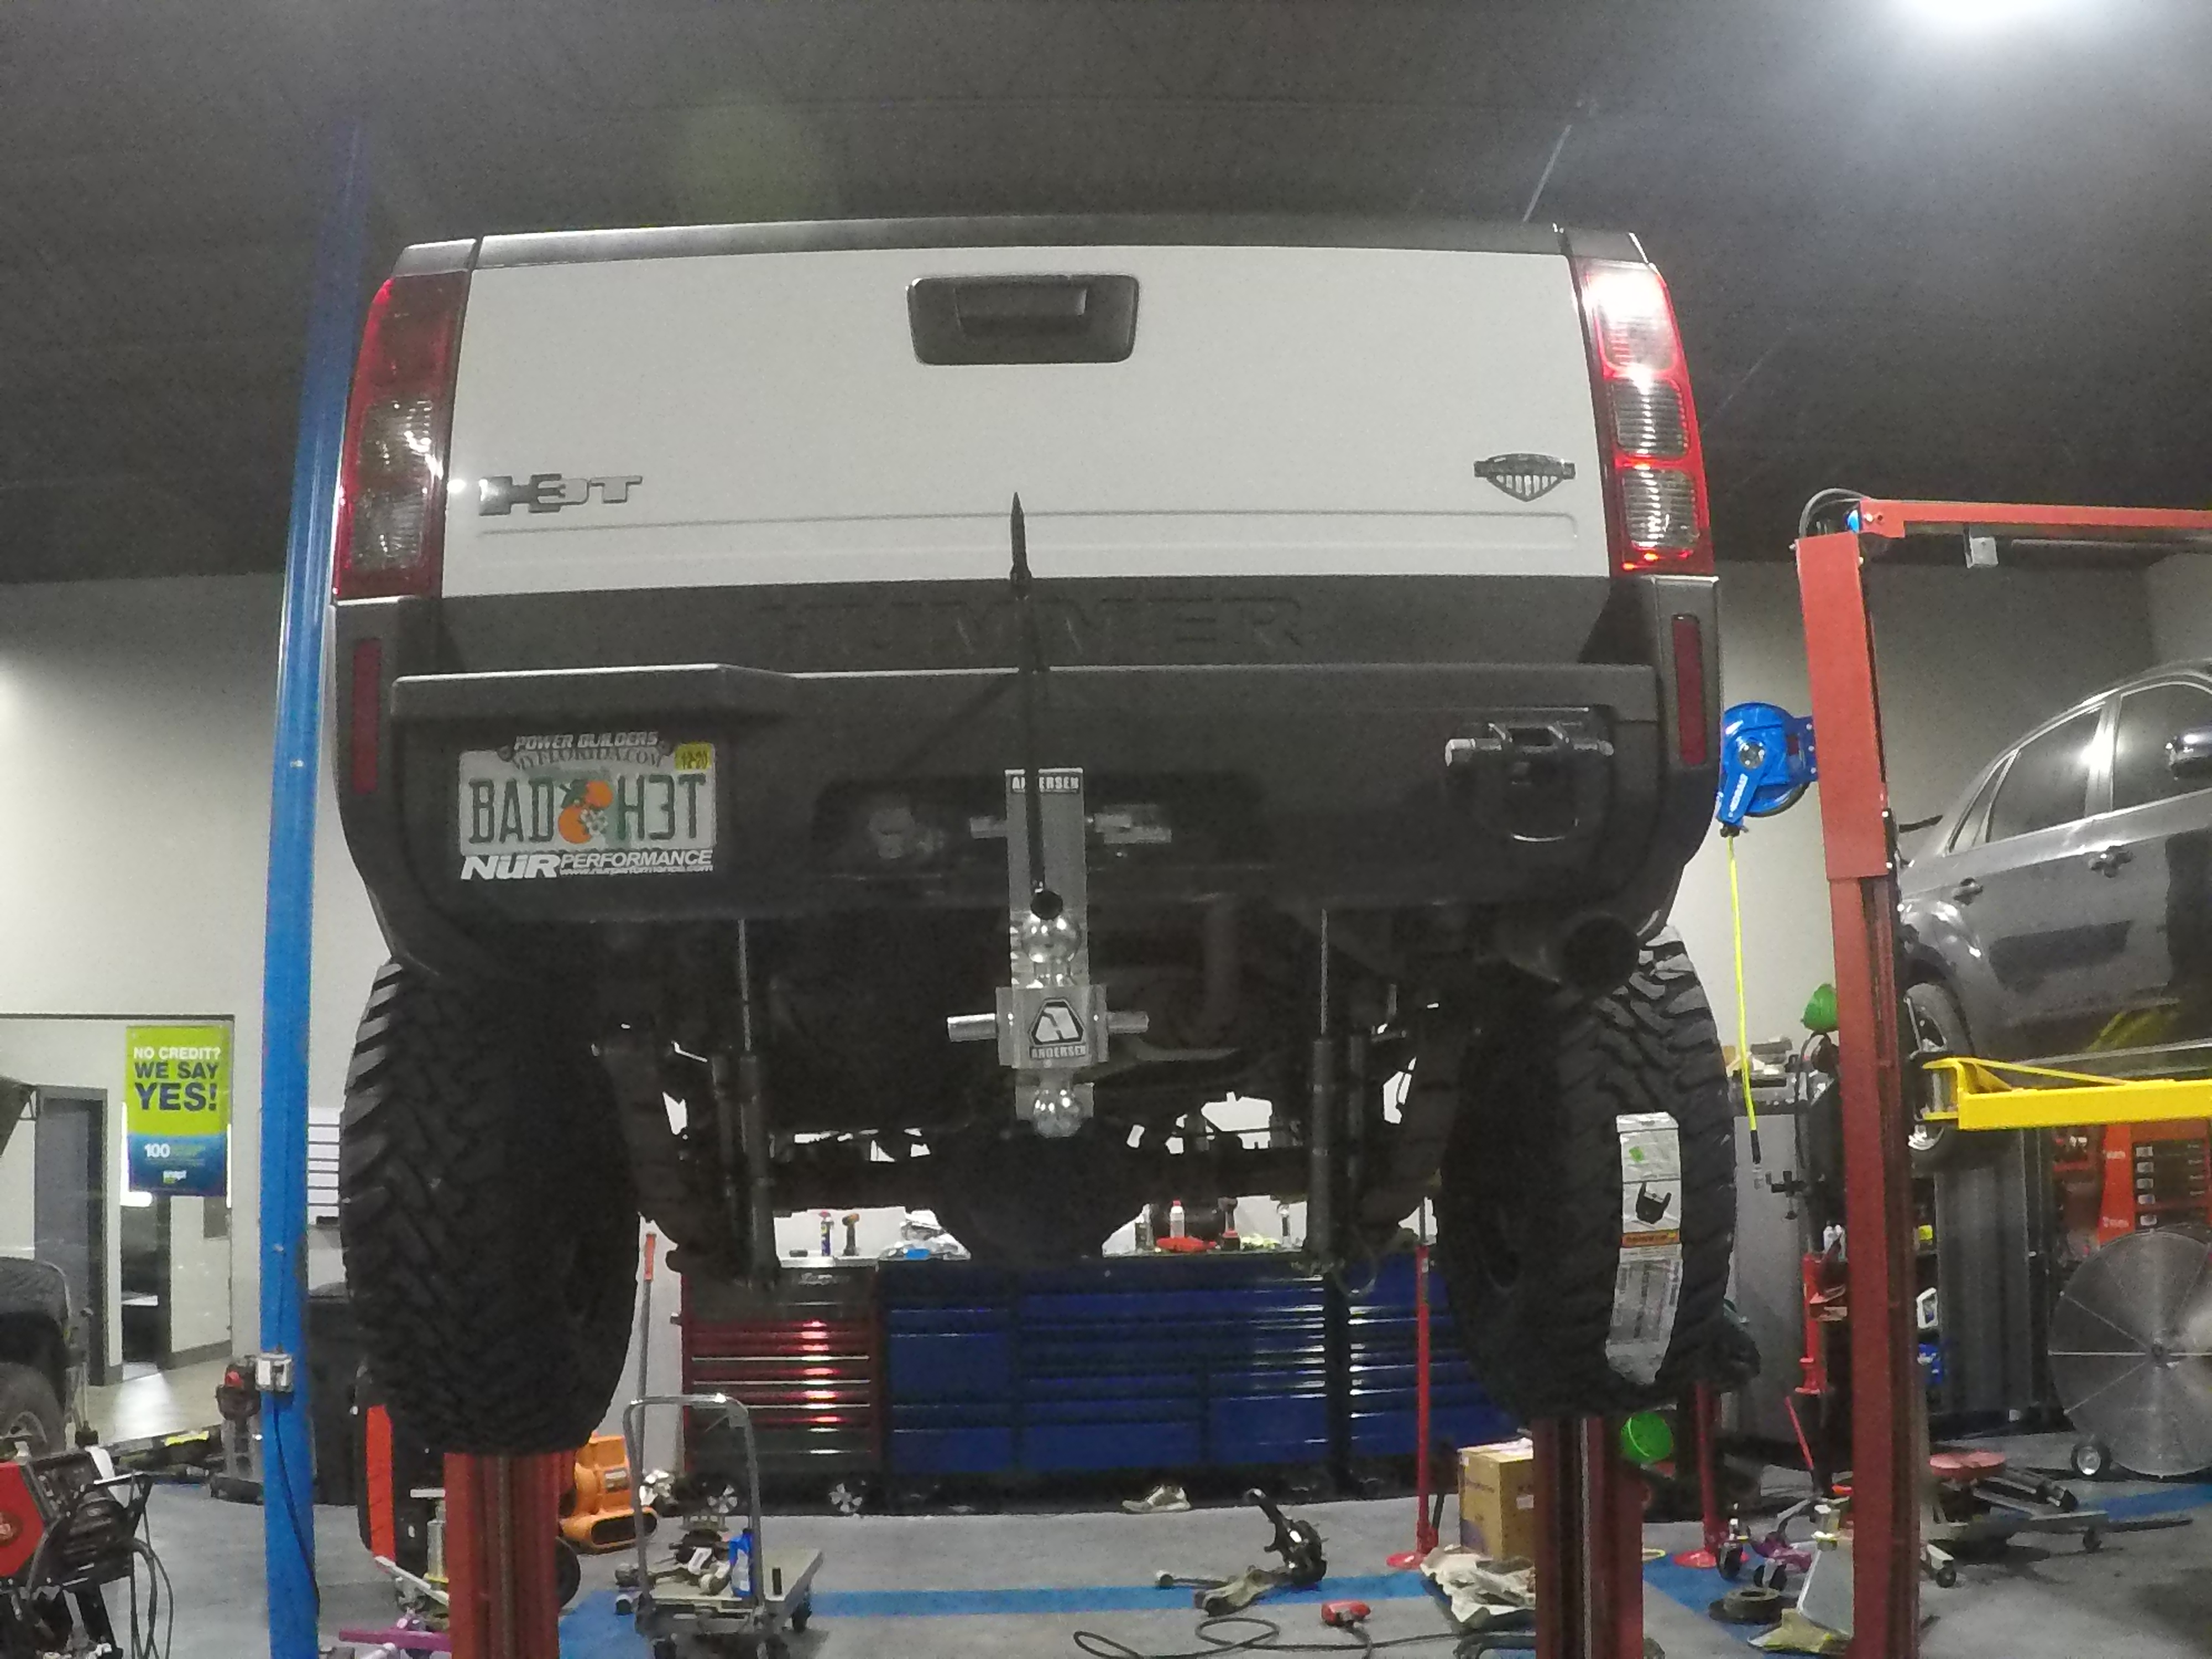
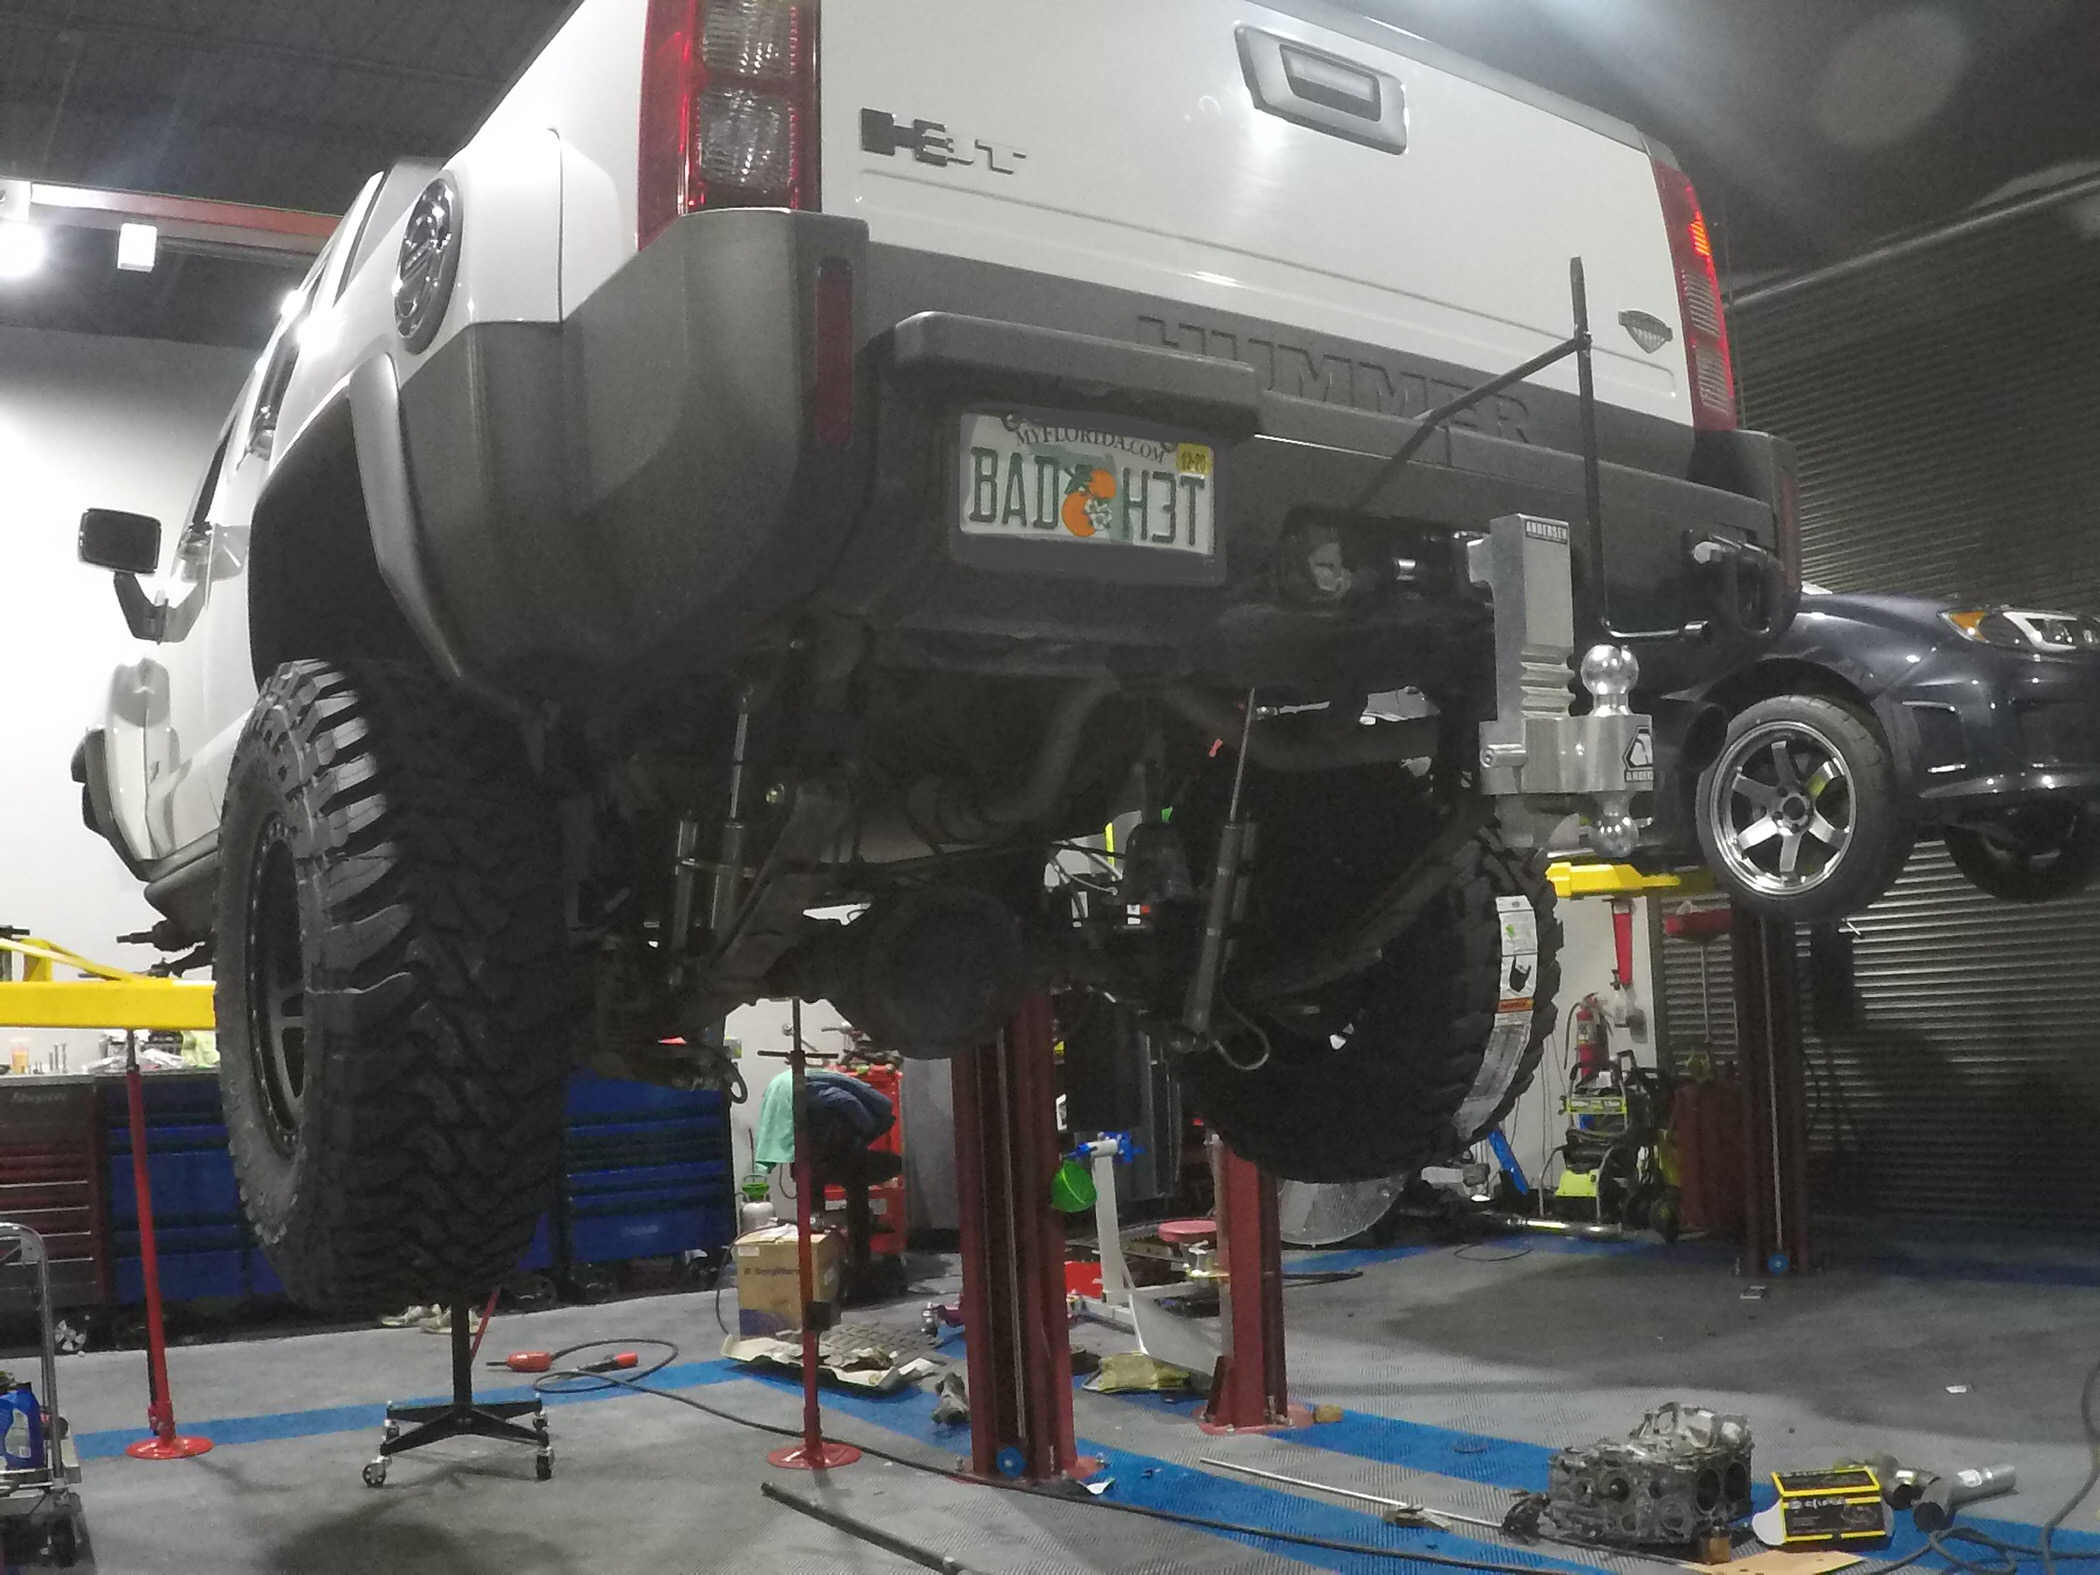
Rear complete and new wheels/tires mounted for test fitment. Minus the sway bar. My Rancho kit was missing a sway bar end link so I ordered up some JKS adjustable end links for a Jeep and re-installed the sway bar a few days later. I ended up liking the Rancho bushings better so I pressed the JKS ones out and put in the Rancho pieces.
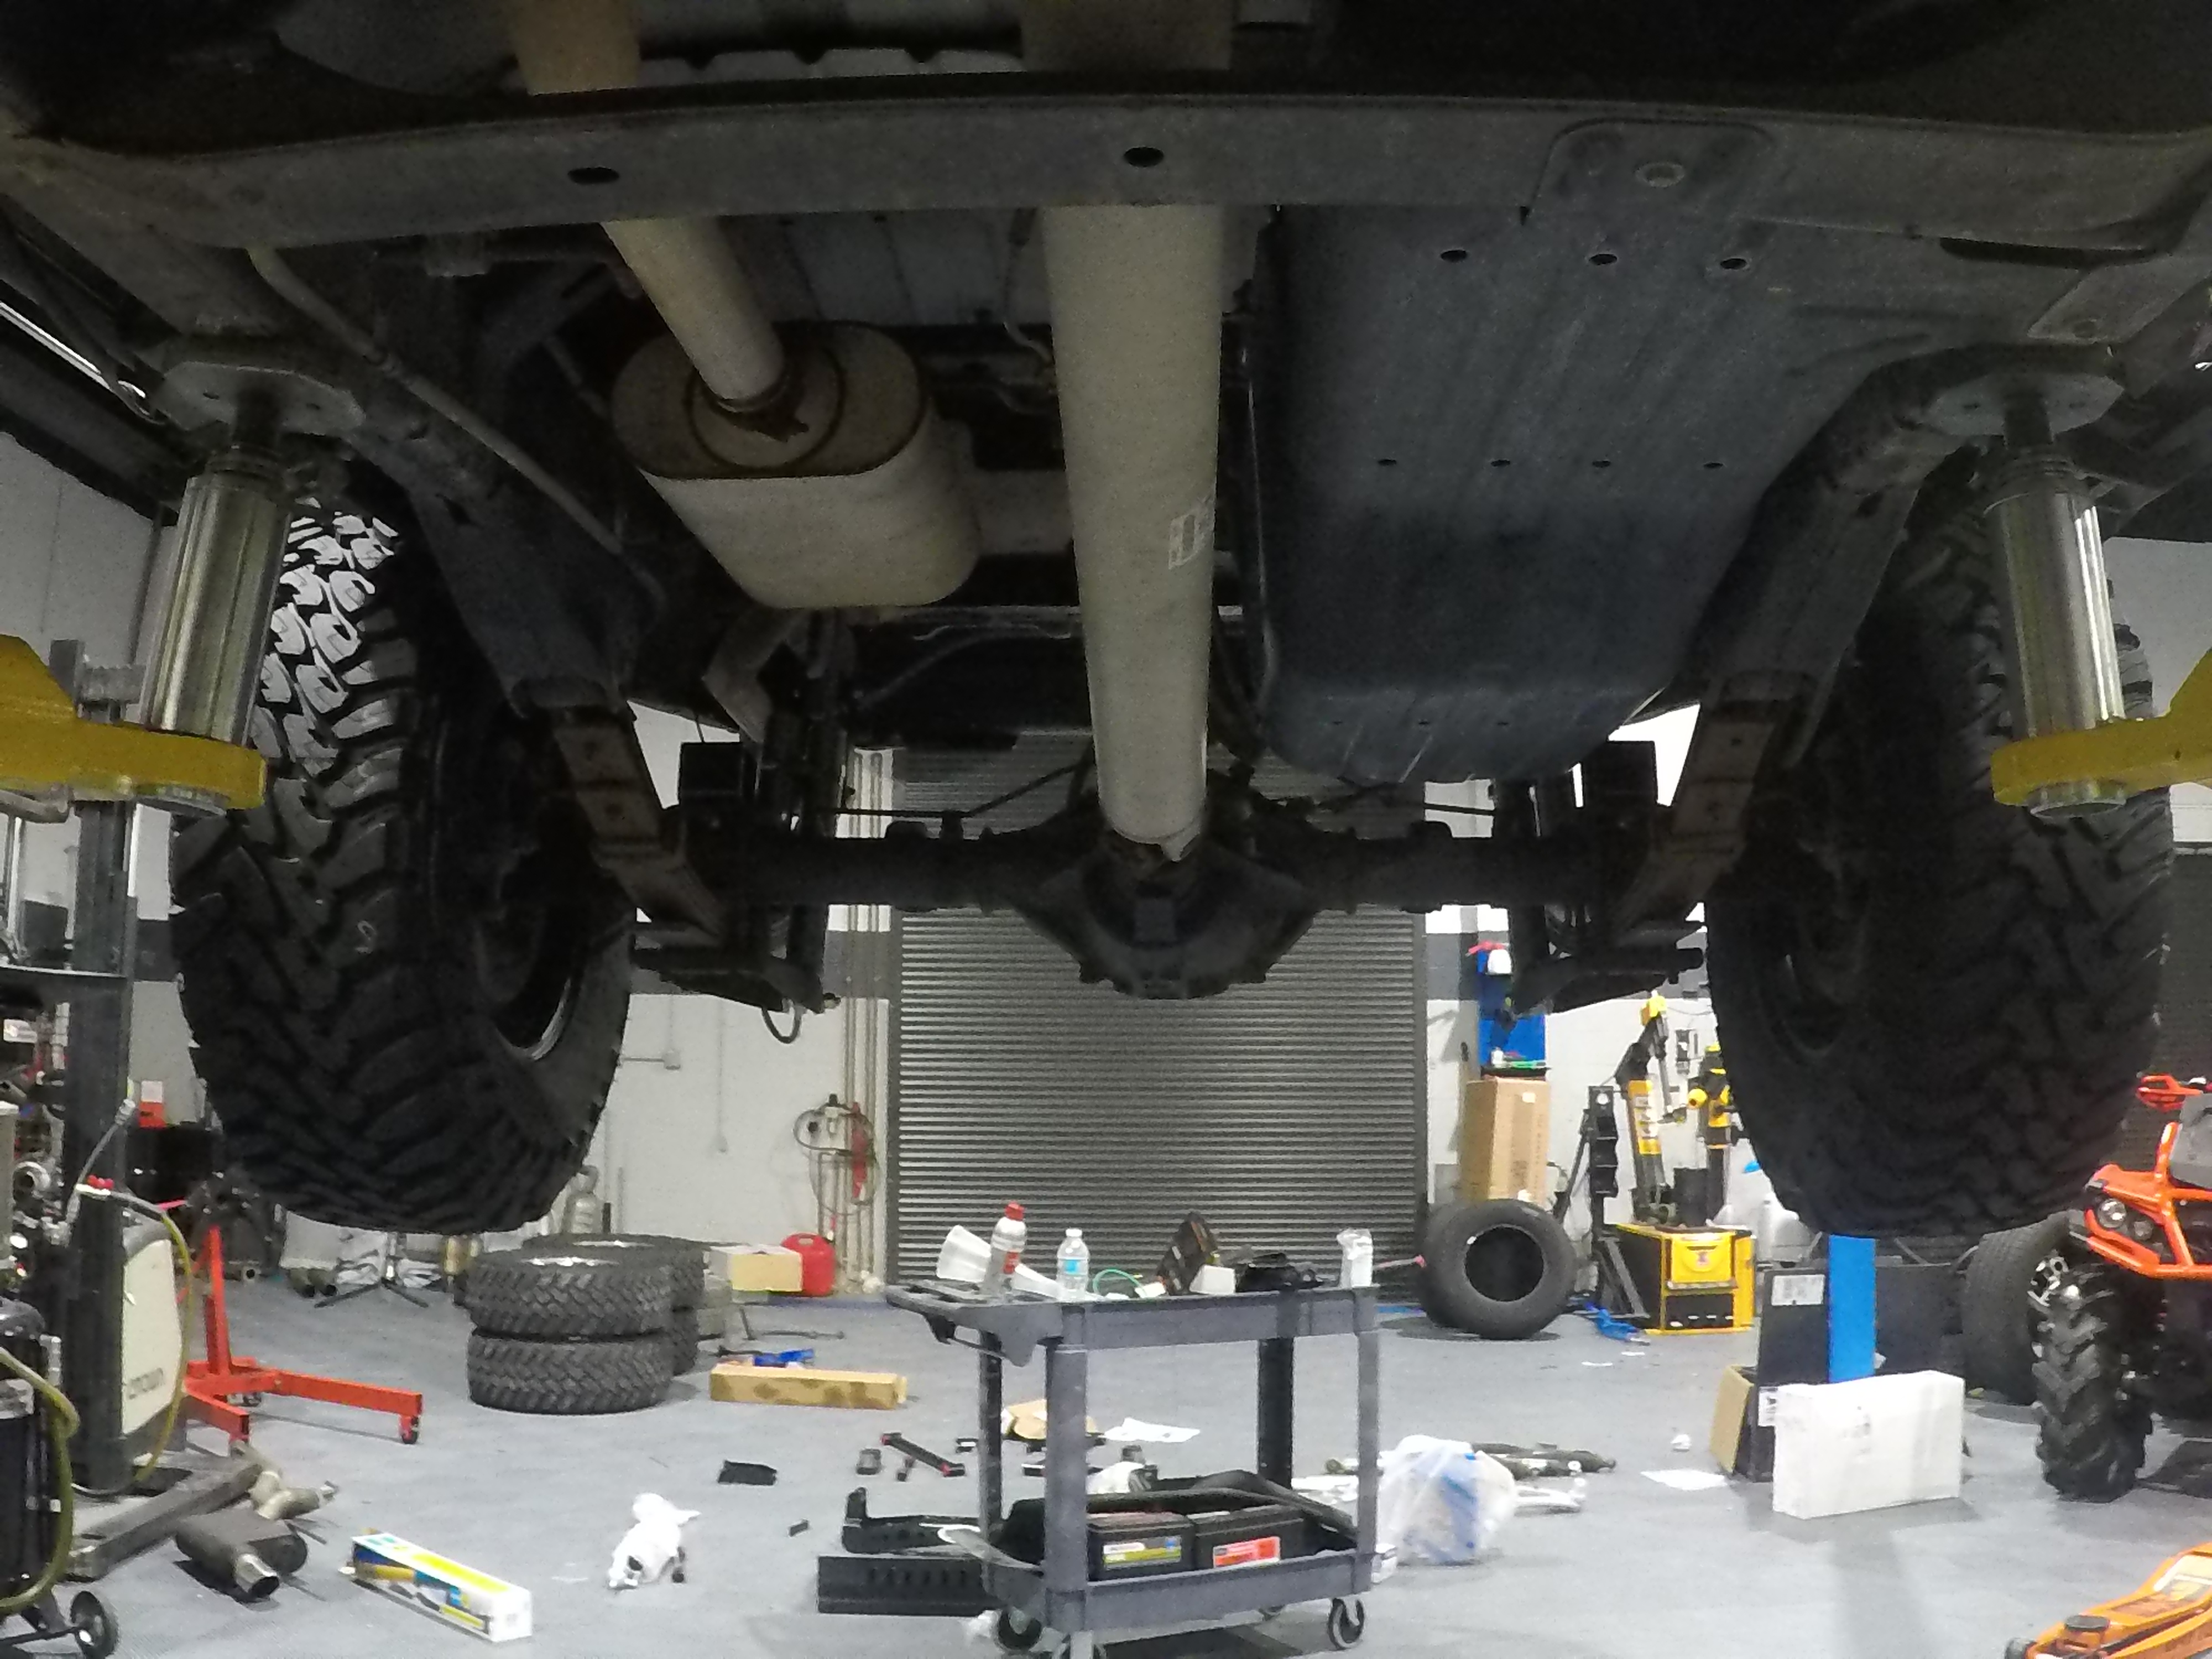
^^^ Another view of completed rear and view of how far shock lines hang.
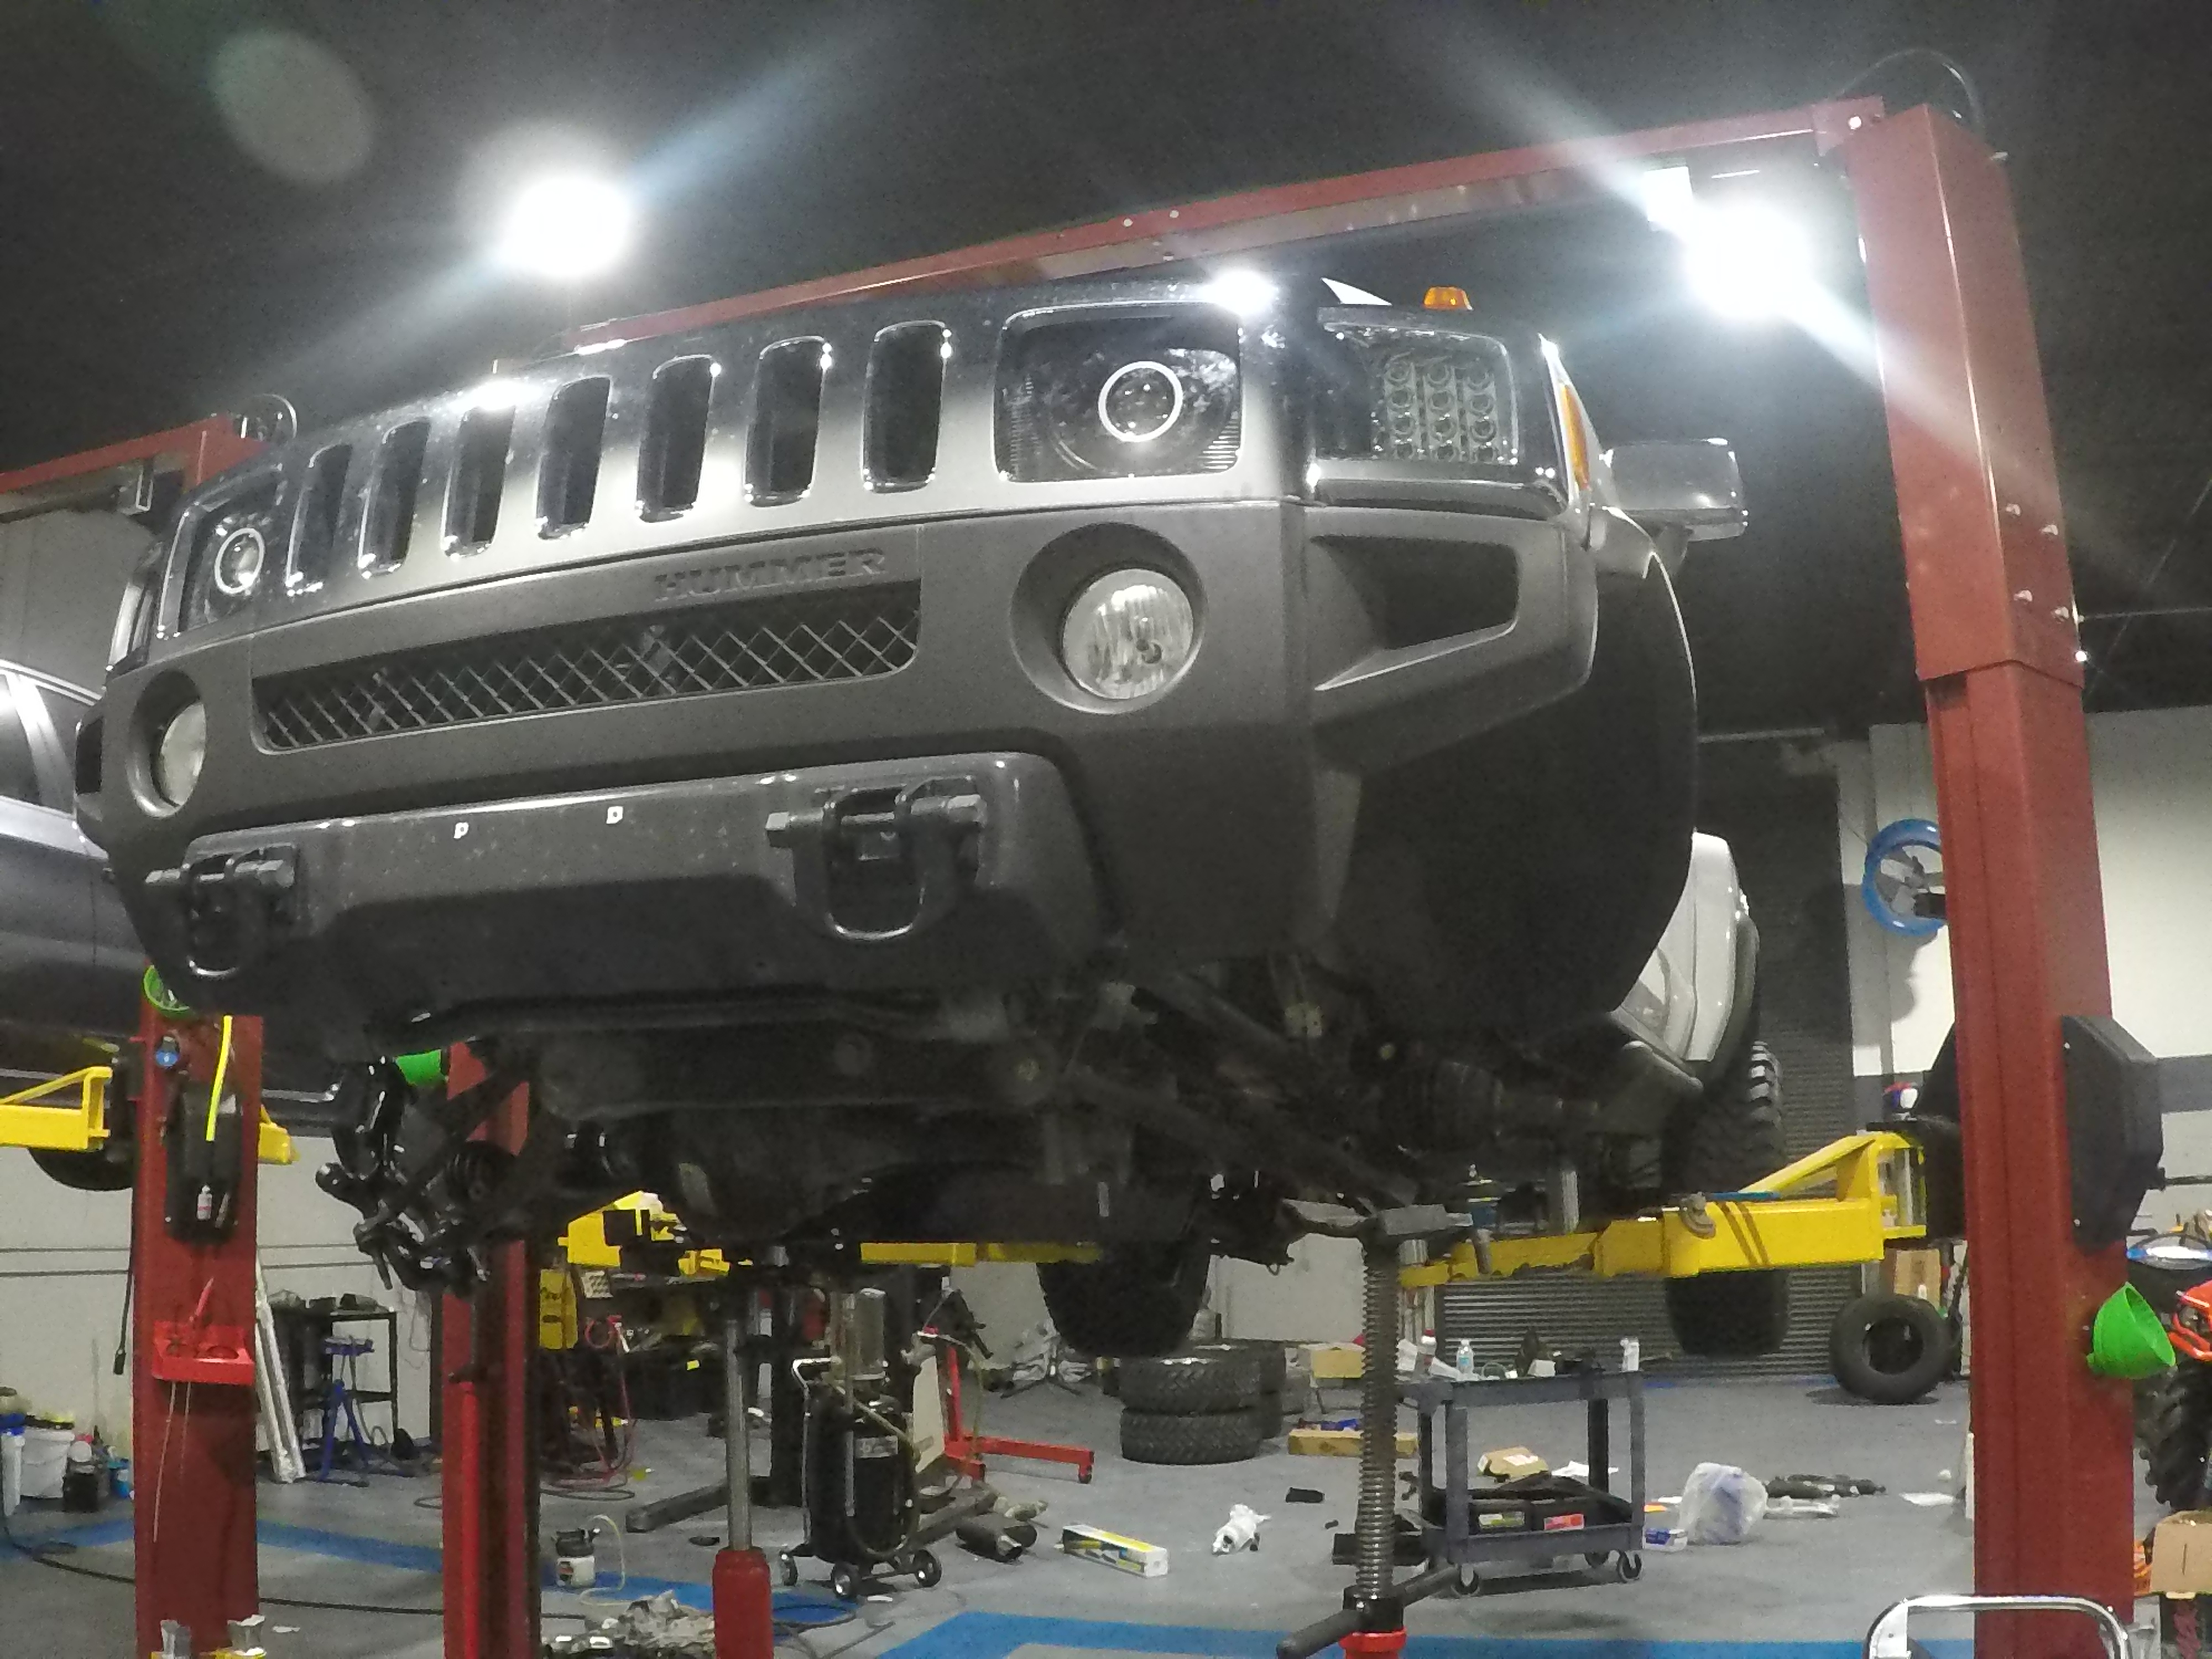
Moving on to the front end progress and did an oil change while everything was apart.

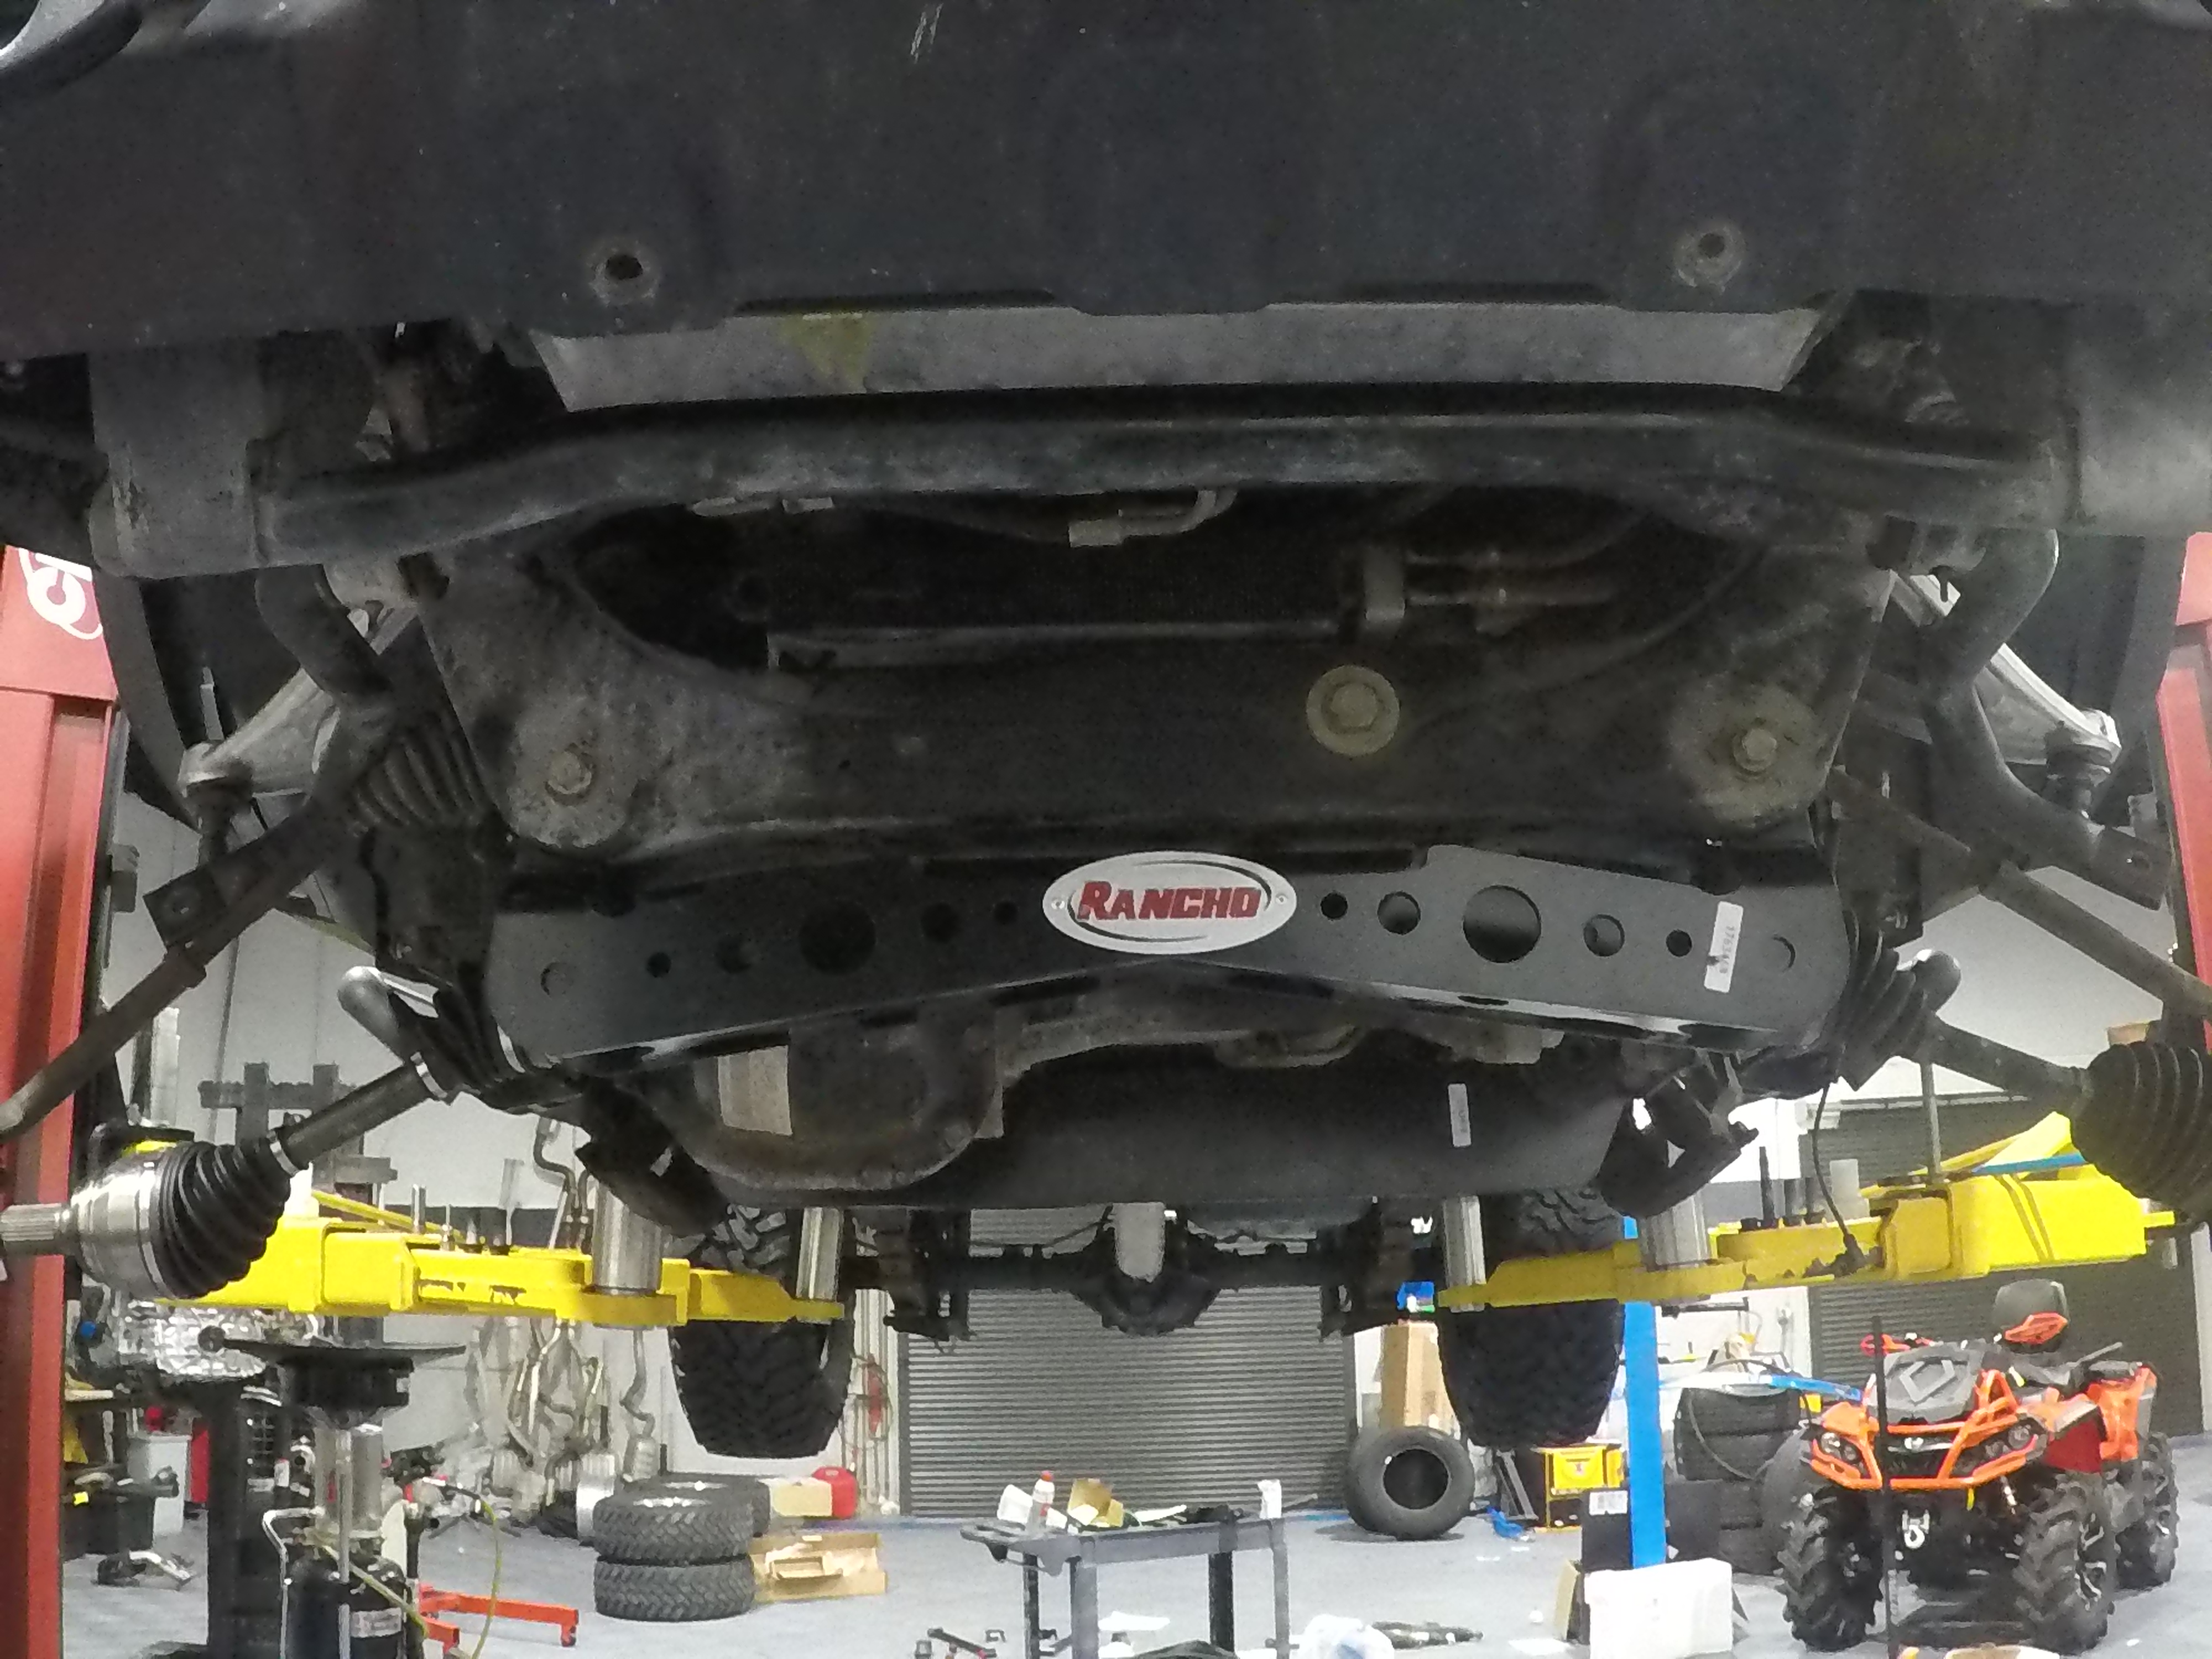
Front diff cross member on.
More progress. Passenger CV axle was leaking so we threw in a new one.
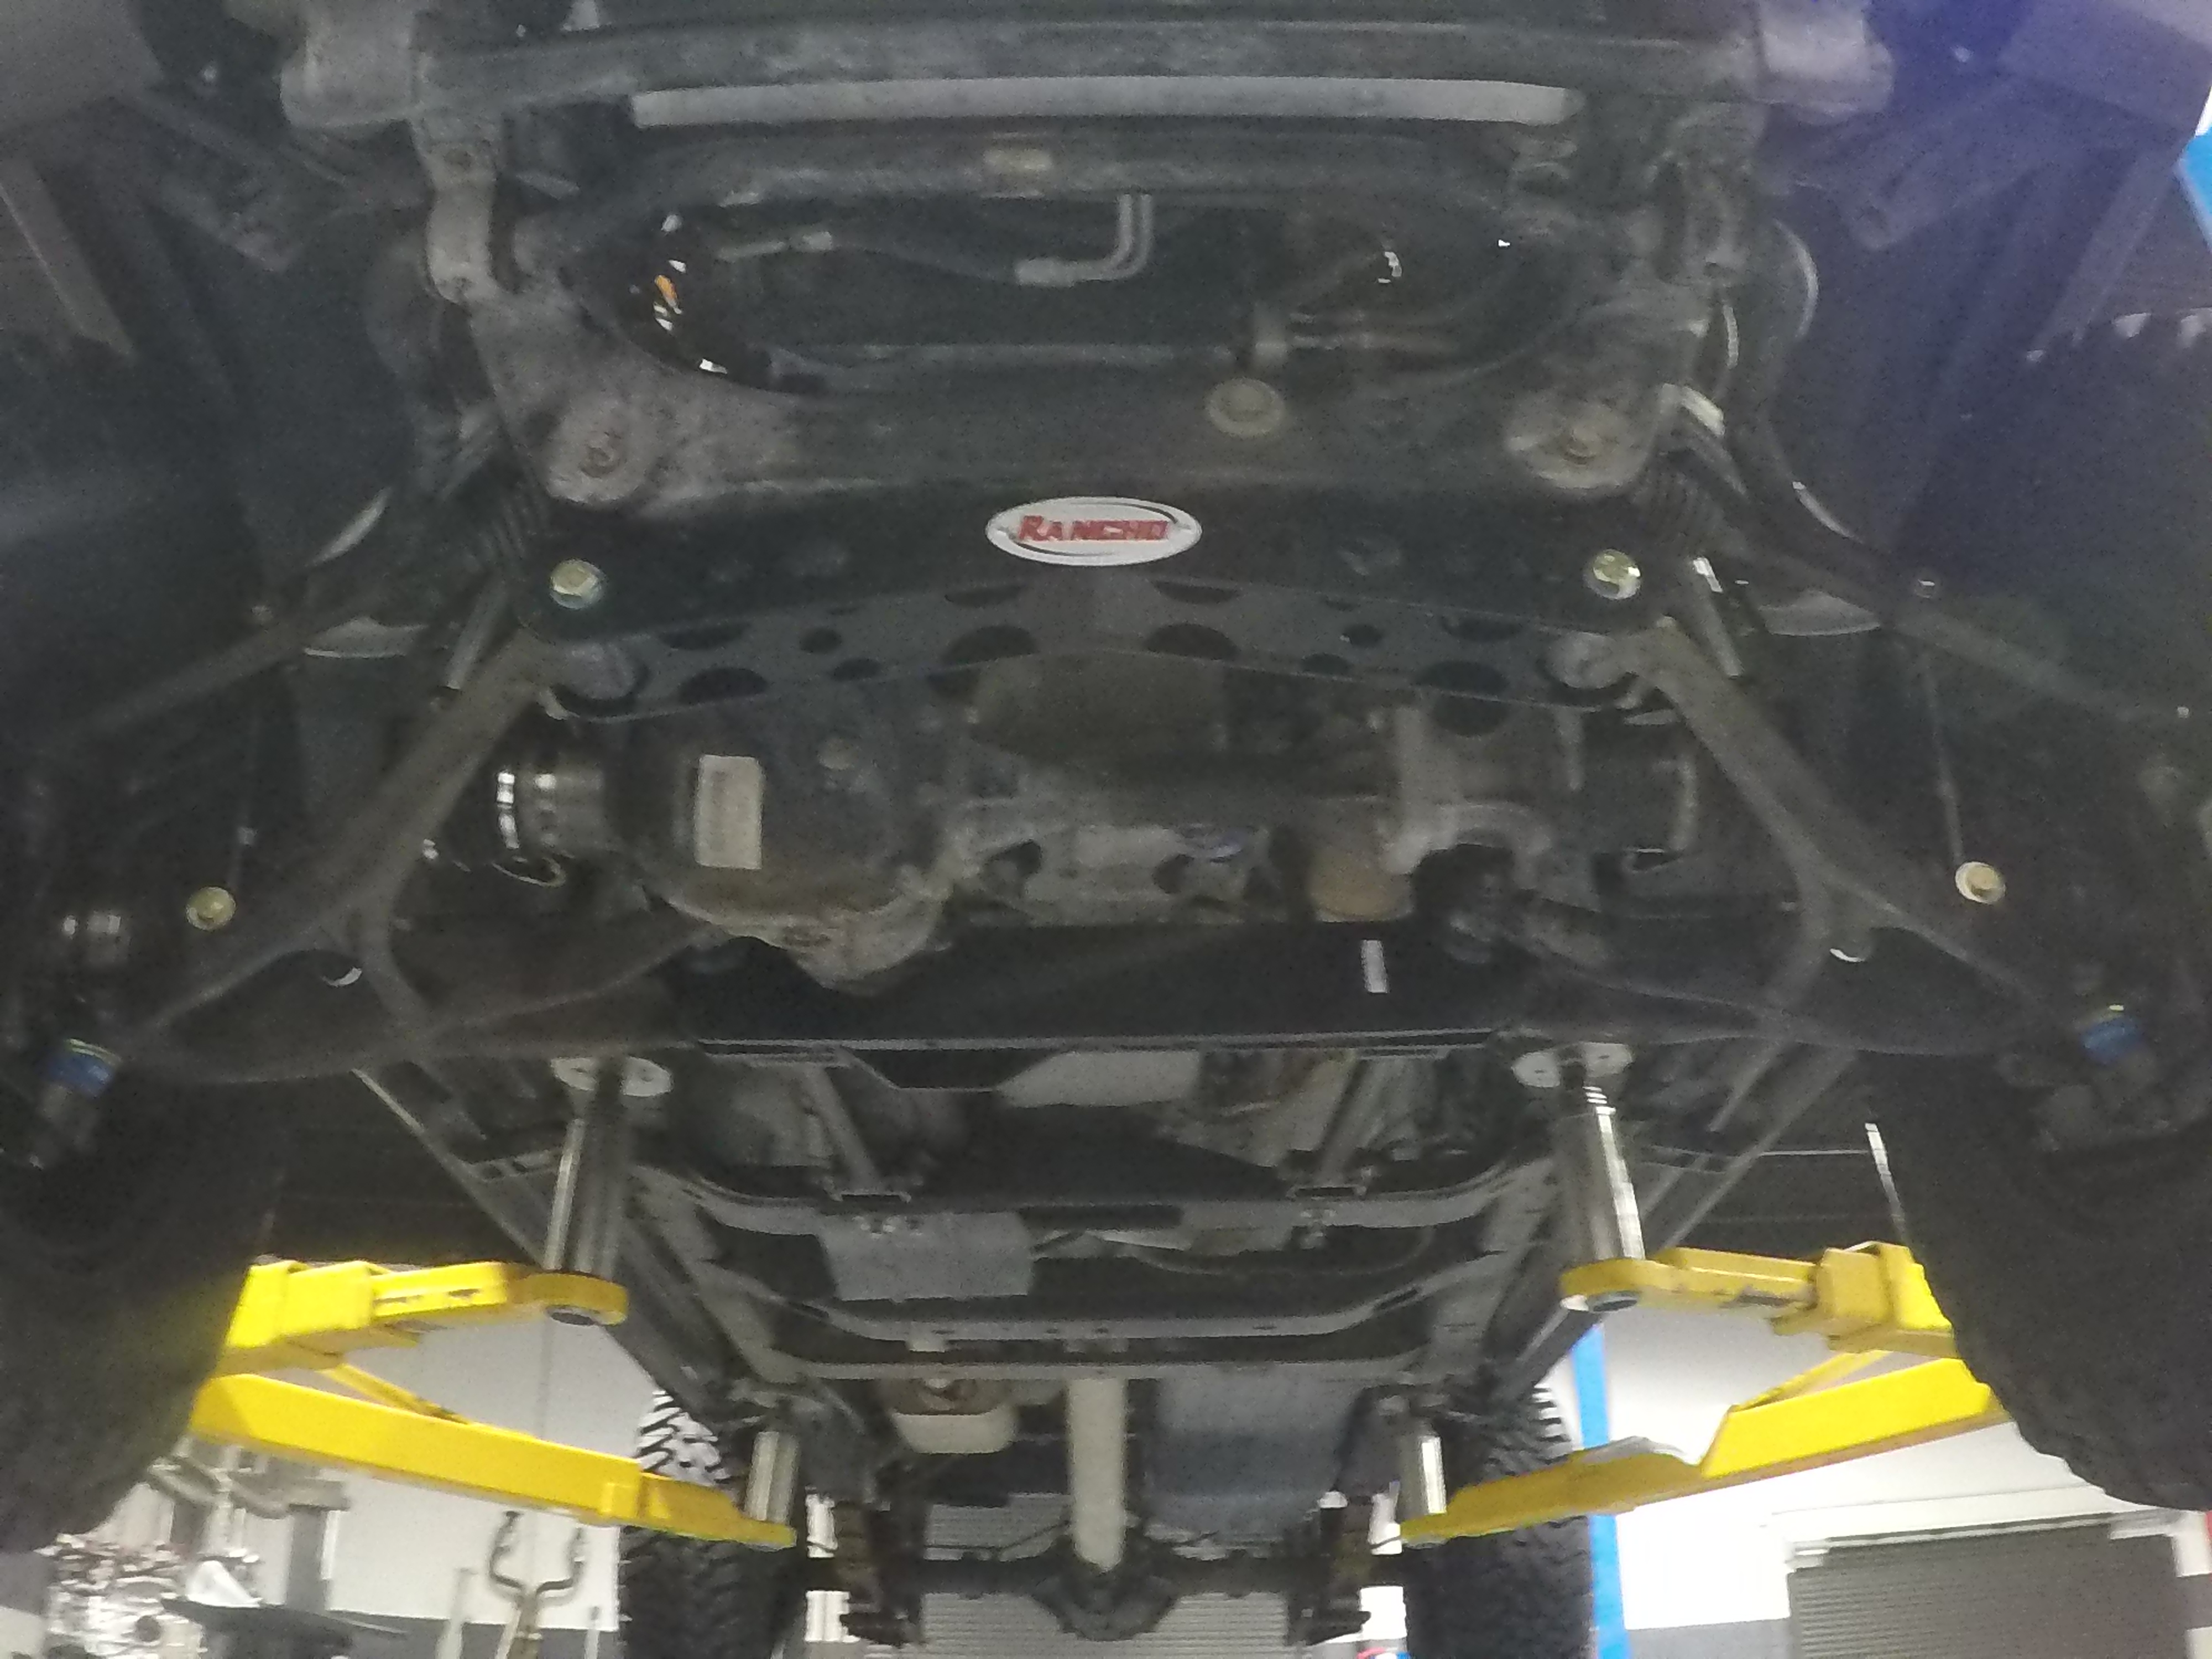
New lower control arm ball joints pressed in, new upper control arms in, sway bar and end links done, extended bump stop mounts done, trailing arms installed and test fit wheels. Almost all set!
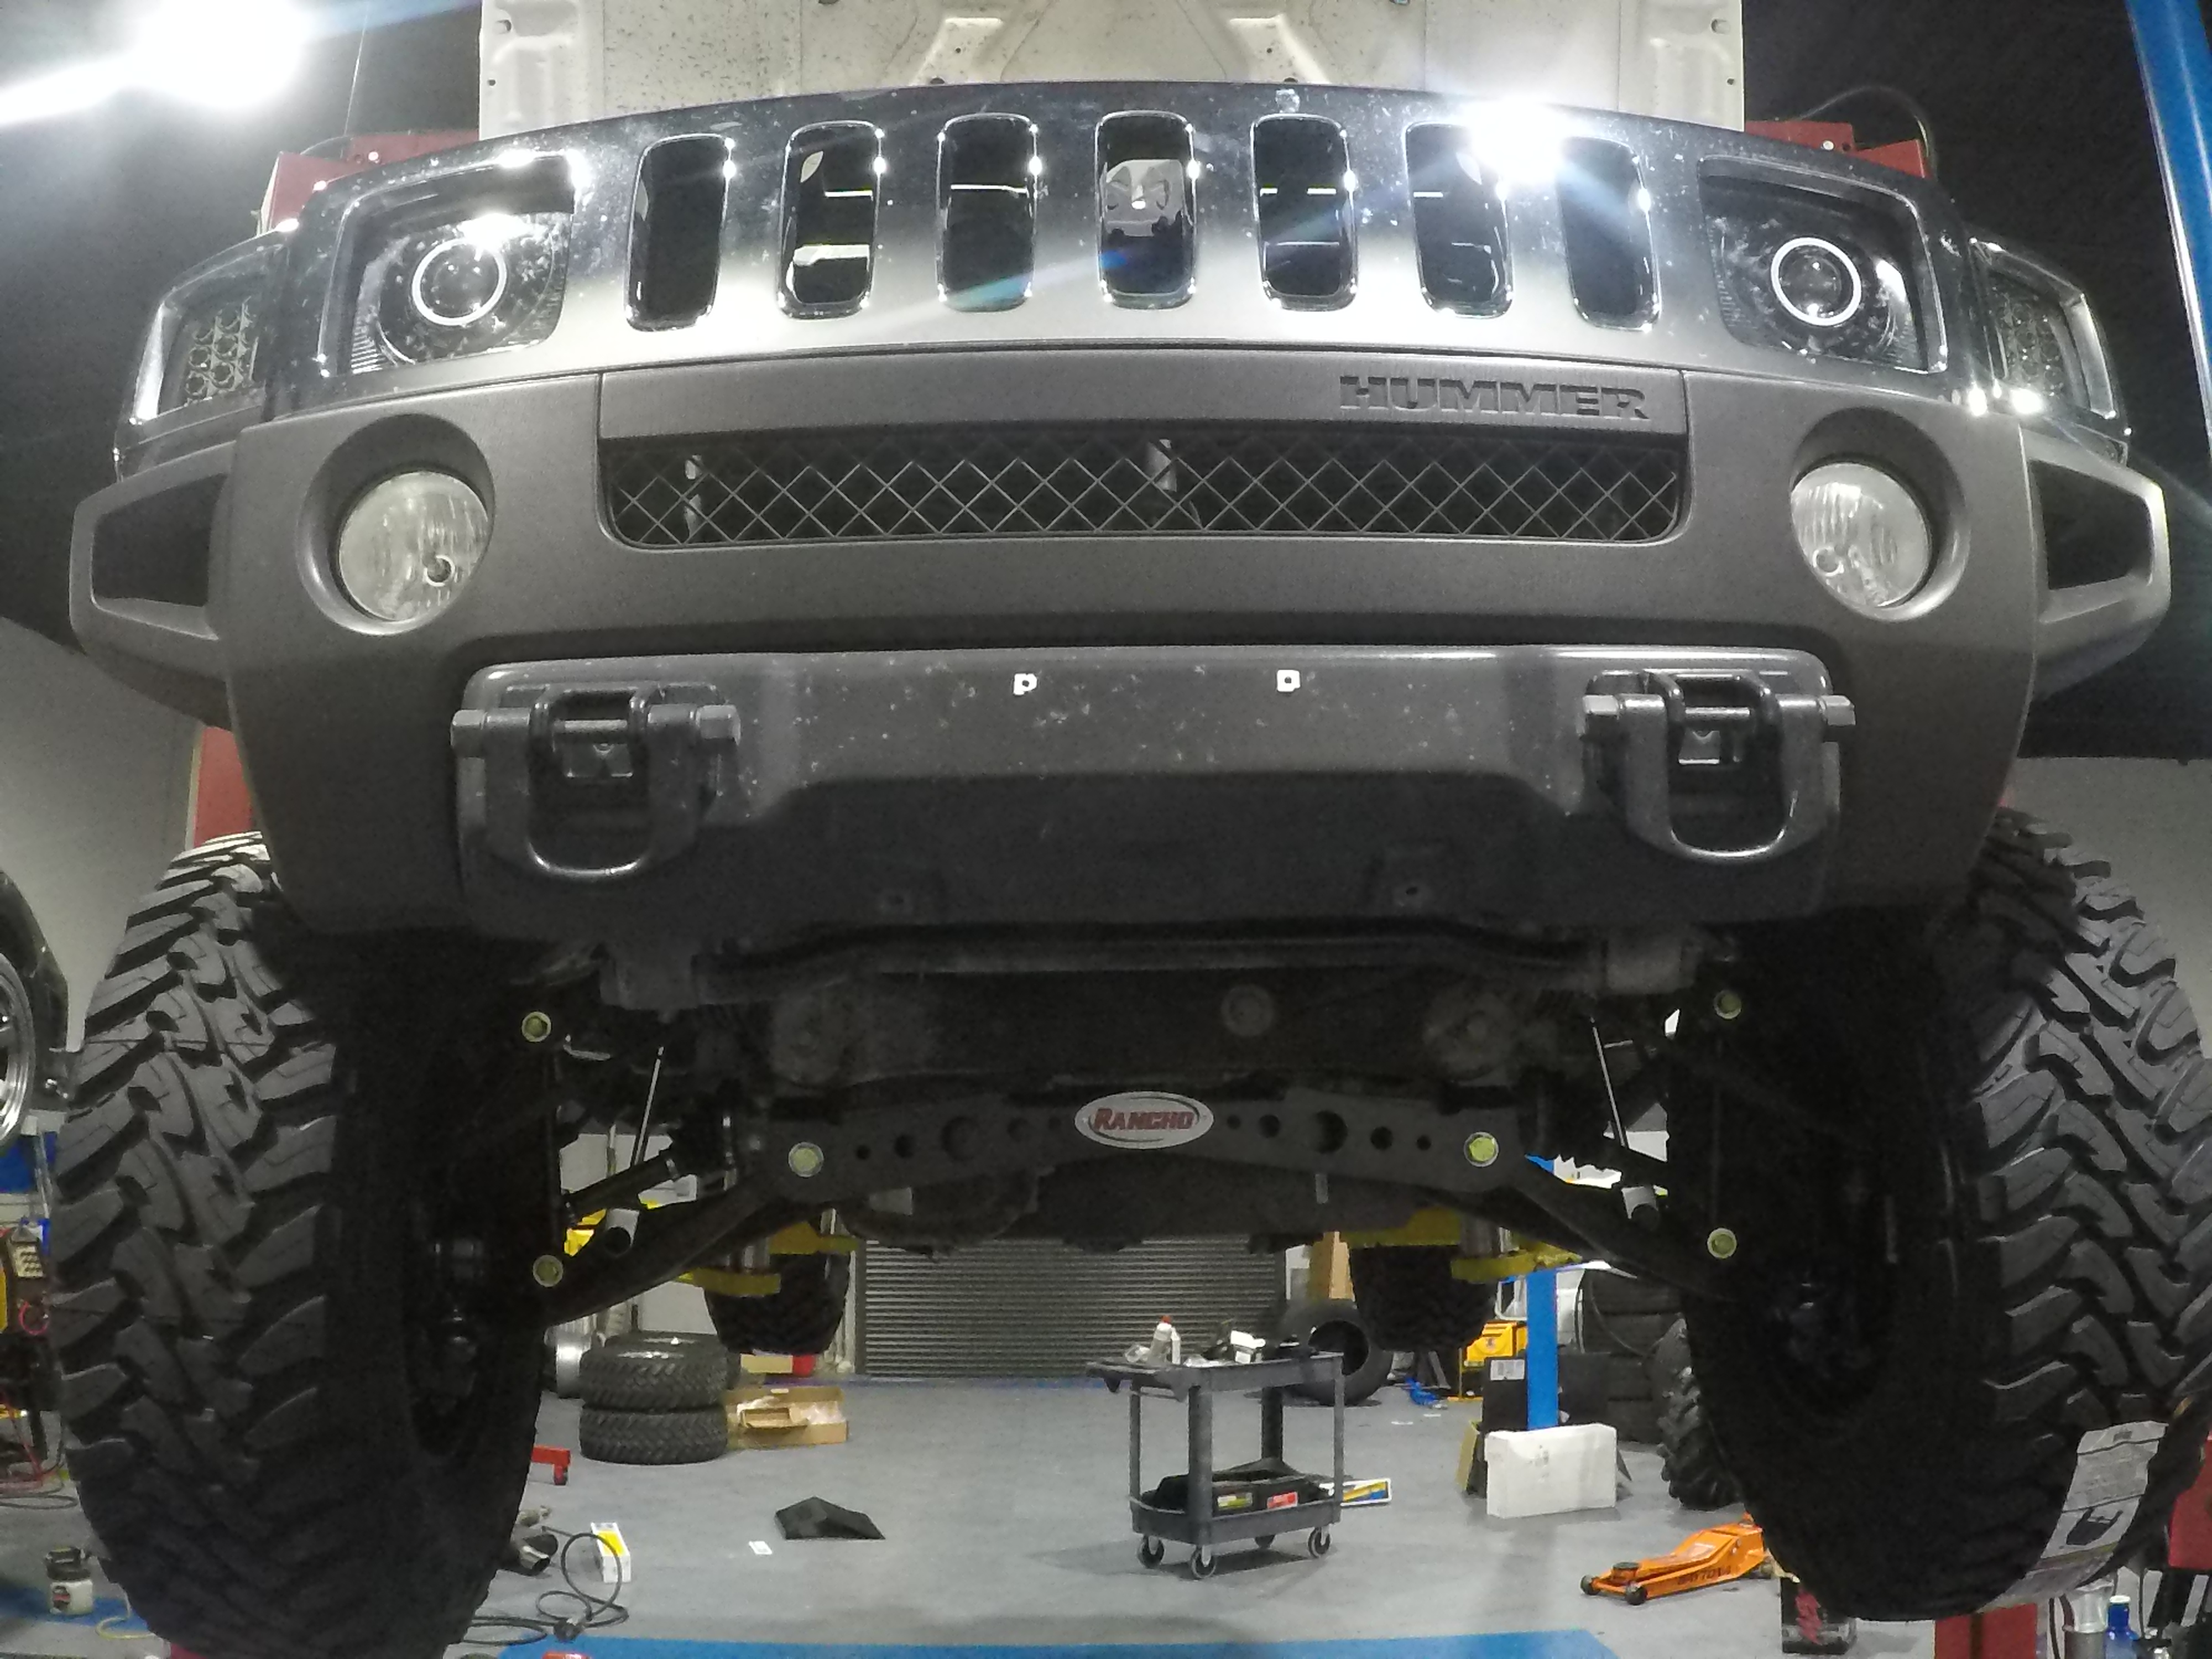
Setting ride height with the torsion bars. Crank the bolts, lower vehicle, jump on front end, measure fender height and repeat. Just the tires alone are making a big difference! Still need to install stock and Rancho skid plates.
Finished this weekend project late Sunday night with the exception of a few missing bolts. Left it at the shop and came back next morning after a run to the hardware store. My kit was missing the bolts for the trailing arms so I had some longer bolts laying around the shop that I used as a placeholder.
Here's how it turned out.
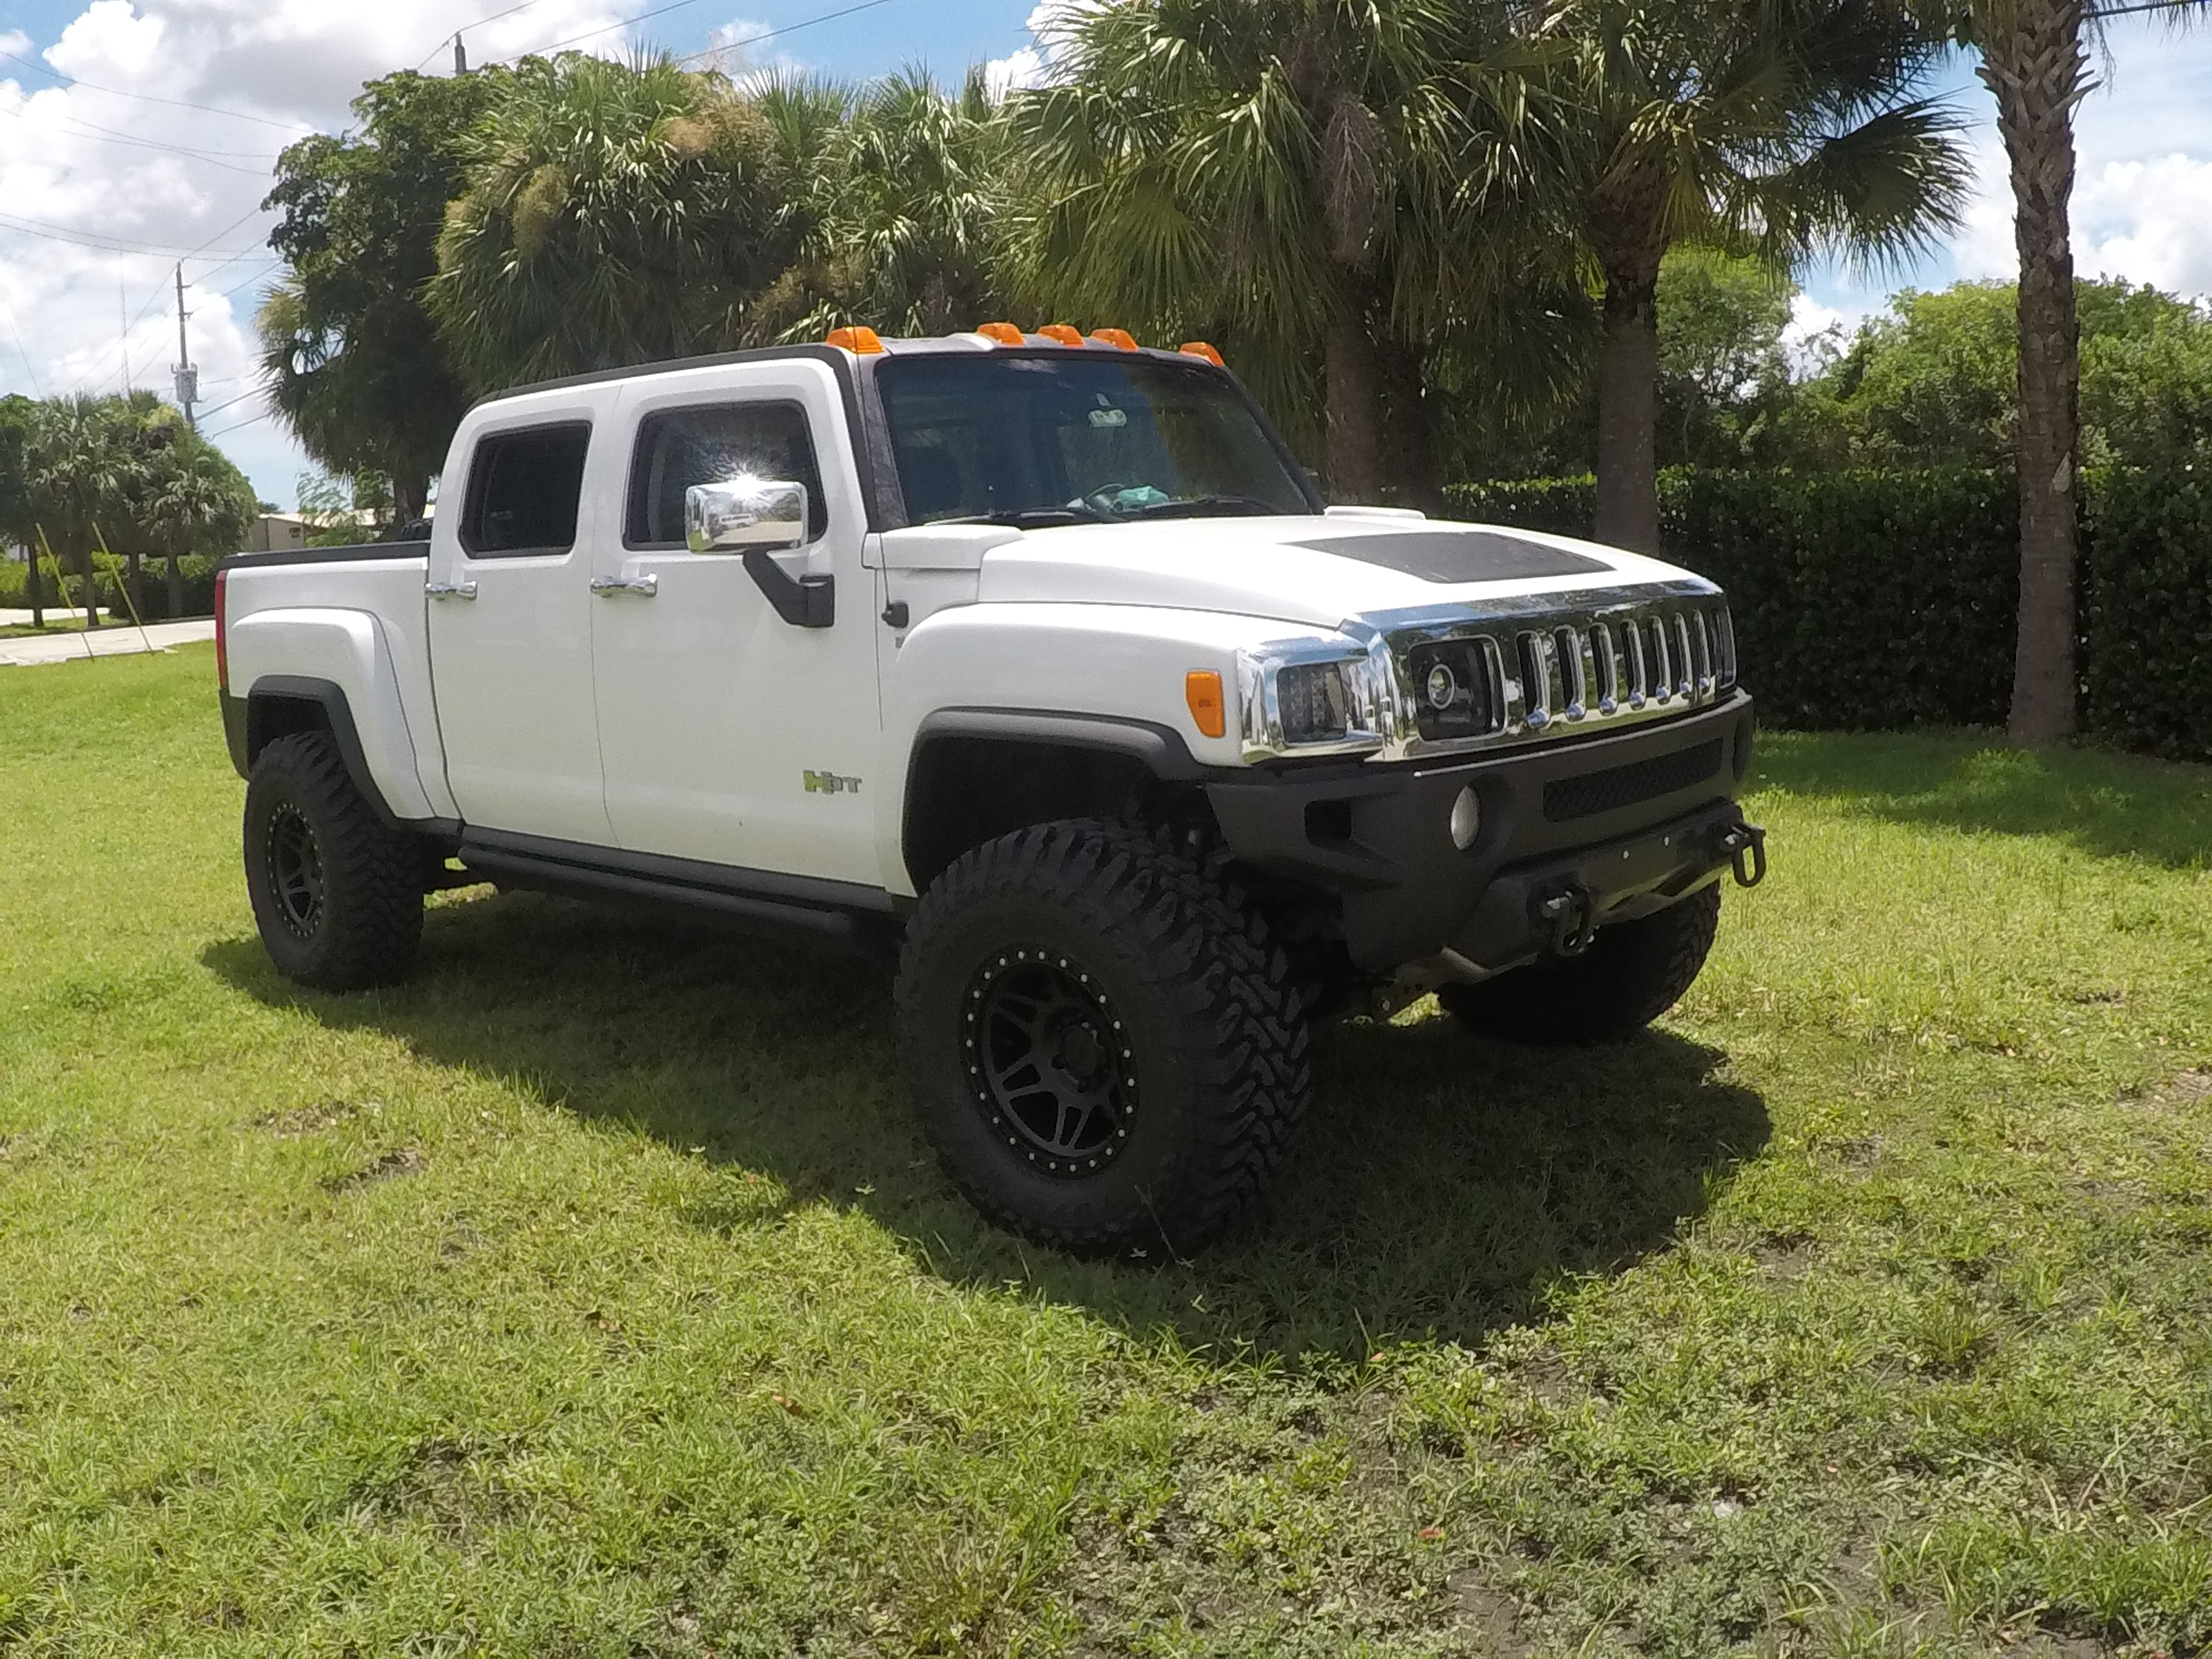

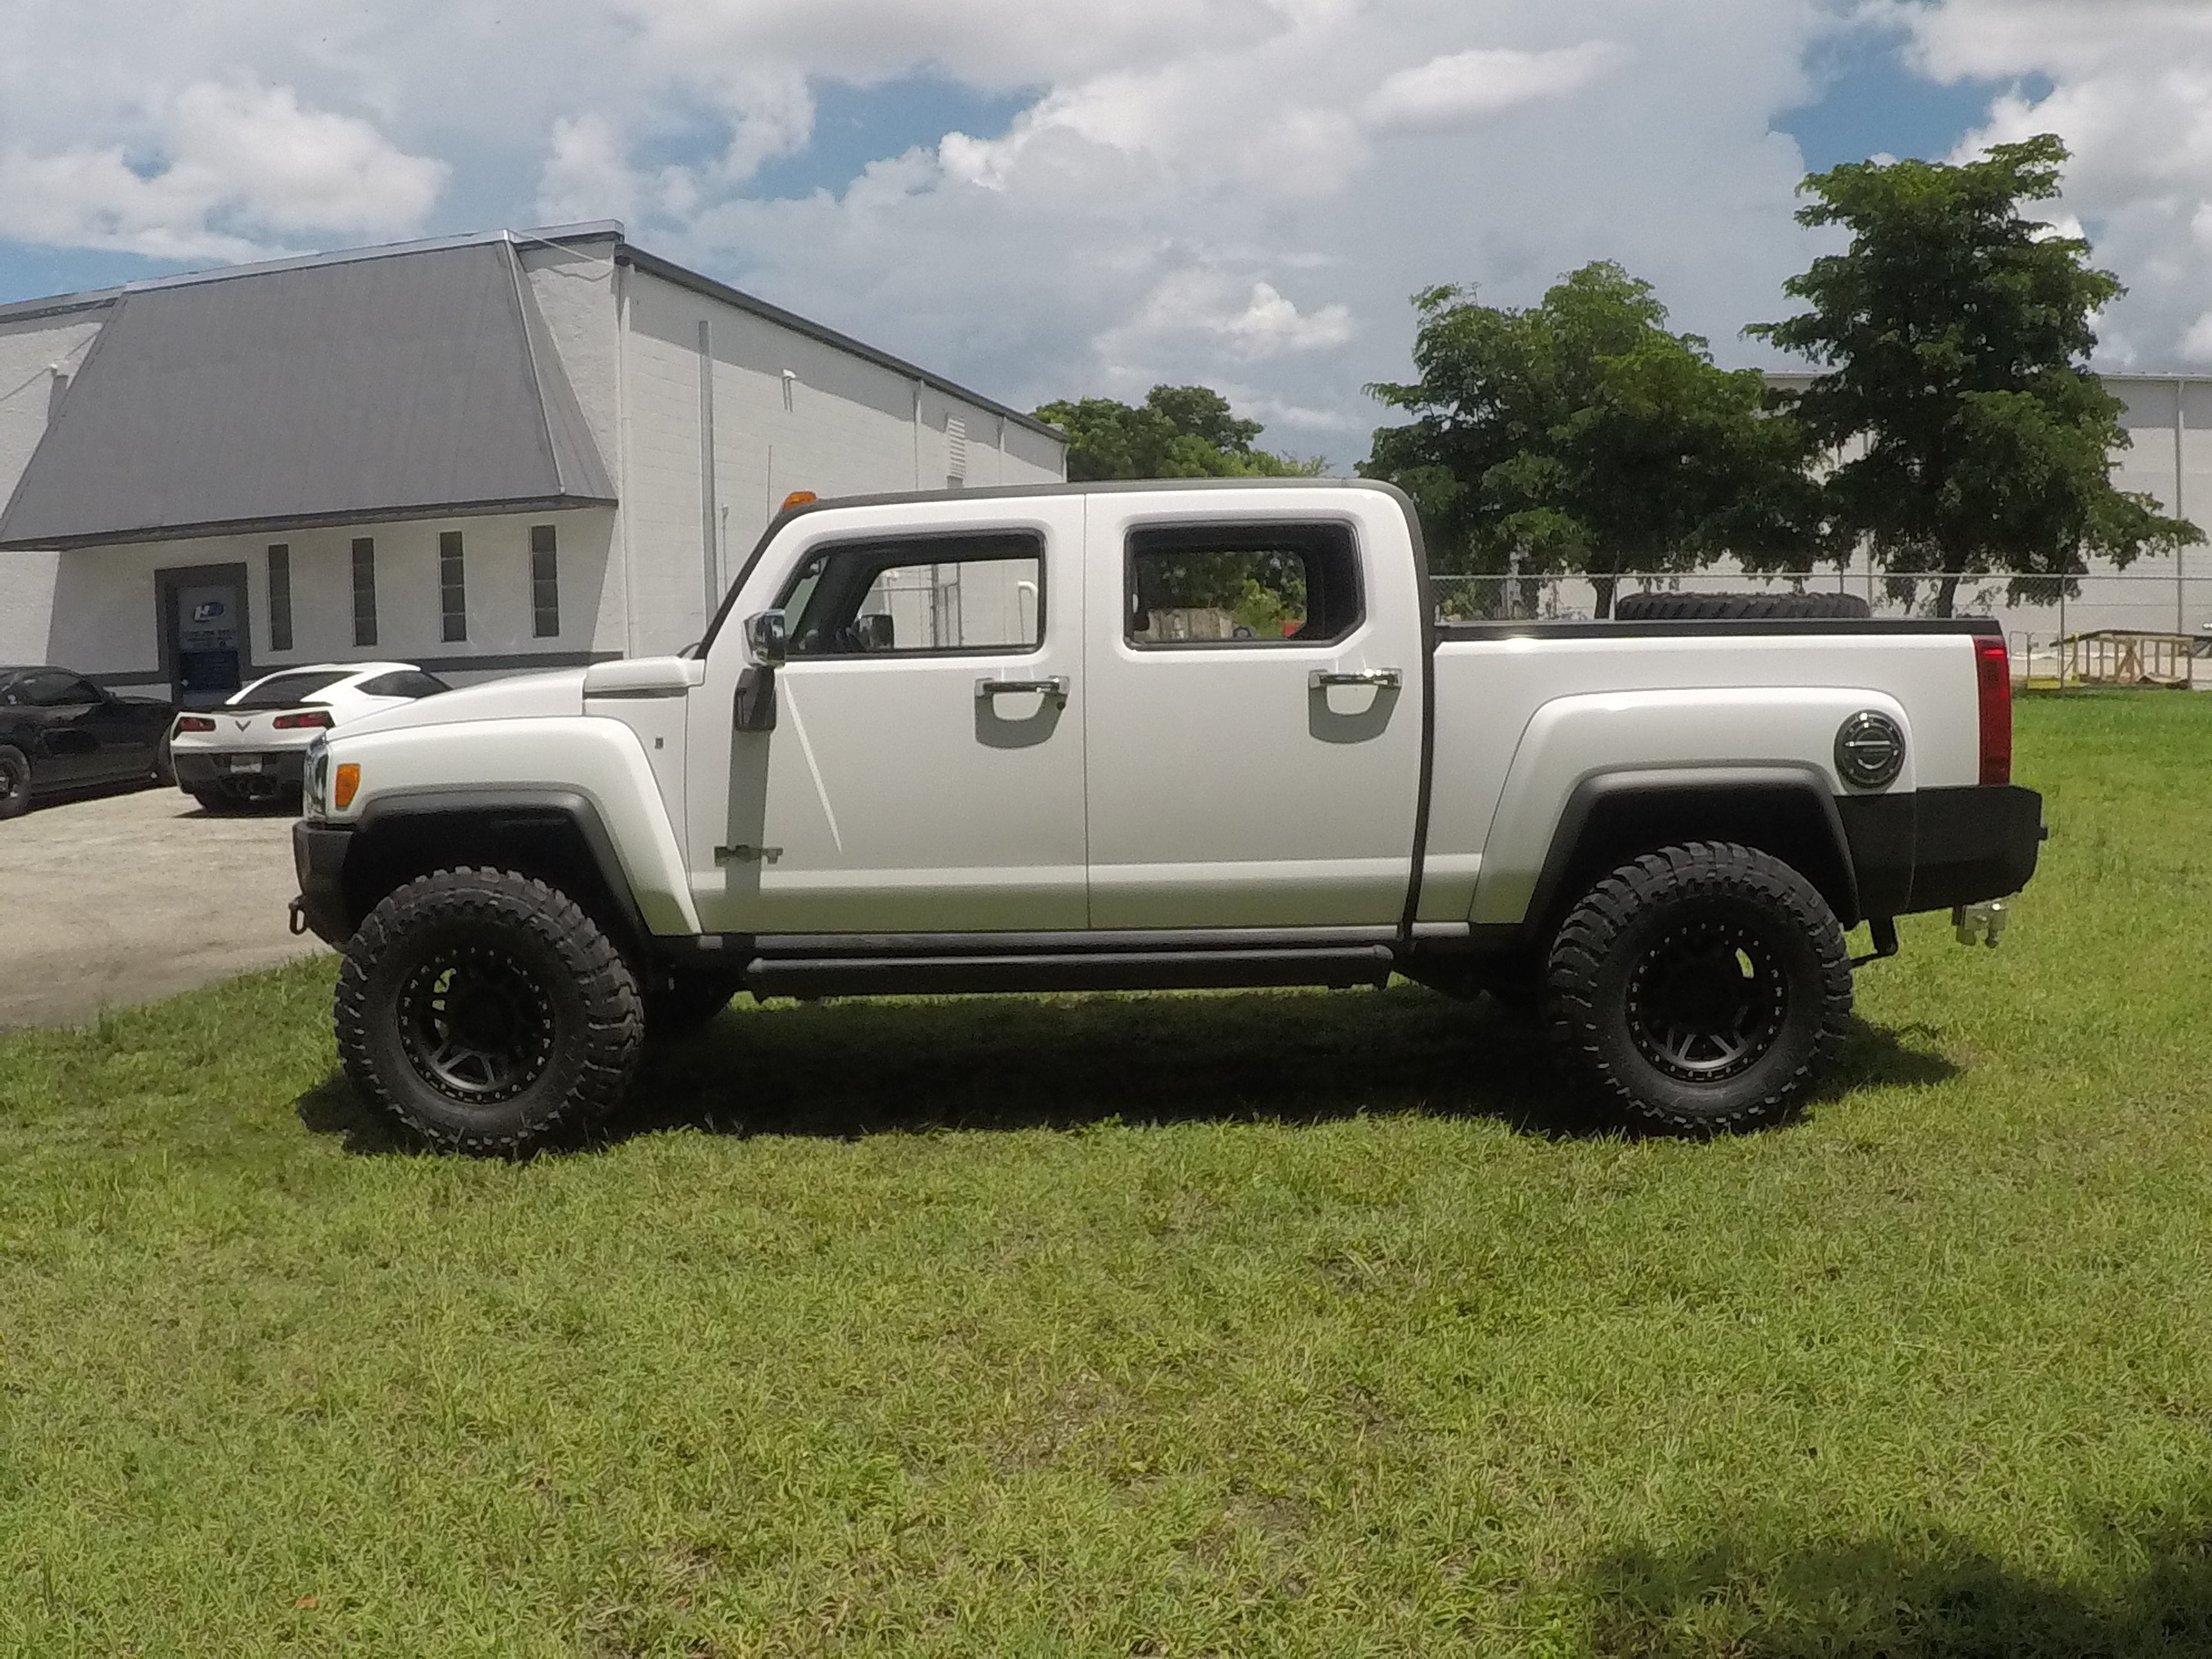
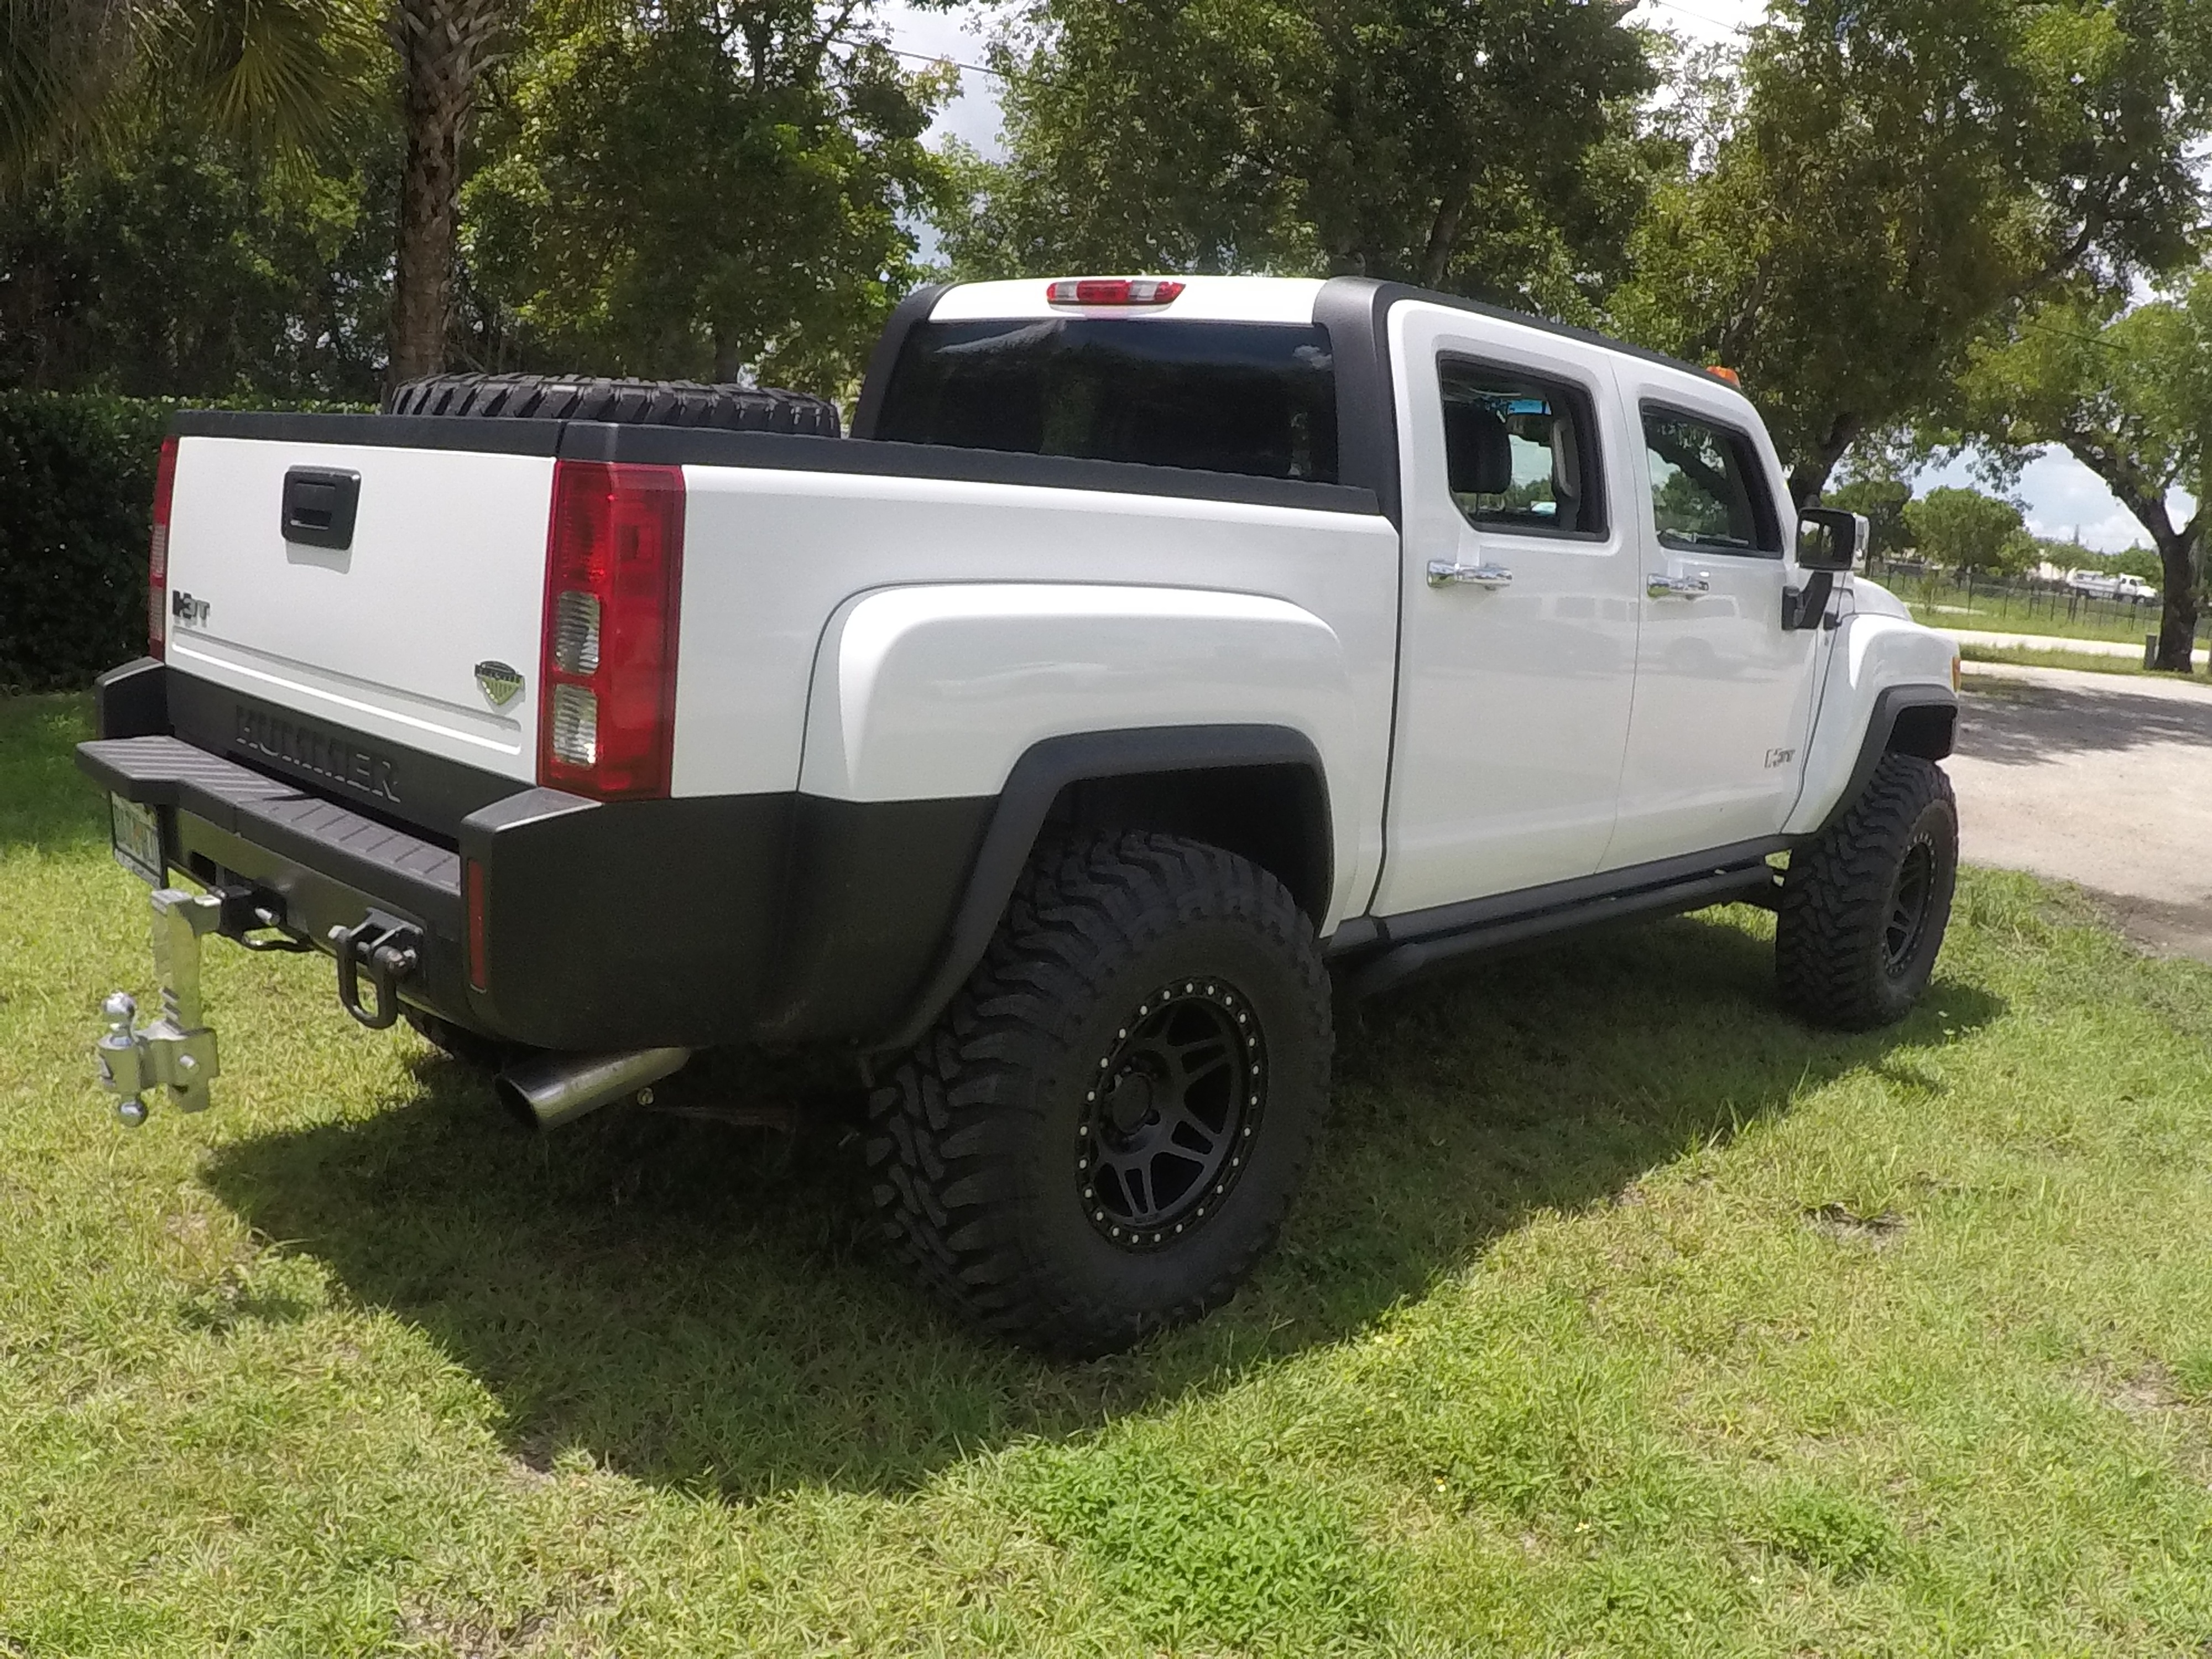
All I can say is, wow! The truck looks great and I can't stop staring at it lol, like I'm in love with the truck all over again. Still a few things that need to be addressed... the front still needed to be adjusted a bit more before a trip to the alignment shop and the rear really only received a minor lift and looked low and out of place. Being that this sat in my garage for over a year, I forgot all about the rear add a leaf lol. Considered a spring over on the rear but have some other plans. The fender flares also make the lift seem not as high because they come down and out from the fenders as opposed to just out.
Couldn't find the add a leaves anywhere. Found them a couple days later. Turns out that I brought them inside for whatever reason. Time to head back to the shop after work.
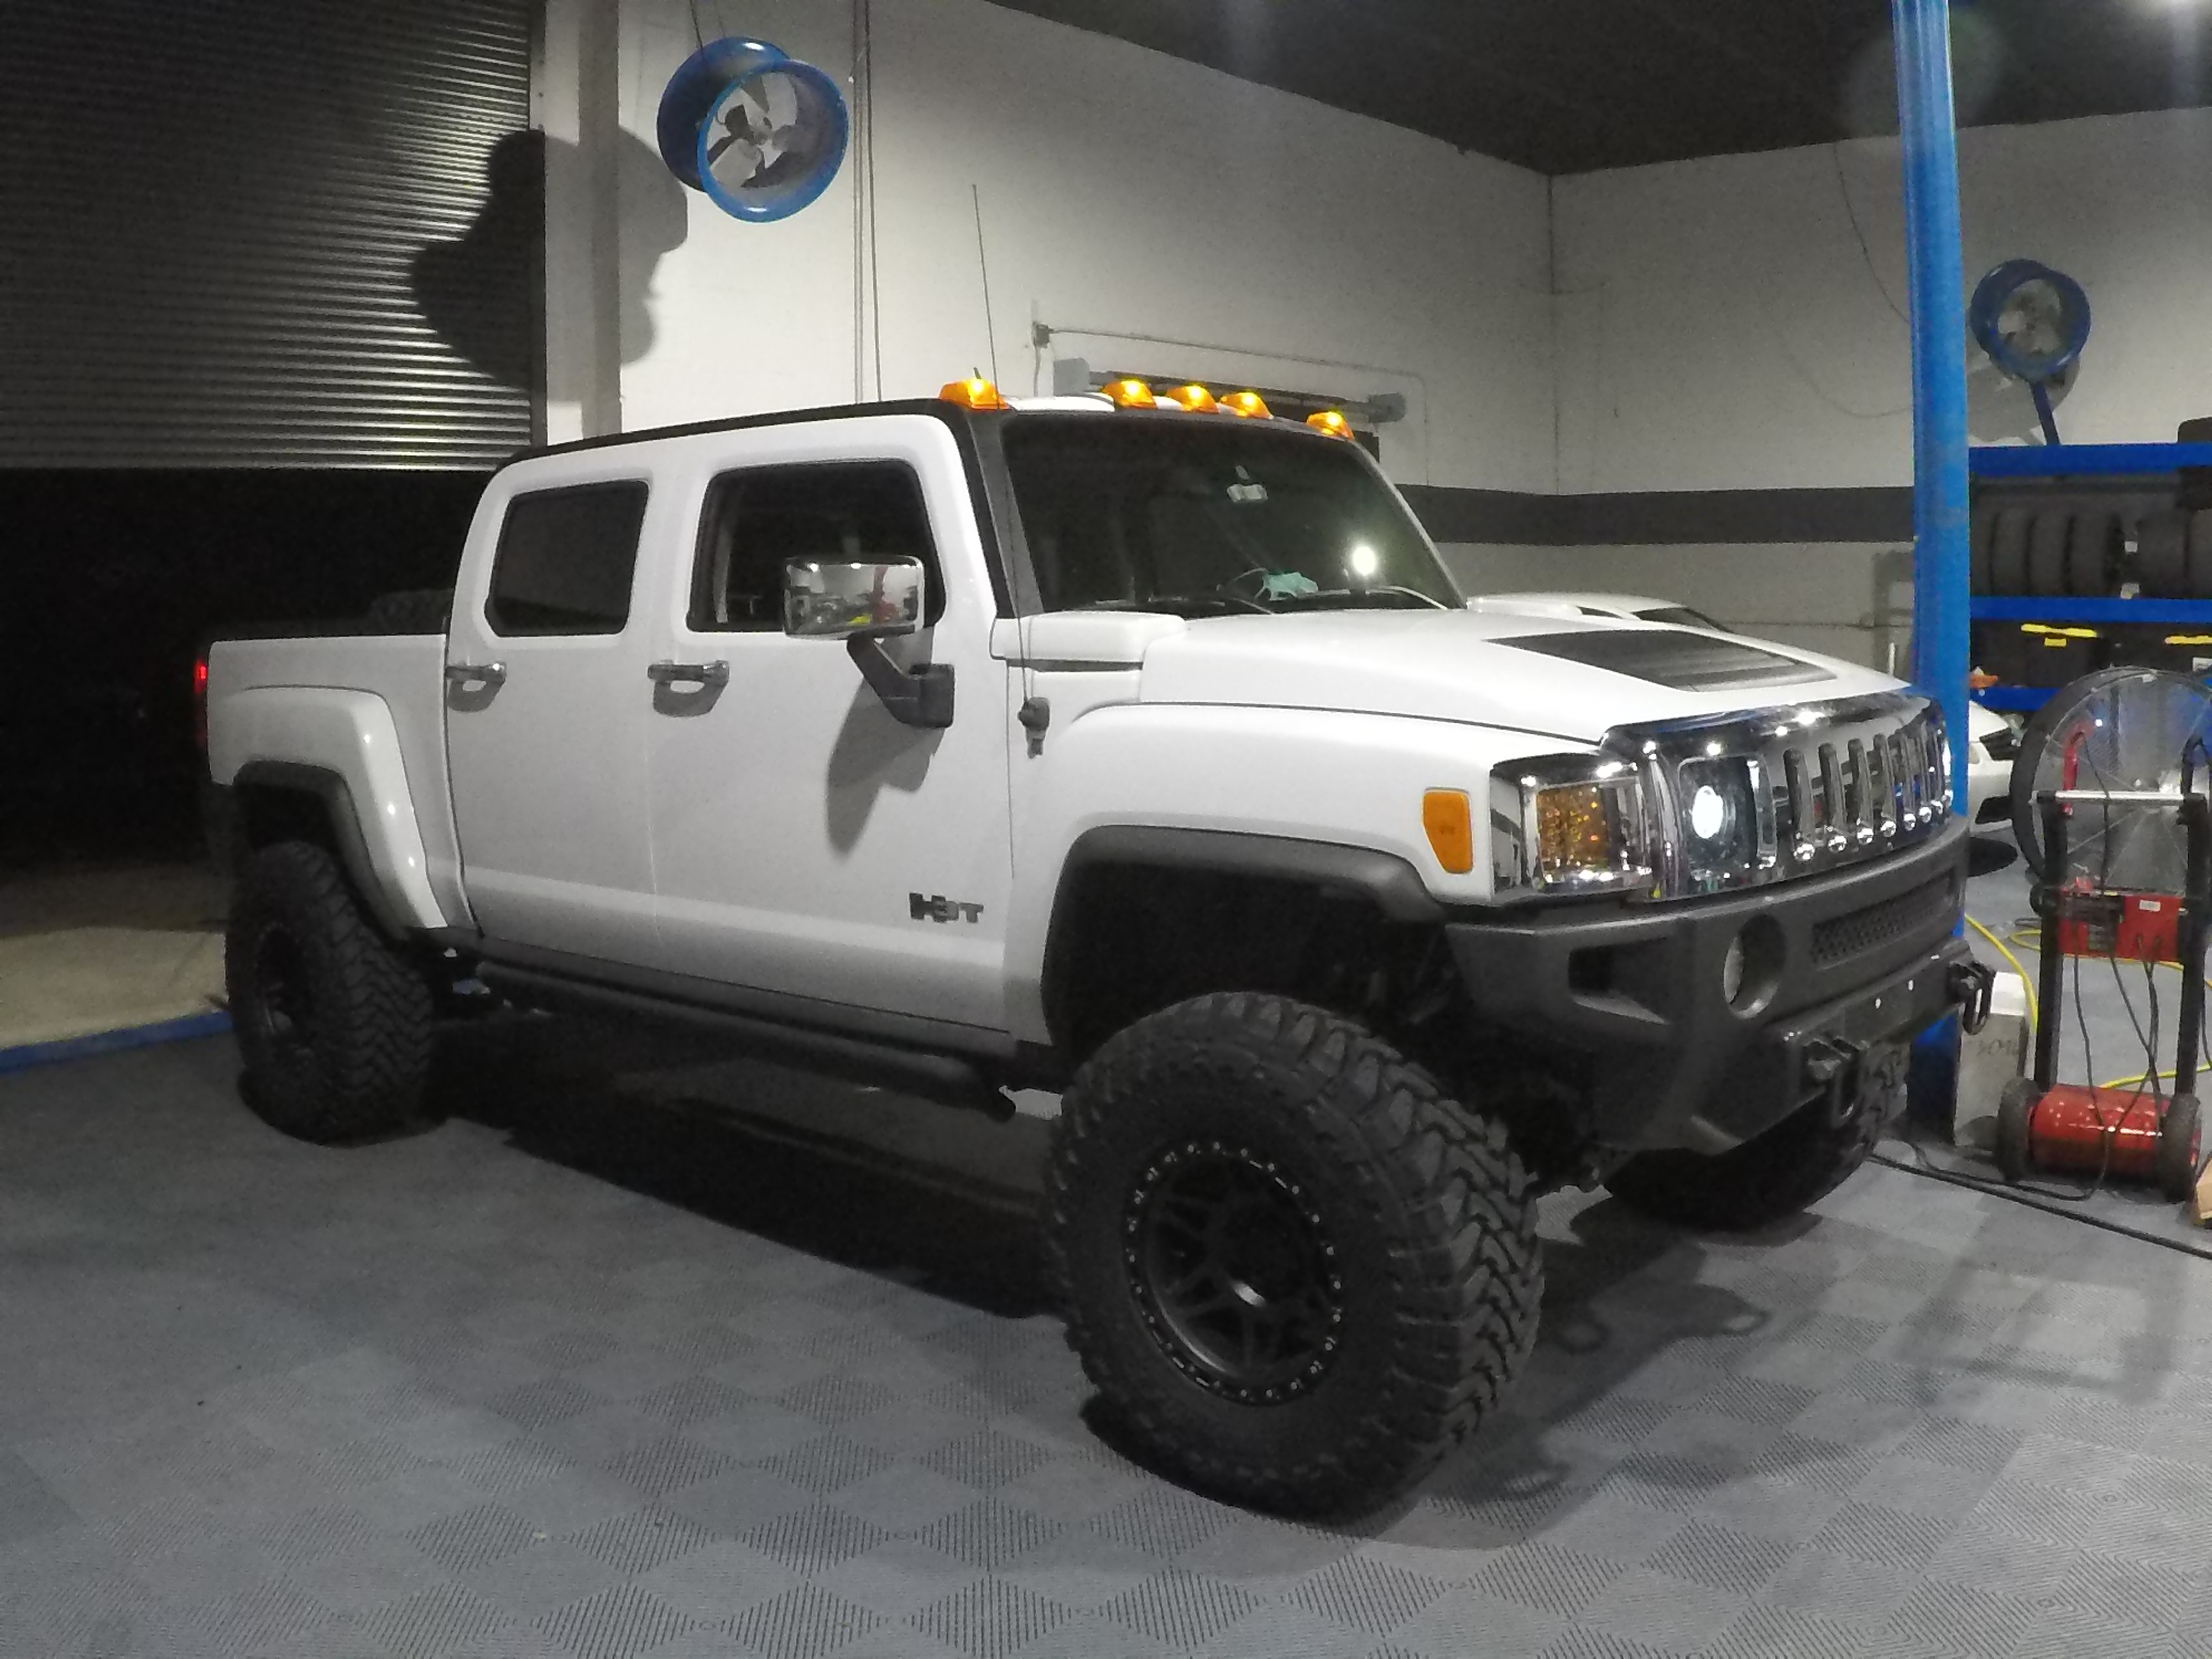
New JKS end links installed and reattached the rear sway bar. Add a leaf done & raised the front a bit. Much better!!
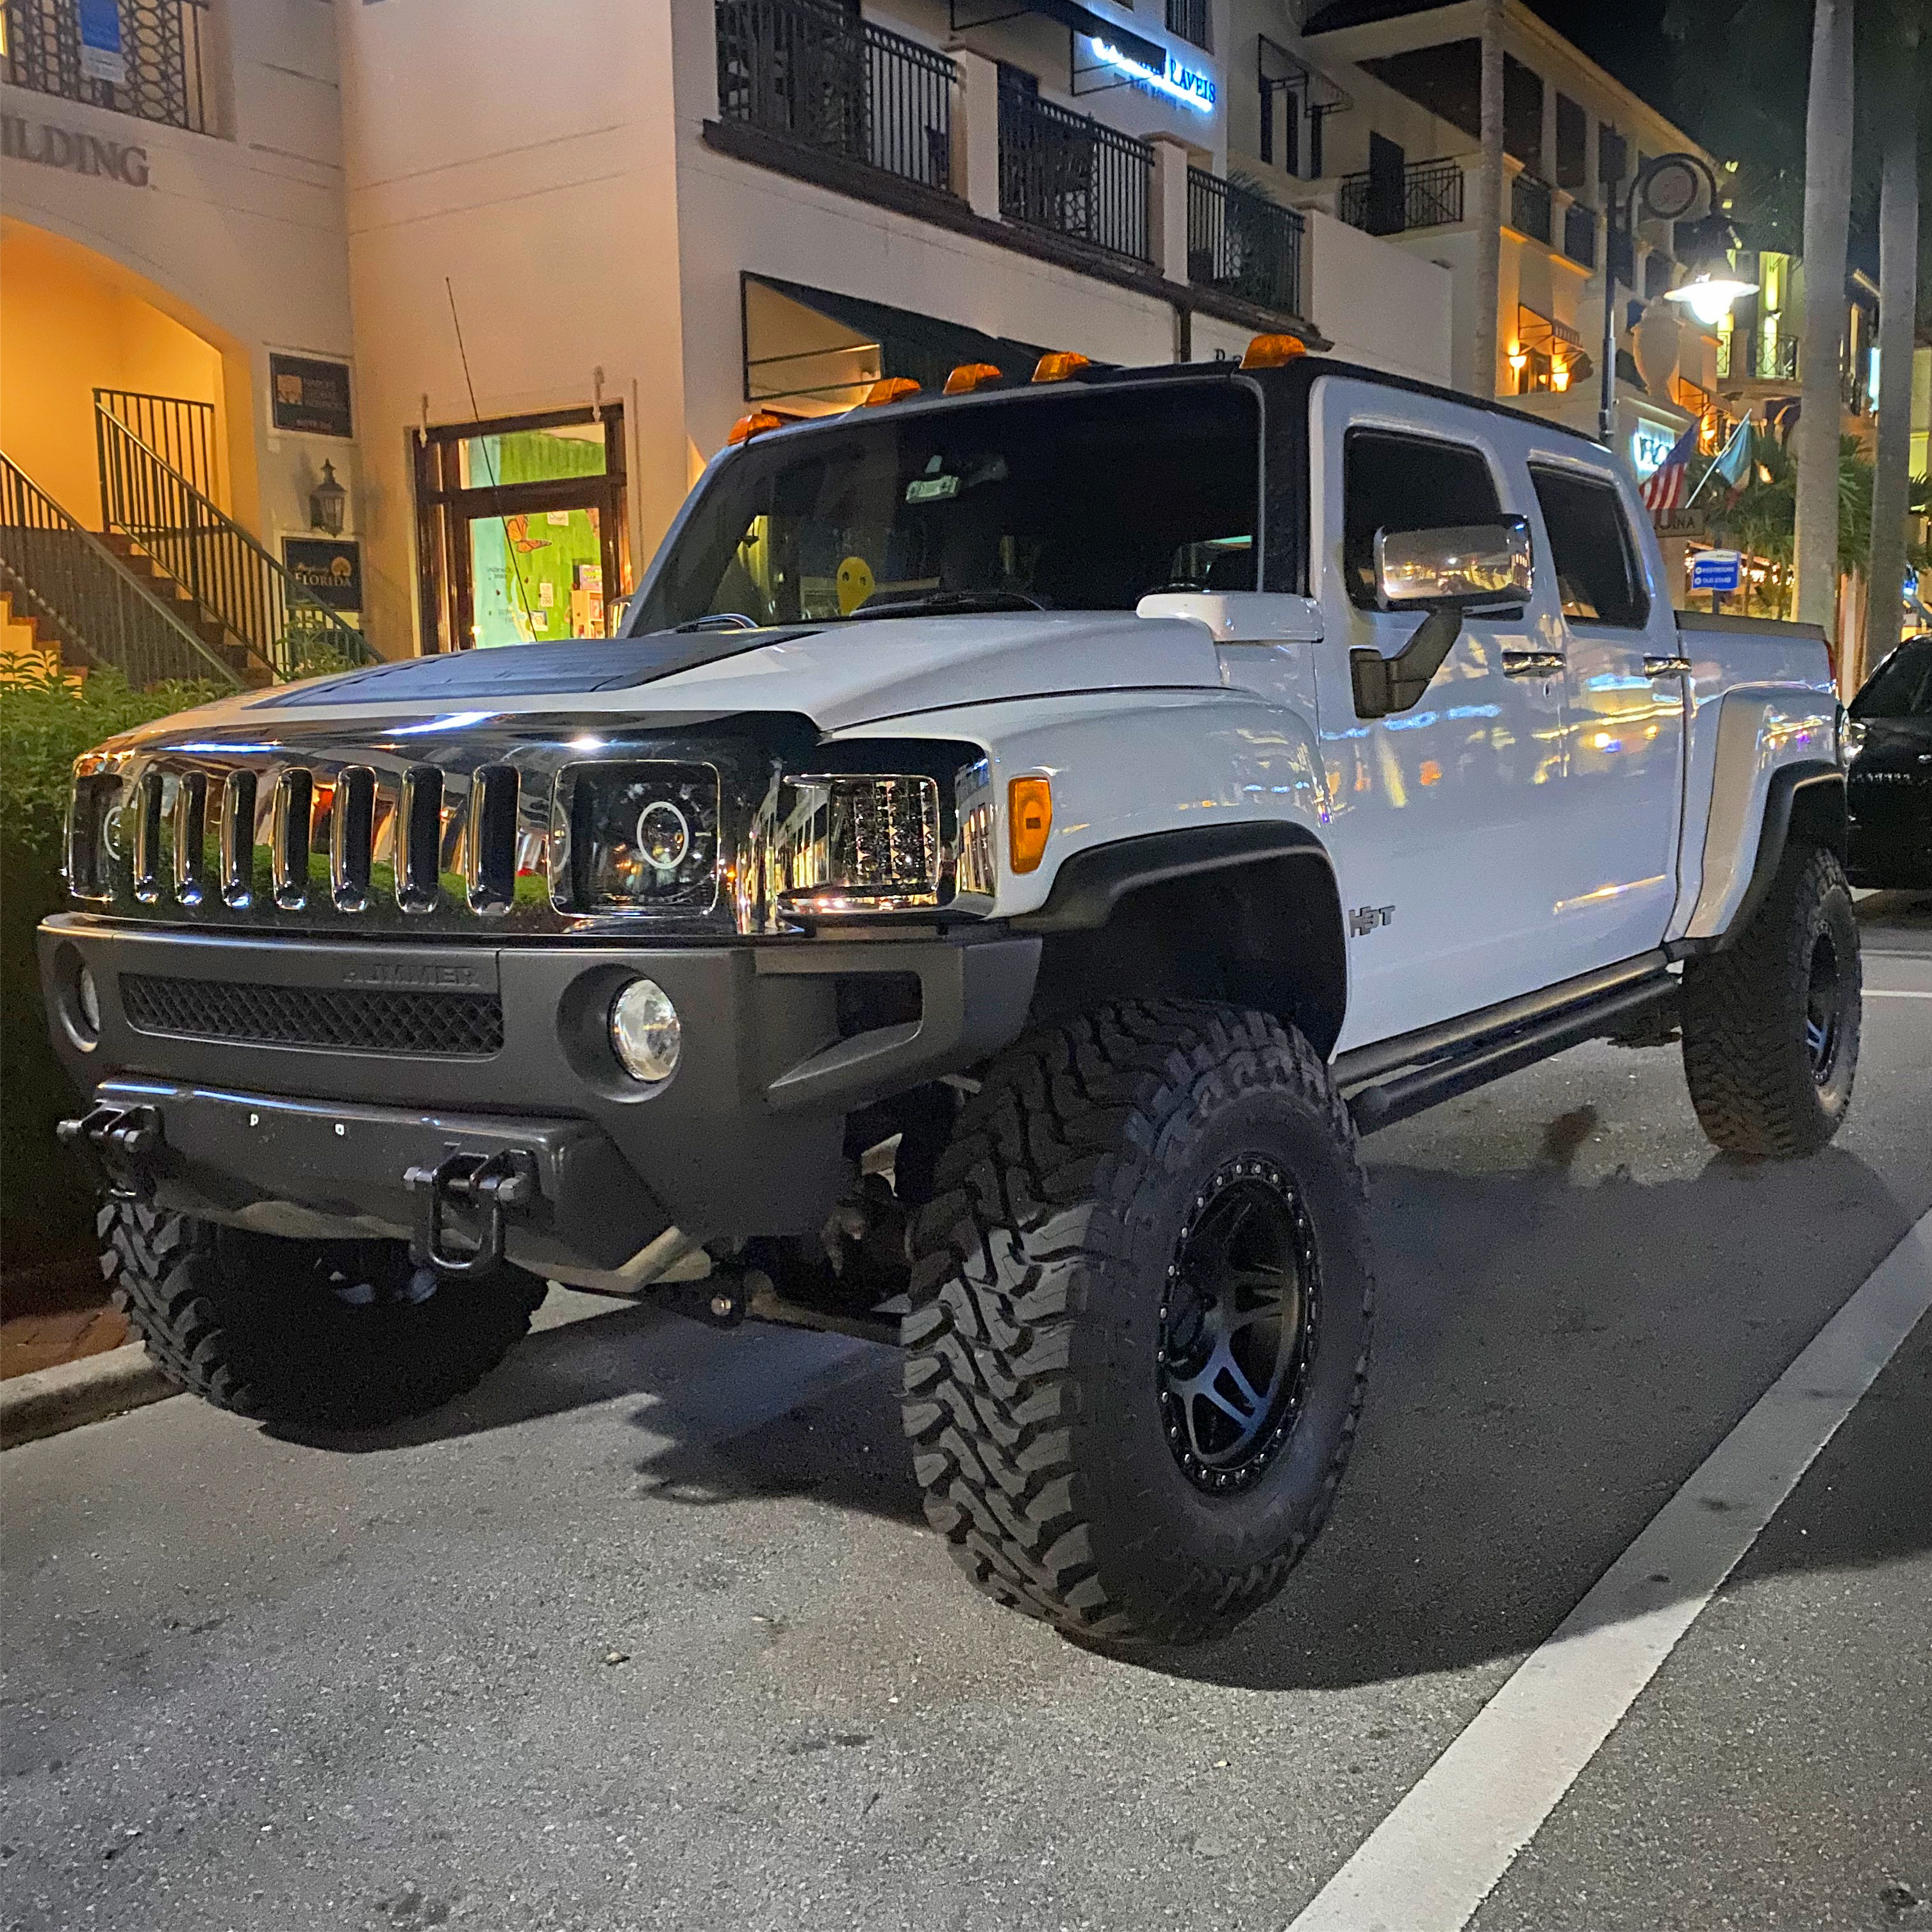
And finally... all washed, cleaned and just right on time to take out for date night with the gf. Man I love this truck. The Duke definitely turns heads driving down the streets crowded with pedestrians with the new lift and cam.
More to come...
I was sitting on this kit for about a year and a half before I finally got off my rear and decided to start working on installing it late last year in August. And I should've done it sooner because it completely changed the truck, I love the way The Duke turned out.
I did this mostly by myself and with a help of a buddy for the first few hours. Really wasn't too difficult to install.
First thing was to lay out all of the parts get the truck on the lift & remove the wheels & tires.
In the kits that were found, they supplied longer shackles and an add a leaf to lift the rear (more on that later).
Non-Rancho items that I used were Bilstein shock absorbers with reservoirs on all 4 corners, new rear brake pads, new upper control arms, new ball joints for the lower control arms that are serviceable, and some Jeep shock mount adapters to adapt to the eyelet mounts on the new shocks.
Started on the rear first to knock it out of the way since it is the easiest thing to tackle. Lowered and removed spare wheel/tire to gain more working room. Inspected the spare tire and it was showing signs of aging so I just threw the whole thing in the garbage. Have no use for that lol. On the positive note, the wheel had barely any rust on it.
I didn't take photos of every step (not that my photos are any good) but here is the rear finished*. New extended shackles installed, bump stop extensions done and rear shocks mounted. Here is where I ran into my first gripe. I ordered these shocks based off of my forum research and what reservoir shocks our fellow Hummer enthusiasts said would work. Do you see the issue here? Annoyingly, the placement on the reservoir lines prevented me from flipping them and mounting them the other way because the lines hit the frame's shock reinforcement metal. As you can imagine, I wasn't too happy about that and couldn't return them because I bought them not long after buying the lift kit 298178298 weeks ago. The only way to run these was to have the lines dip down about an inch from the bottom of the shock which is going to be a BIG issue when off road. For the sake of finishing the install, I said screw it and will run these until they break, then buying the correct ones. Thank you to Shawn Townsend for getting me the part number for the correct shocks for when these break! And yes, they are bound to break at some point with my adventures.
View of the shock. Instead of coming out perpendicular and then 90 parallel to the shock body, these just exit at a 45 degree angle and straight.
Rear complete and new wheels/tires mounted for test fitment. Minus the sway bar. My Rancho kit was missing a sway bar end link so I ordered up some JKS adjustable end links for a Jeep and re-installed the sway bar a few days later. I ended up liking the Rancho bushings better so I pressed the JKS ones out and put in the Rancho pieces.
^^^ Another view of completed rear and view of how far shock lines hang.
Moving on to the front end progress and did an oil change while everything was apart.
Front diff cross member on.
More progress. Passenger CV axle was leaking so we threw in a new one.
New lower control arm ball joints pressed in, new upper control arms in, sway bar and end links done, extended bump stop mounts done, trailing arms installed and test fit wheels. Almost all set!
Setting ride height with the torsion bars. Crank the bolts, lower vehicle, jump on front end, measure fender height and repeat. Just the tires alone are making a big difference! Still need to install stock and Rancho skid plates.
Finished this weekend project late Sunday night with the exception of a few missing bolts. Left it at the shop and came back next morning after a run to the hardware store. My kit was missing the bolts for the trailing arms so I had some longer bolts laying around the shop that I used as a placeholder.
Here's how it turned out.
All I can say is, wow! The truck looks great and I can't stop staring at it lol, like I'm in love with the truck all over again. Still a few things that need to be addressed... the front still needed to be adjusted a bit more before a trip to the alignment shop and the rear really only received a minor lift and looked low and out of place. Being that this sat in my garage for over a year, I forgot all about the rear add a leaf lol. Considered a spring over on the rear but have some other plans. The fender flares also make the lift seem not as high because they come down and out from the fenders as opposed to just out.
Couldn't find the add a leaves anywhere. Found them a couple days later. Turns out that I brought them inside for whatever reason. Time to head back to the shop after work.
New JKS end links installed and reattached the rear sway bar. Add a leaf done & raised the front a bit. Much better!!
And finally... all washed, cleaned and just right on time to take out for date night with the gf. Man I love this truck. The Duke definitely turns heads driving down the streets crowded with pedestrians with the new lift and cam.
More to come...
Thread Starter
|
Senior Member
Joined: Mar 2012
Posts: 295
From: SW Florida
 Rear Airbag Installation Time
After the last round of adjustments to the front T bars, I felt like I went a bit too aggressive with the height. So I brought it back down some prior to going off to get an alignment.
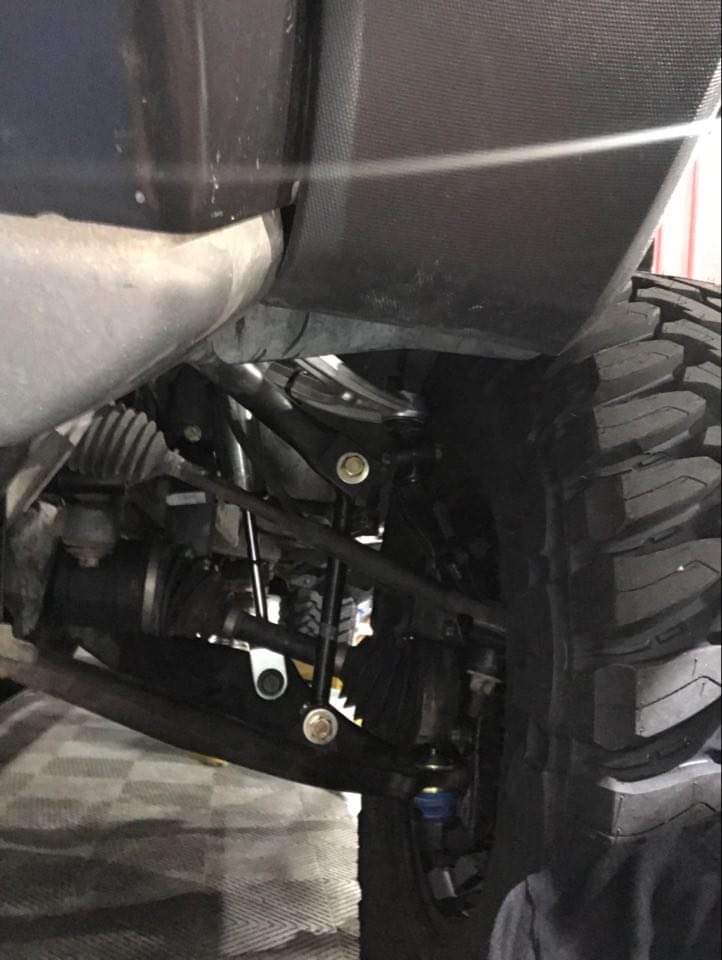
I'm sure this wouldn't have lasted too long at this angle.
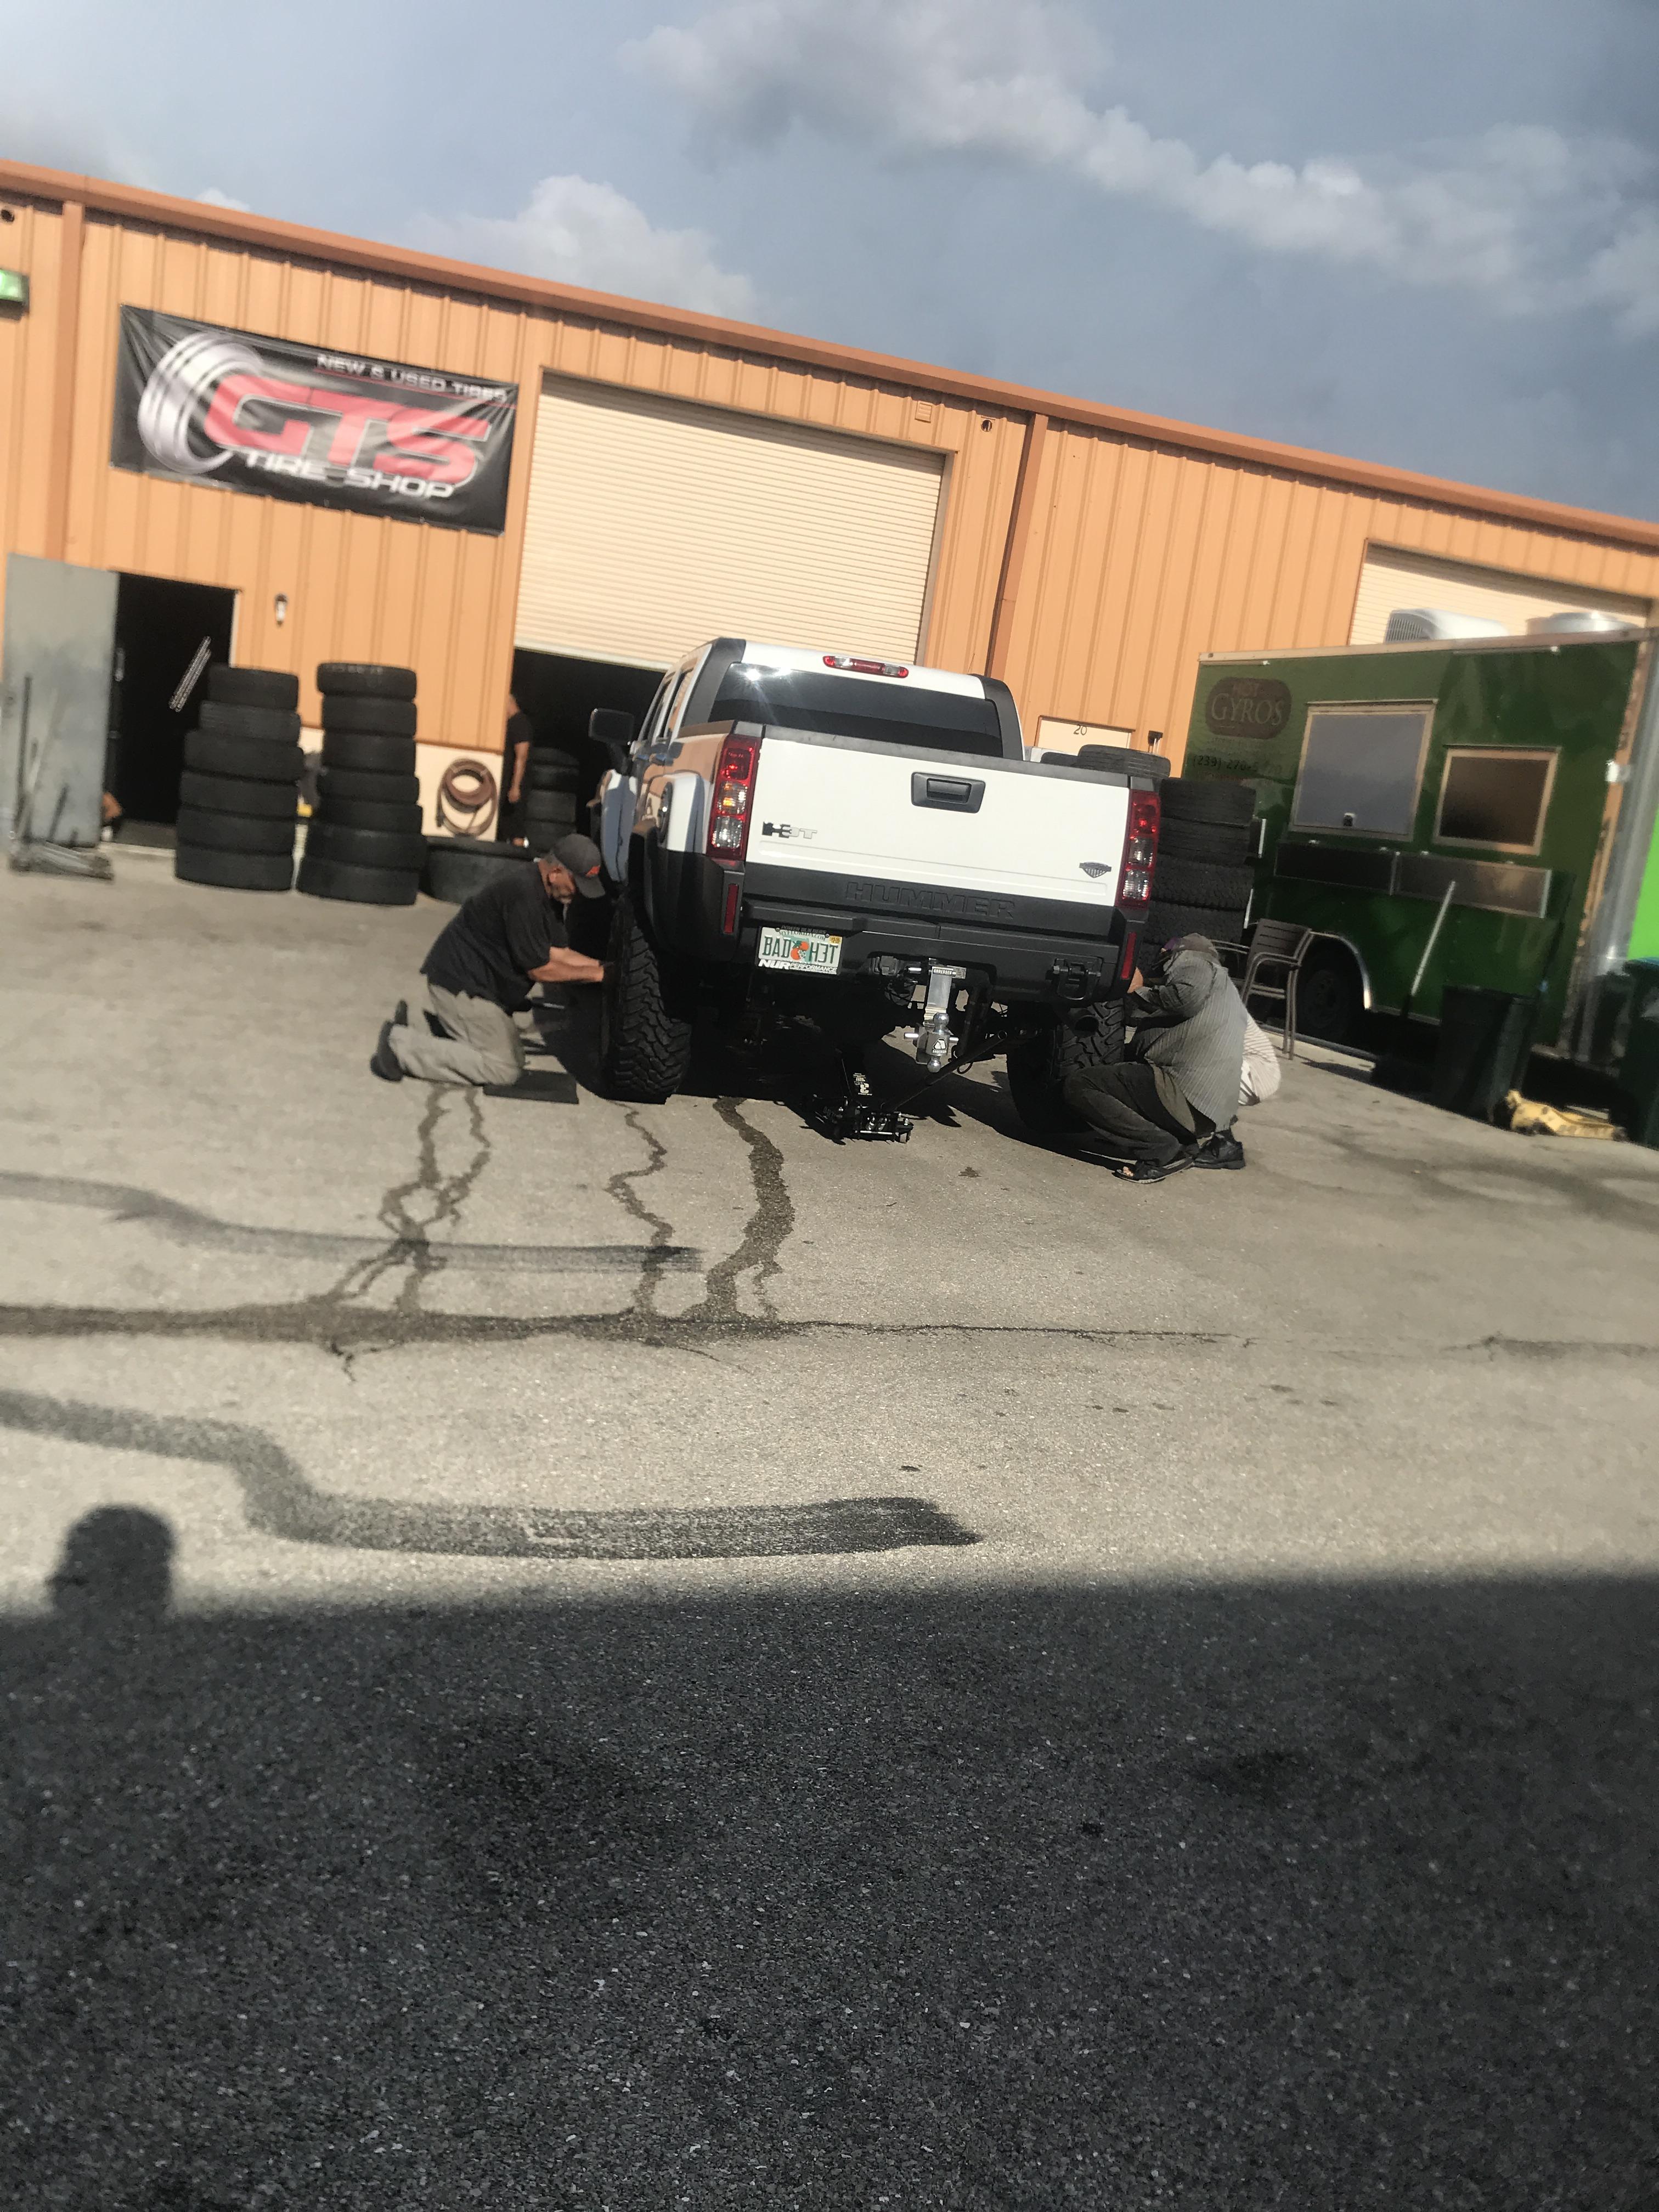
After an alignment, I had the wheels & tires rebalanced. There was a noticeable vibration on the of the wheels, and the shop that balanced them before indicated that they were "chasing weights" on one of them. I.e., the balancer kept telling him to put more and more weight on the wheel to balance it.
So now that I had the front to the height I was finally comfortable with, I wanted to tackle the lack of lift on the rear. All that I did to the rear when I did the Rancho install above was the extended shackles and an add-a-leaf. And they both definitely lifted the rear some (I'd say maybe 2-2.5-ish inches from both), they weren't enough to match the front. If you just glanced at the truck you might not have noticed it, but if you stare for more than a second or two then you can see the subtle difference in height between the front and rear. And this would probably be even more pronounced when towing the race car or anything with a bit of tongue weight.
The solution came from my buddy Joshua Gostomski, a fellow H3T enthusiast that some of you know, who suggested I run the Firestone airbags in combination of the Daystar cups. Not only will this be able to lift the rear the additional ~1.5-2" that was missing, but it would also be able to level the rear when towing AND have the off-road benefit of not being mounted to both the leaf spring and frame. By only being mounted on the frame, it allows the rear to articulate and not pull up or push down on the axle when going over obstacles. I put pictures of what I used below
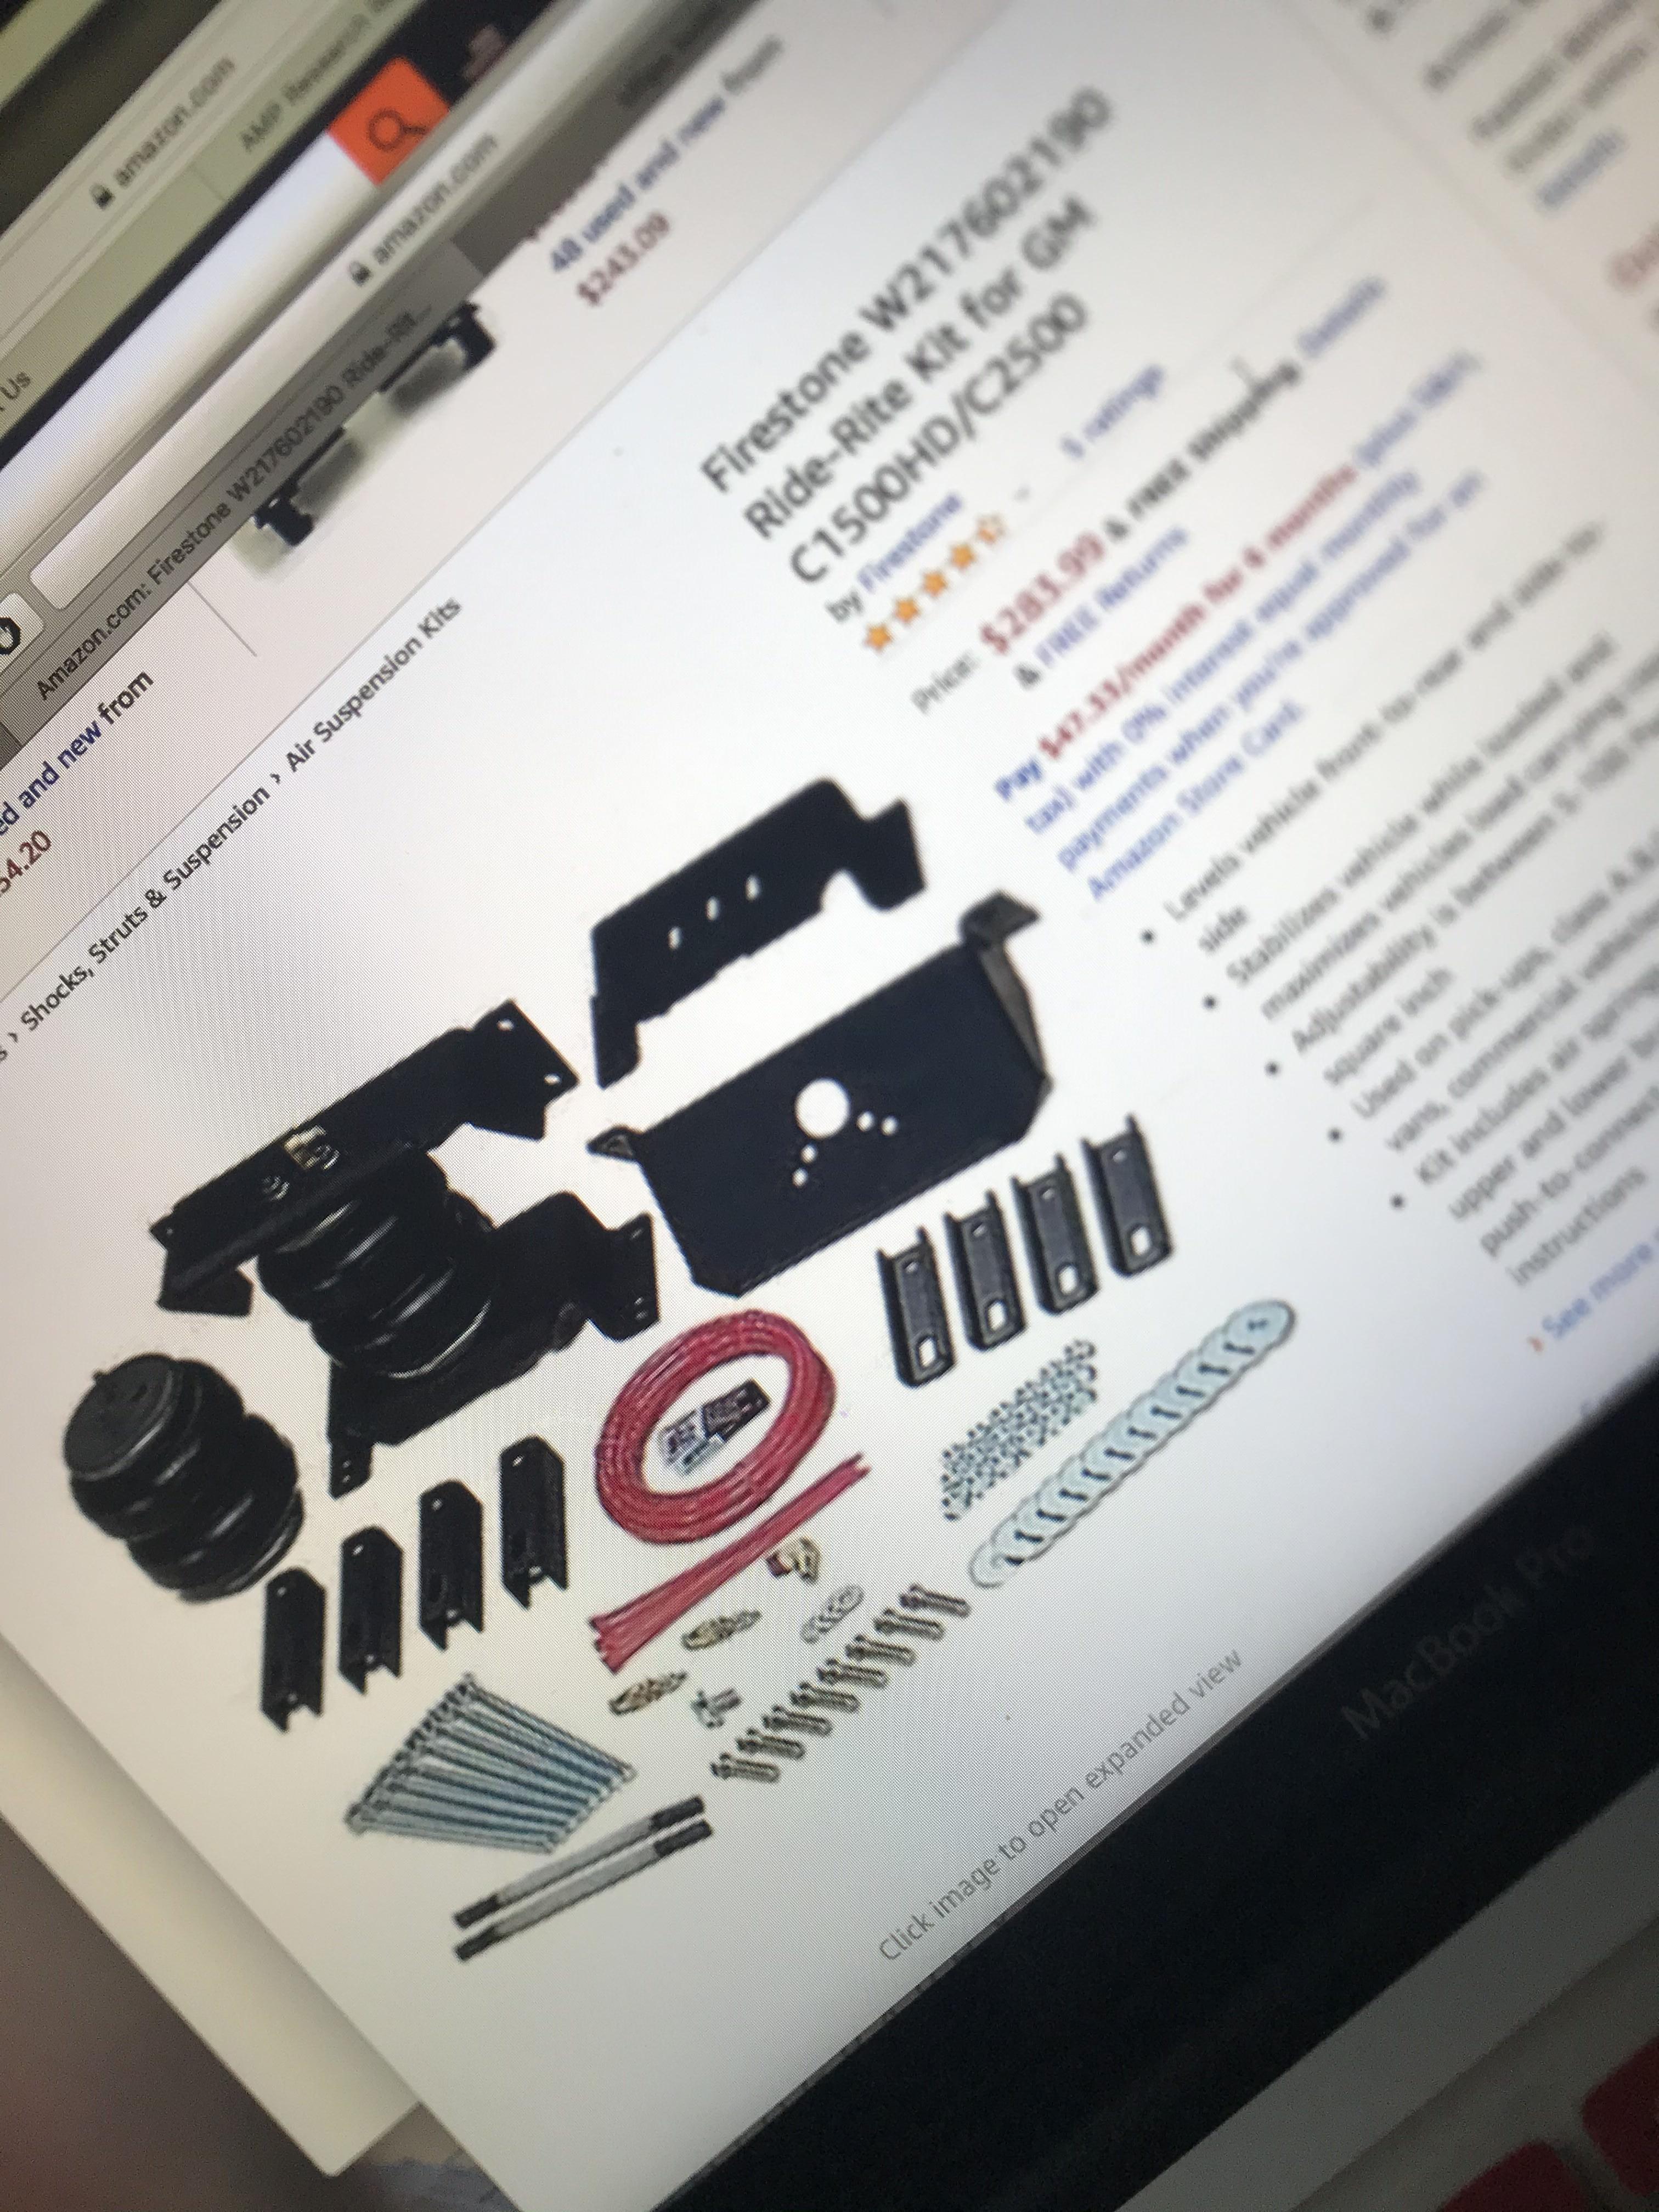
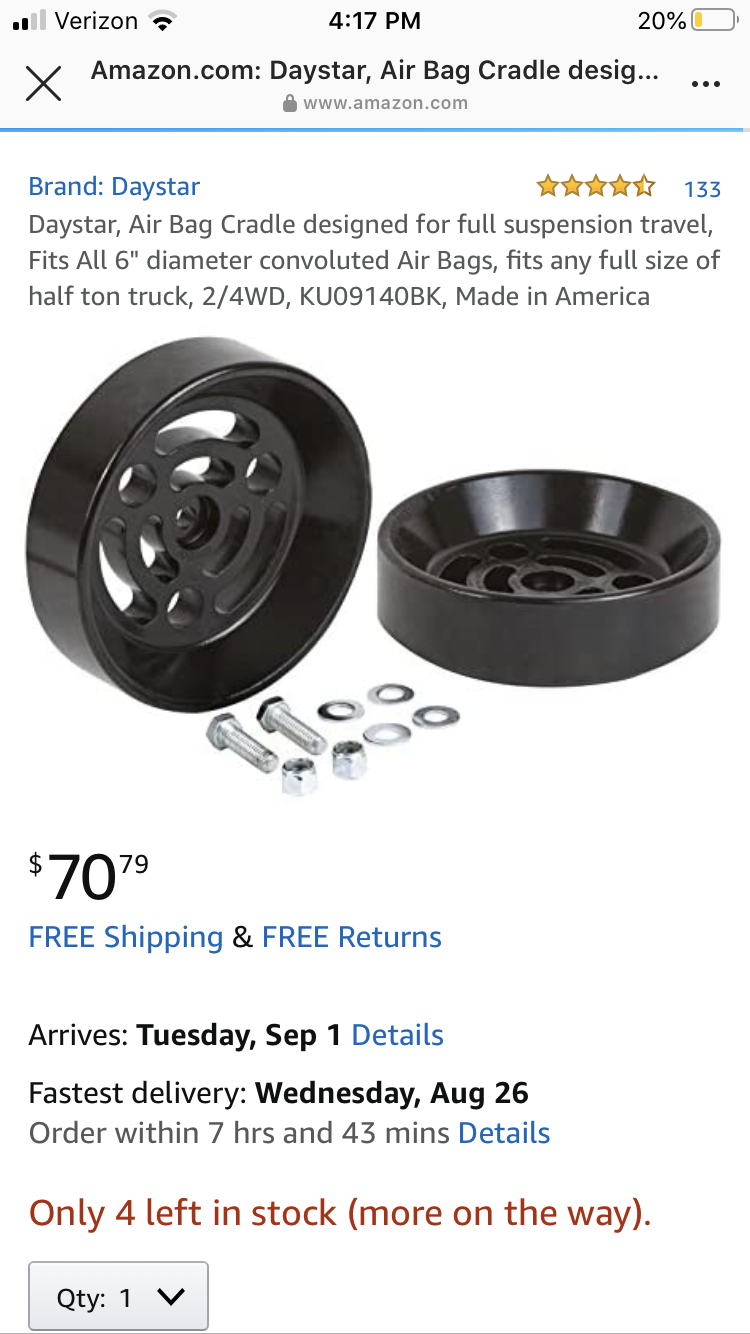
What I also purchased that's not above was the mount spacers. These are pretty universal and depending on your set up, you will need a 2-4 inch spacer.
I ordered everything right before going on vacation so I didn't have time to install until after.
Might catch some flak for this but...
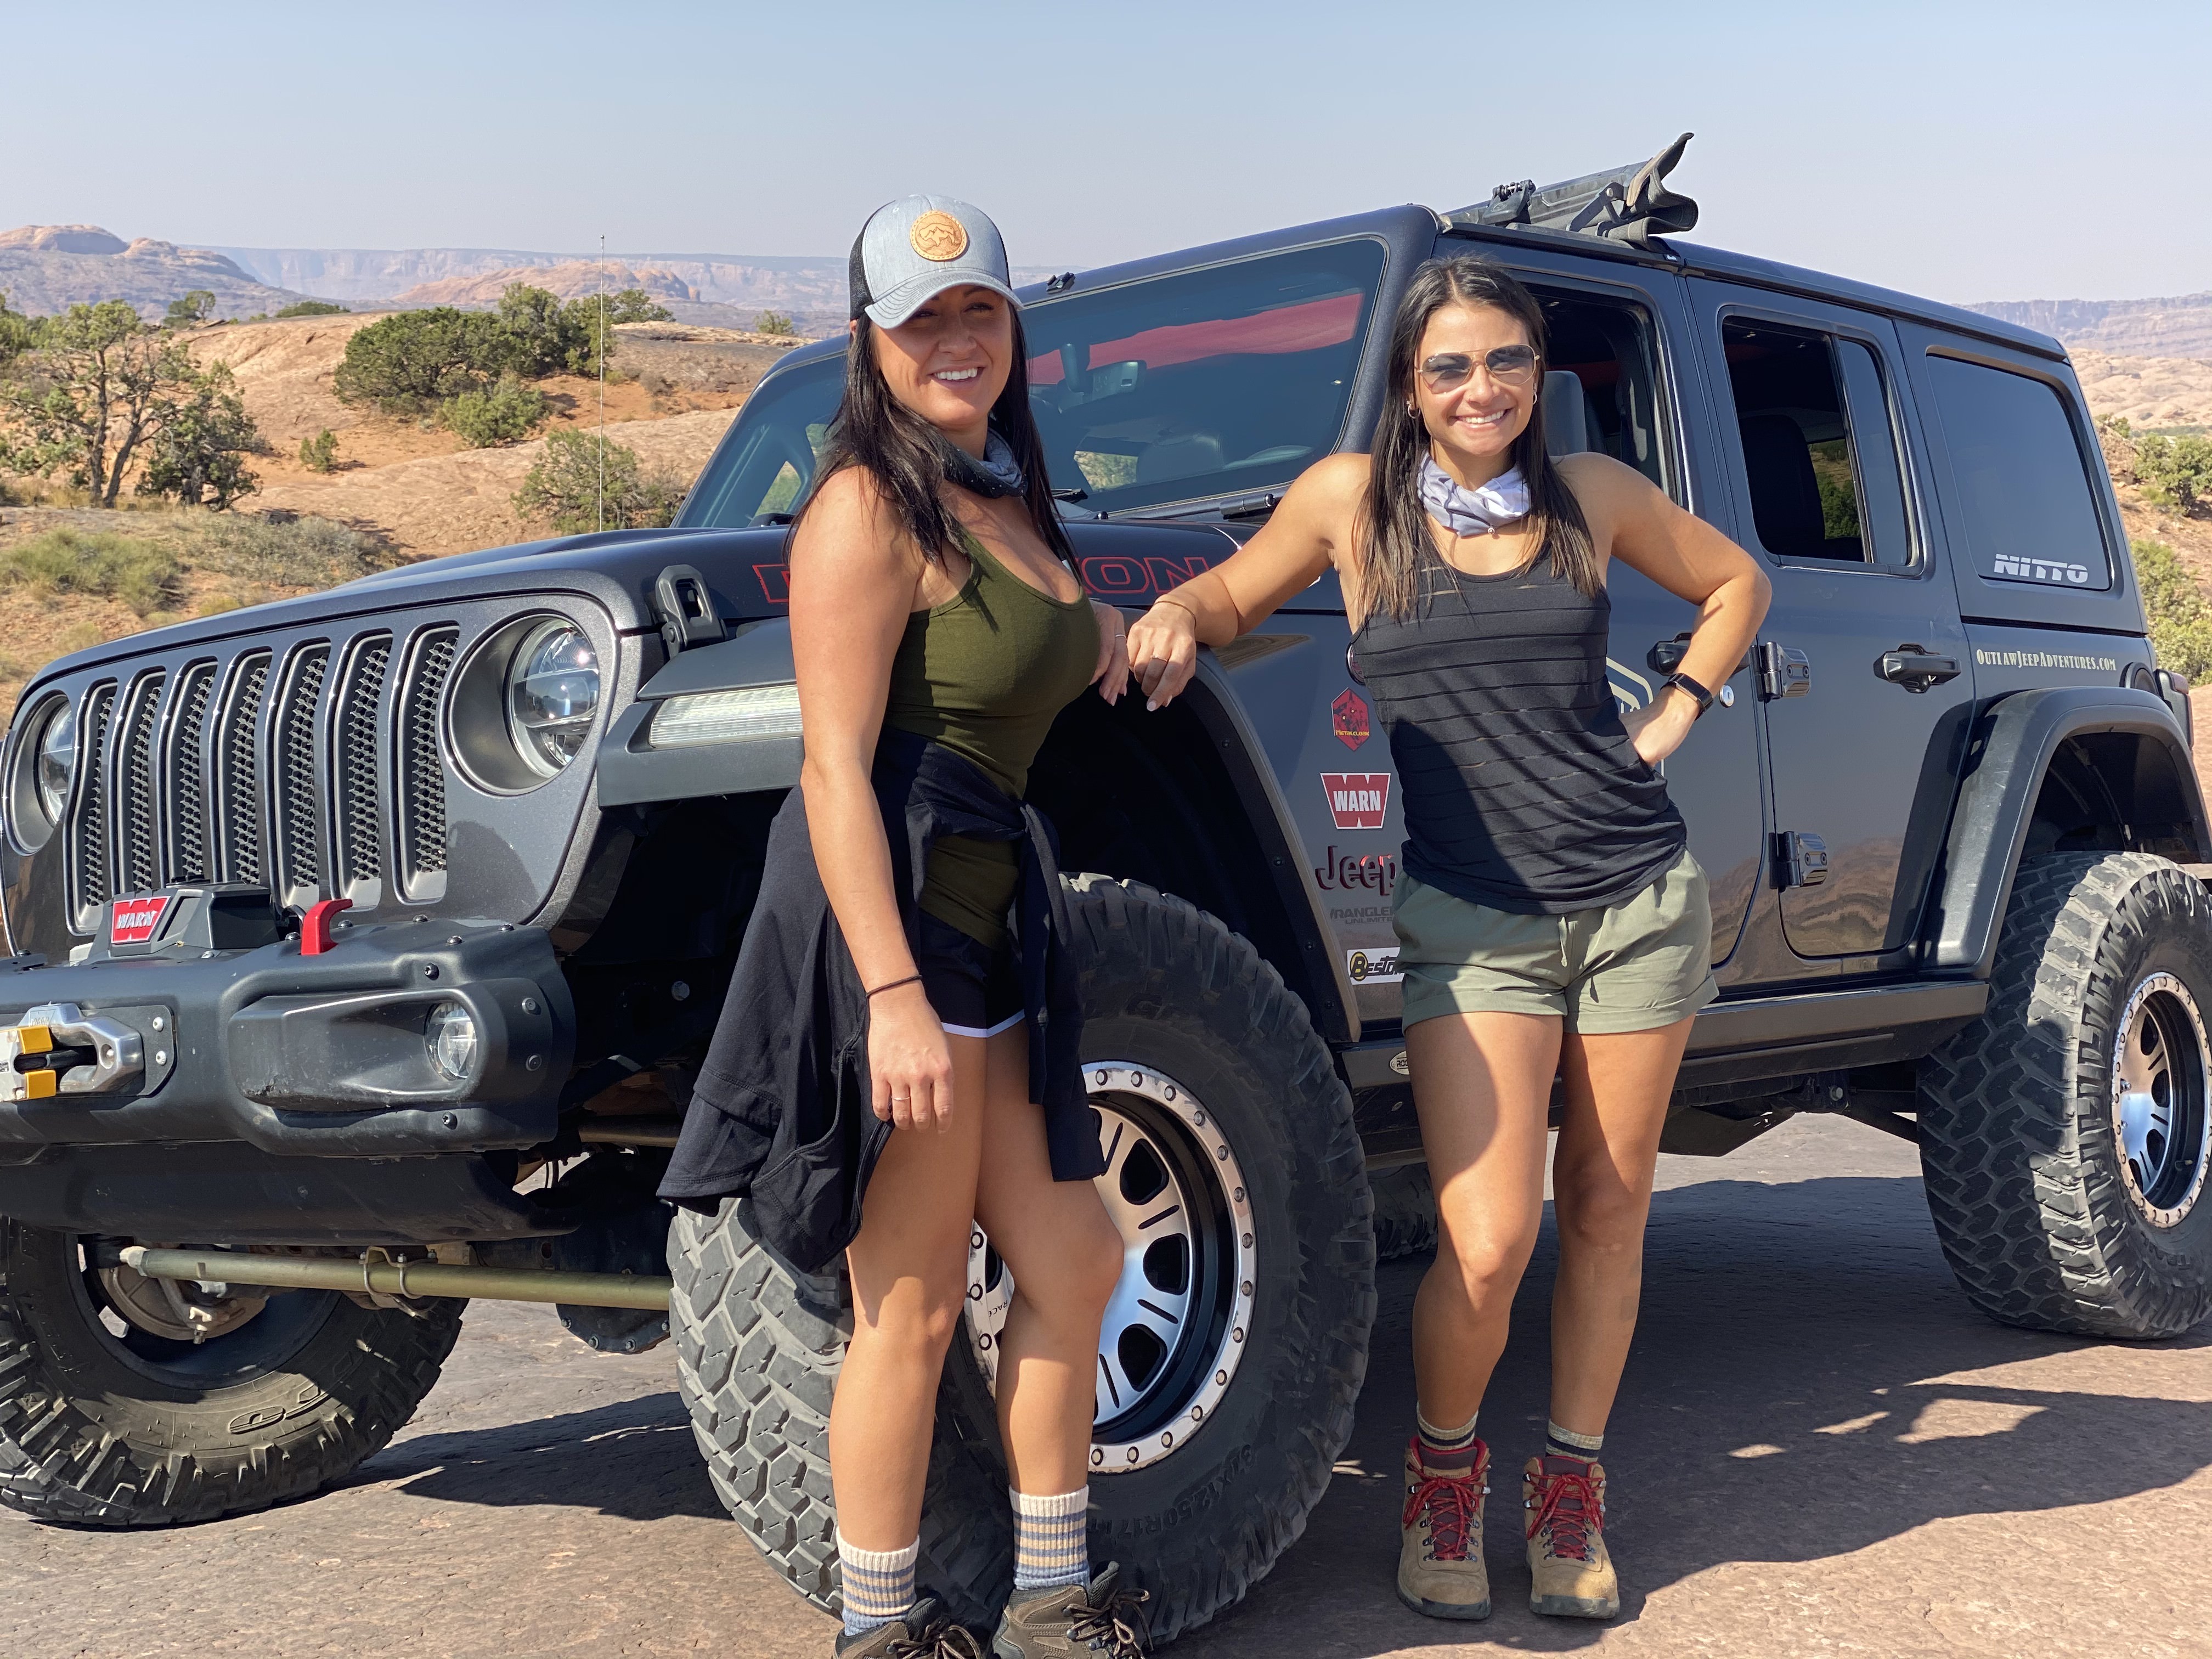
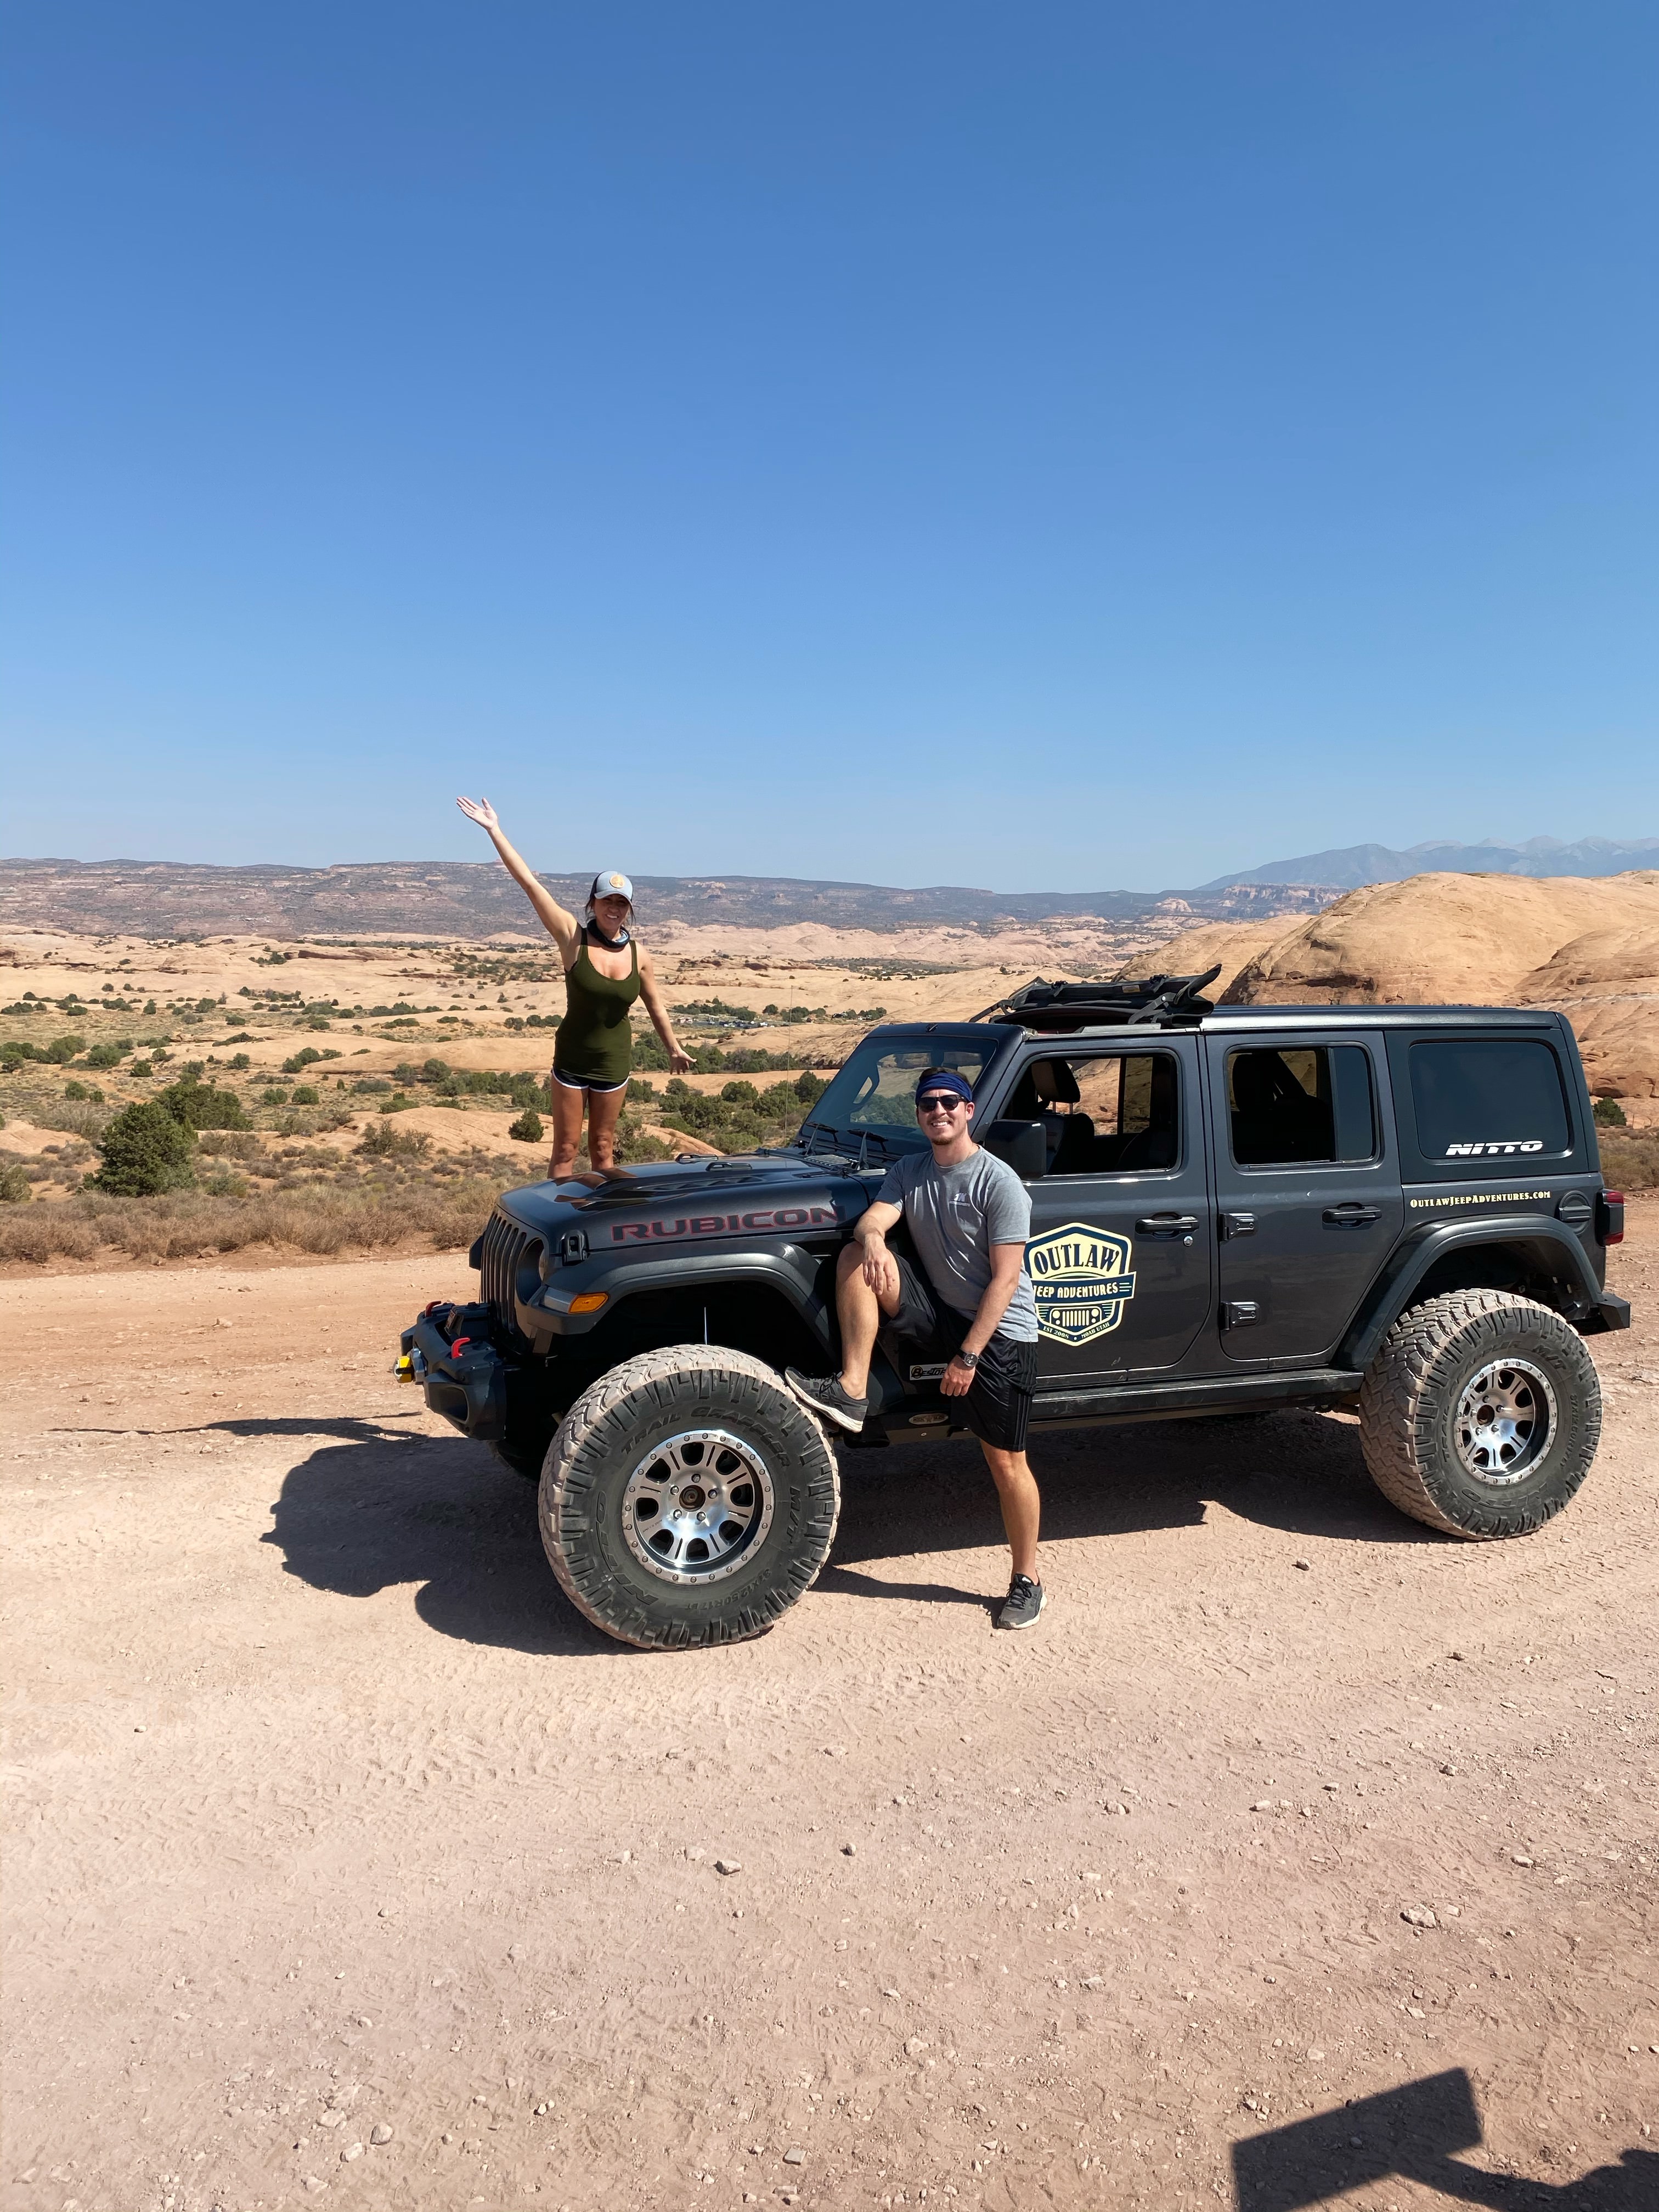
Part of our vacation was visiting Moab, UT which was beautiful. It was my first time in Moab, and being the adventurous type (like most of us in here), we rented a Jeep Rubicon to hit up the Hells Revenge trail. Moab offers a Hummer H1 tour that I looked into but it's a ride along, lame. And the other "self-drive" options were guided, so you had to follow the guy in front of you. Ours was a day rental that we could do pretty much whatever we wanted on our own albeit a bit more pricey.
All I can say is WOW!!! Aside from it being a Jeep (I know...), the trails and obstacles were WAY different than anything that we have in Florida. The scenery was beautiful, weather was comfortably cool and we all just had a great time. I wish we had something even remotely close to this in FL. The Jeep, if you're curious had a suspension lift and 37" tires, electronic locking front/rear diffs and even an electronic sway bar detachment button. Not gonna lie, it impressed me a bit. Doesn't make me want to get rid of the T though.
Anyways, back on topic...
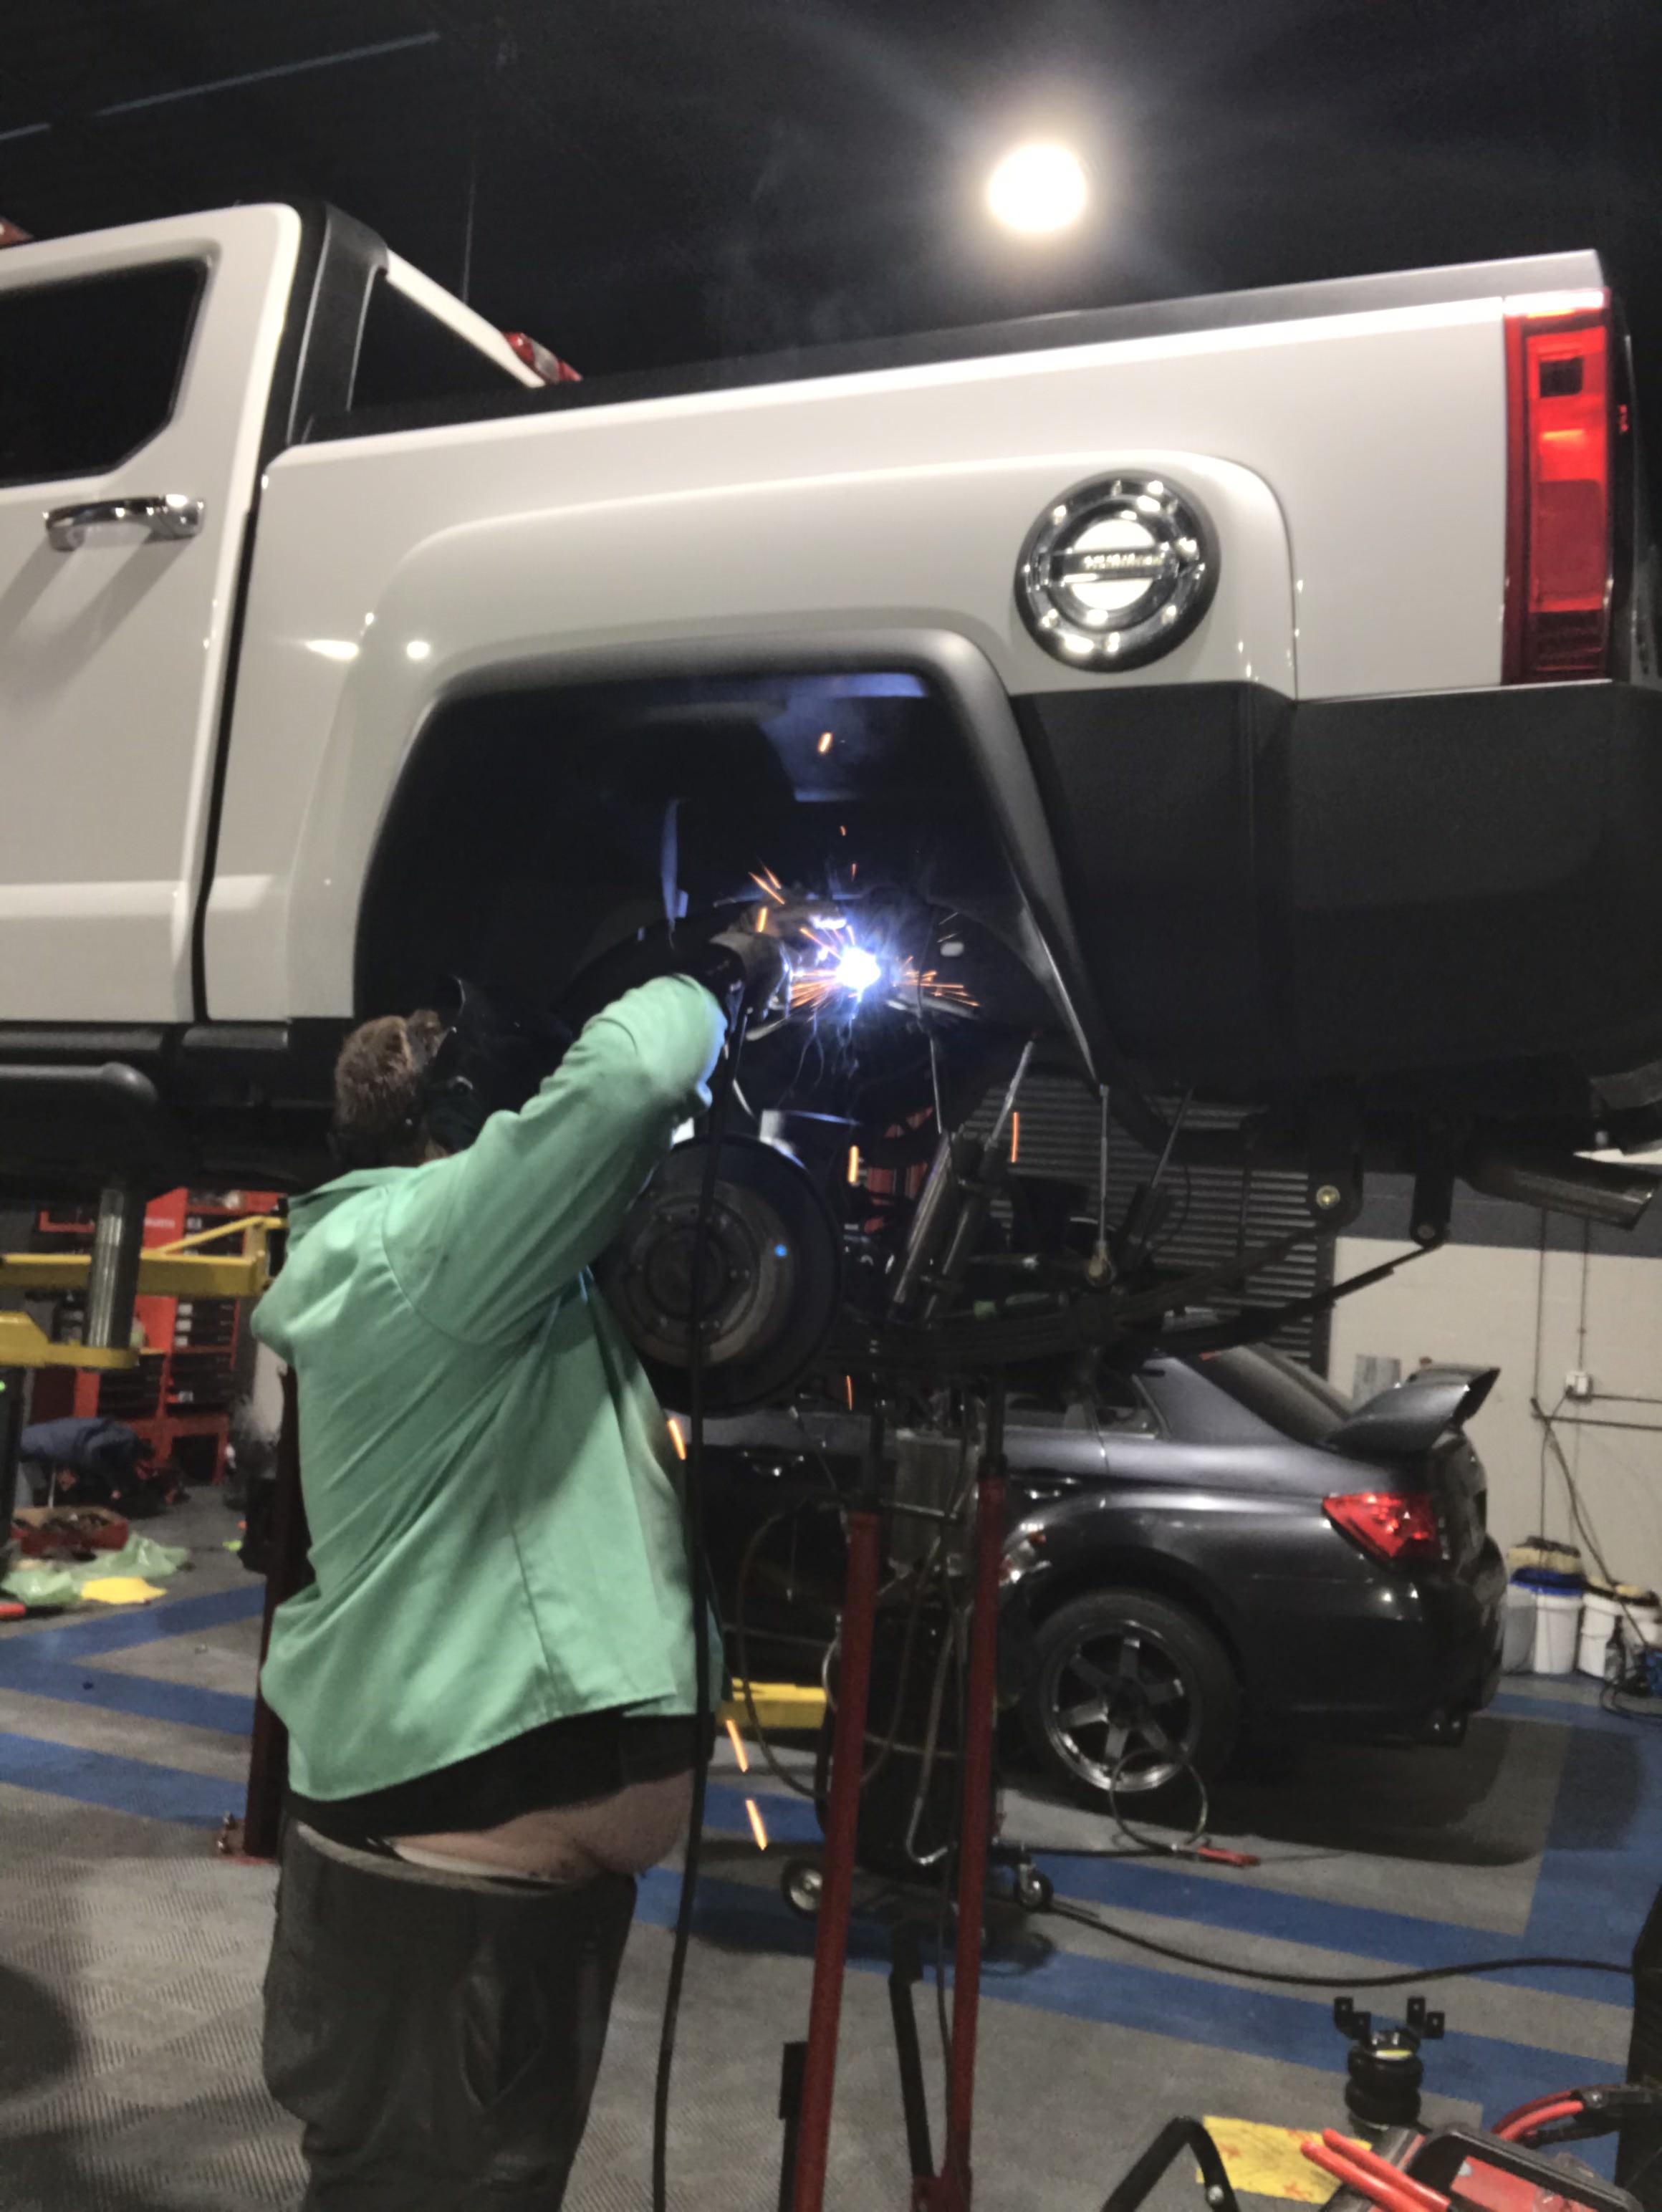
The Firestone airbag system will go in place of your bump stops. First thing to do is cut out the bump stop mounts and grind down the frame for welding. Once that is done, I mocked up the frame mounts to where I wanted them, tacked in place and welded outside face. After that, I heated them up with a propane torch. This is because the frame mounts that come in this kit are just slightly wider than the frame for the H3/H3T and meant for a Silverado frame I believe. Not a huge deal. After the mount has some decent heat in it, we took a BFH and coerced the mount to conform to the shape of our frames and welded the inside of the mounts. My buddy Will took care of the welding while I prepped the other side of the truck.
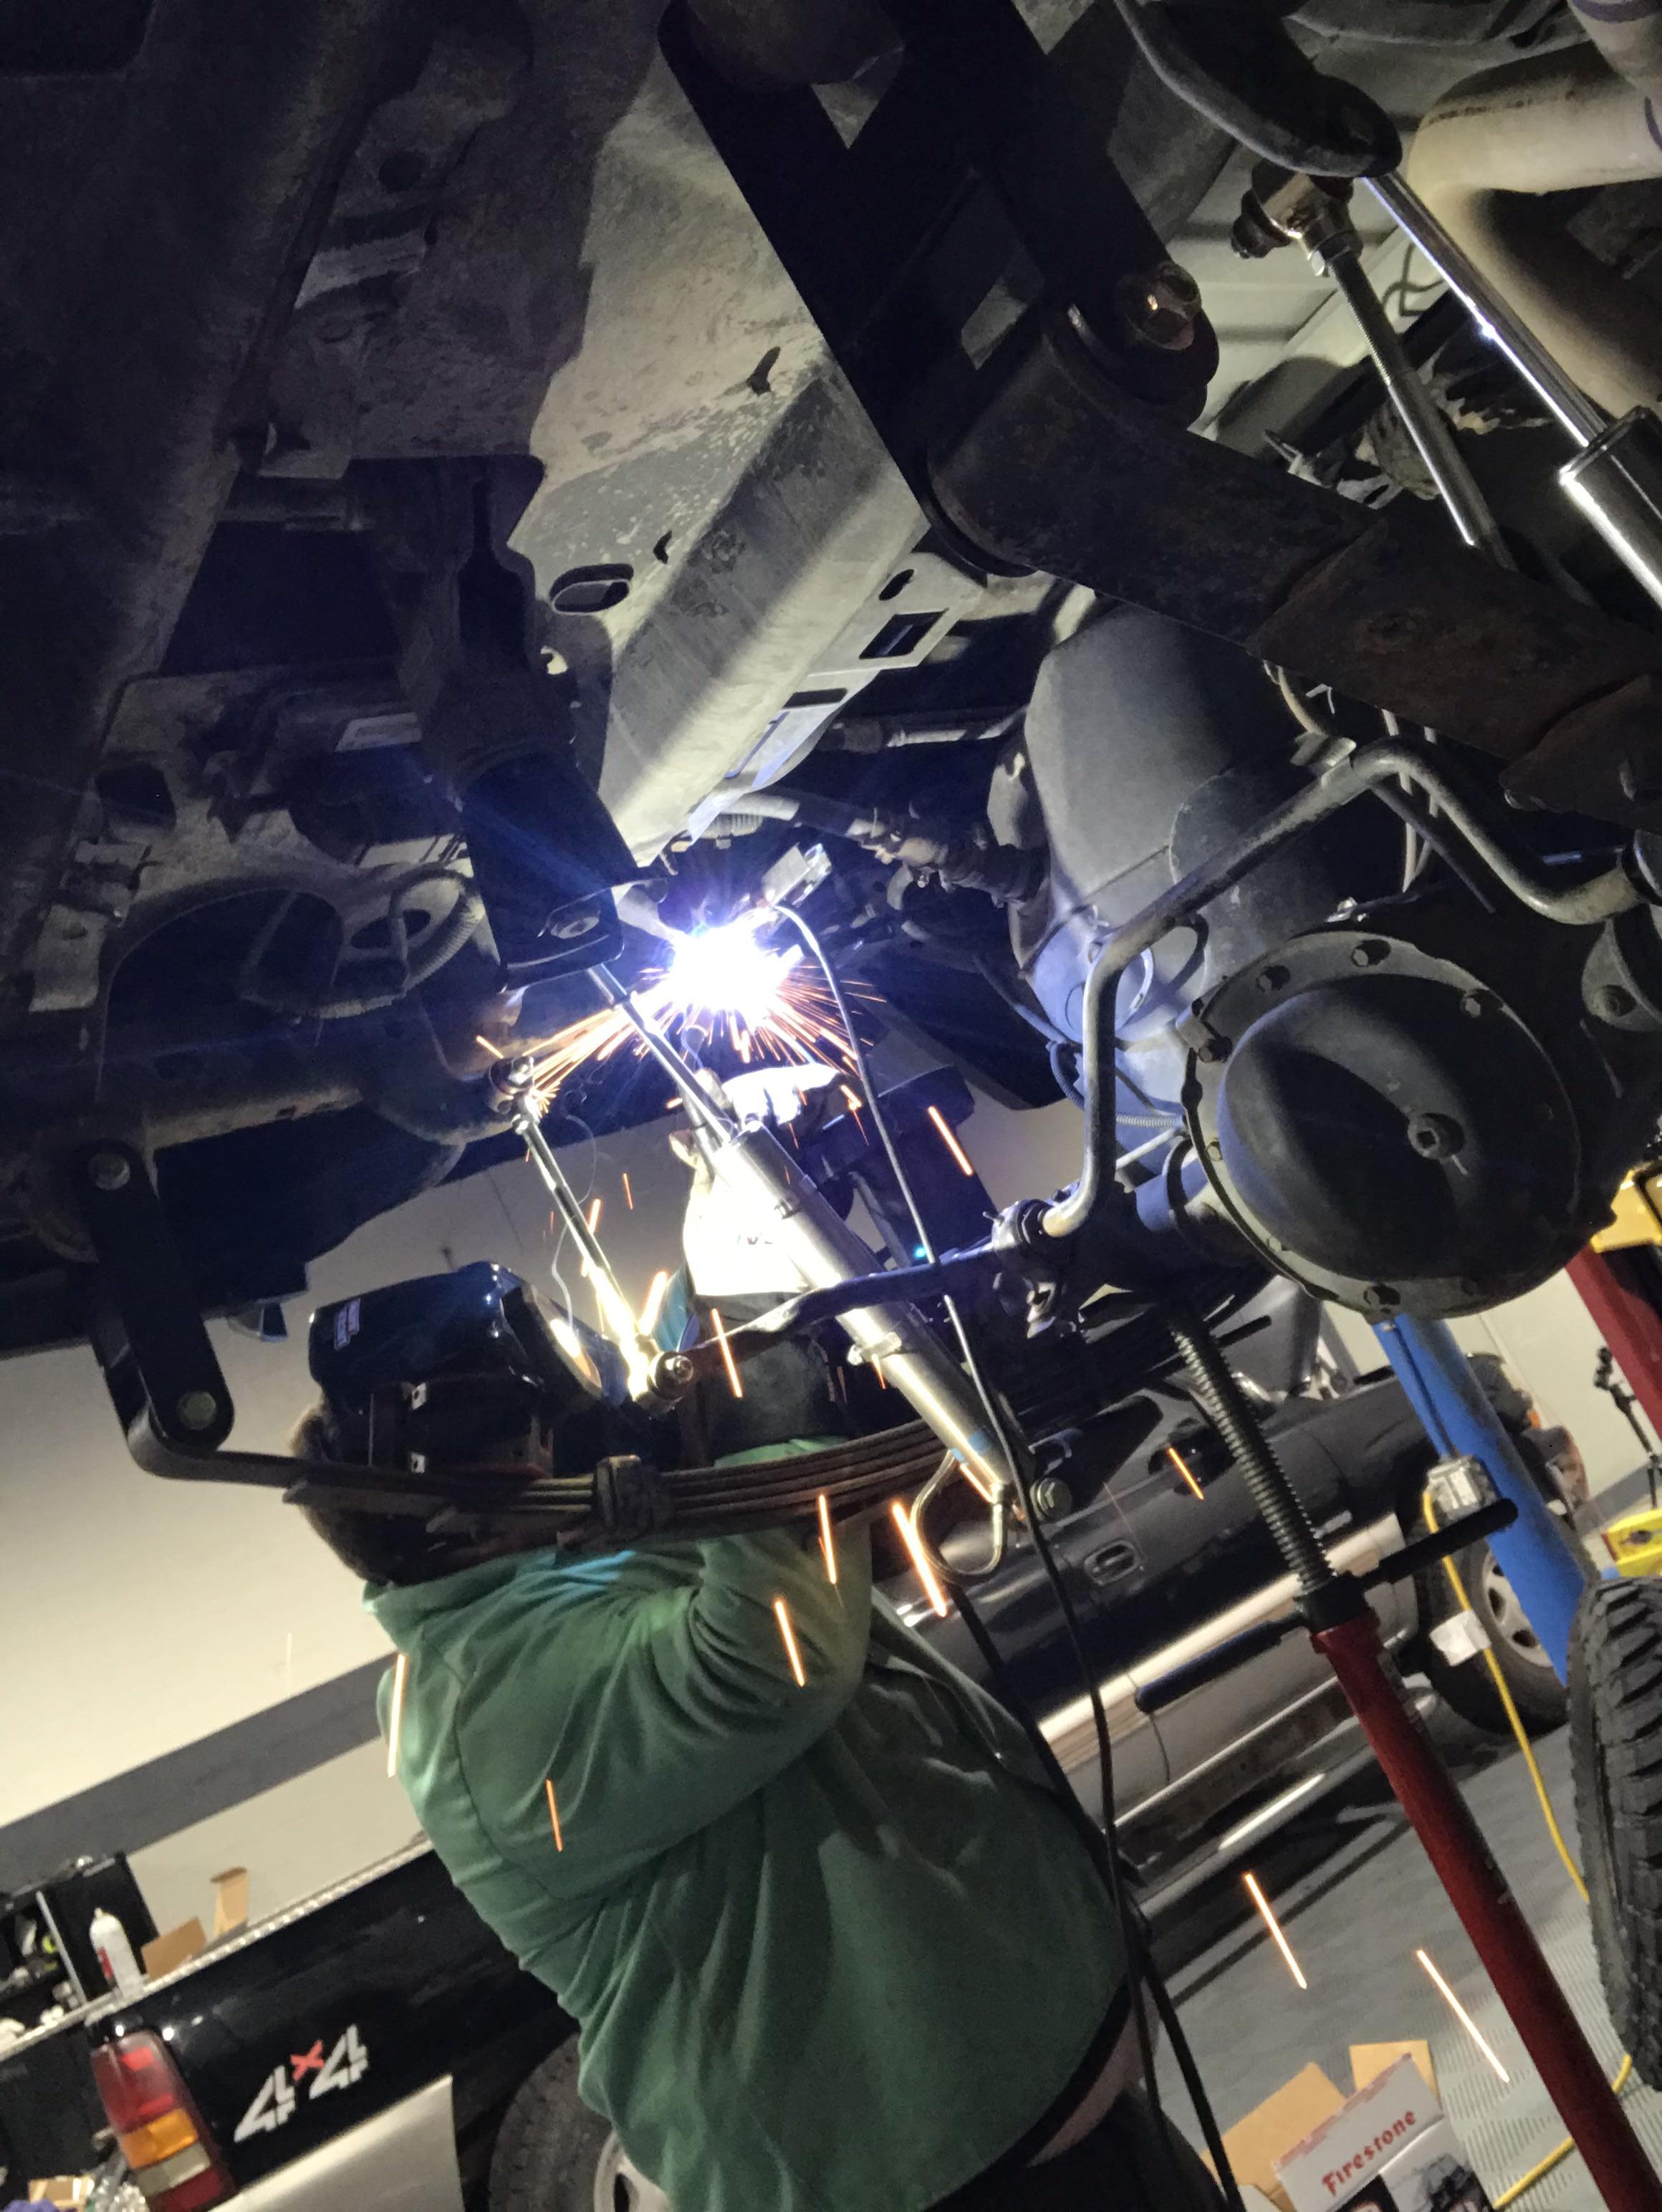
If you also do this, just be careful of the fuel lines on the drivers side. Here Will is welding the bottom and inside of the drivers side mount.
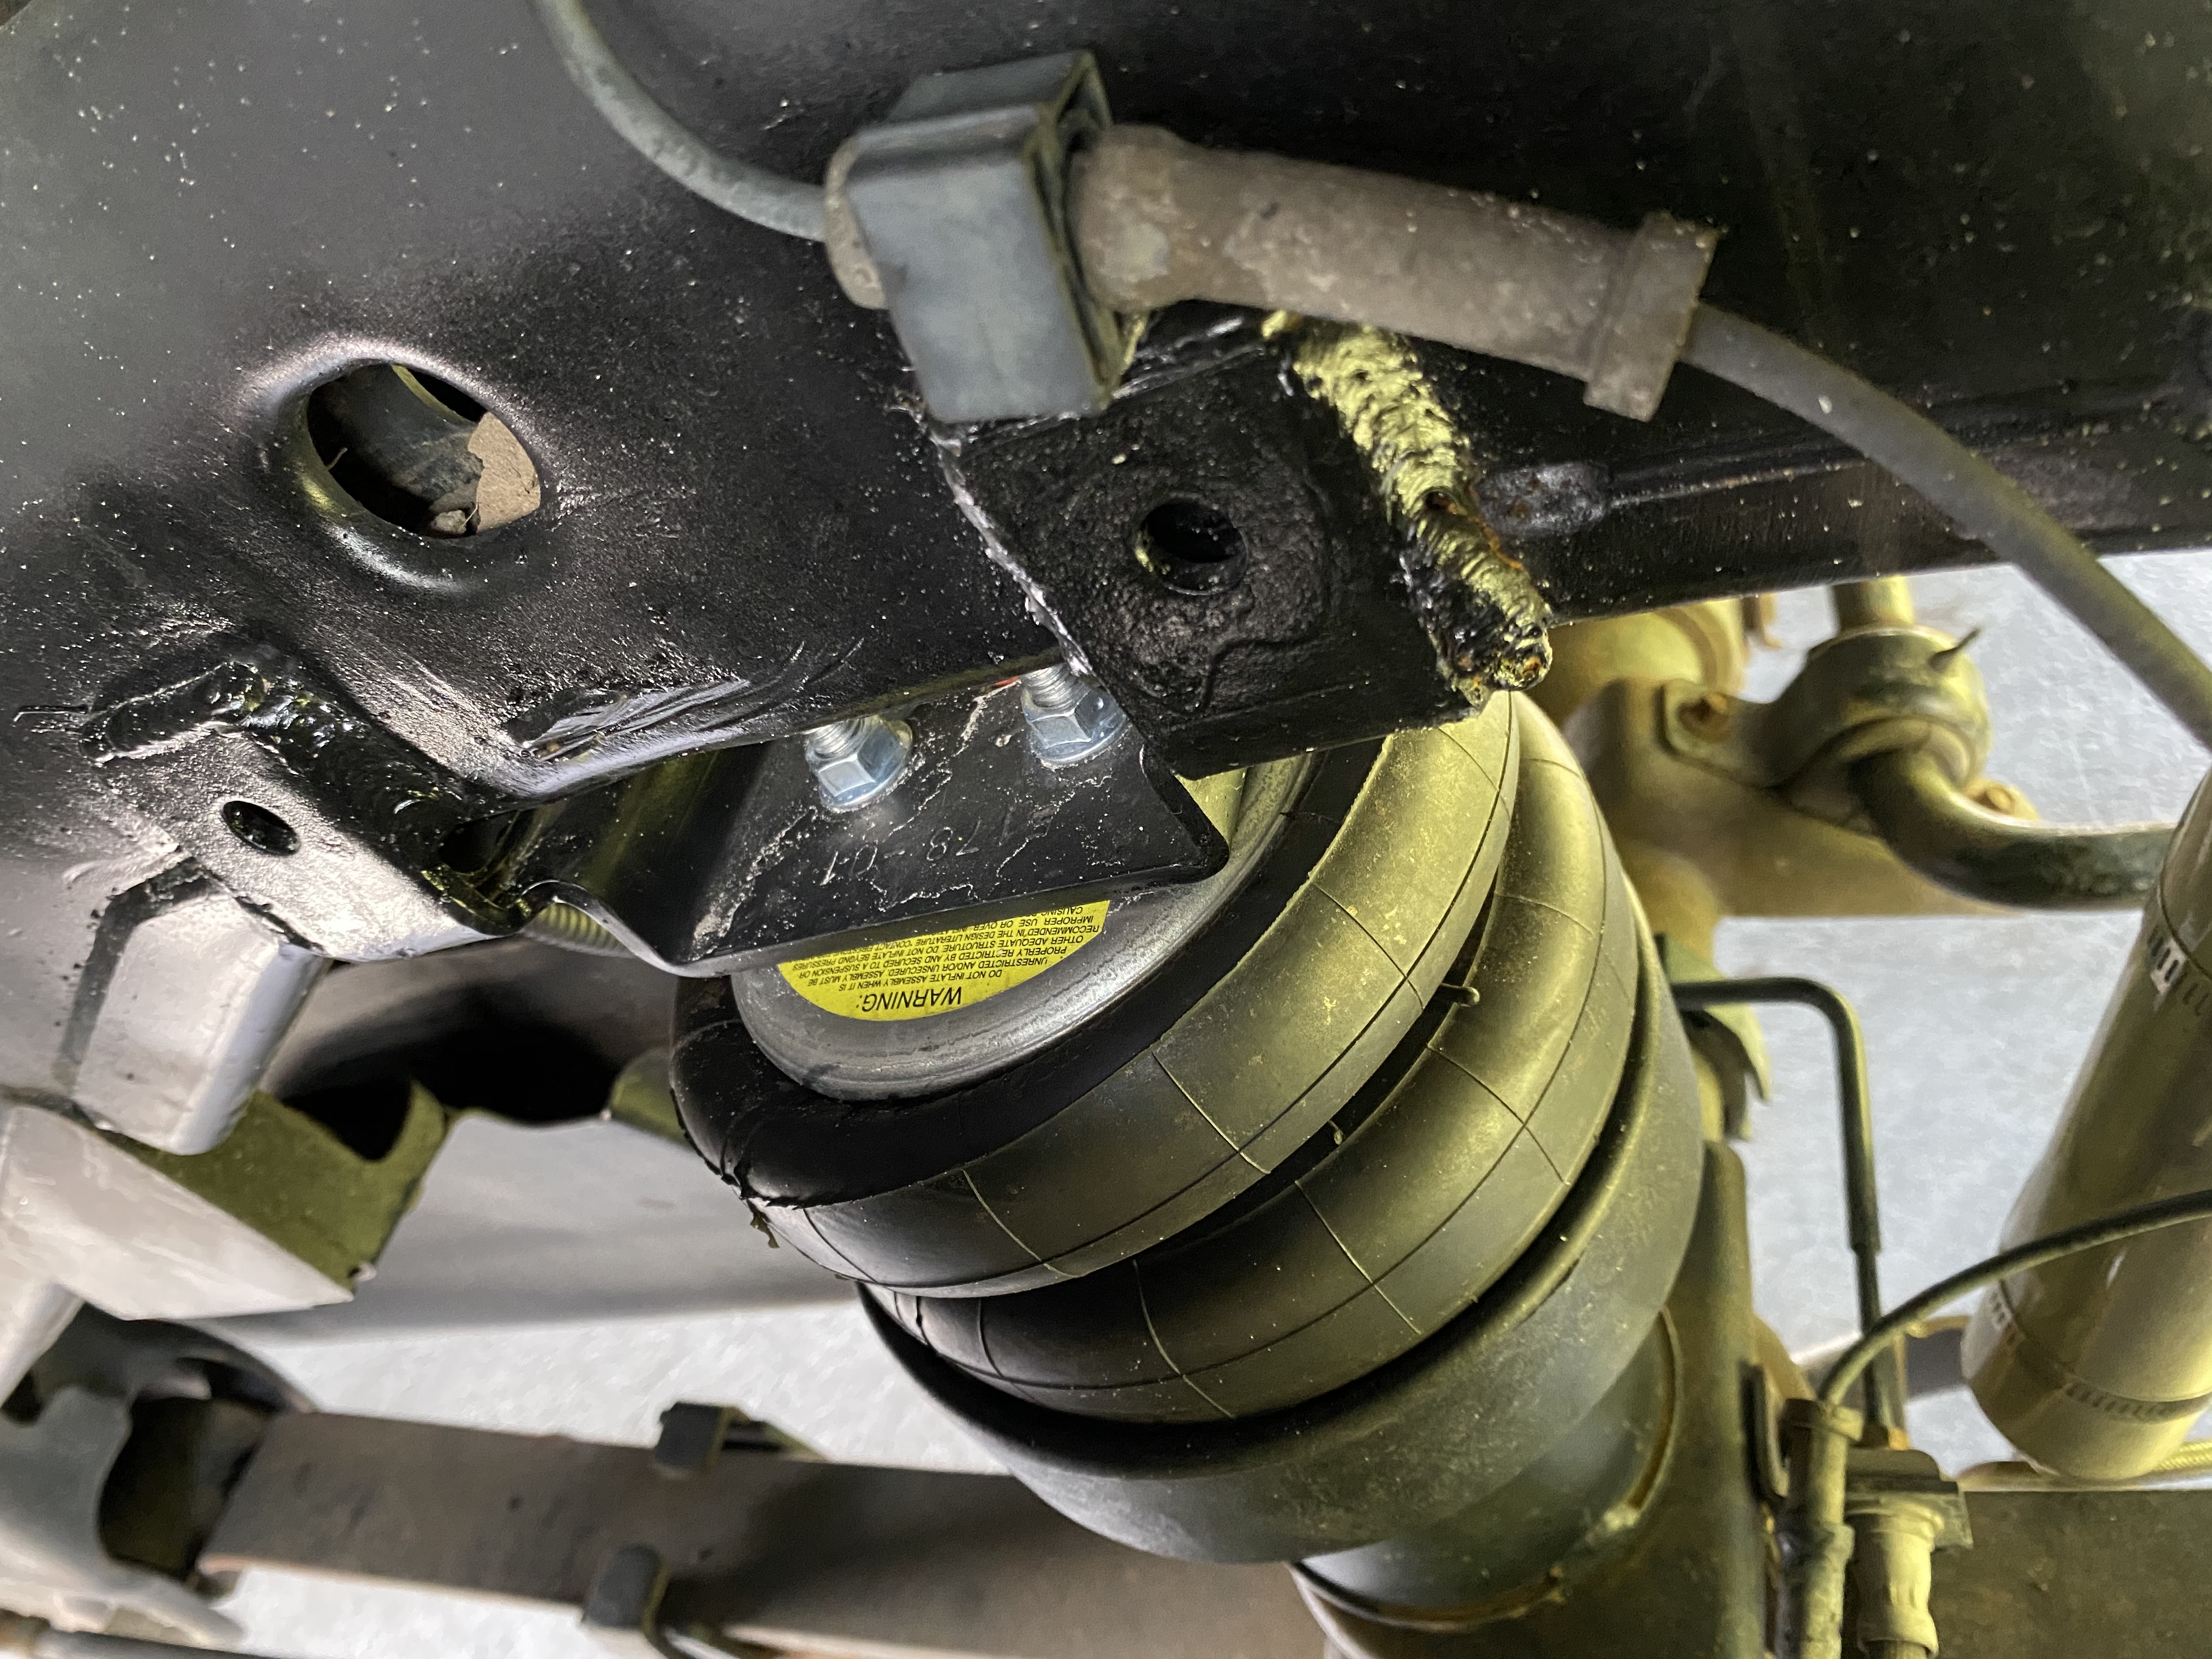
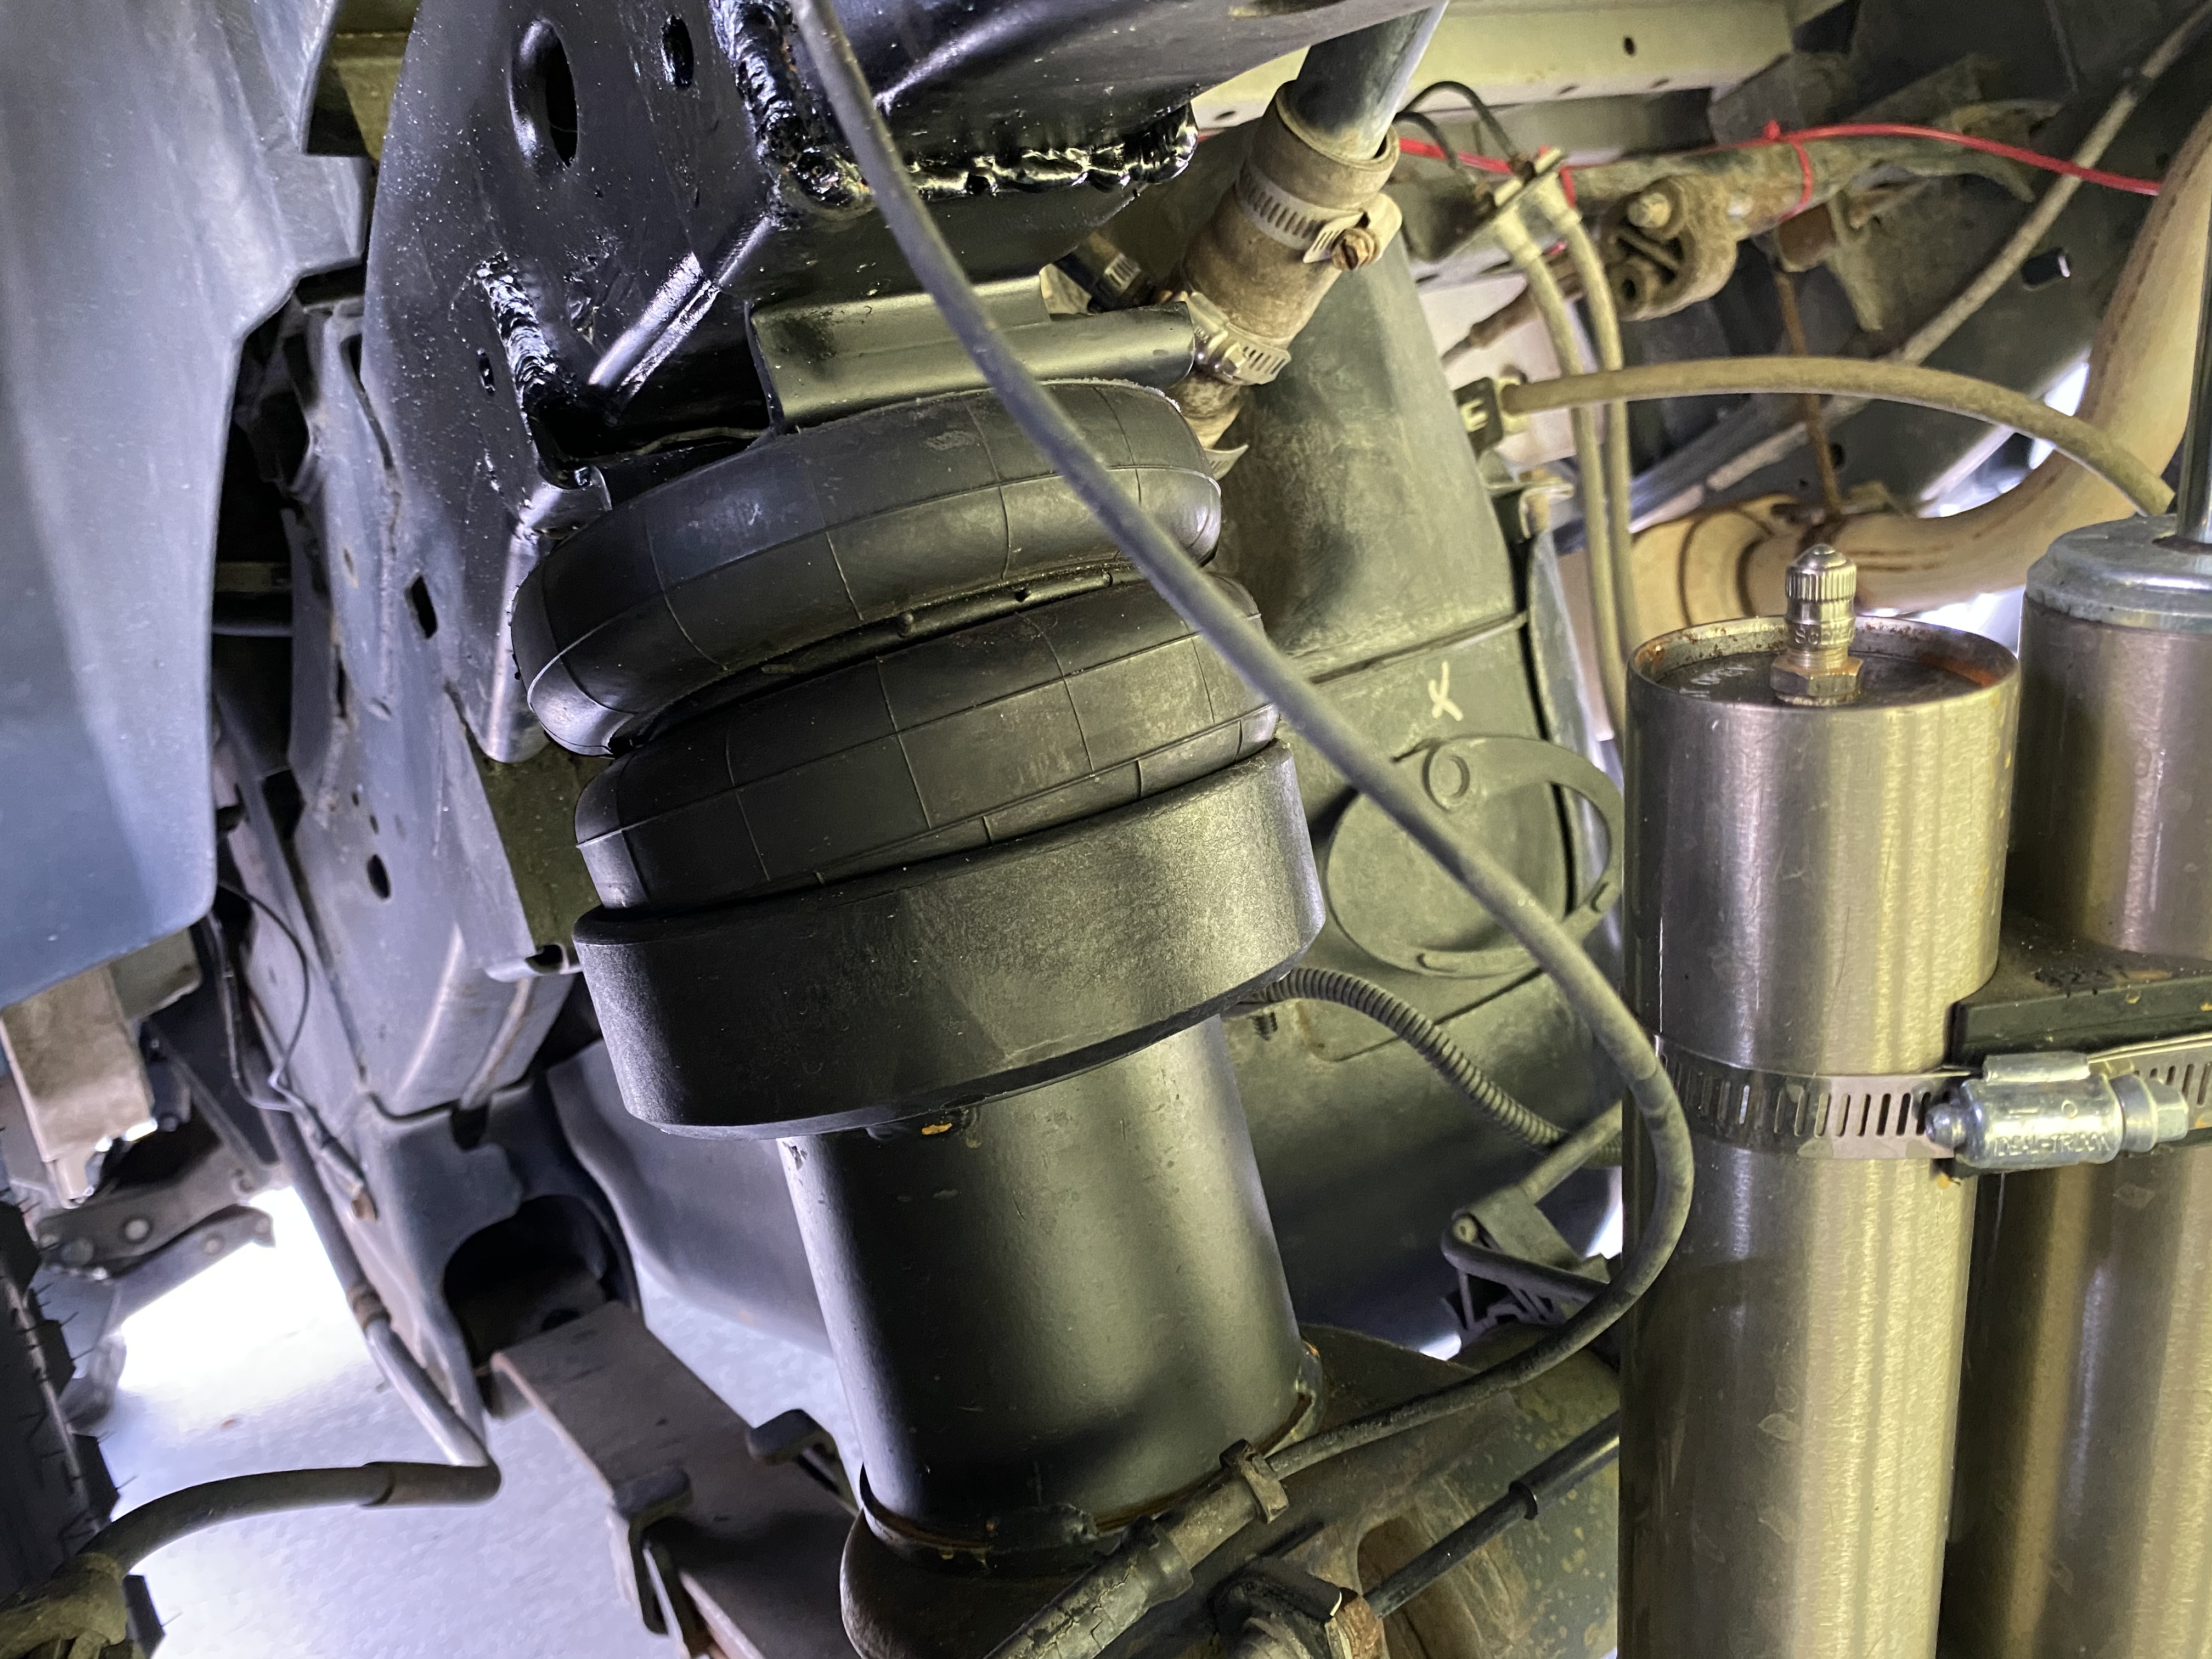
Driver side views after some chassis paint and install of the spacer, Daystar cup and airbag on top mount. You can see my red air line routed to the other bag (they are Tee'd together) and brake line not yet secured. This was a test of the system to identify any potential issues or line snags.
My recommendation for you if you do this is to go for the 3" spacer if you have around the same amount of lift that I do in the rear. Maybe even a 2" spacer for a stock rear. I bought the 4" spacer as recommended by Josh, and it works but I find that it is a bit too tall on my truck and will be switching to a 3". I want more compression space between the bottom of the mount and the top of the Daystar cup.
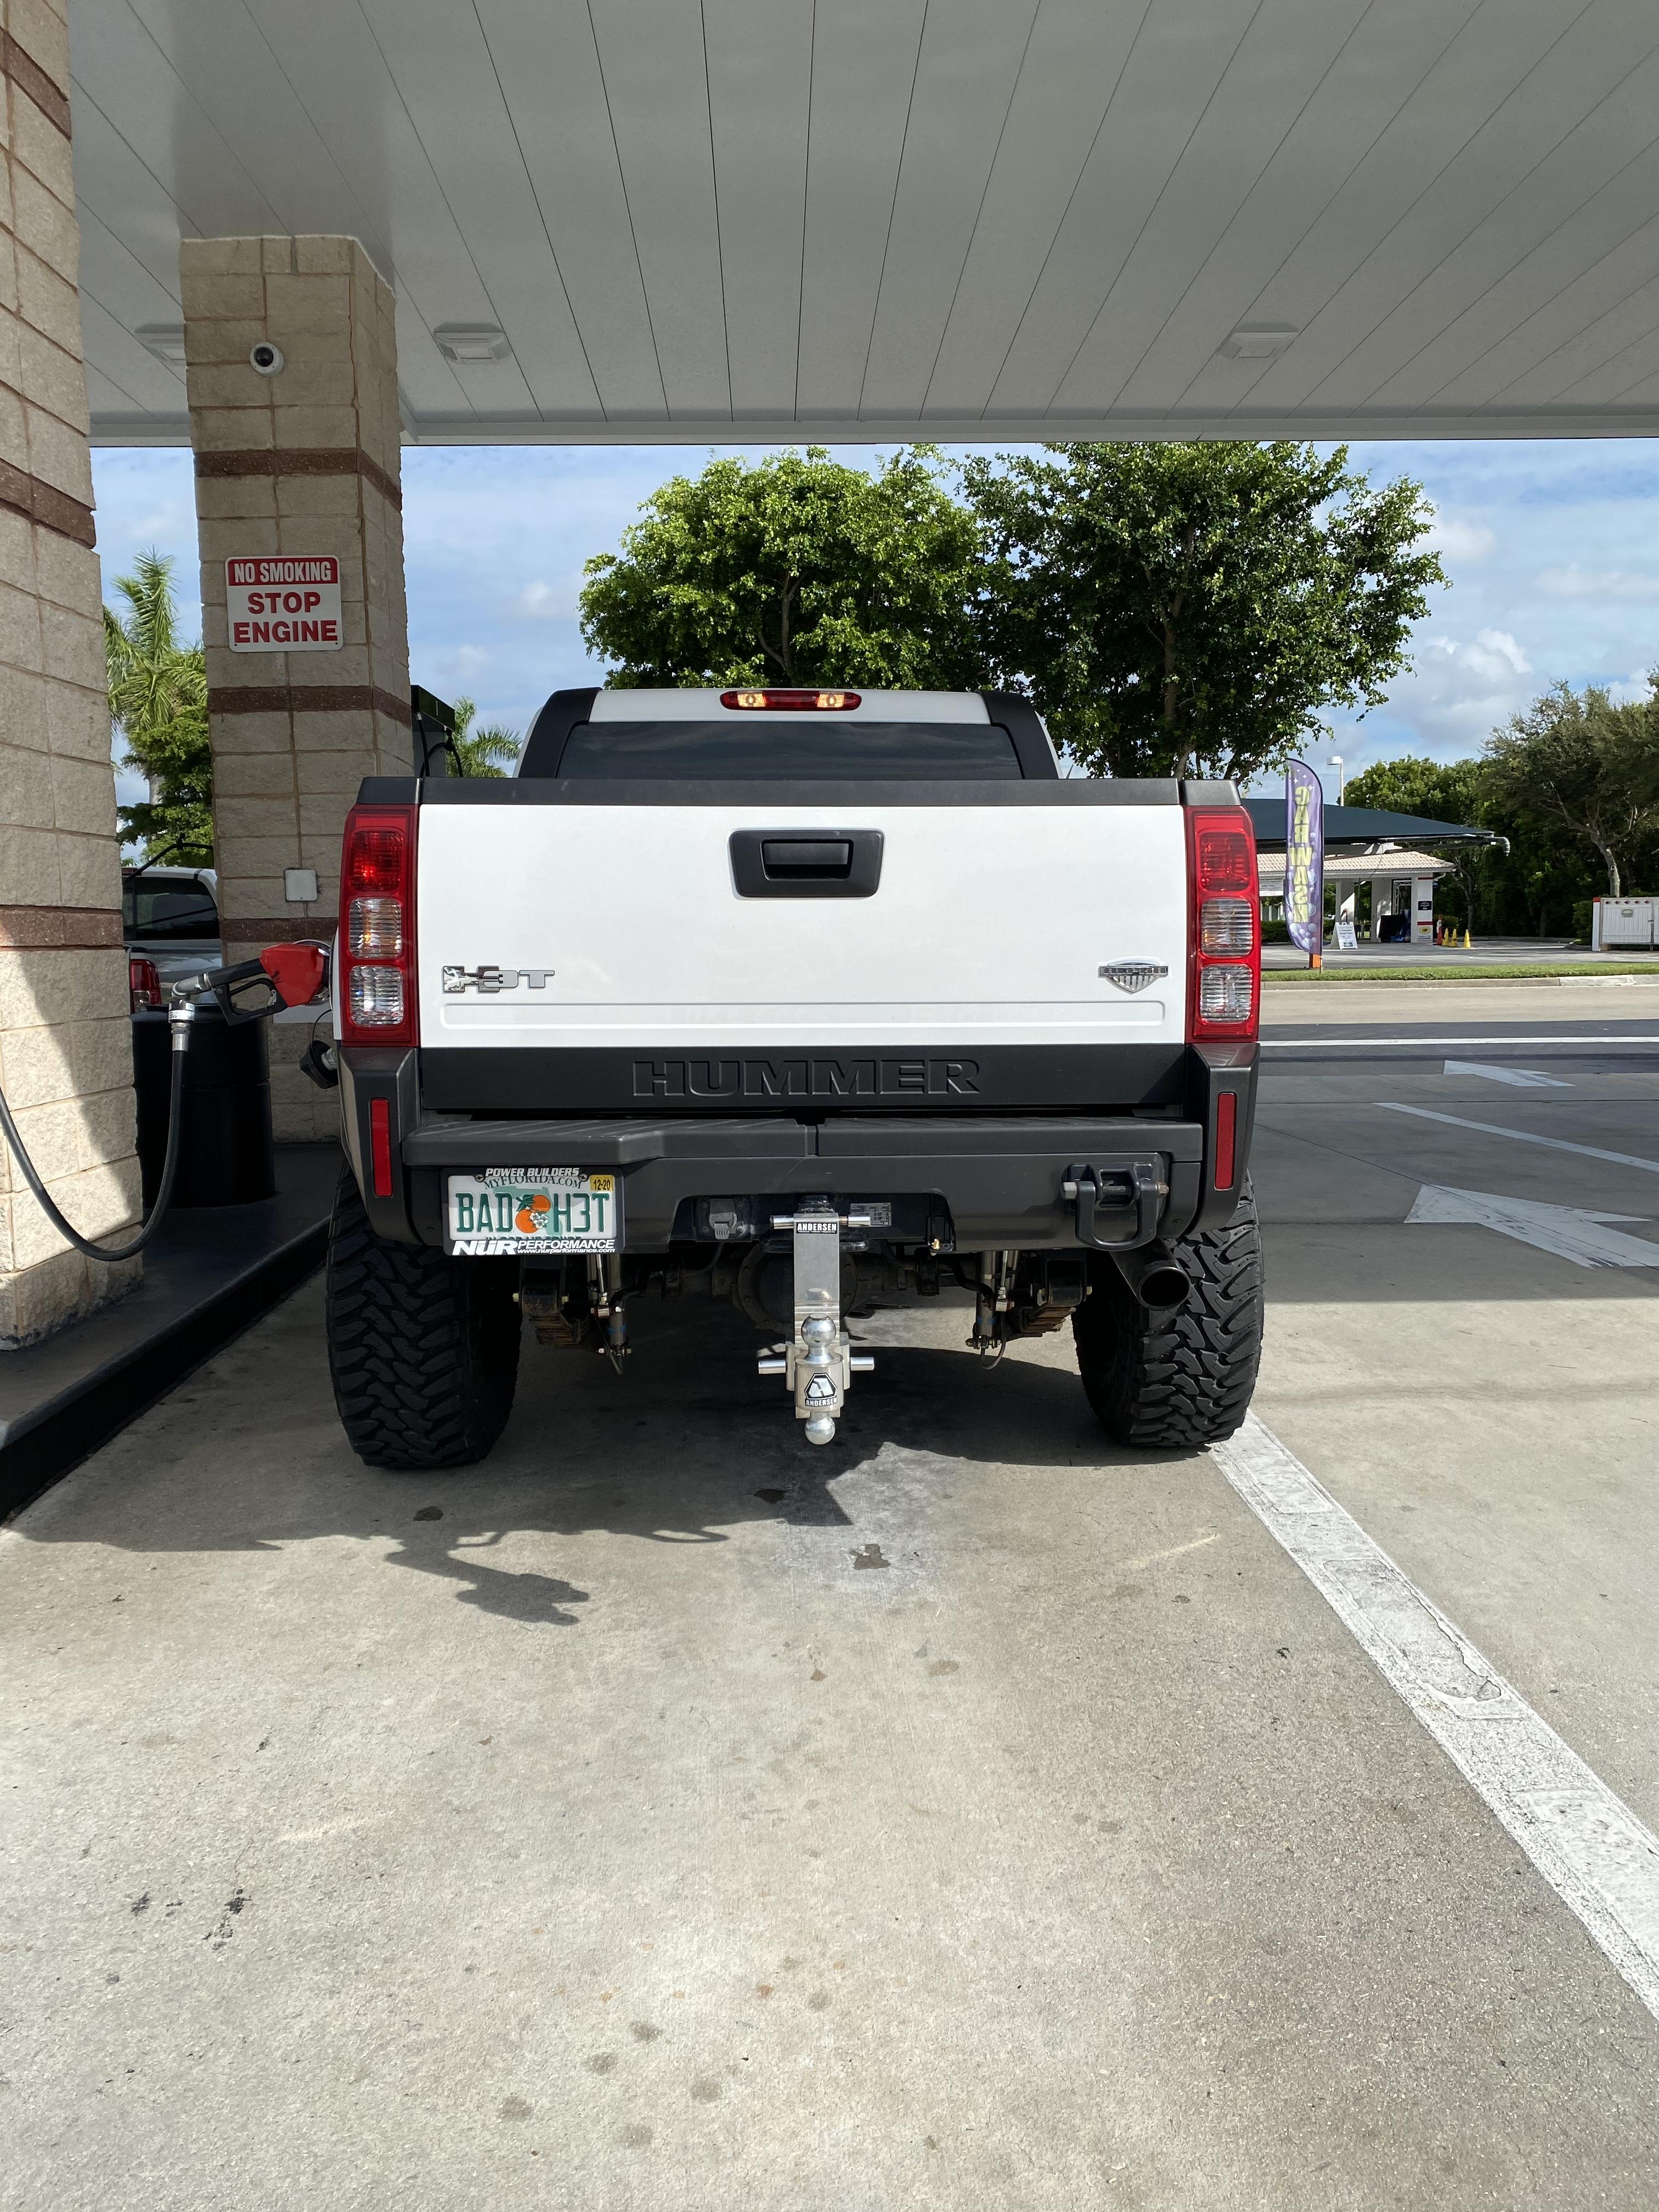
The amount the airbags can lift up the rear is impressive! Firestone doesn't recommend going over 100 PSI in the air bags, so in our test we aired them up to 80 lbs to see if any lines would be caught or stretched. To my amusement, the bags at 80 lbs lifted the rear 5 inches over it's static height with the lift already, haha like 6-7 inches of lift over stock roughly. Deff not needing that much, they seem to like about 25 lbs to level it.
I'm very happy with these and would recommend to both trail-goers (with Daystar cups) and people looking to level the rear when towing. Here's a shot of the rear after install with just 25 psi in the rear to level it out. Much better. I will also post towing pics when I try it out.
No more of that saggy butt look!
I'm sure this wouldn't have lasted too long at this angle.
After an alignment, I had the wheels & tires rebalanced. There was a noticeable vibration on the of the wheels, and the shop that balanced them before indicated that they were "chasing weights" on one of them. I.e., the balancer kept telling him to put more and more weight on the wheel to balance it.
So now that I had the front to the height I was finally comfortable with, I wanted to tackle the lack of lift on the rear. All that I did to the rear when I did the Rancho install above was the extended shackles and an add-a-leaf. And they both definitely lifted the rear some (I'd say maybe 2-2.5-ish inches from both), they weren't enough to match the front. If you just glanced at the truck you might not have noticed it, but if you stare for more than a second or two then you can see the subtle difference in height between the front and rear. And this would probably be even more pronounced when towing the race car or anything with a bit of tongue weight.
The solution came from my buddy Joshua Gostomski, a fellow H3T enthusiast that some of you know, who suggested I run the Firestone airbags in combination of the Daystar cups. Not only will this be able to lift the rear the additional ~1.5-2" that was missing, but it would also be able to level the rear when towing AND have the off-road benefit of not being mounted to both the leaf spring and frame. By only being mounted on the frame, it allows the rear to articulate and not pull up or push down on the axle when going over obstacles. I put pictures of what I used below
What I also purchased that's not above was the mount spacers. These are pretty universal and depending on your set up, you will need a 2-4 inch spacer.
I ordered everything right before going on vacation so I didn't have time to install until after.
Might catch some flak for this but...
Part of our vacation was visiting Moab, UT which was beautiful. It was my first time in Moab, and being the adventurous type (like most of us in here), we rented a Jeep Rubicon to hit up the Hells Revenge trail. Moab offers a Hummer H1 tour that I looked into but it's a ride along, lame. And the other "self-drive" options were guided, so you had to follow the guy in front of you. Ours was a day rental that we could do pretty much whatever we wanted on our own albeit a bit more pricey.
All I can say is WOW!!! Aside from it being a Jeep (I know...), the trails and obstacles were WAY different than anything that we have in Florida. The scenery was beautiful, weather was comfortably cool and we all just had a great time. I wish we had something even remotely close to this in FL. The Jeep, if you're curious had a suspension lift and 37" tires, electronic locking front/rear diffs and even an electronic sway bar detachment button. Not gonna lie, it impressed me a bit. Doesn't make me want to get rid of the T though.
Anyways, back on topic...
The Firestone airbag system will go in place of your bump stops. First thing to do is cut out the bump stop mounts and grind down the frame for welding. Once that is done, I mocked up the frame mounts to where I wanted them, tacked in place and welded outside face. After that, I heated them up with a propane torch. This is because the frame mounts that come in this kit are just slightly wider than the frame for the H3/H3T and meant for a Silverado frame I believe. Not a huge deal. After the mount has some decent heat in it, we took a BFH and coerced the mount to conform to the shape of our frames and welded the inside of the mounts. My buddy Will took care of the welding while I prepped the other side of the truck.
If you also do this, just be careful of the fuel lines on the drivers side. Here Will is welding the bottom and inside of the drivers side mount.
Driver side views after some chassis paint and install of the spacer, Daystar cup and airbag on top mount. You can see my red air line routed to the other bag (they are Tee'd together) and brake line not yet secured. This was a test of the system to identify any potential issues or line snags.
My recommendation for you if you do this is to go for the 3" spacer if you have around the same amount of lift that I do in the rear. Maybe even a 2" spacer for a stock rear. I bought the 4" spacer as recommended by Josh, and it works but I find that it is a bit too tall on my truck and will be switching to a 3". I want more compression space between the bottom of the mount and the top of the Daystar cup.
The amount the airbags can lift up the rear is impressive! Firestone doesn't recommend going over 100 PSI in the air bags, so in our test we aired them up to 80 lbs to see if any lines would be caught or stretched. To my amusement, the bags at 80 lbs lifted the rear 5 inches over it's static height with the lift already, haha like 6-7 inches of lift over stock roughly. Deff not needing that much, they seem to like about 25 lbs to level it.
I'm very happy with these and would recommend to both trail-goers (with Daystar cups) and people looking to level the rear when towing. Here's a shot of the rear after install with just 25 psi in the rear to level it out. Much better. I will also post towing pics when I try it out.
No more of that saggy butt look!

Senior Member
Joined: Jul 2012
Posts: 9,042
From: C-Town


Thread Starter
|
Senior Member
Joined: Mar 2012
Posts: 295
From: SW Florida
Super Moderator
Joined: Jul 2007
Posts: 13,111
From: Boat Town USA MI
So while I am at it, what about that ARP Cam Bolt? Staying tuned for that.

Thread Starter
|
Senior Member
Joined: Mar 2012
Posts: 295
From: SW Florida
So the other day I was driving down the road and I thought.......... hey, Gpcalero had pics in that thread with the oil pump removed and seems like the oil pan still in place. I though I should ask how the oil pump came off & went back on with the pan on. I know it can be done, but it is a meticulous PITA to get that oil pick up tube bolt out and then back in. Did you loosen the pan, or just fight with the pick up bolt???? This would be good to know info.
So while I am at it, what about that ARP Cam Bolt? Staying tuned for that.
So while I am at it, what about that ARP Cam Bolt? Staying tuned for that.
Hahahaha great questions!!

Easy one first... I can't remember why I put that there because that isn't the "cam bolt" at all! lmao. I either forgot what I was going to say after, or didn't think because that is the ARP harmonic balancer bolt! I might've tried to introduce a future reason to speak about the change on the cam's 3 bolt holes vs. the stock cam with 1 hole, especially since I probably wrote both of those posts after installing everything lol. But again, our stock has a big single and aftermarket cams usually go with the 3-bolt style, so I had to switch to that way. Very easy, went with ARP bolts.
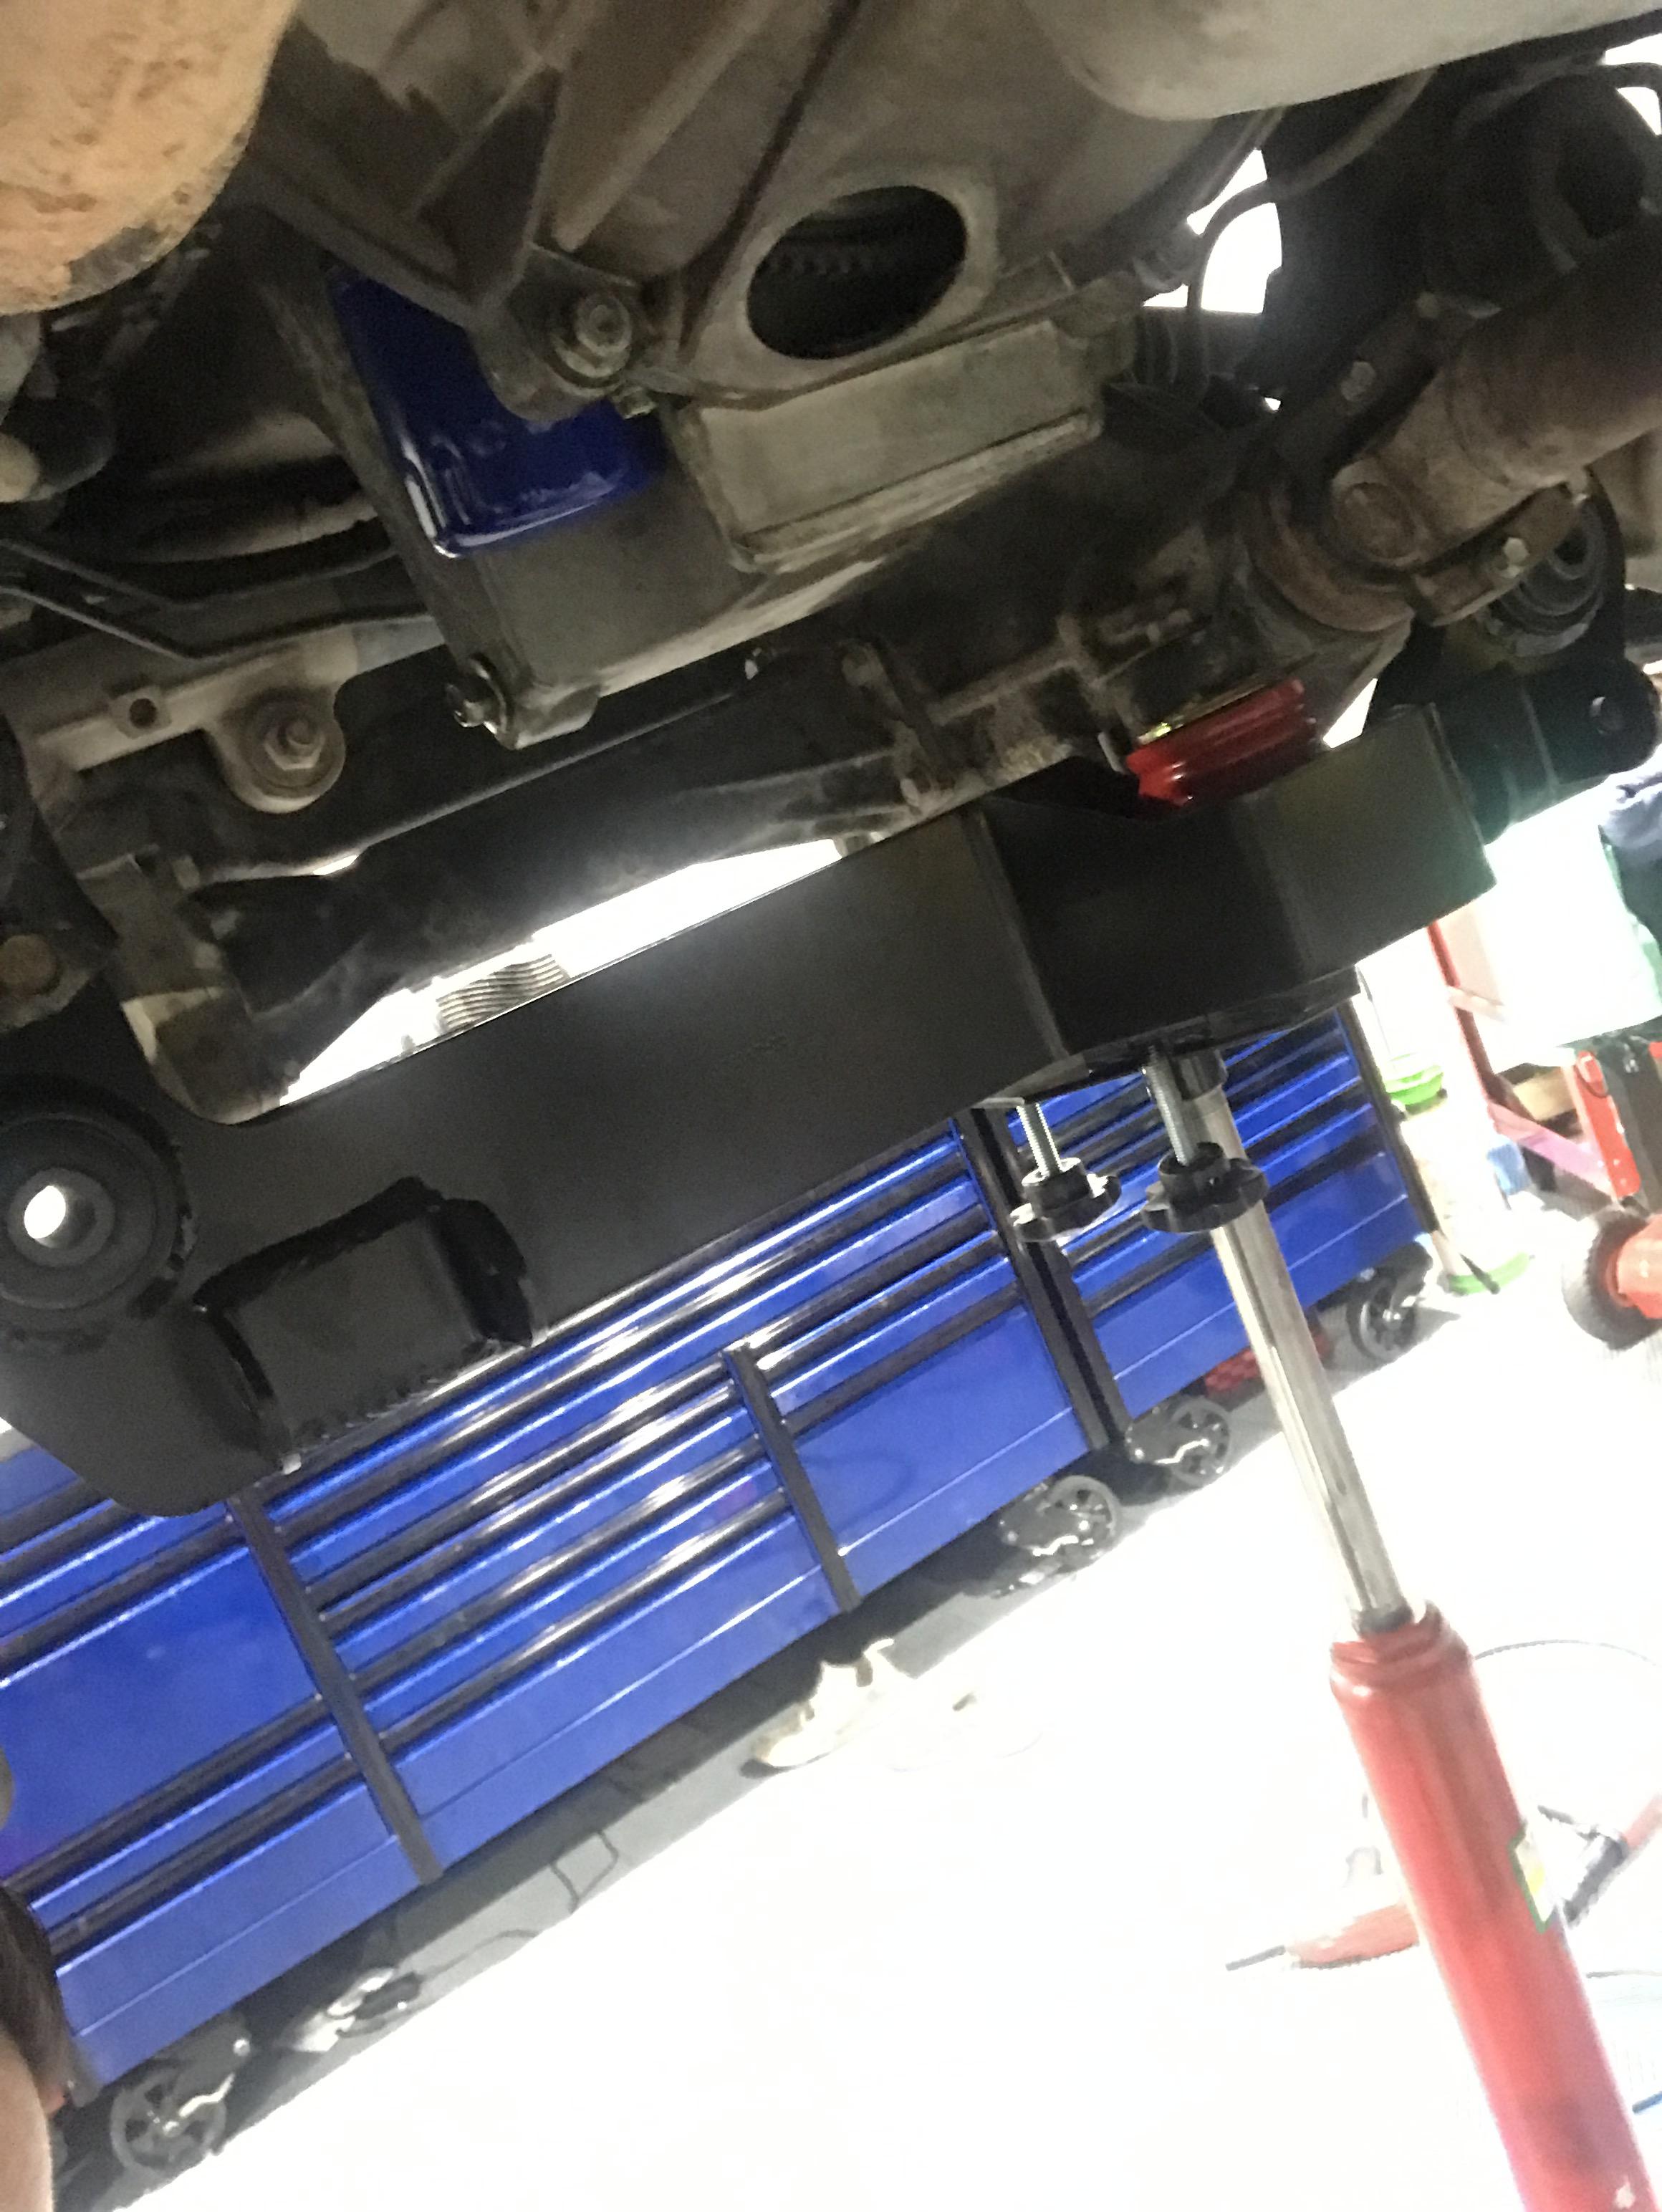
And the important one... when installing the cam, I did remove the oil pump during everything because I replaced the stock timing chain. Truck just hit 100k miles then so I didn't want to throw it back in since they are cheaper. And you are right, it is a PITA to get the oil pick up tube on and off with the pan in the way, so I went under the truck and looked to remove the pan to do so. Well... it's more of a PITA to remove the pan due to stuff being in the way of it (just look down there), so I ultimately just loosened the pan as much as I could, and worked it with the extra room. But as you can see in the photo, I was sure to not screw myself and put shop rags in place and used a magnet to be sure I didn't lose the pick up tube bolt down in the oil pan. I couldn't get the bolt out & back in place without the pan dropped down half an inch (which was all I could get it to move, if even that). Luckily, the oil pan gasket didn't leak on me after wrenching the bolts back.
Super Moderator
Joined: Jul 2007
Posts: 13,111
From: Boat Town USA MI
Yep, that is what I thought. GM could have put that bolt on the other side of the pickup tube and it would have been MUCH easier.
I was just bustin your chops on the "Cam Bolt" thing as I knew what you were talking about.
Thanks for the reply.
For all the I5 H3 guys out there, I think the situation with the I5 front cover off Oil Pump pick up tube bolt is similar, it can be done with the pan on/loose, but it is one frustratingly slow process. I recall somewhere somebody mentioned they did it. I would never try it with a hang over or too many cups of coffee.
I was just bustin your chops on the "Cam Bolt" thing as I knew what you were talking about.
Thanks for the reply.
For all the I5 H3 guys out there, I think the situation with the I5 front cover off Oil Pump pick up tube bolt is similar, it can be done with the pan on/loose, but it is one frustratingly slow process. I recall somewhere somebody mentioned they did it. I would never try it with a hang over or too many cups of coffee.