When you click on links to various merchants on this site and make a purchase, this can result in this site earning a commission. Affiliate programs and affiliations include, but are not limited to, the eBay Partner Network.
Yeah - I actually do not think that outer part is intended to be removable, ever. The only way to remove it is to break its tabs off as the factory melts the tabs into place. The switch and the black part around it are removable. I'd use some 2 part epoxy and permanently reattached that bit. Then in the future if you need to remove the switch or its black plastic part that it clips into, just remove those.
They might be on some years though. GM made a few slight changes like that with other bits like the grab handles. On a 2003 and I think 2004 the grab handles on the door panel are not able to be detached without damage but on later years they can be easily unbolted and removed. Some bits have the plastic tabs/clips melted to the surrounding plastic while other bits do not.
This sounds like the best way to go. I'm just curious how to remove the black bezel without pulling the entire master switch surround out though? It was a pain in the *** to remove even when i had the switch out. Do you just pull up? The clips seemed super tight to where you need to pry them up one at a time. Maybe I could shave them down before I epoxy everything down? Or try the previously mentioned idea of adding spacers
They are insanely tight which was why I said it will eventually break if you are removing the thing enough times. You can buy new bezels though, good luck finding door panels for less than a fortune though.
You can check ebay for a better door panel. You can also sell yours even if it's in parts to subsidize your panel. If the price is right, people will buy it even if it's busted up.
Personally I'd remove the door panel, that way you can do whatever you need to do to re-attach and reinforce it from the side that cant be seen. As mentioned the edges need to be de-greased before applying bonding agent. IPA is a good cleaner but try it out on a hidden surface 1st. Super glue is always the temptation as its quick, but its too brittle and won't last.
You could try "plastic-welding" the part back in place using a hot soldering iron (not too hot) with a clean tip (solder wiped off) carefully melting the two parts together unitl the plastic "puddles" and merges, working along the seams. Obviously you dont want to "break through" to the visible side, but with care it can be done, it doenst have to go too deep. Experiment with some scrap materials 1st, you will be amazed at how strong the joints become. Only for the brave I suspect, and of course dont blame me!
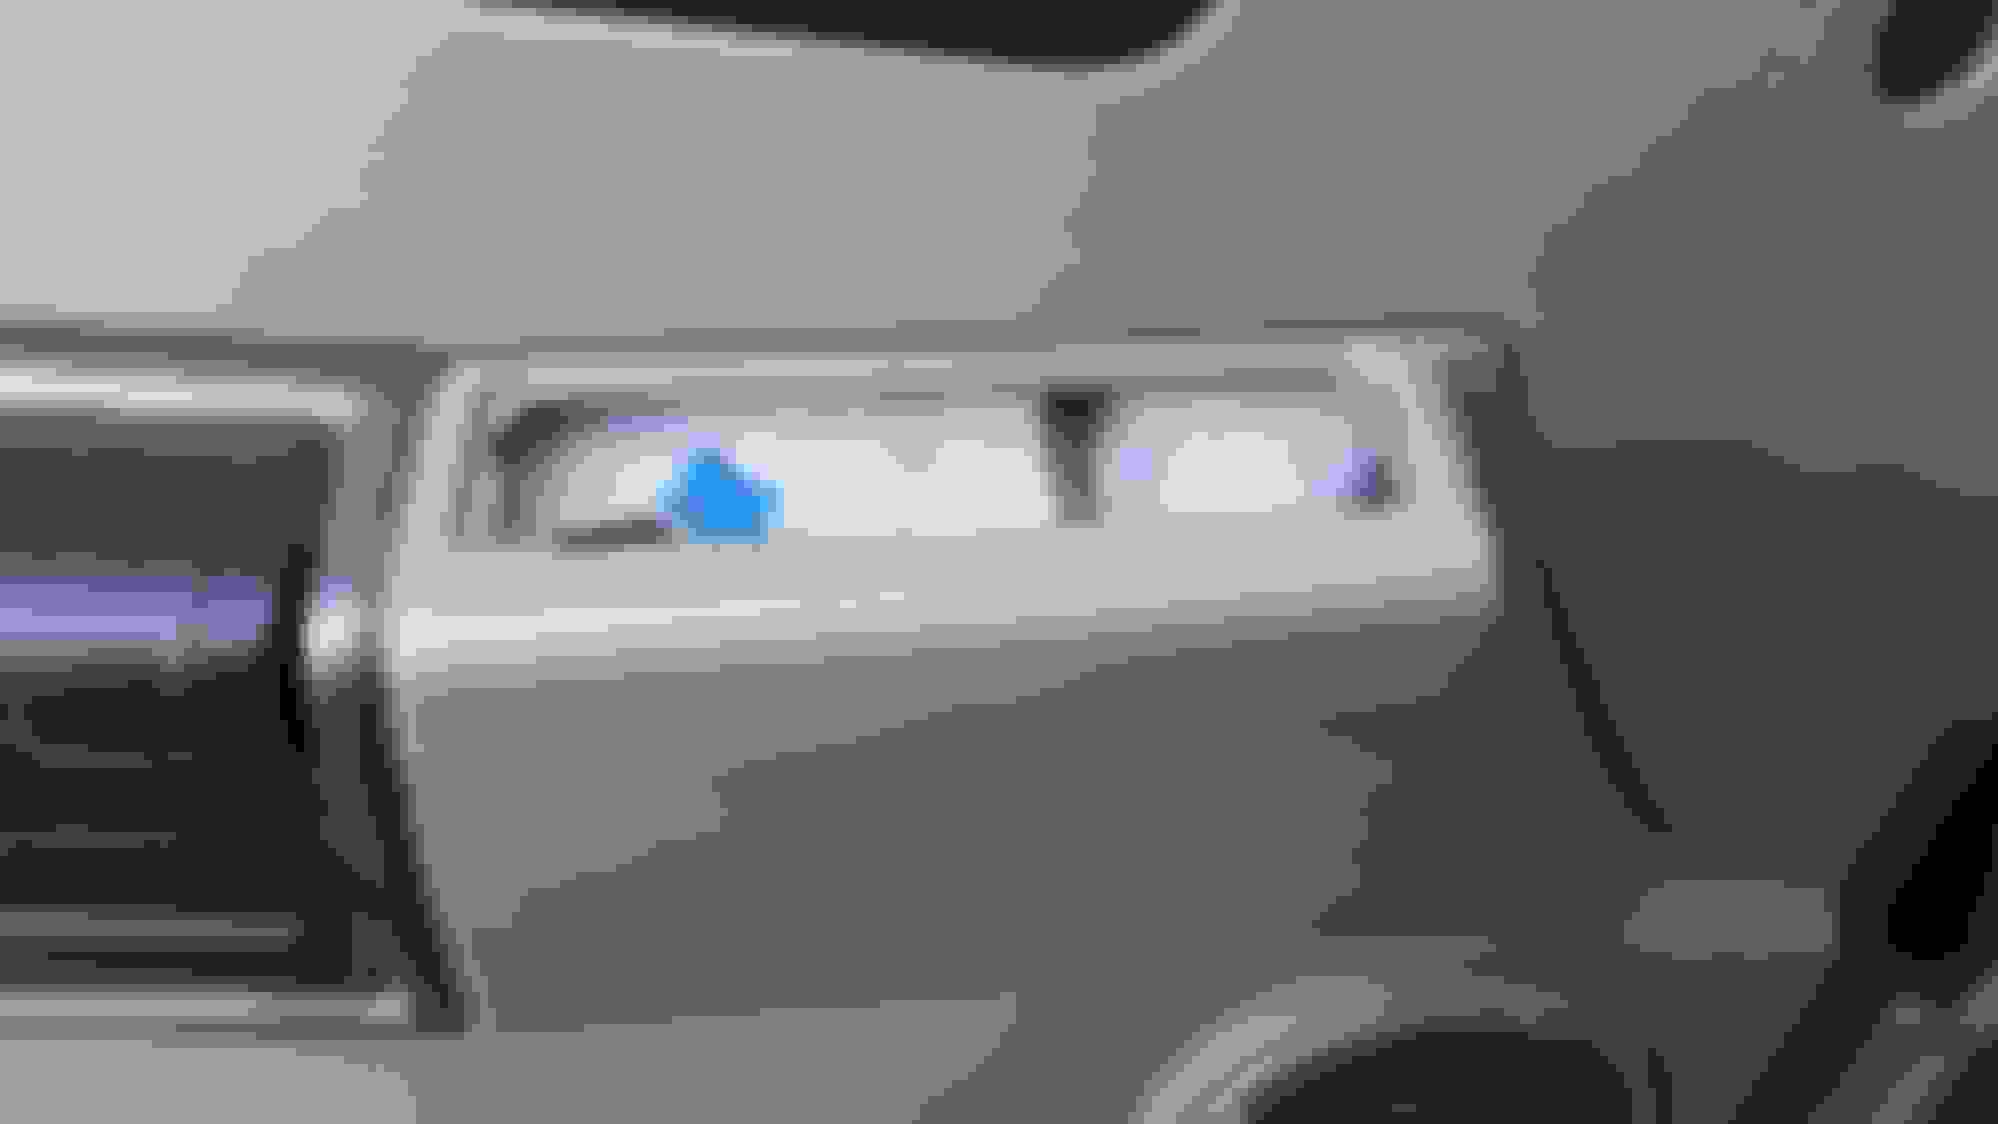
I found someone else's technique at removing the switch module (passenger side shown) using a putty knife but its not a method I've ever tried.
That's how I have always removed mine, I found that exact picture. Removing the door panel to get the switch pack out I would do at your own risk. Door panels are a lot of expensive than the plastic bezel holding the pack in. Break some of the door panel clips and you're in a much bigger world of hurt. I have taken my door panels off, all 4 and one of mine separated from the leather top portion so I used the solder iron technique to melt it back together.
That's how I have always removed mine, I found that exact picture. Removing the door panel to get the switch pack out I would do at your own risk. Door panels are a lot of expensive than the plastic bezel holding the pack in. Break some of the door panel clips and you're in a much bigger world of hurt. I have taken my door panels off, all 4 and one of mine separated from the leather top portion so I used the solder iron technique to melt it back together.
The proper plastic panel levers help, they're not expensive. Had to remove the front doors to repair the power-fold mirrors (
) and also to replace a broken passenger window. Glueing/welding from the exposed area might leave things looking messy, but yes breaking a door clip would be a problem.
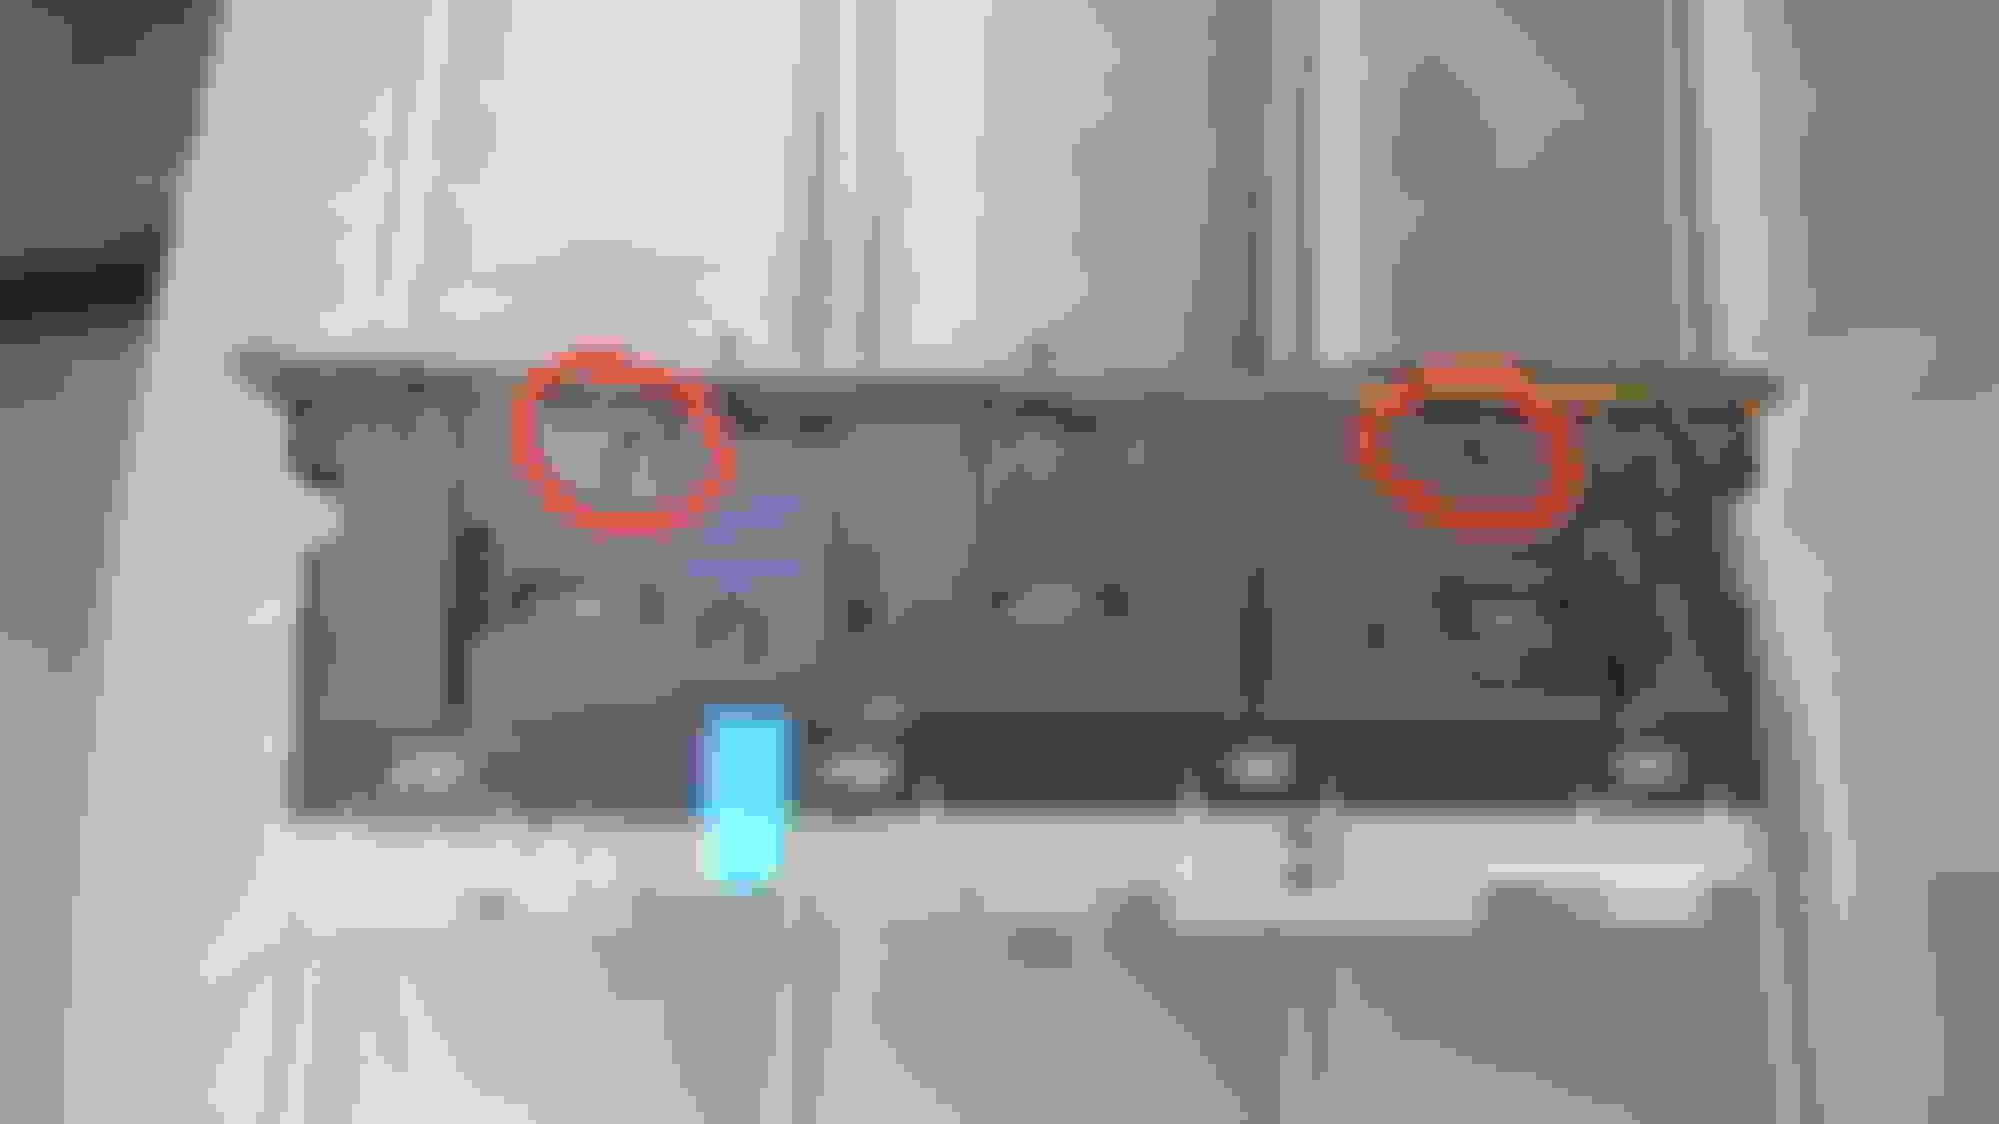
I used beige plastic bonding epoxy to permanently attach the door panel master switch surround back on.
I then used a file to get the switch pack to where it will snap into place but also easily be removed using a flat head screw driver if I ever need to in the future. I tested it before I epoxy'd the thing down.
Looks good, I'm just curious why you anticipate removing the switches so often to file the catches down?
just on the off chance I ever need to replace it, I don't want to risk breaking anything on the door panel. I also started this project becuz the half *** way the previous owner glued it on bothered me
just on the off chance I ever need to replace it, I don't want to risk breaking anything on the door panel. I also started this project becuz the half *** way the previous owner glued it on bothered me

 03-12-2018, 01:41 PM