When you click on links to various merchants on this site and make a purchase, this can result in this site earning a commission. Affiliate programs and affiliations include, but are not limited to, the eBay Partner Network.
Hummer H2For those who like a little more gleam to their Hummer, the H2 offers a similar rugged look as the H1, but as a lower cost, and with more added features, making it almost a massive luxury SUV.
Hi Guys decided to install LED lights and a light bar in the front of the Hummer H2. Was wondering if someone can give me clarification on where to install the diode so that the fog lamps could run during the night.
OPTION 1
OPTION 2
If Option 2 which terminal should I connect the diode to.
Last edited by man-of-war; Dec 20, 2018 at 03:23 PM.
Unless you also add a switch you would have no way to manually turn them on or off. They would be on with your headlights (or whatever you choose as the power source). You would also want to determine if they are ground switched or not. Its possible they have 12v+ all the time and they are cut on with a relay allowing a ground to them. A lot of the lighting is setup that way on GM trucks.
Amusingly the fuse box under the hood does have a fog light relay but I'm not sure what its wired to. Its indicted that way because GM uses the exact same fuse box in multiple vehicles.
Not sure but one I am planning on doing, just have not had time yet, is to wire mine to a factory GM fog light button that I've already gotten from a Tahoe (same as our rear wiper switch but has a fog light button below it). I've also swapped the lights already to led ones.
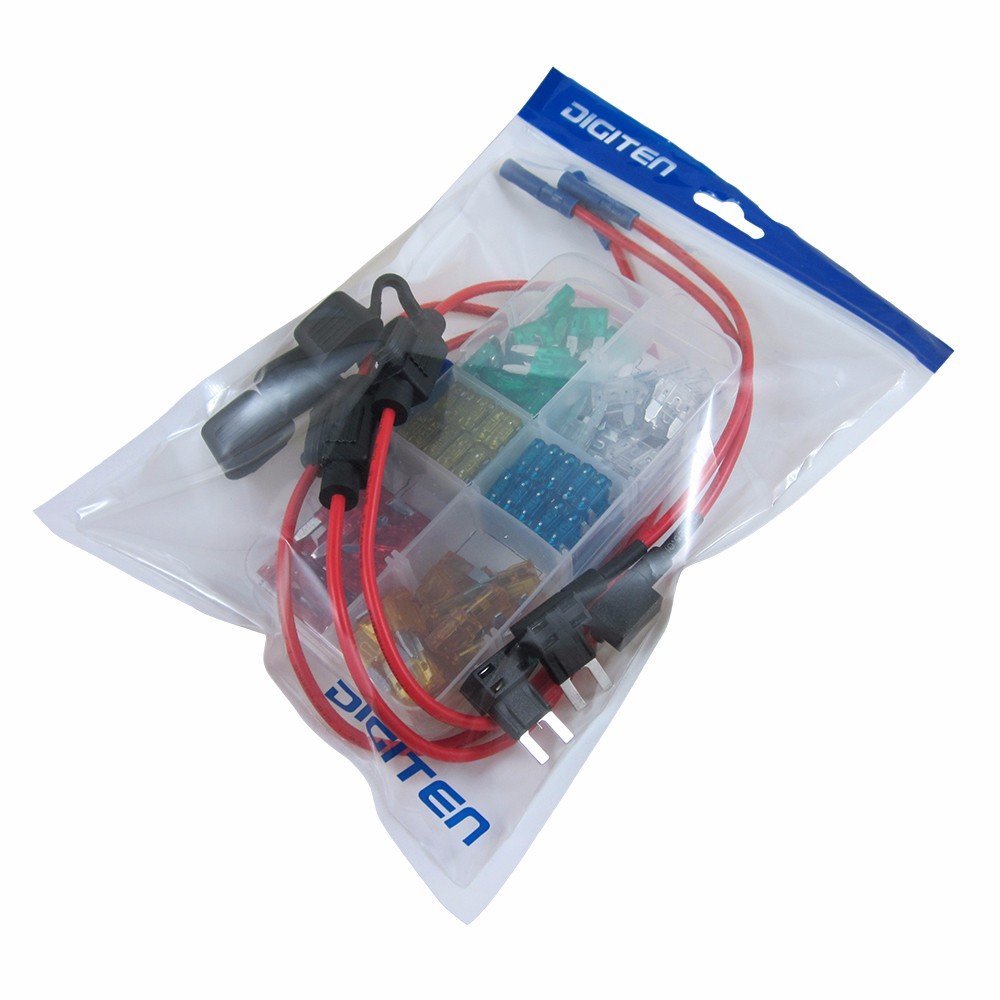
I'll simplify things for the others that want to try this on your HUMMER H2 2008.. The Diode used was a 0 to 500 V 1 amp
YOUR USING FUSES 26 AND 22 ......The diode will have a silver marking on it. Connect that end of the diode to the 26 fuse and the other end of the diode to fuse 22.
I used a volt meter to the diode then directly to the car battery which indicated the voltage flow. If you have the diode in the wrong way you will know as the diode will get very hot, be prepared to unplug the fuses..... I'll post Option 1 below and the direction of the silver strap on the diode.
This is the correct direction of the diode silver strap on diode facing fuse 26.
I soldered the wires onto the fuses. It all works great!! Got my LED headlights but their under the christmas tree
Last edited by man-of-war; Dec 20, 2018 at 07:57 PM.
I was confused because you posted the pics for the DRL diode mod but asked how to install?? I've had the mod installed for years and years without issue. It's a great, quick addition.
Always wanted to do that. Now i know how. Thanks for the post.
Not trying to nit pick you. I would really consider redoing what you have done there. You could trim the diode shorter and use some heat shrink on the exposed solder joints. As it is you have live exposed wires. Dont want you to burn your rig down. If that was just to show how to do it. Sorry for assuming. Thanks agin for the post.
The first couple pictures were to show which direction the diode was to be installed. I think the last picture shows everything all tucked away and insulated. I ordered these from Amazon, should have them soon.
Add A Link are great little pigtails when tapping into the fuse block. Honestly, just heatshrinking the setup like you have done is plenty fine. That's how I've ran mine every since I've had my rig. I also made a bunch for friends and one for my wife's car since I had to buy a large pack of diodes.