When you click on links to various merchants on this site and make a purchase, this can result in this site earning a commission. Affiliate programs and affiliations include, but are not limited to, the eBay Partner Network.
Hummer H2For those who like a little more gleam to their Hummer, the H2 offers a similar rugged look as the H1, but as a lower cost, and with more added features, making it almost a massive luxury SUV.
I am replacing my fuel vapor canister but I cannot figure out how to get the old one out. The black plastic canister is mounted on a metal bracket that bolts into the frame rail (driver's side). The bracket has metal tabs at the front that the canister slots into, and a single nut over a threaded post at the back end. I removed the nut but couldn't remove the canister. I loosened the two bolts holding the bracket to the frame but they don't back out completely even when loose.
LOLOL!!! Yeah, I was thinking the same thing... the canister must have gone in first on the manufacturing line before something else was installed that blocked access to it. I am considering cutting ~1/2" off the end of the threaded post to gain a little clearance.
Any tips from alldata would be helpful and much appreciated!!!
In reference to your post in that other thread, I have a new vent solenoid in front of me, and a new canister and purge valve are arriving today.
This is what the GM eSI system shows.... I wonder if they just sort of get stuck in place of the years and need some percussive persuasion (beat on it with a hammer or something lol) to get it to move??
Alldatadiy has a page with that info but the pictures are blank, I tried to get in touch with them but there is no easy way to do it to let them know of the issue.
Legerwn, I think your theory about the canister being installed before the body is true, because you cannot really take the canister out and install the new one as it is laid out!
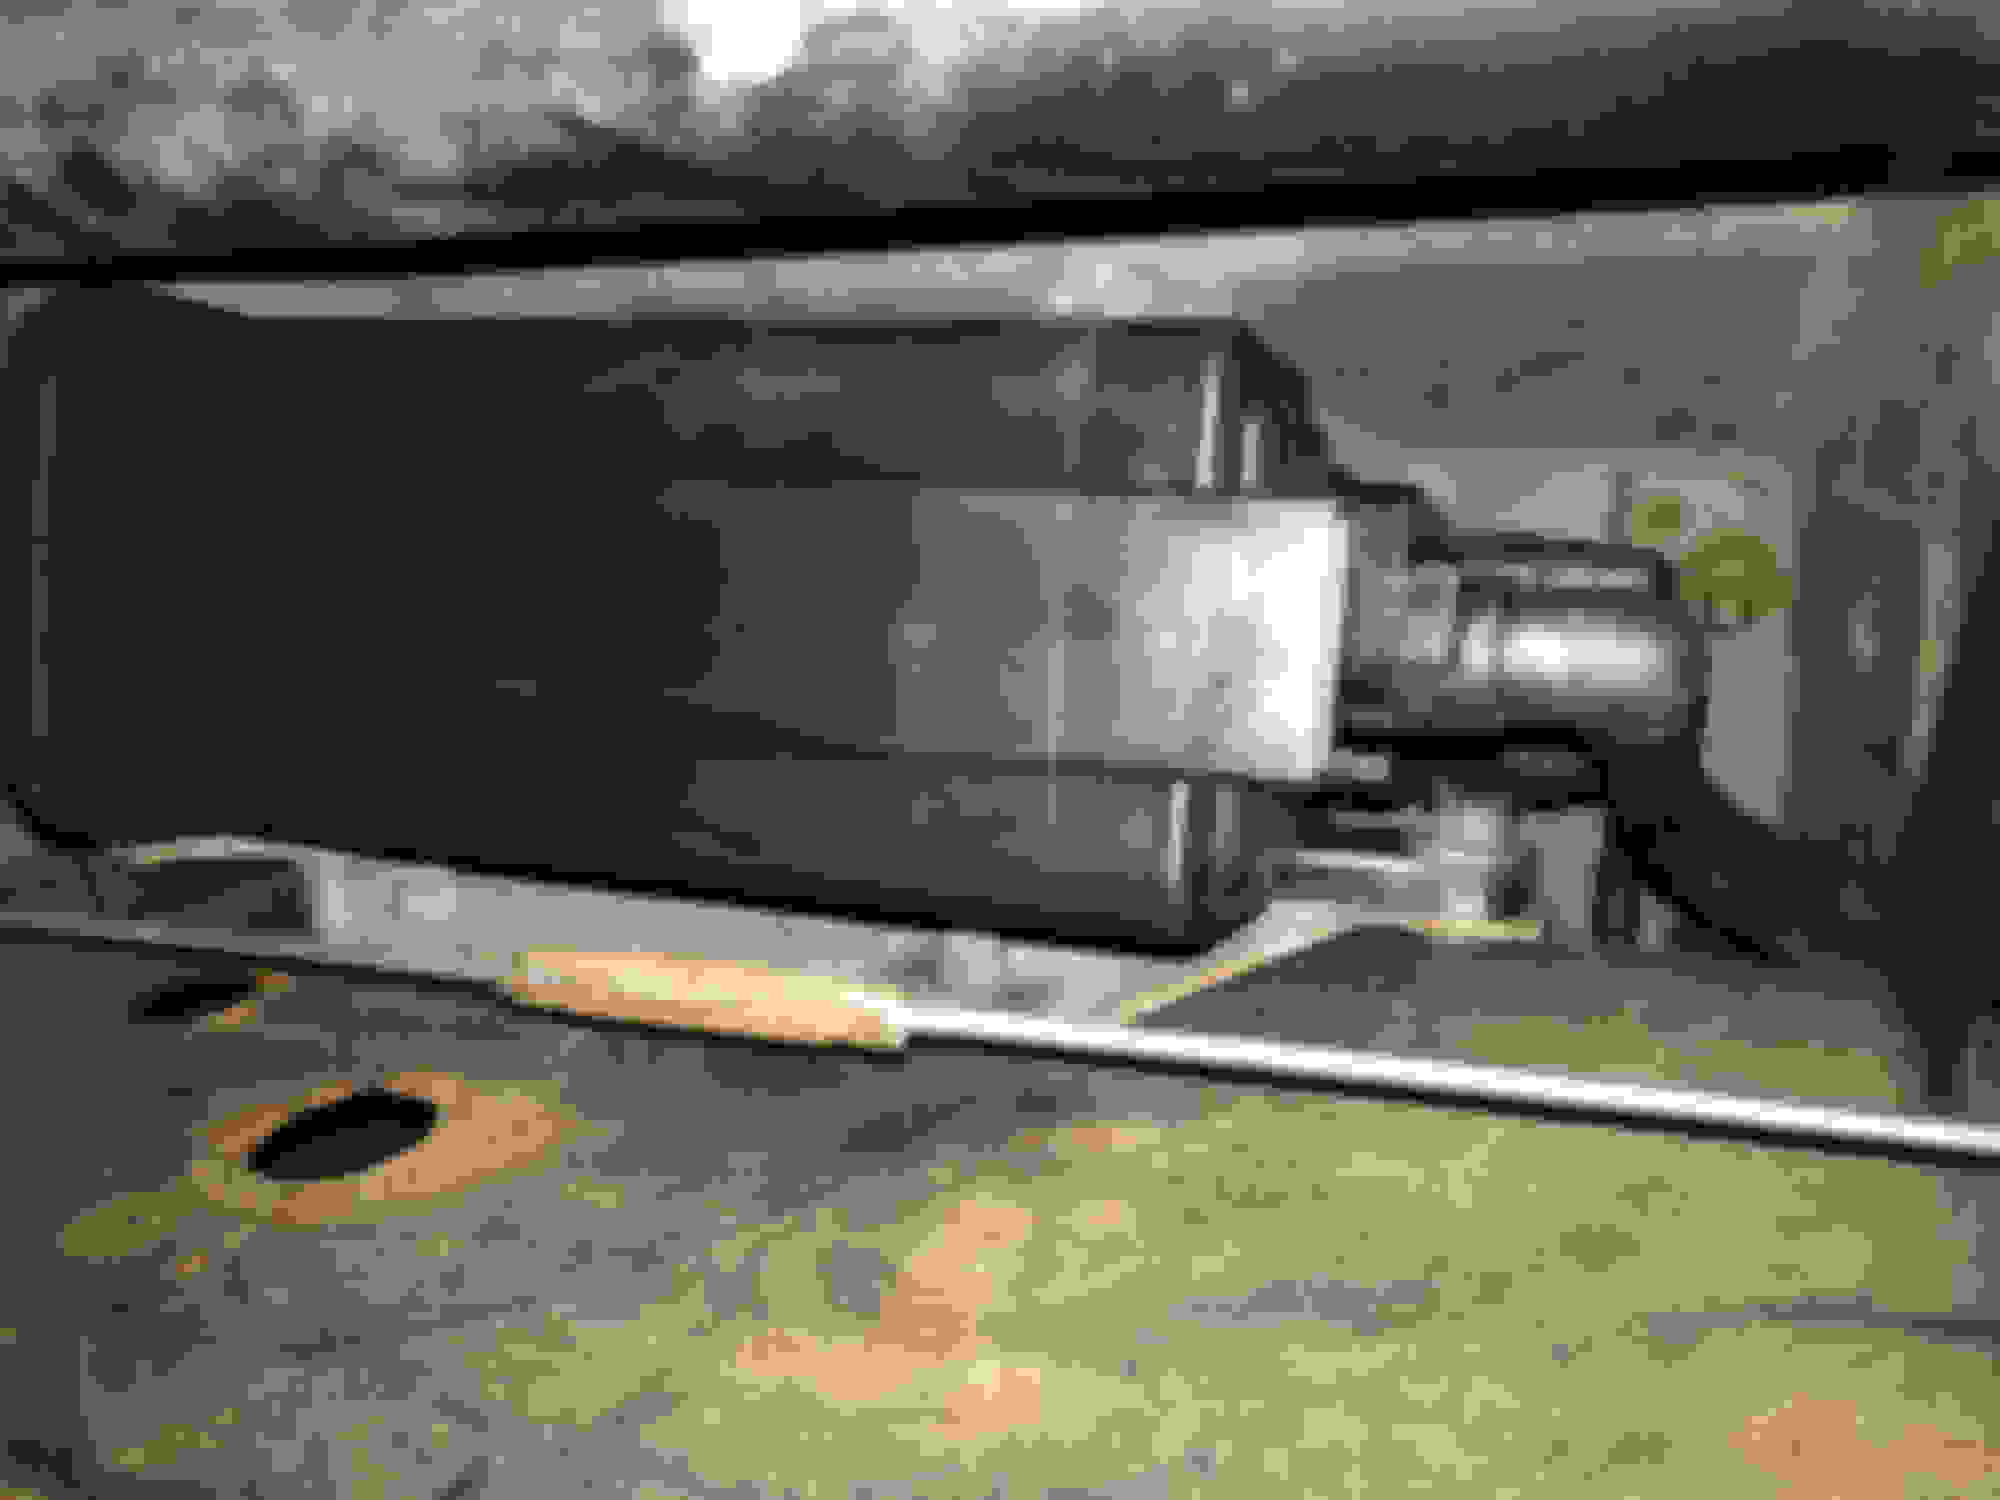
BUT... if you take a sawzall to the threaded post right above the nut, the shortened post yields plenty of room to remove the canister quite easily!
This pic shows the threaded post cut off at the top of the 13mm nut prior to removal.
With the post cut, I removed the 13mm nut and swung the canister away from the bracket and shifted it toward the rear, freeing it from the bracket tabs at the front of the canister. Installing the new canister is much easier this way, too!
I had trouble removing two of the hose connectors on the rear face of the canister, so I sawzalled the nipples off the canister first, then disconnected the hoses from the cut stubs. By contrast, those connectors go on very easily!