
Bump Stop Replacement Tutorial


Thread Starter
|
Senior Member
Joined: Sep 2014
Posts: 813
For those who aren't accustomed to working on their own vehicles, this is a great place to start.
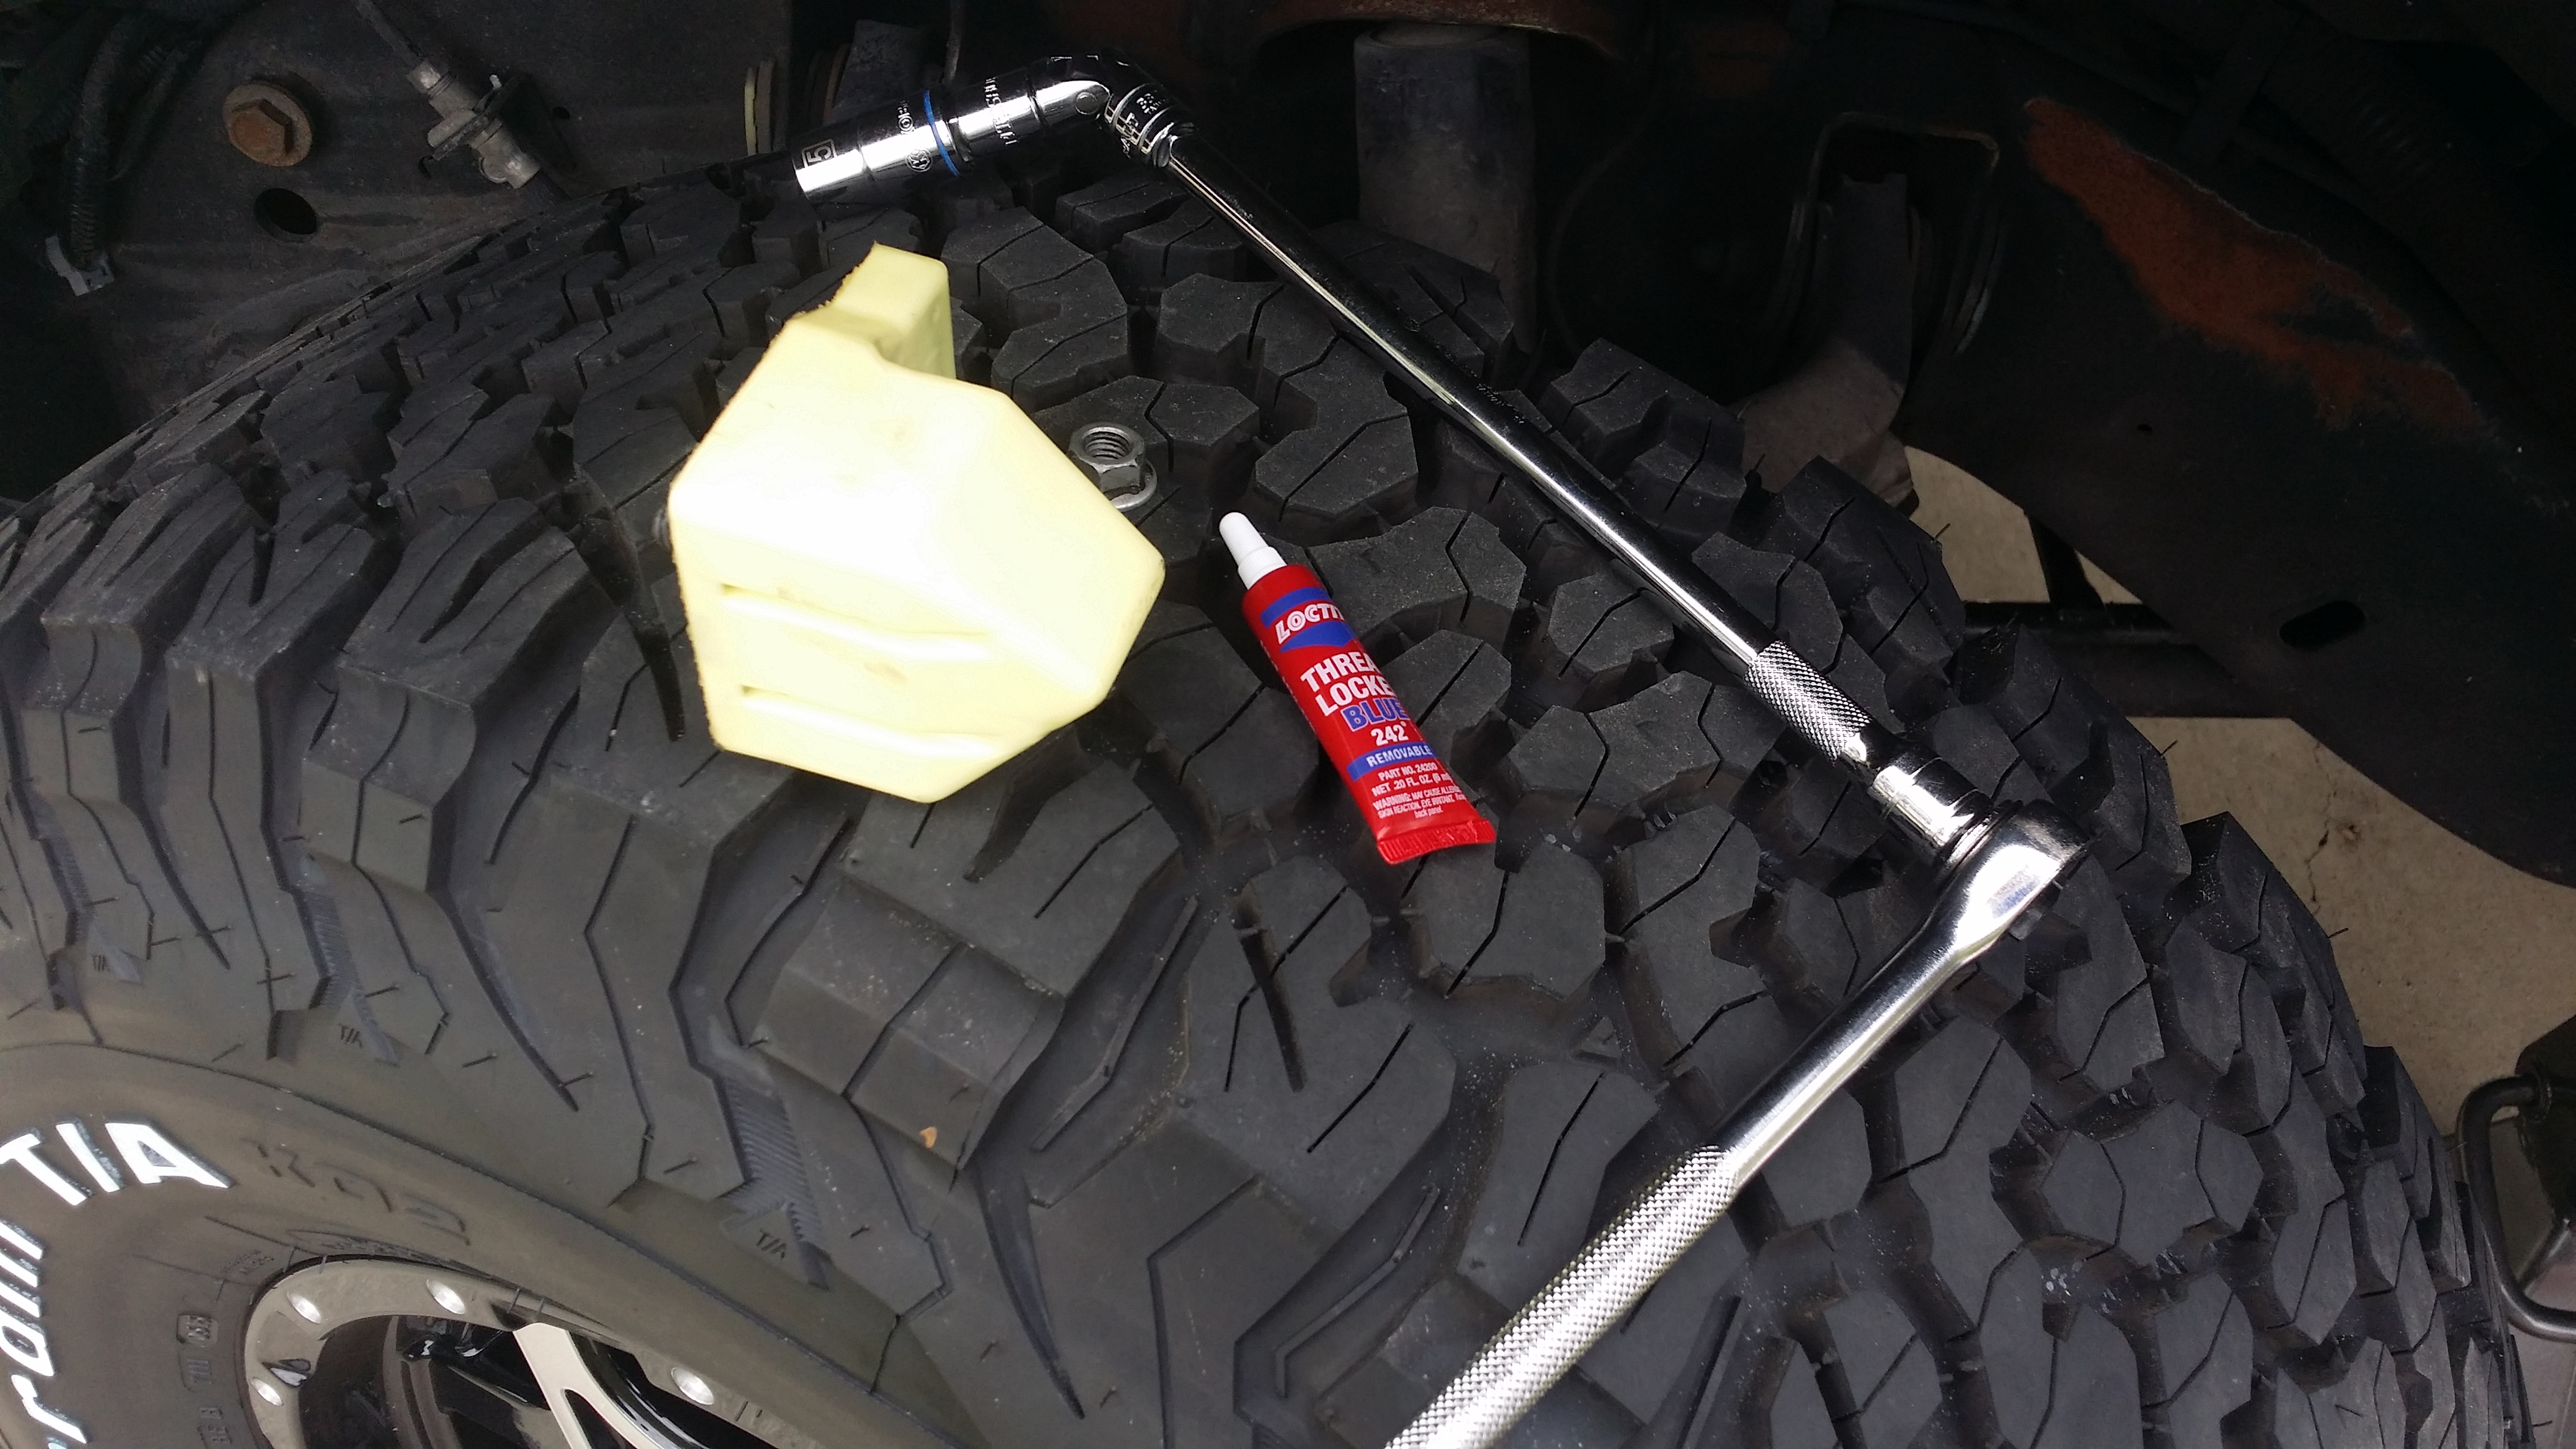
Required Tools:
Jack
Jackstand(s)
Socket Wrench
Socket extension (10" seems to work best)
15mm socket
Loctite Thread Locker (Blue 242)
2x Bump Stop: part number 15835667
Directions:
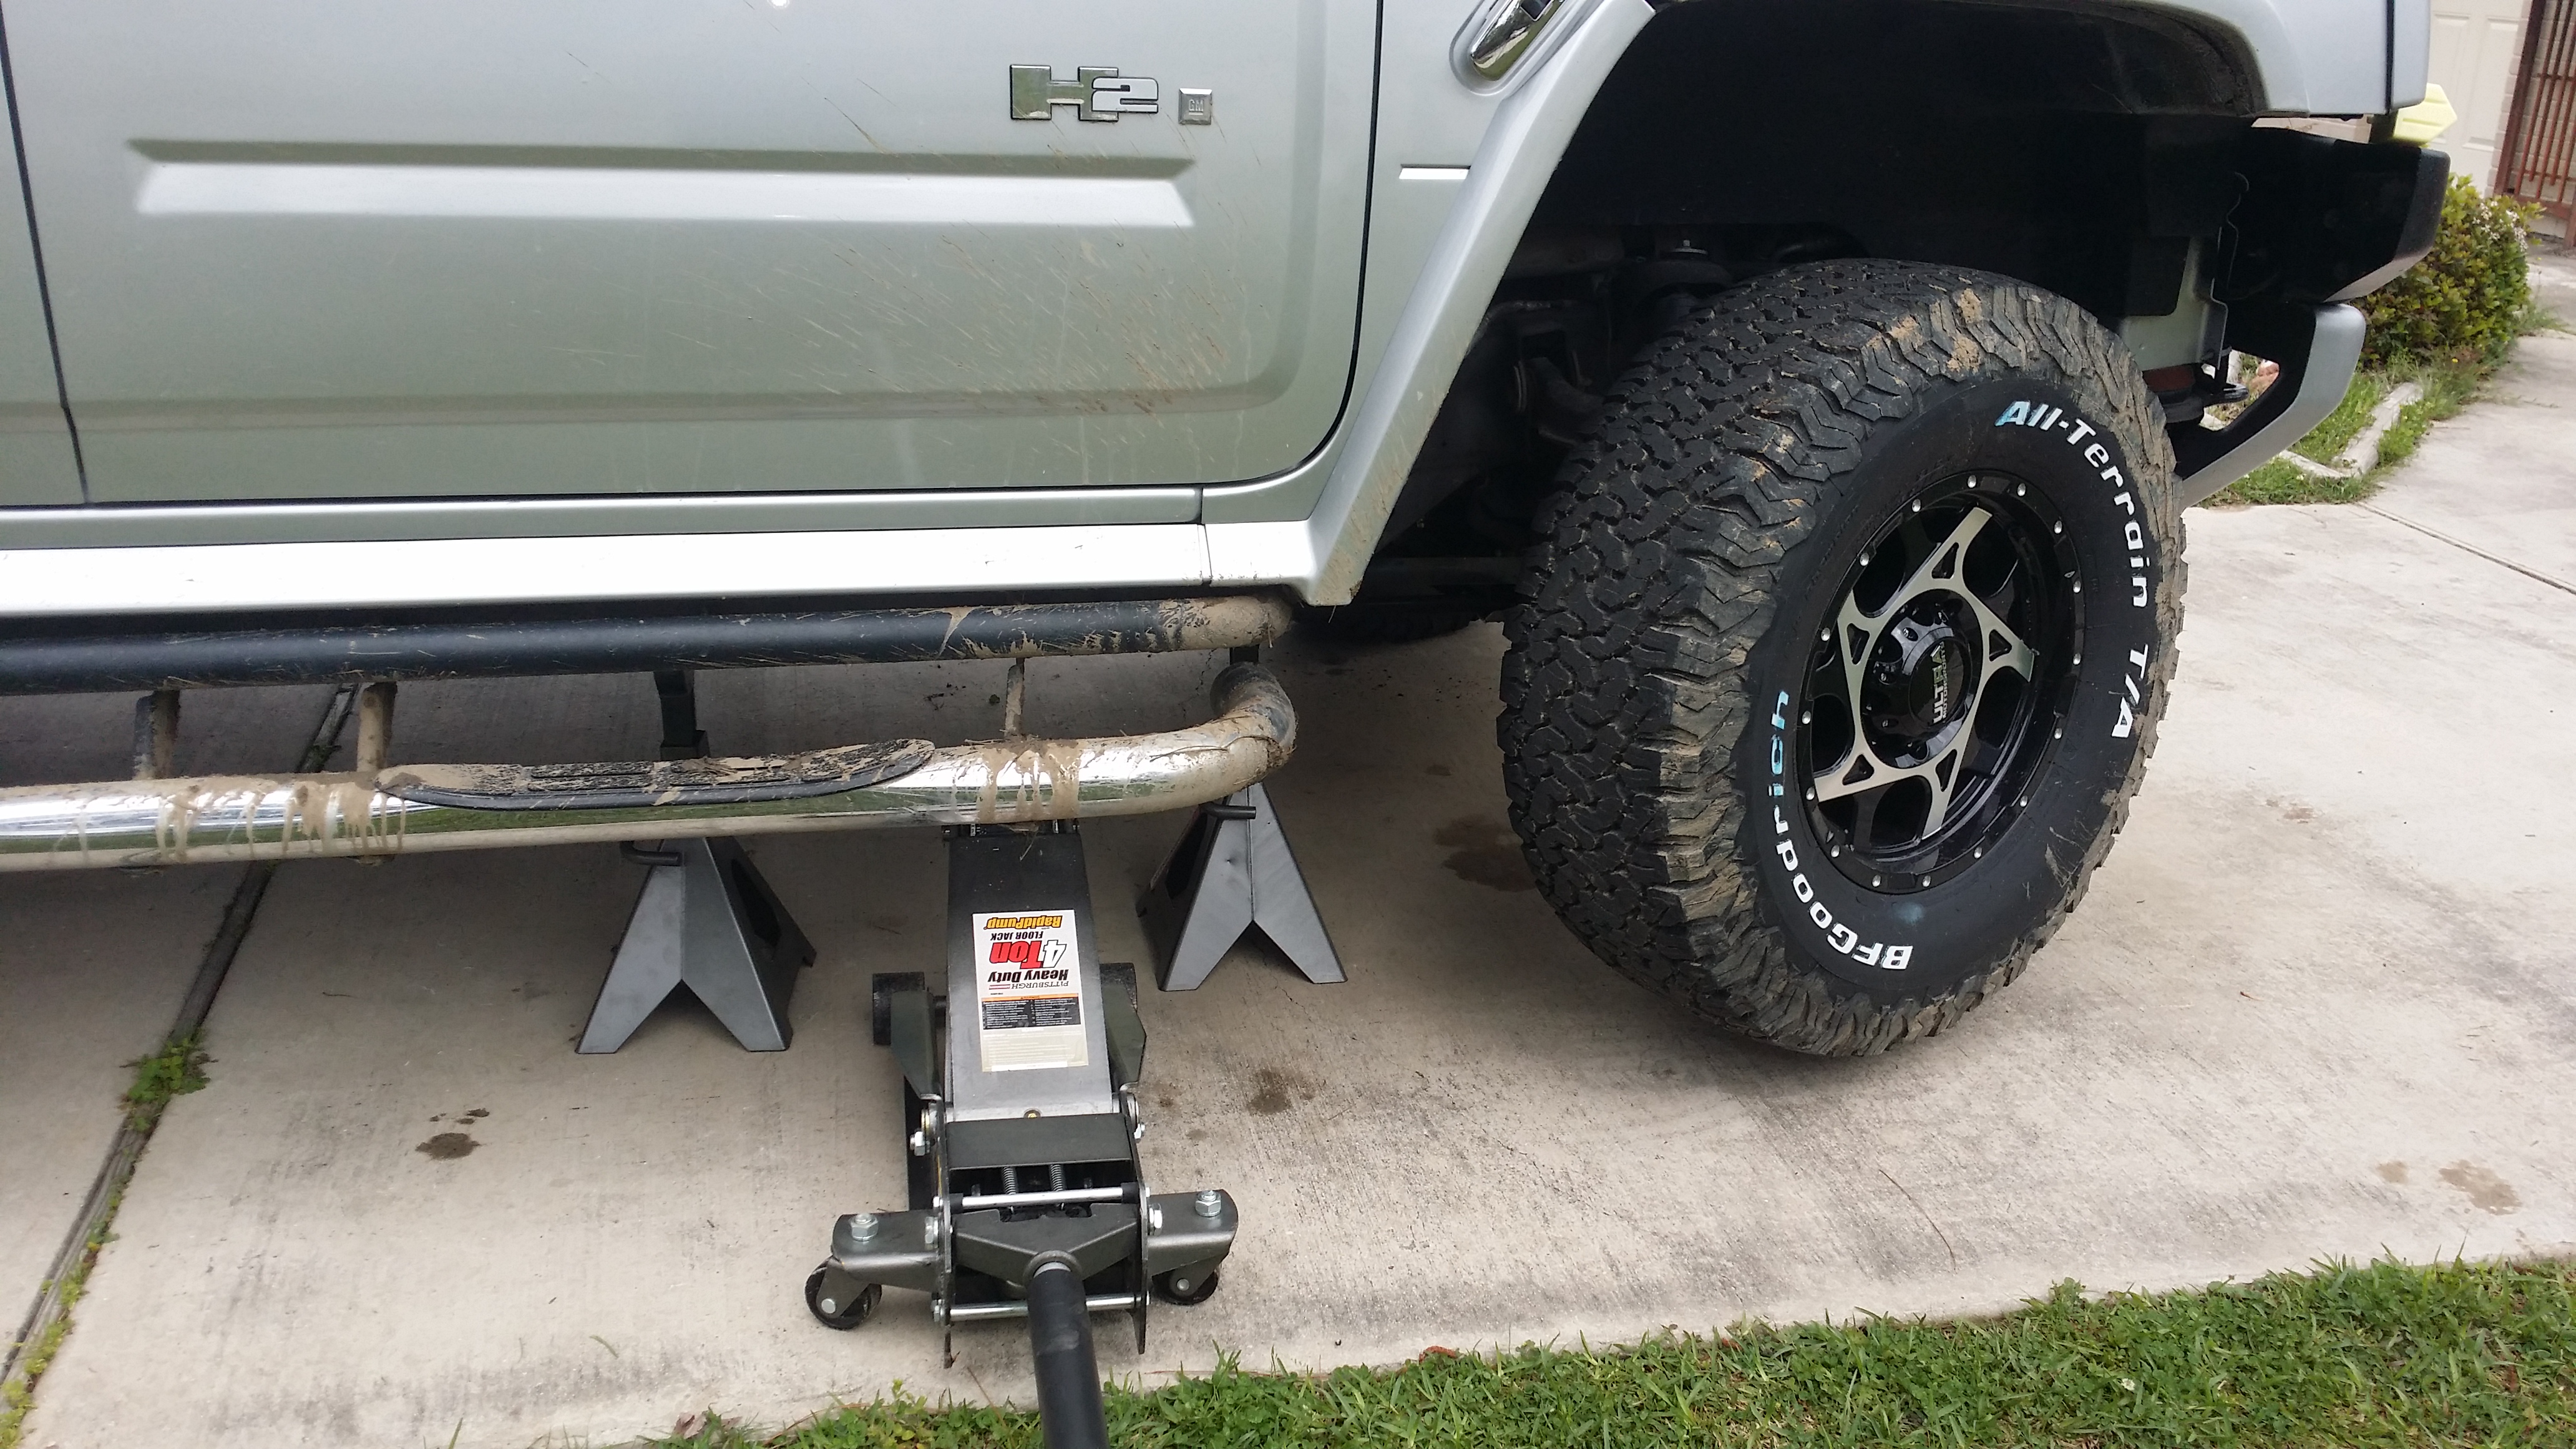
1. Turn on the engine & turn the wheel to expose the rear portion of the lower control arm for easy access.
2. Lift the vehichle w/ the jack & use a jackstand or 2 like I did. Can't be careful enough. Remember to give the tire a shove to make sure the vehicle is stable.
3. Locate the nut that secures the bumpstop & loosen it. This does not require a breaker bar.
4. Remove the nut & bumpstop. Clean the threading on the nut.
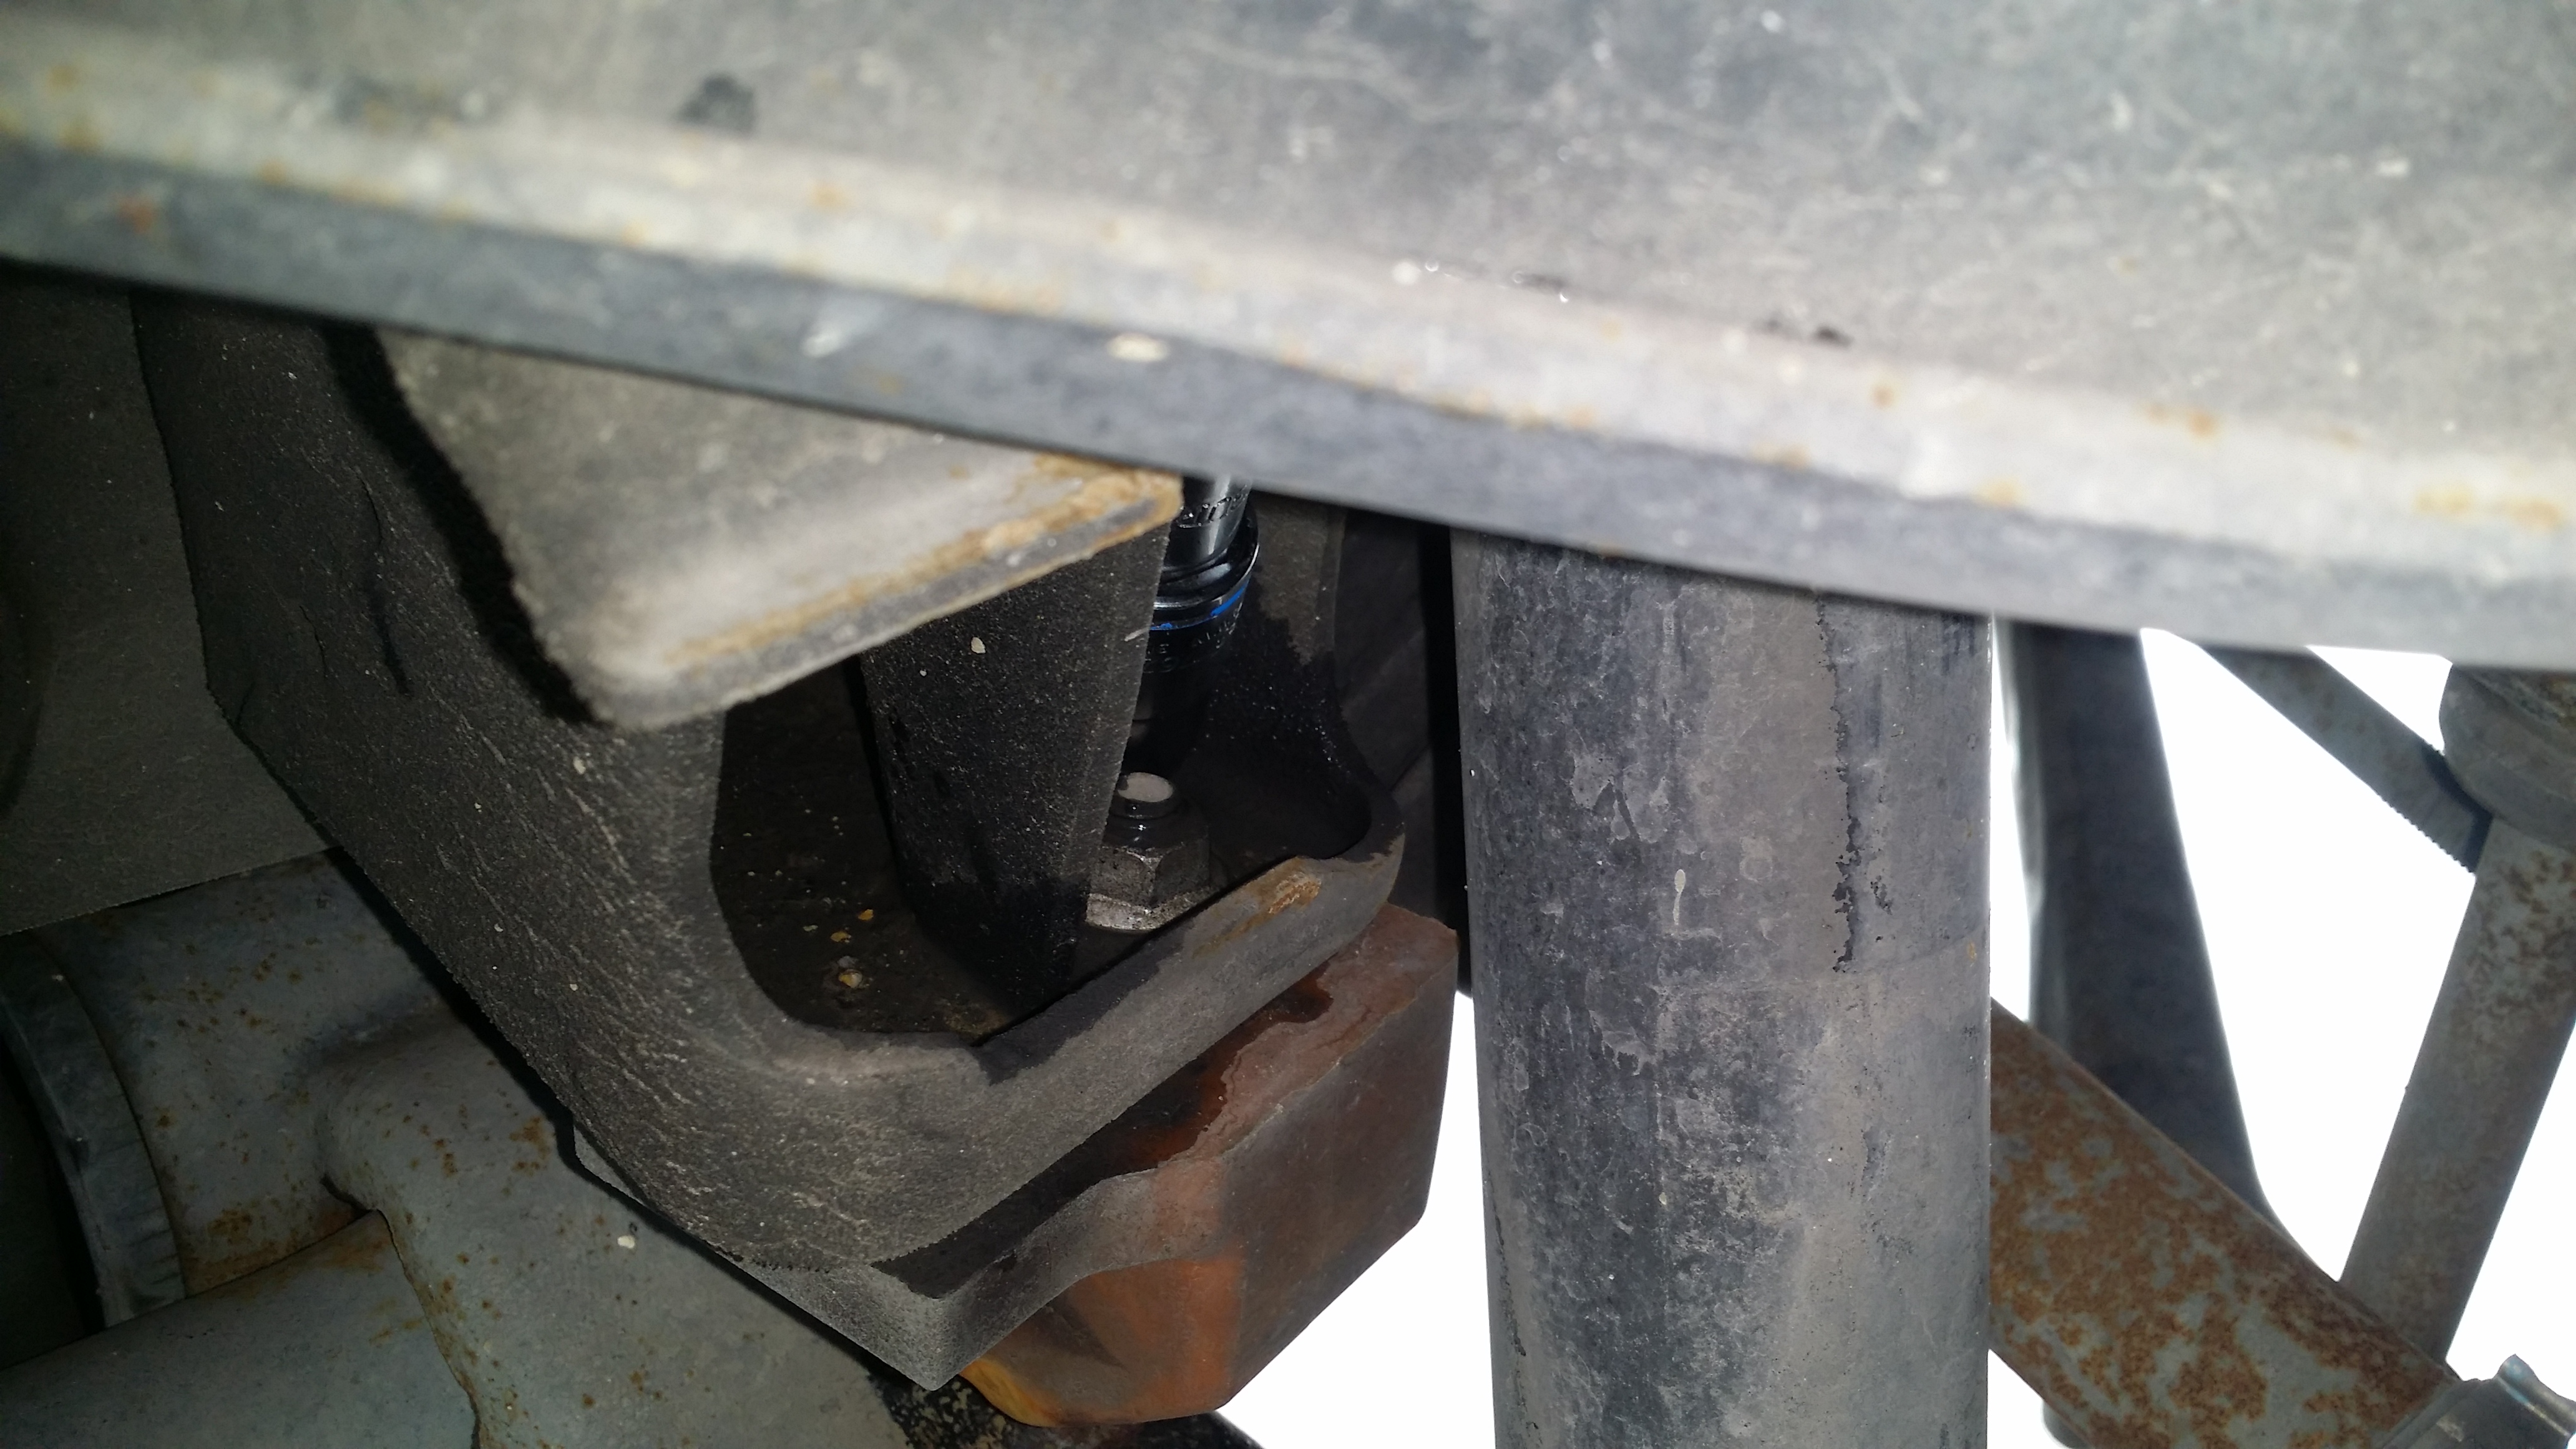
5. Replace the bump stop. There is a small metal tab across from the threaded bolt. This doing into a small hole & prevents the bump stop from turning.
6. Place the nut back & use the socket to secure the location. Once the threaded bolt is inserted, use the extension to thread the nut to the bolt by hand. This is much easier than using the socket wrench. Once you cannot turn the nut by hand, finish tightening the nut with the wrench. Remember to always apply pressure to the bump stop tightening it to keep that metal tab it's slot. If you don't, it will move around & you'll have to loosen the nut & start over.
The torque spec is 22 lb-ft.
7. Jack up the vehicle, remove the jackstand & lower it. You'll notice how the bumpstop sits against the lower control are while at rest.
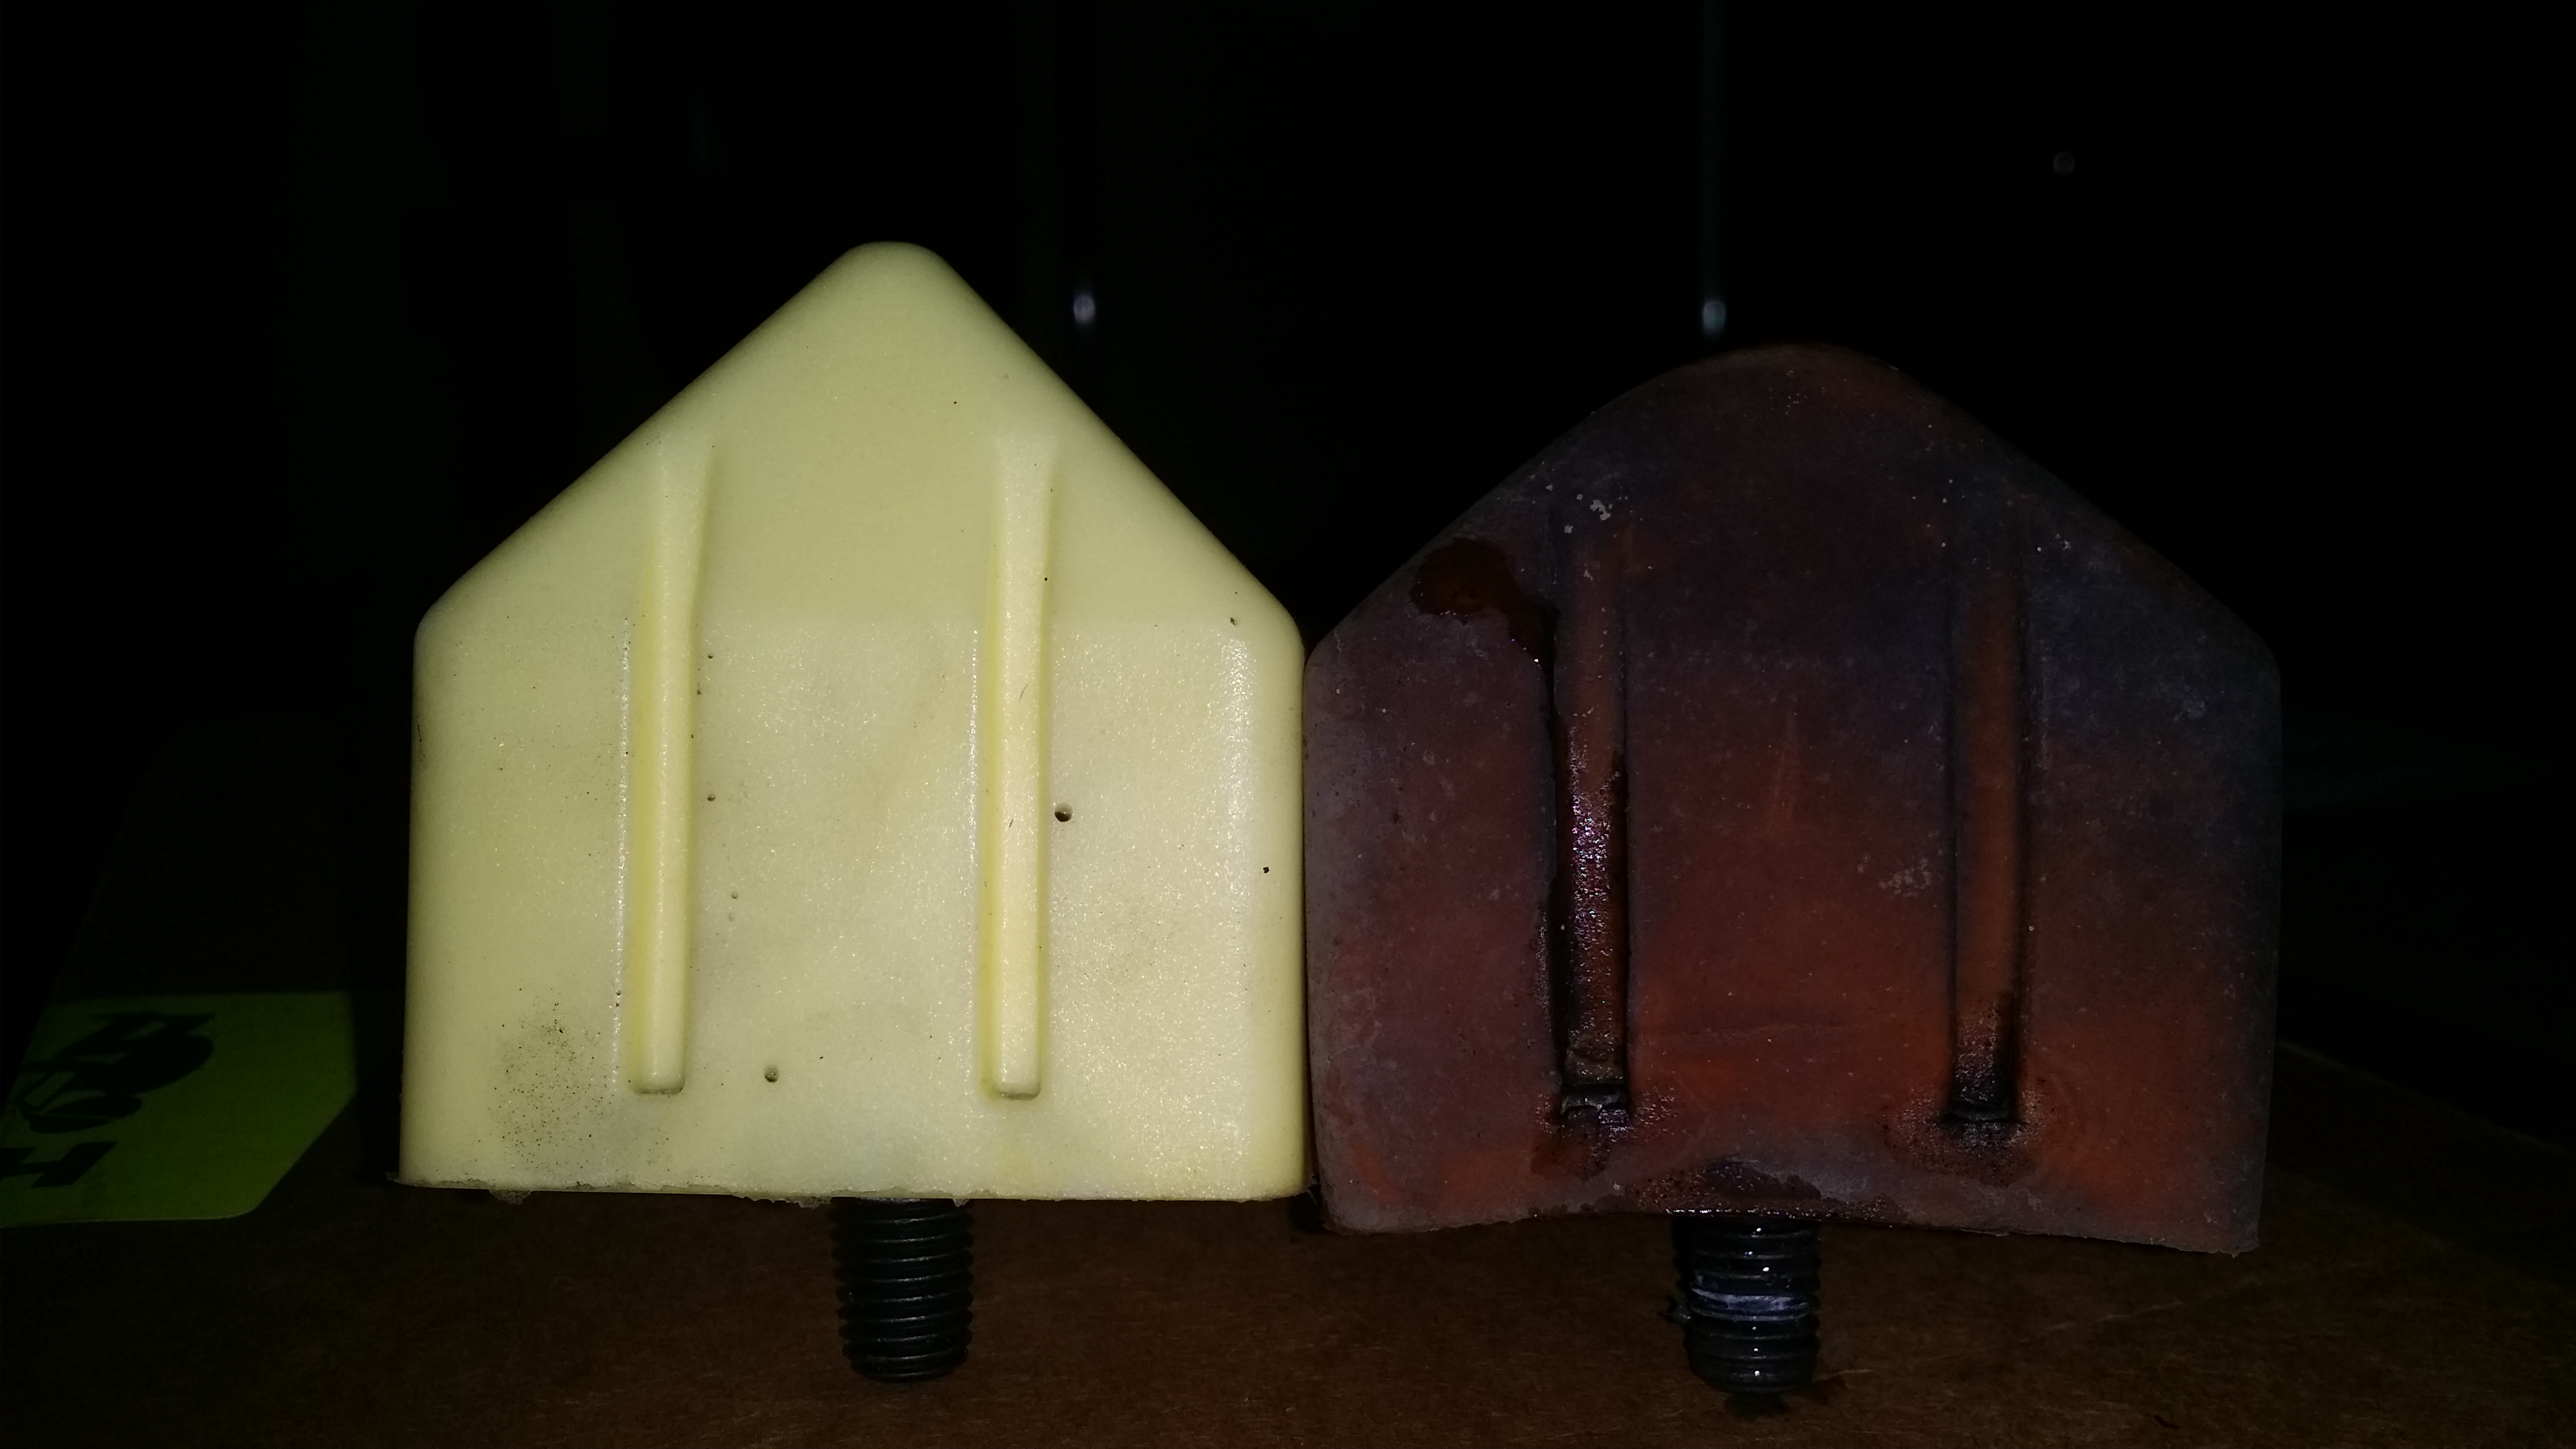
Here's a picture diagram.
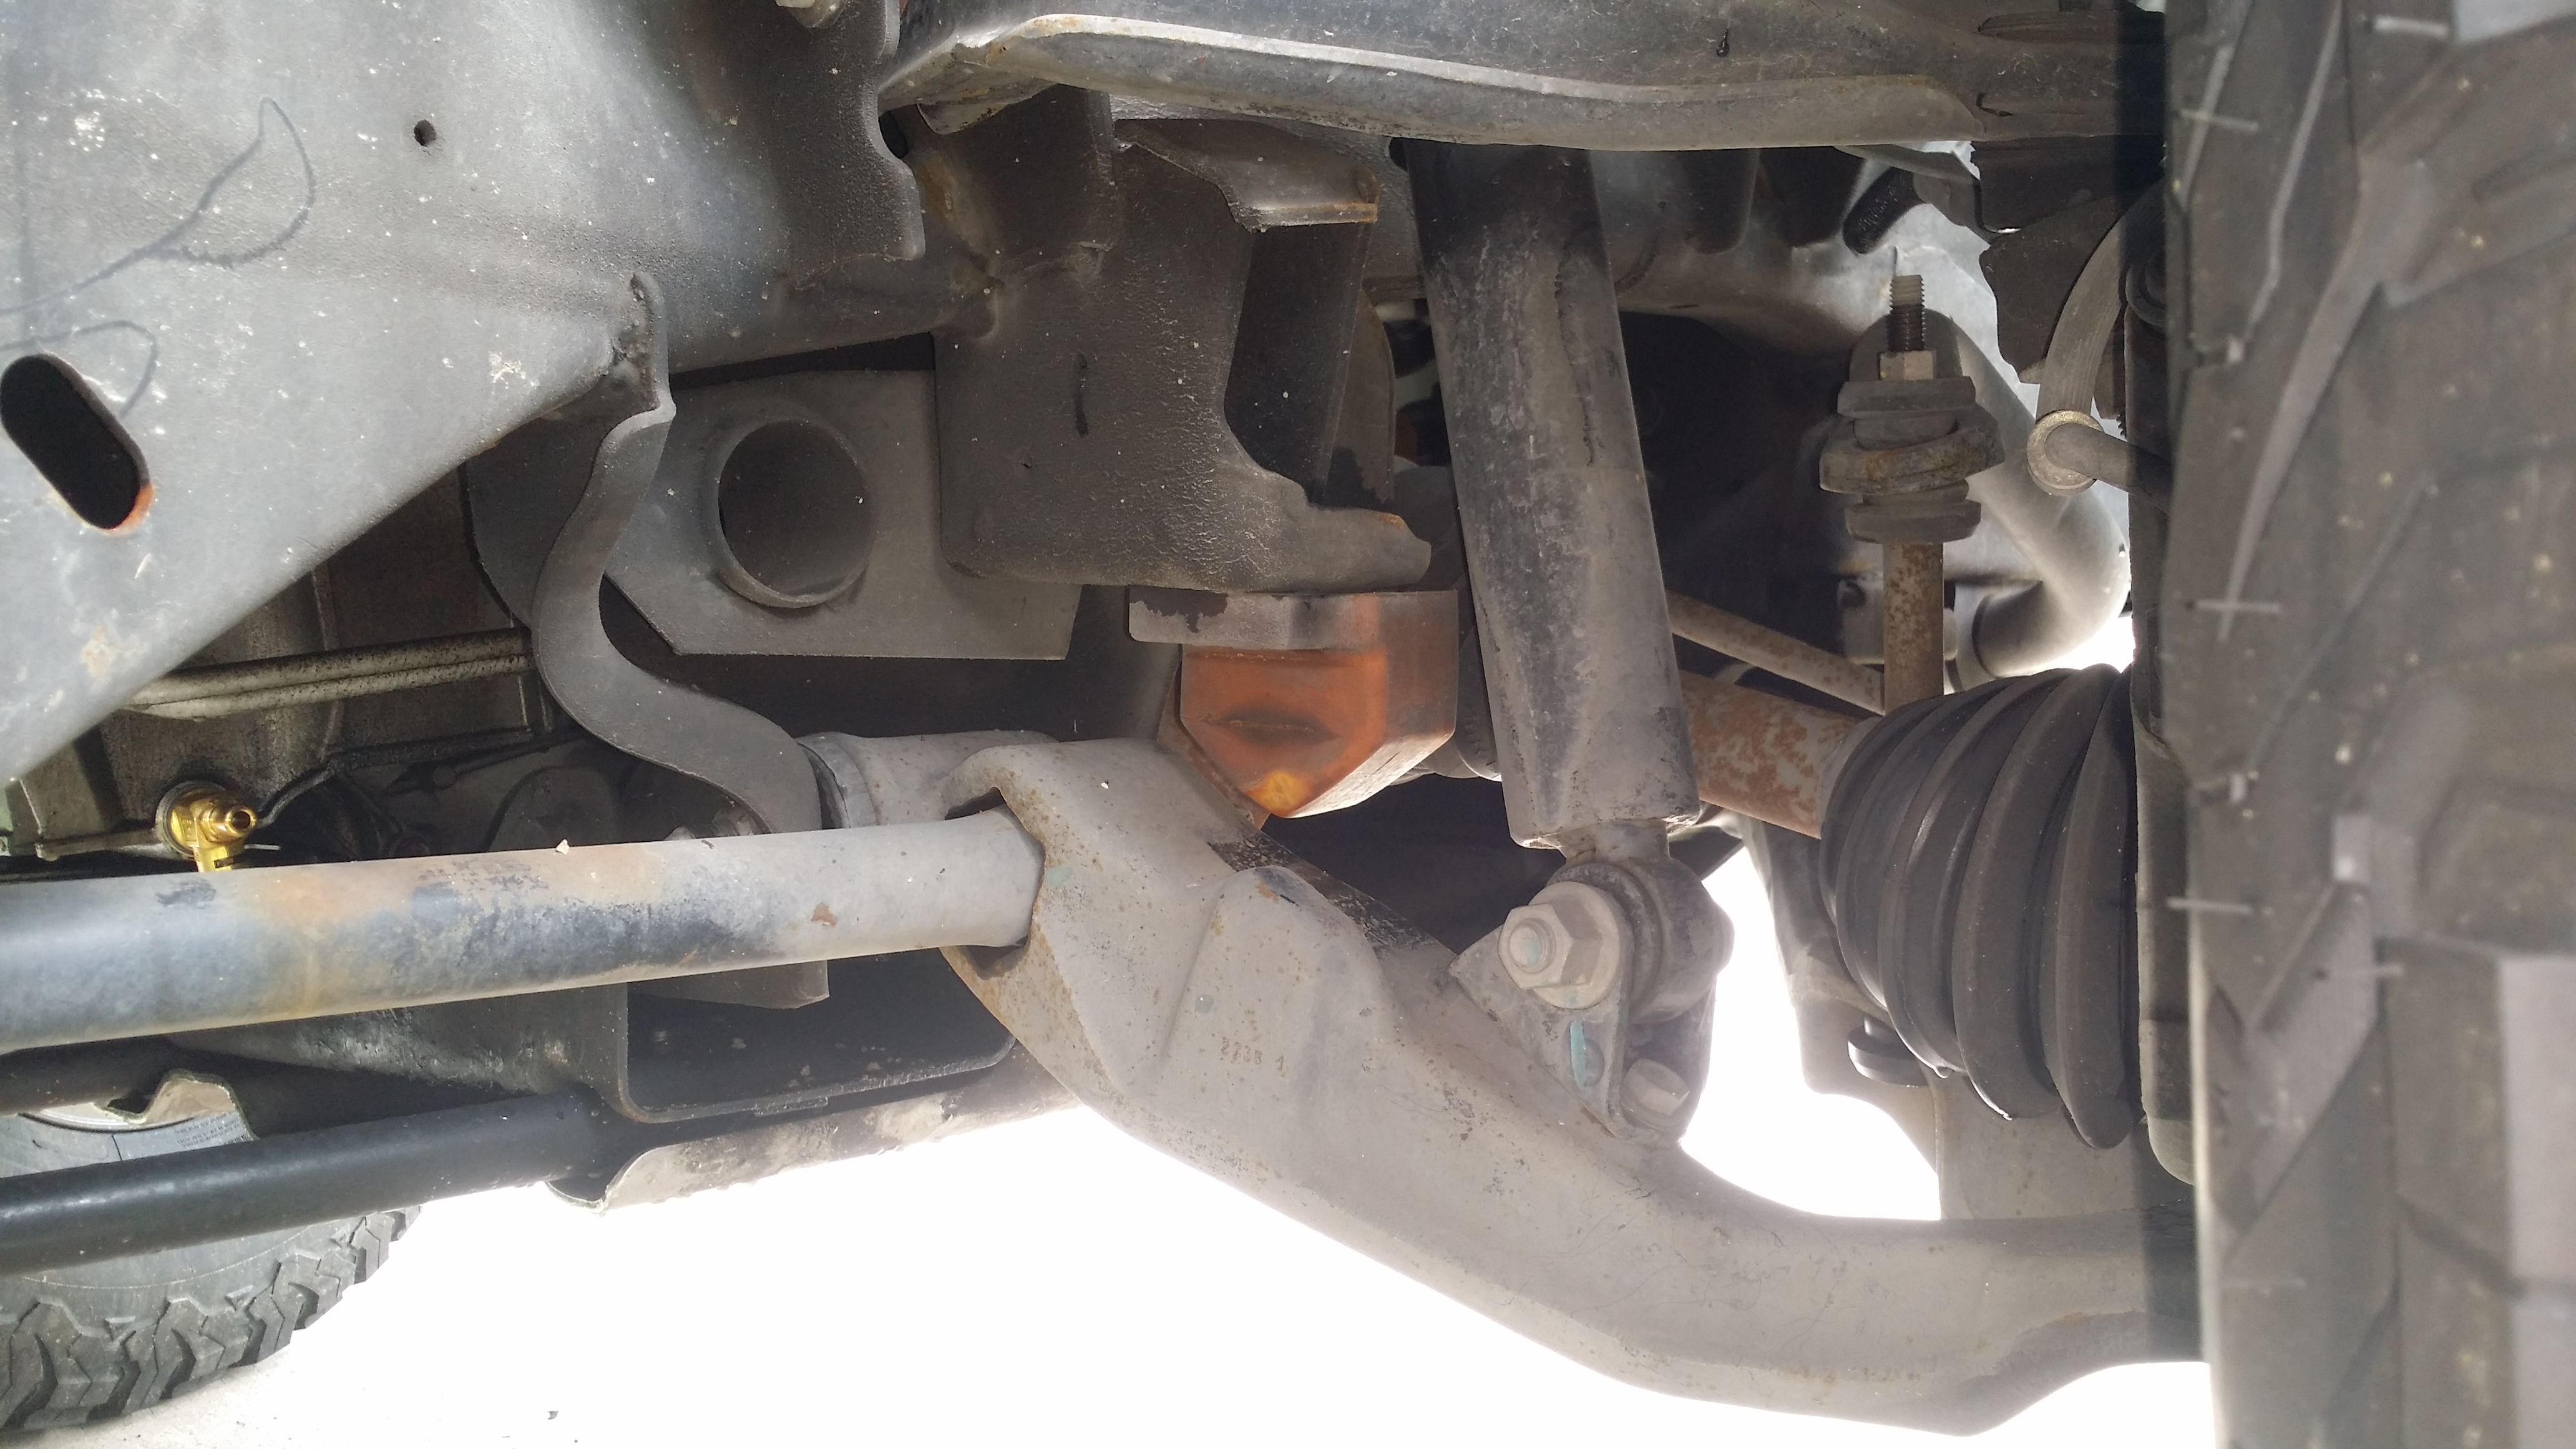

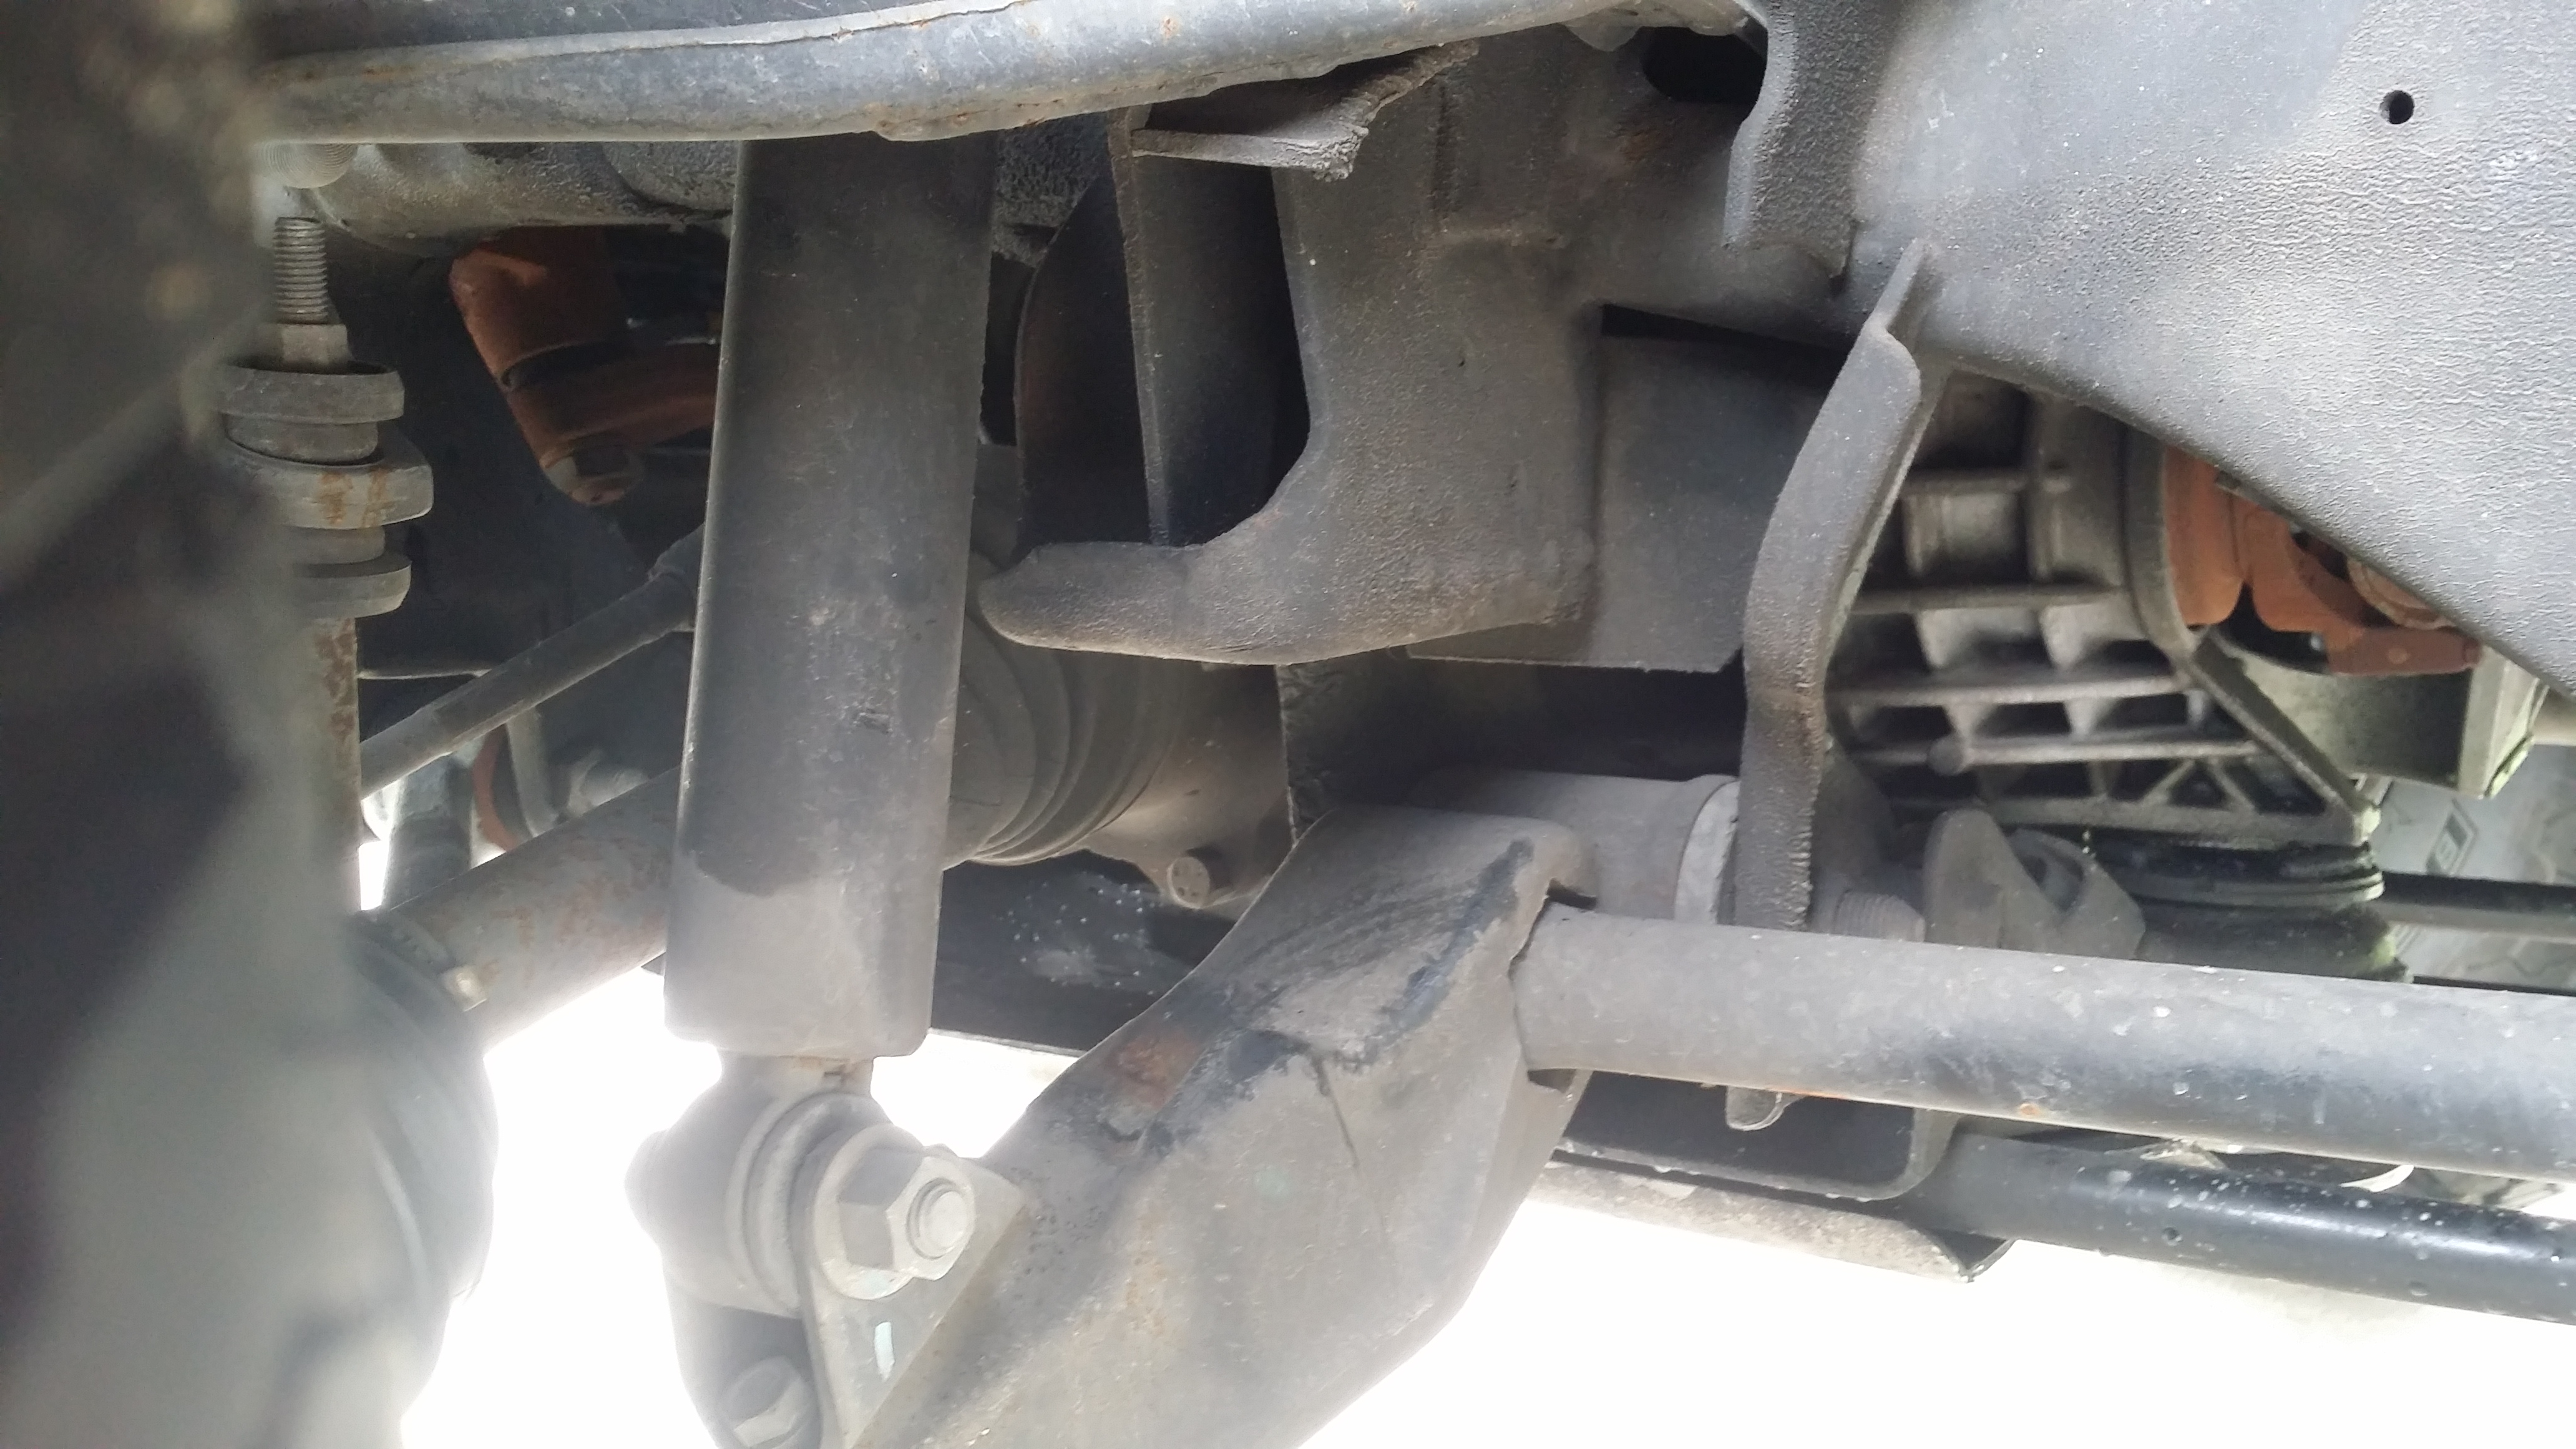
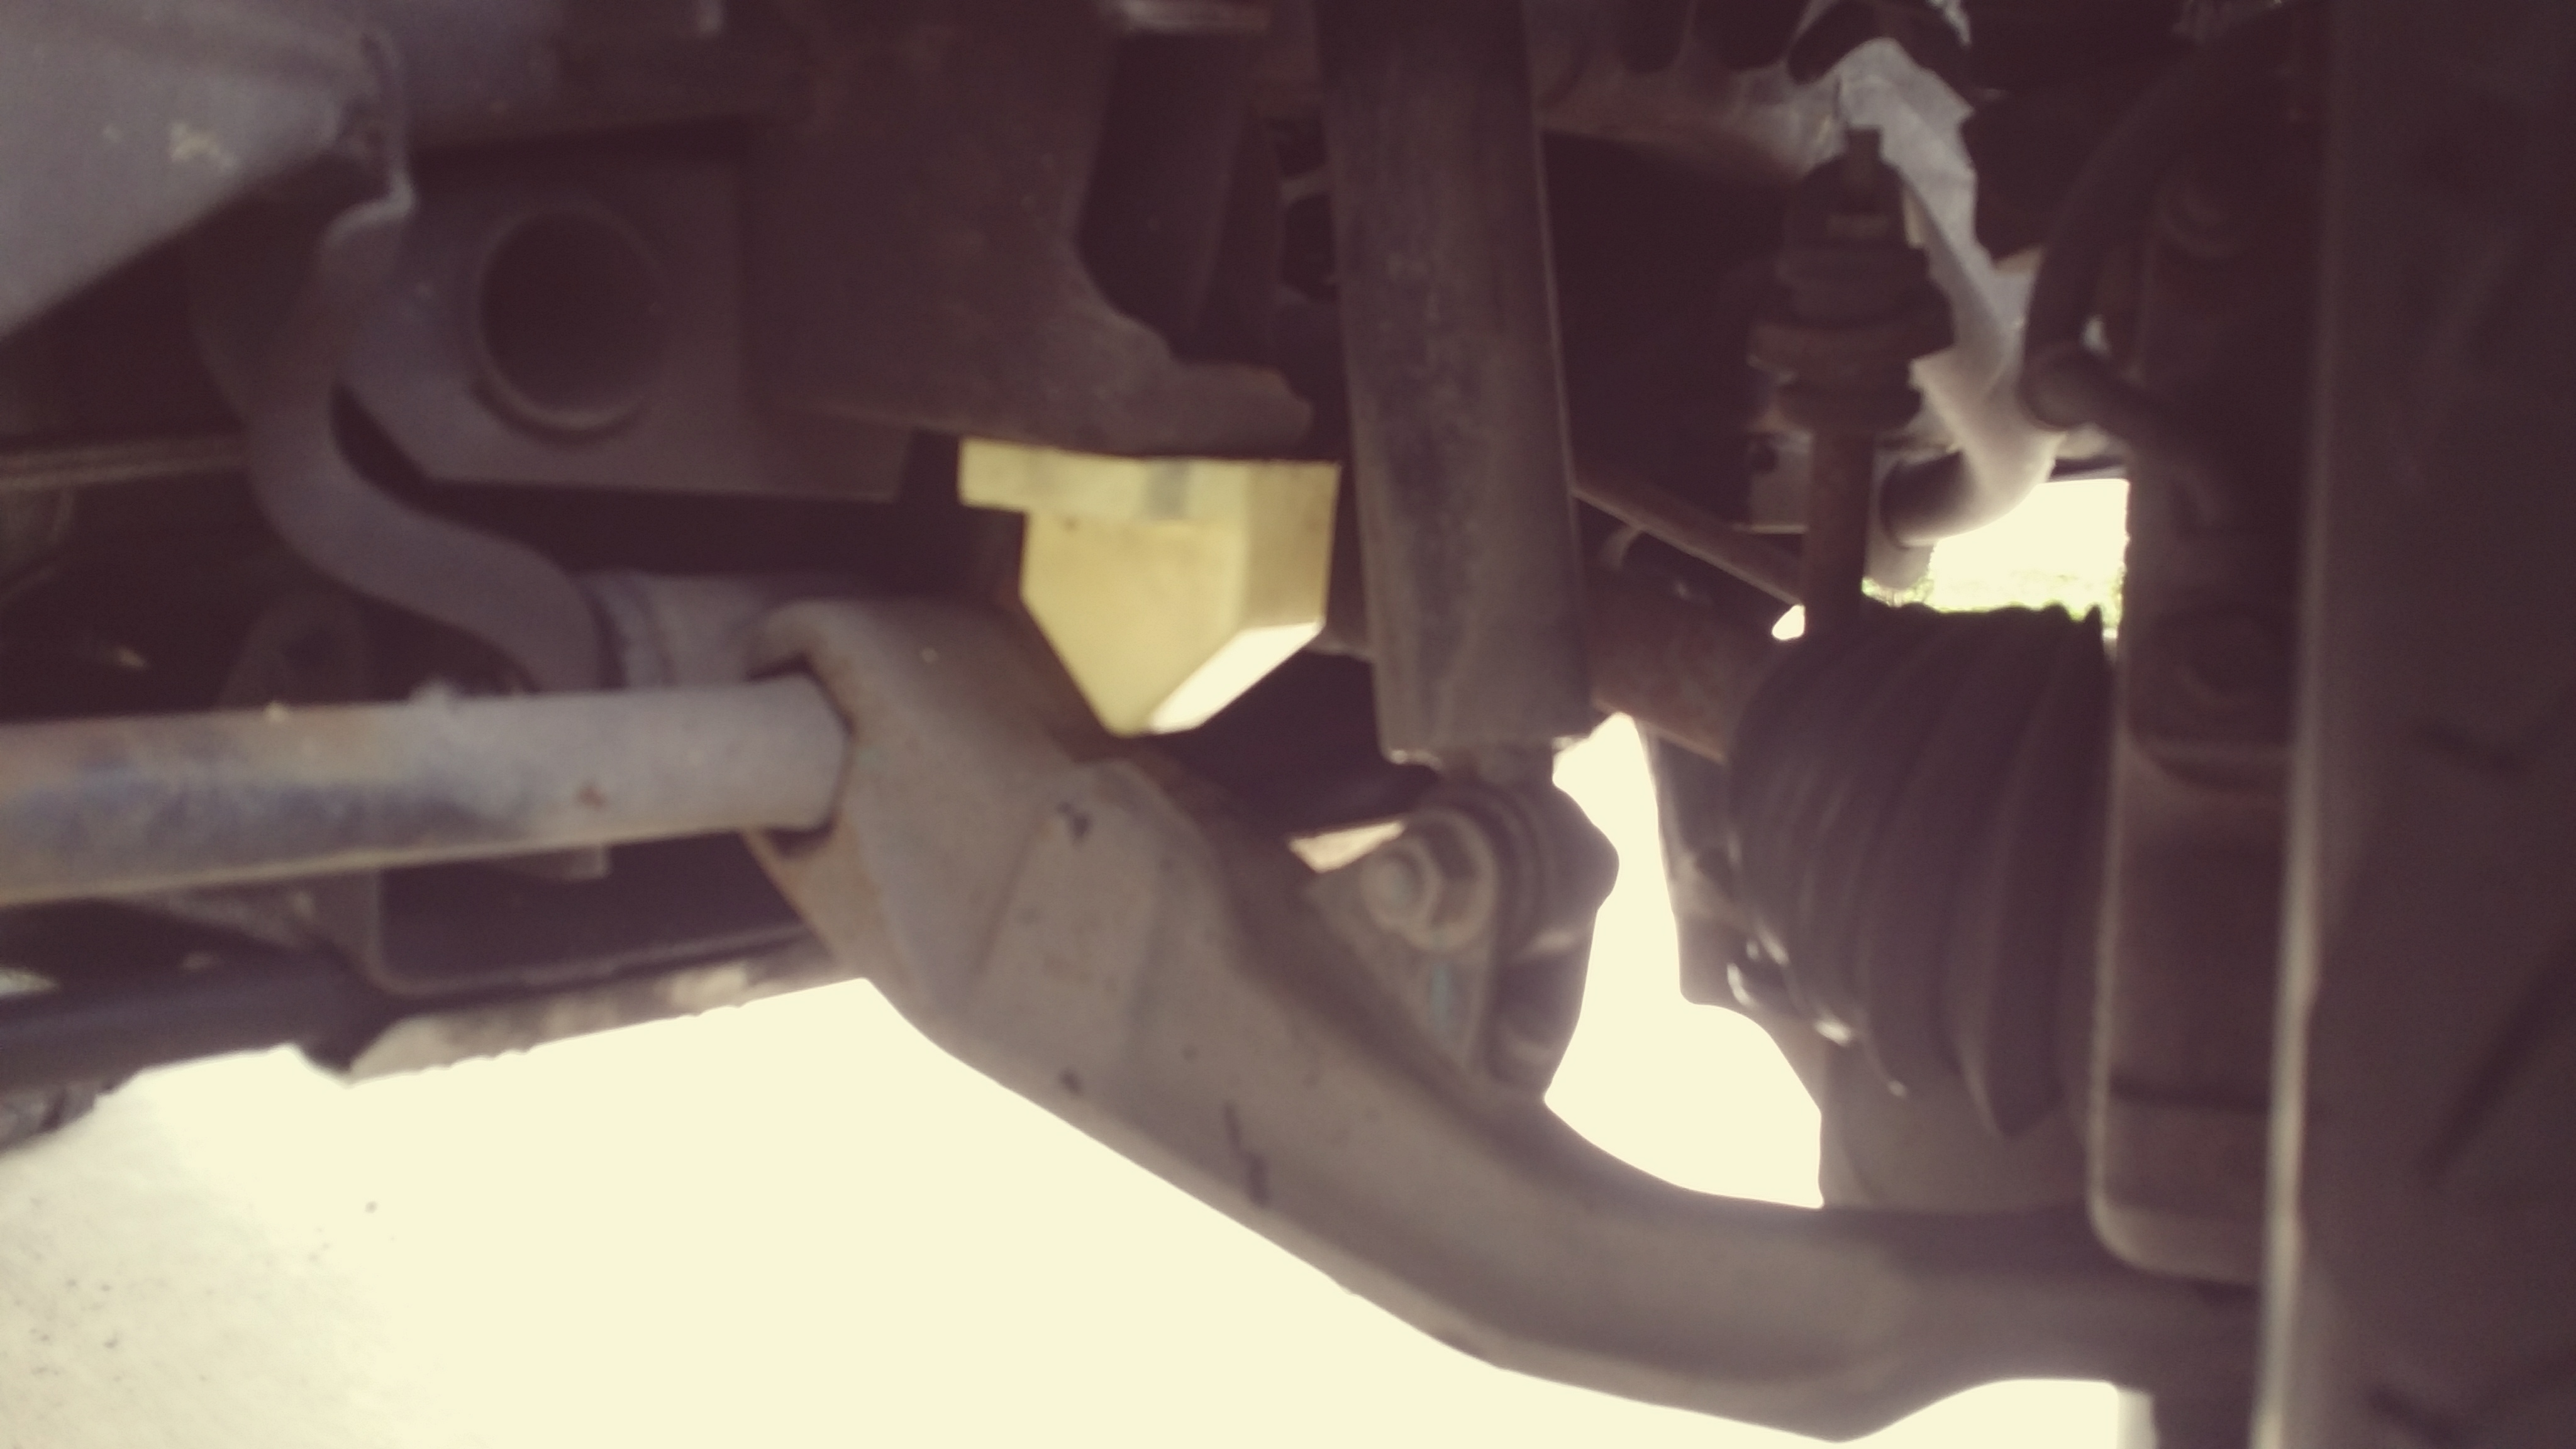
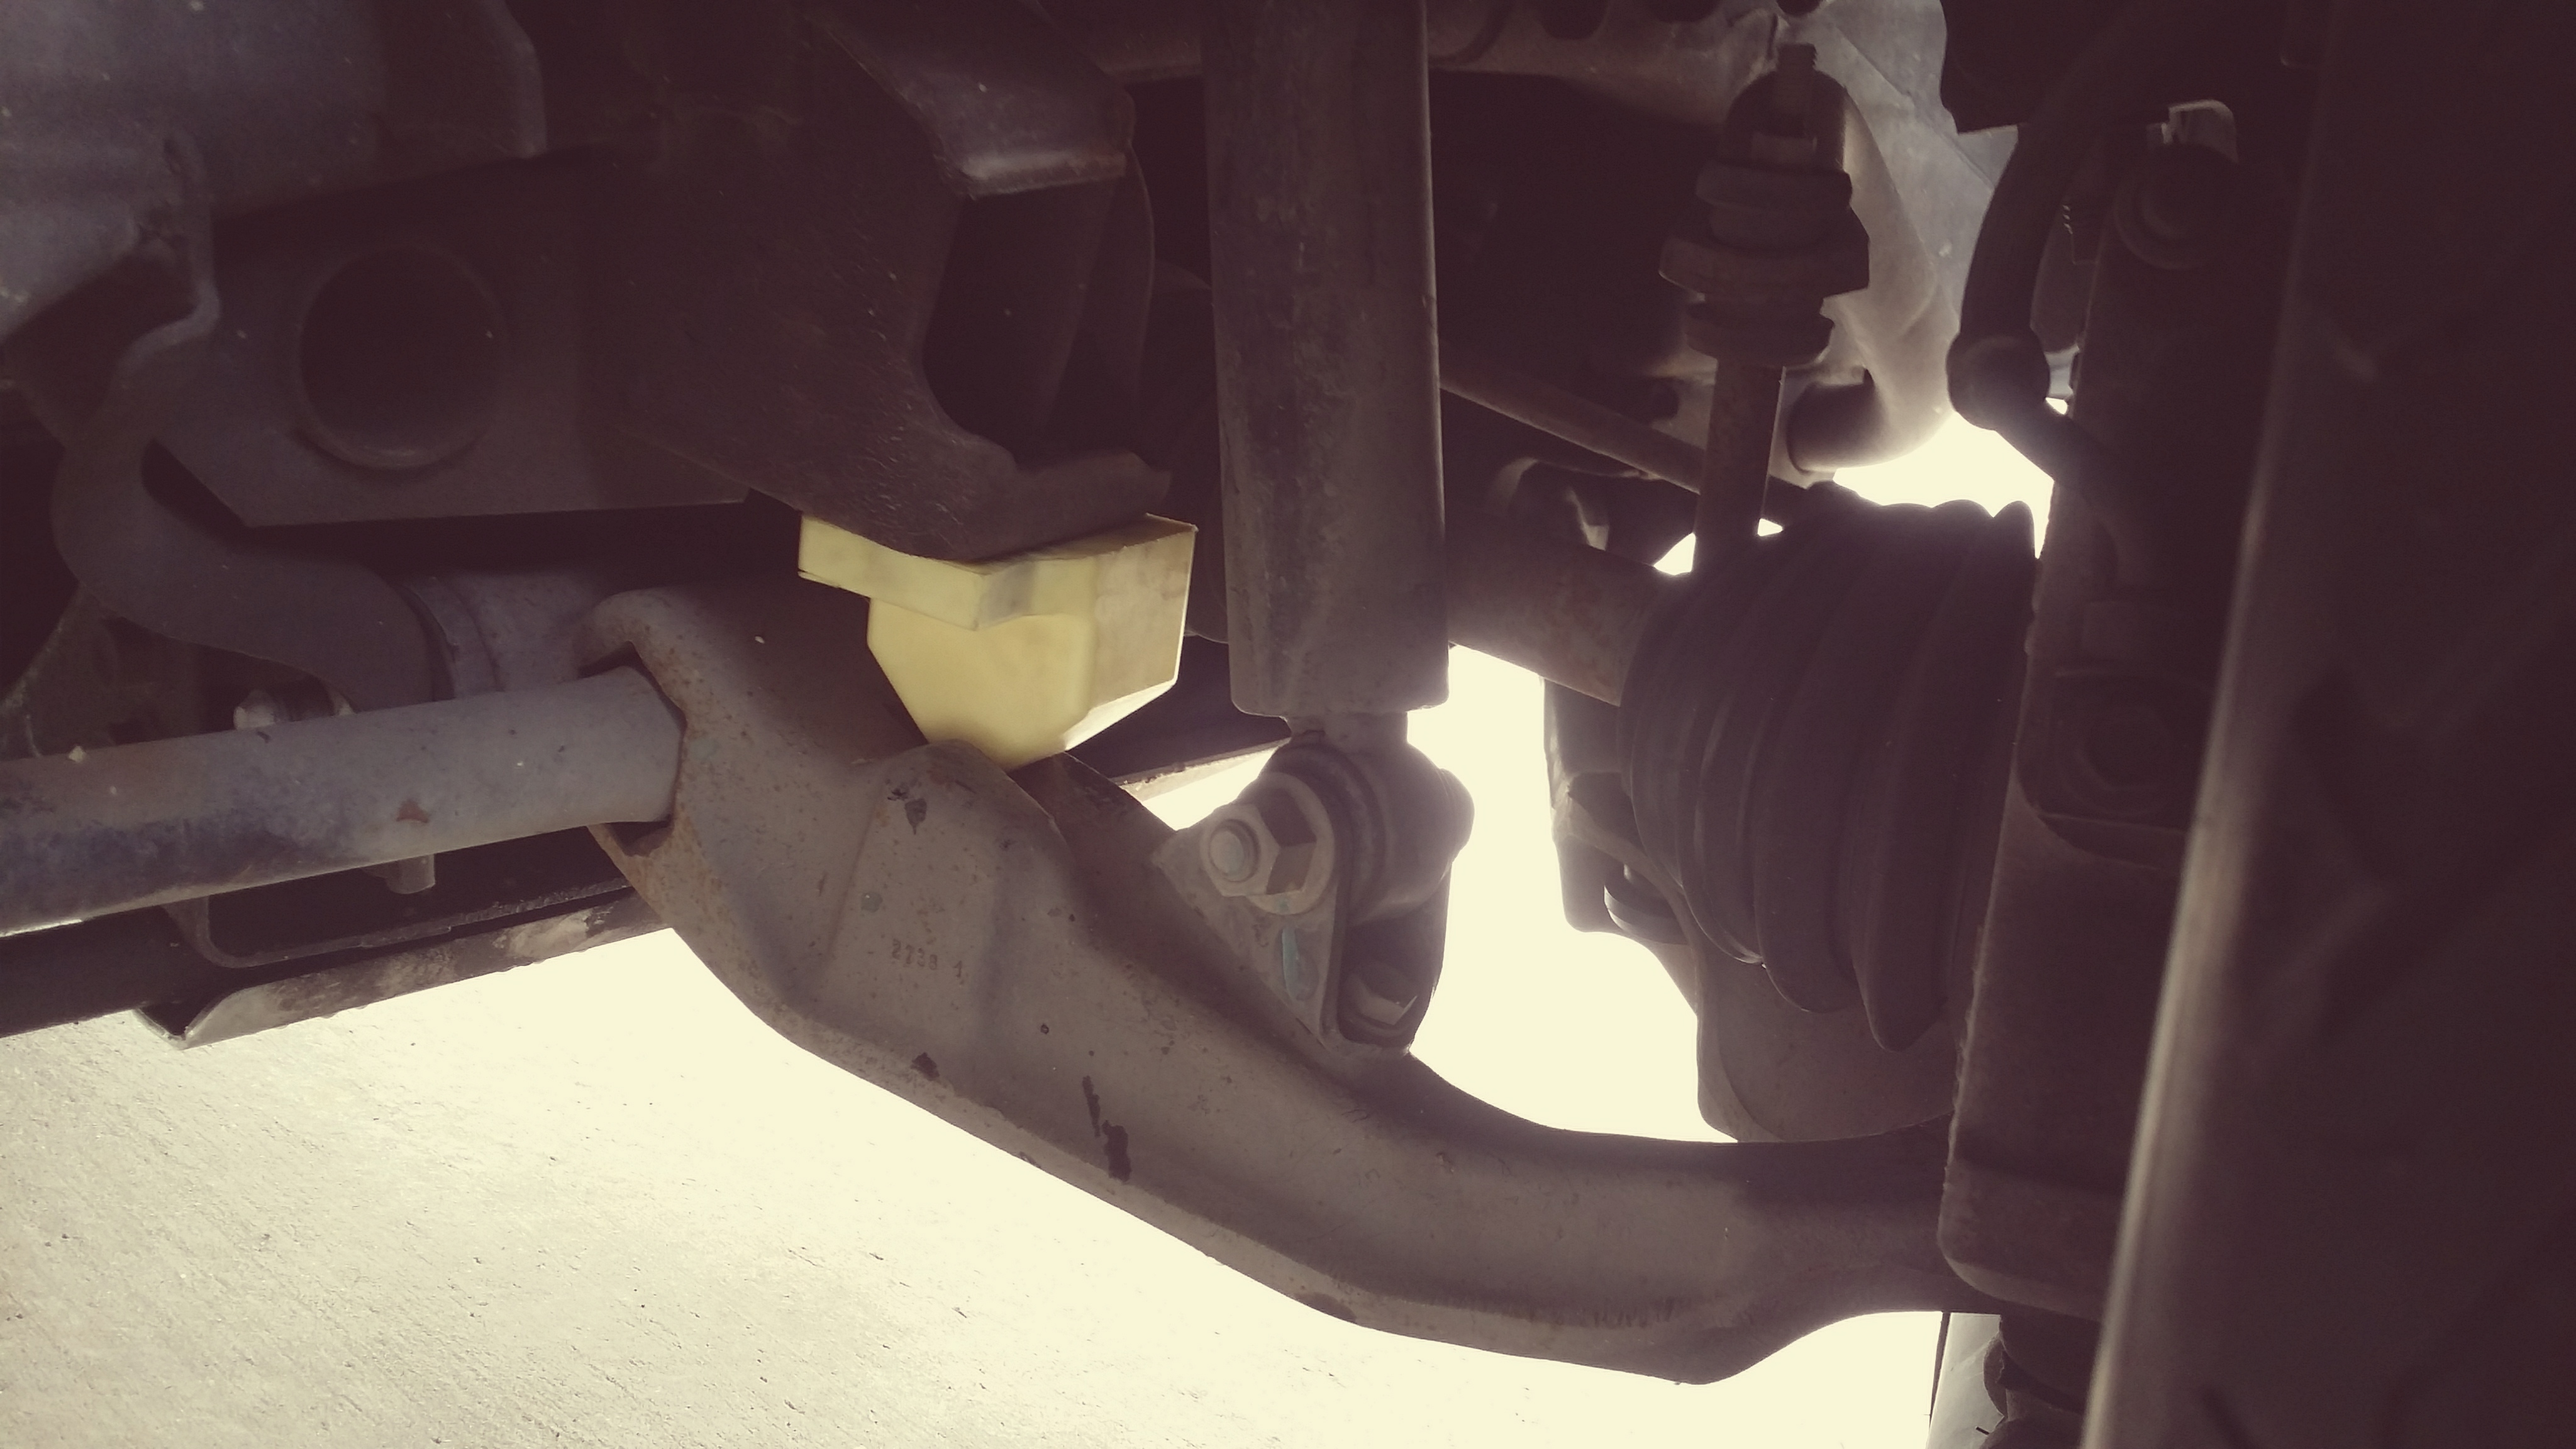
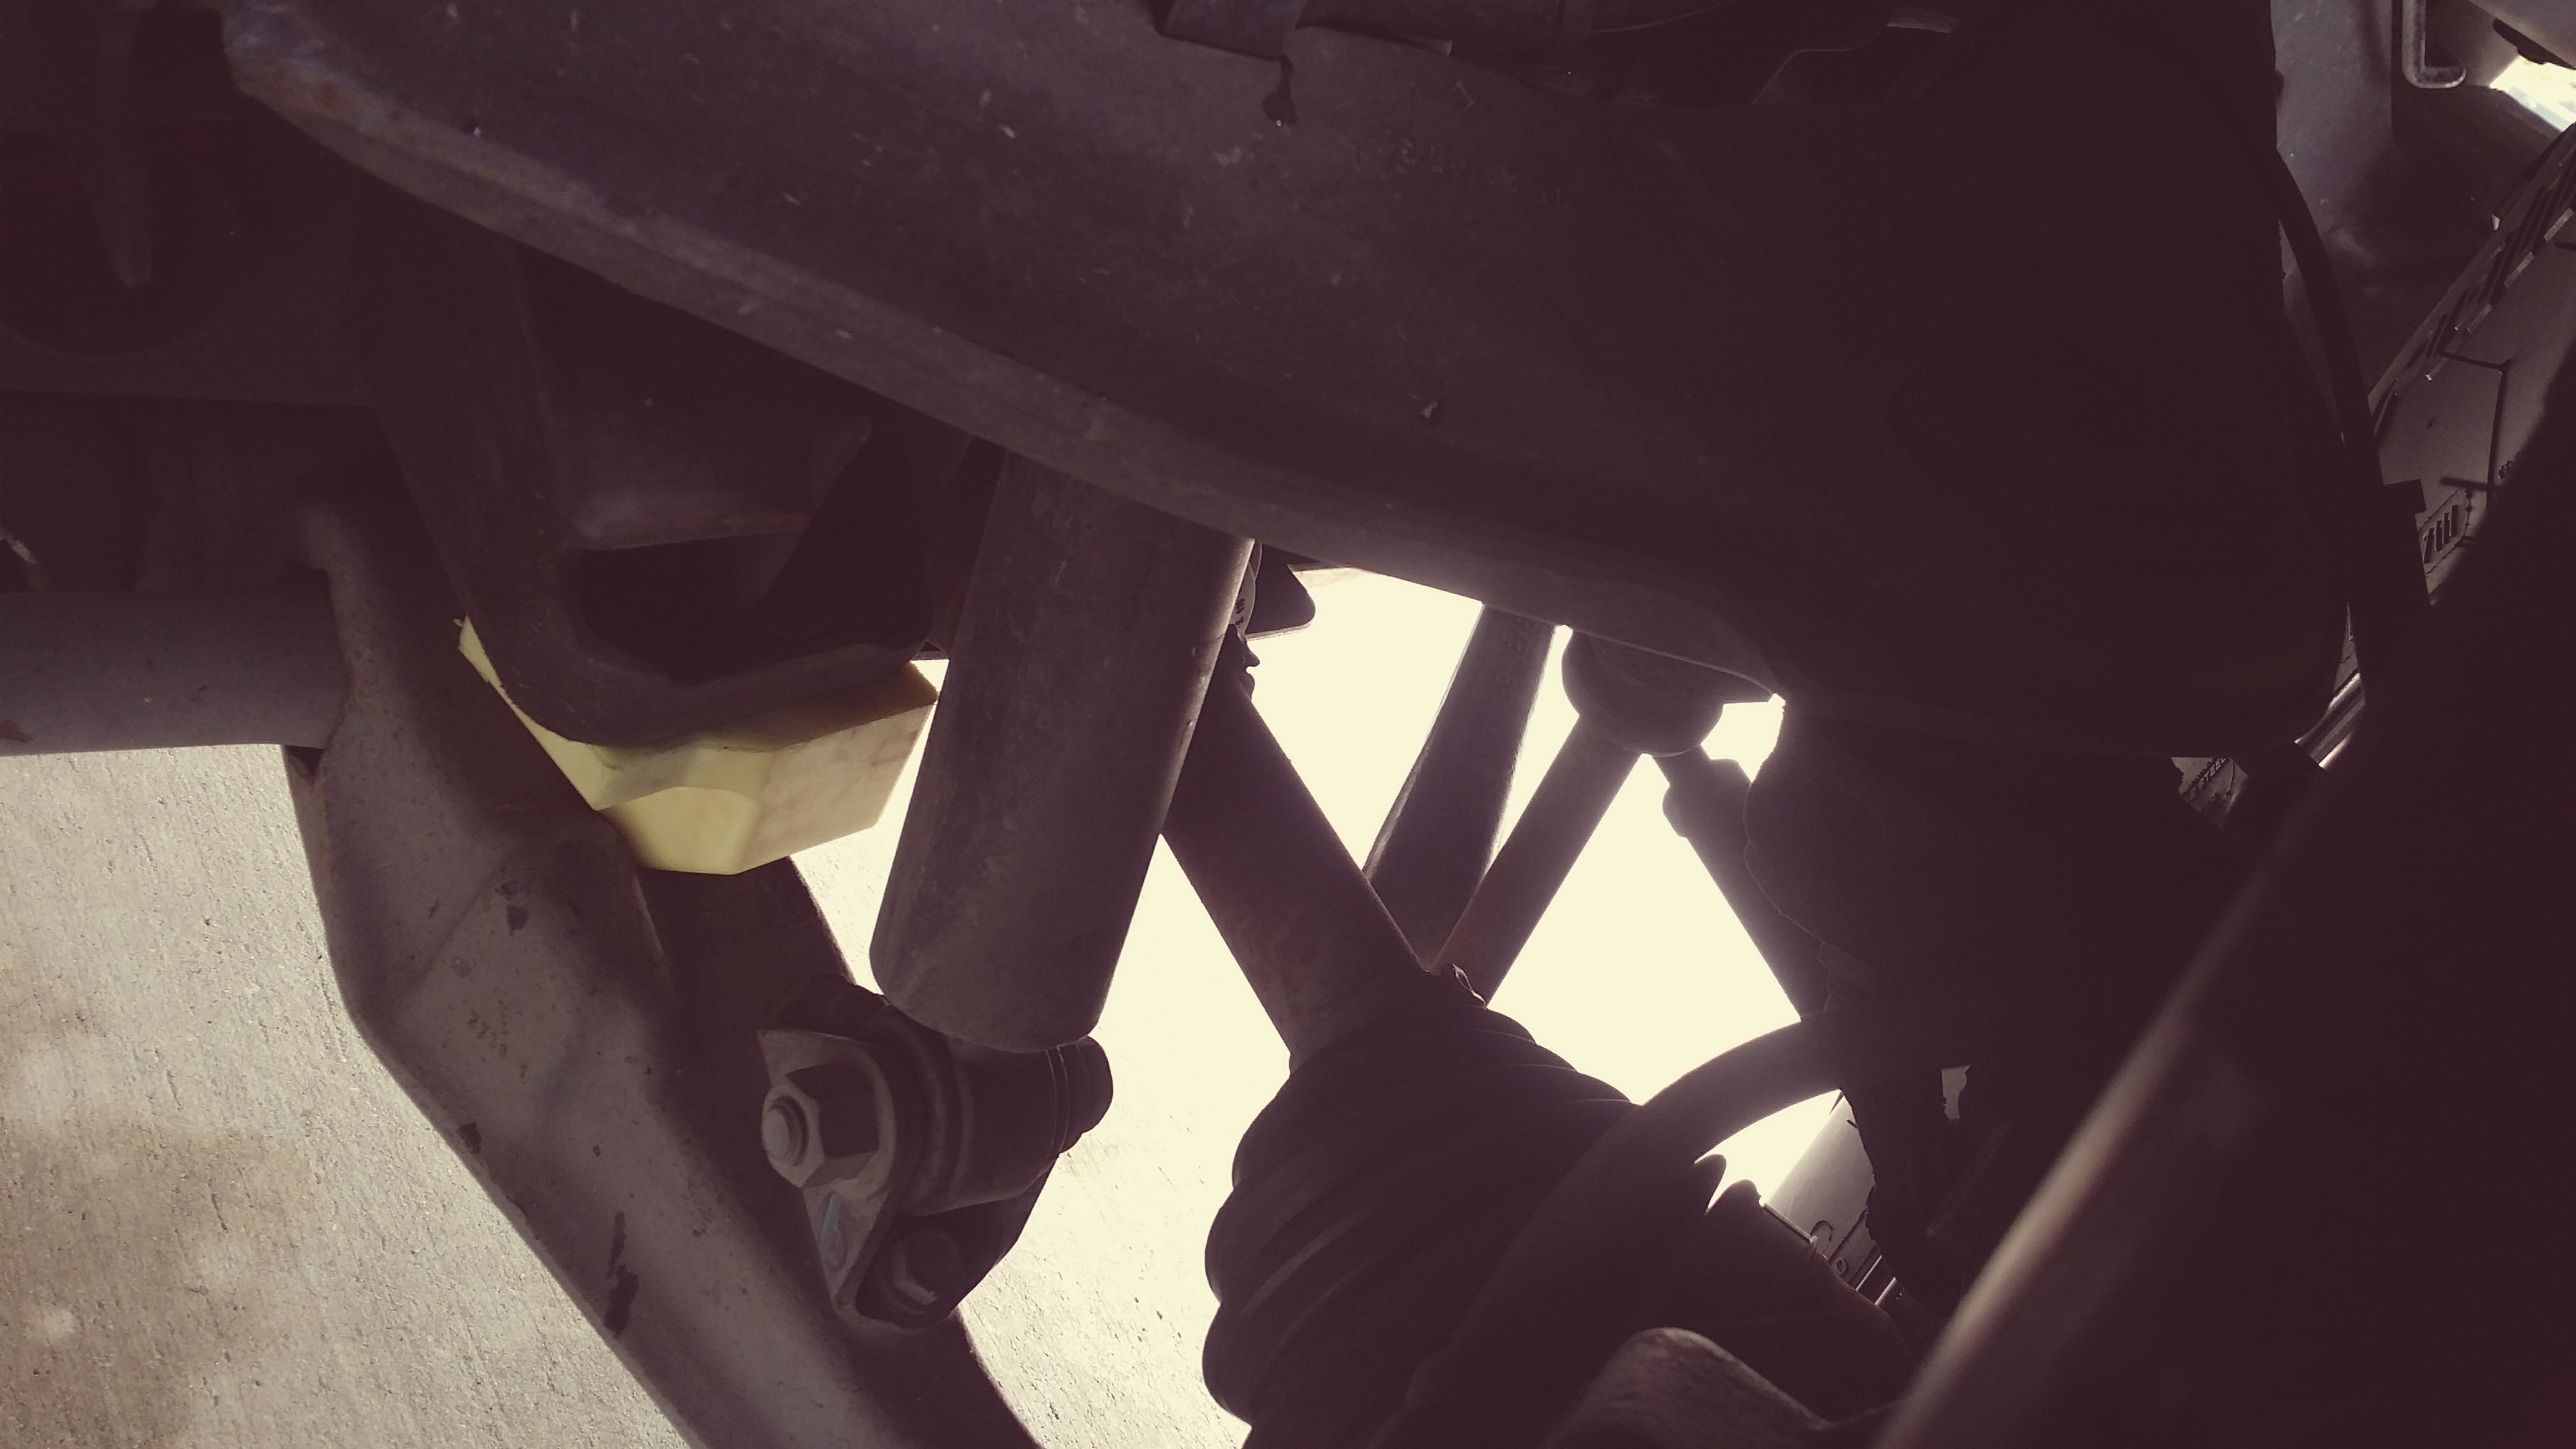
The picture w/ the mounting location pictured without the bump stop is from the driver's side. That's why it looks reversed compared to the rest of the pictures.
You may want to check your bump stops.
Both of mine were bad for difference reasons.
Here's the driver's side bump stop. It's clearly dry rotted.
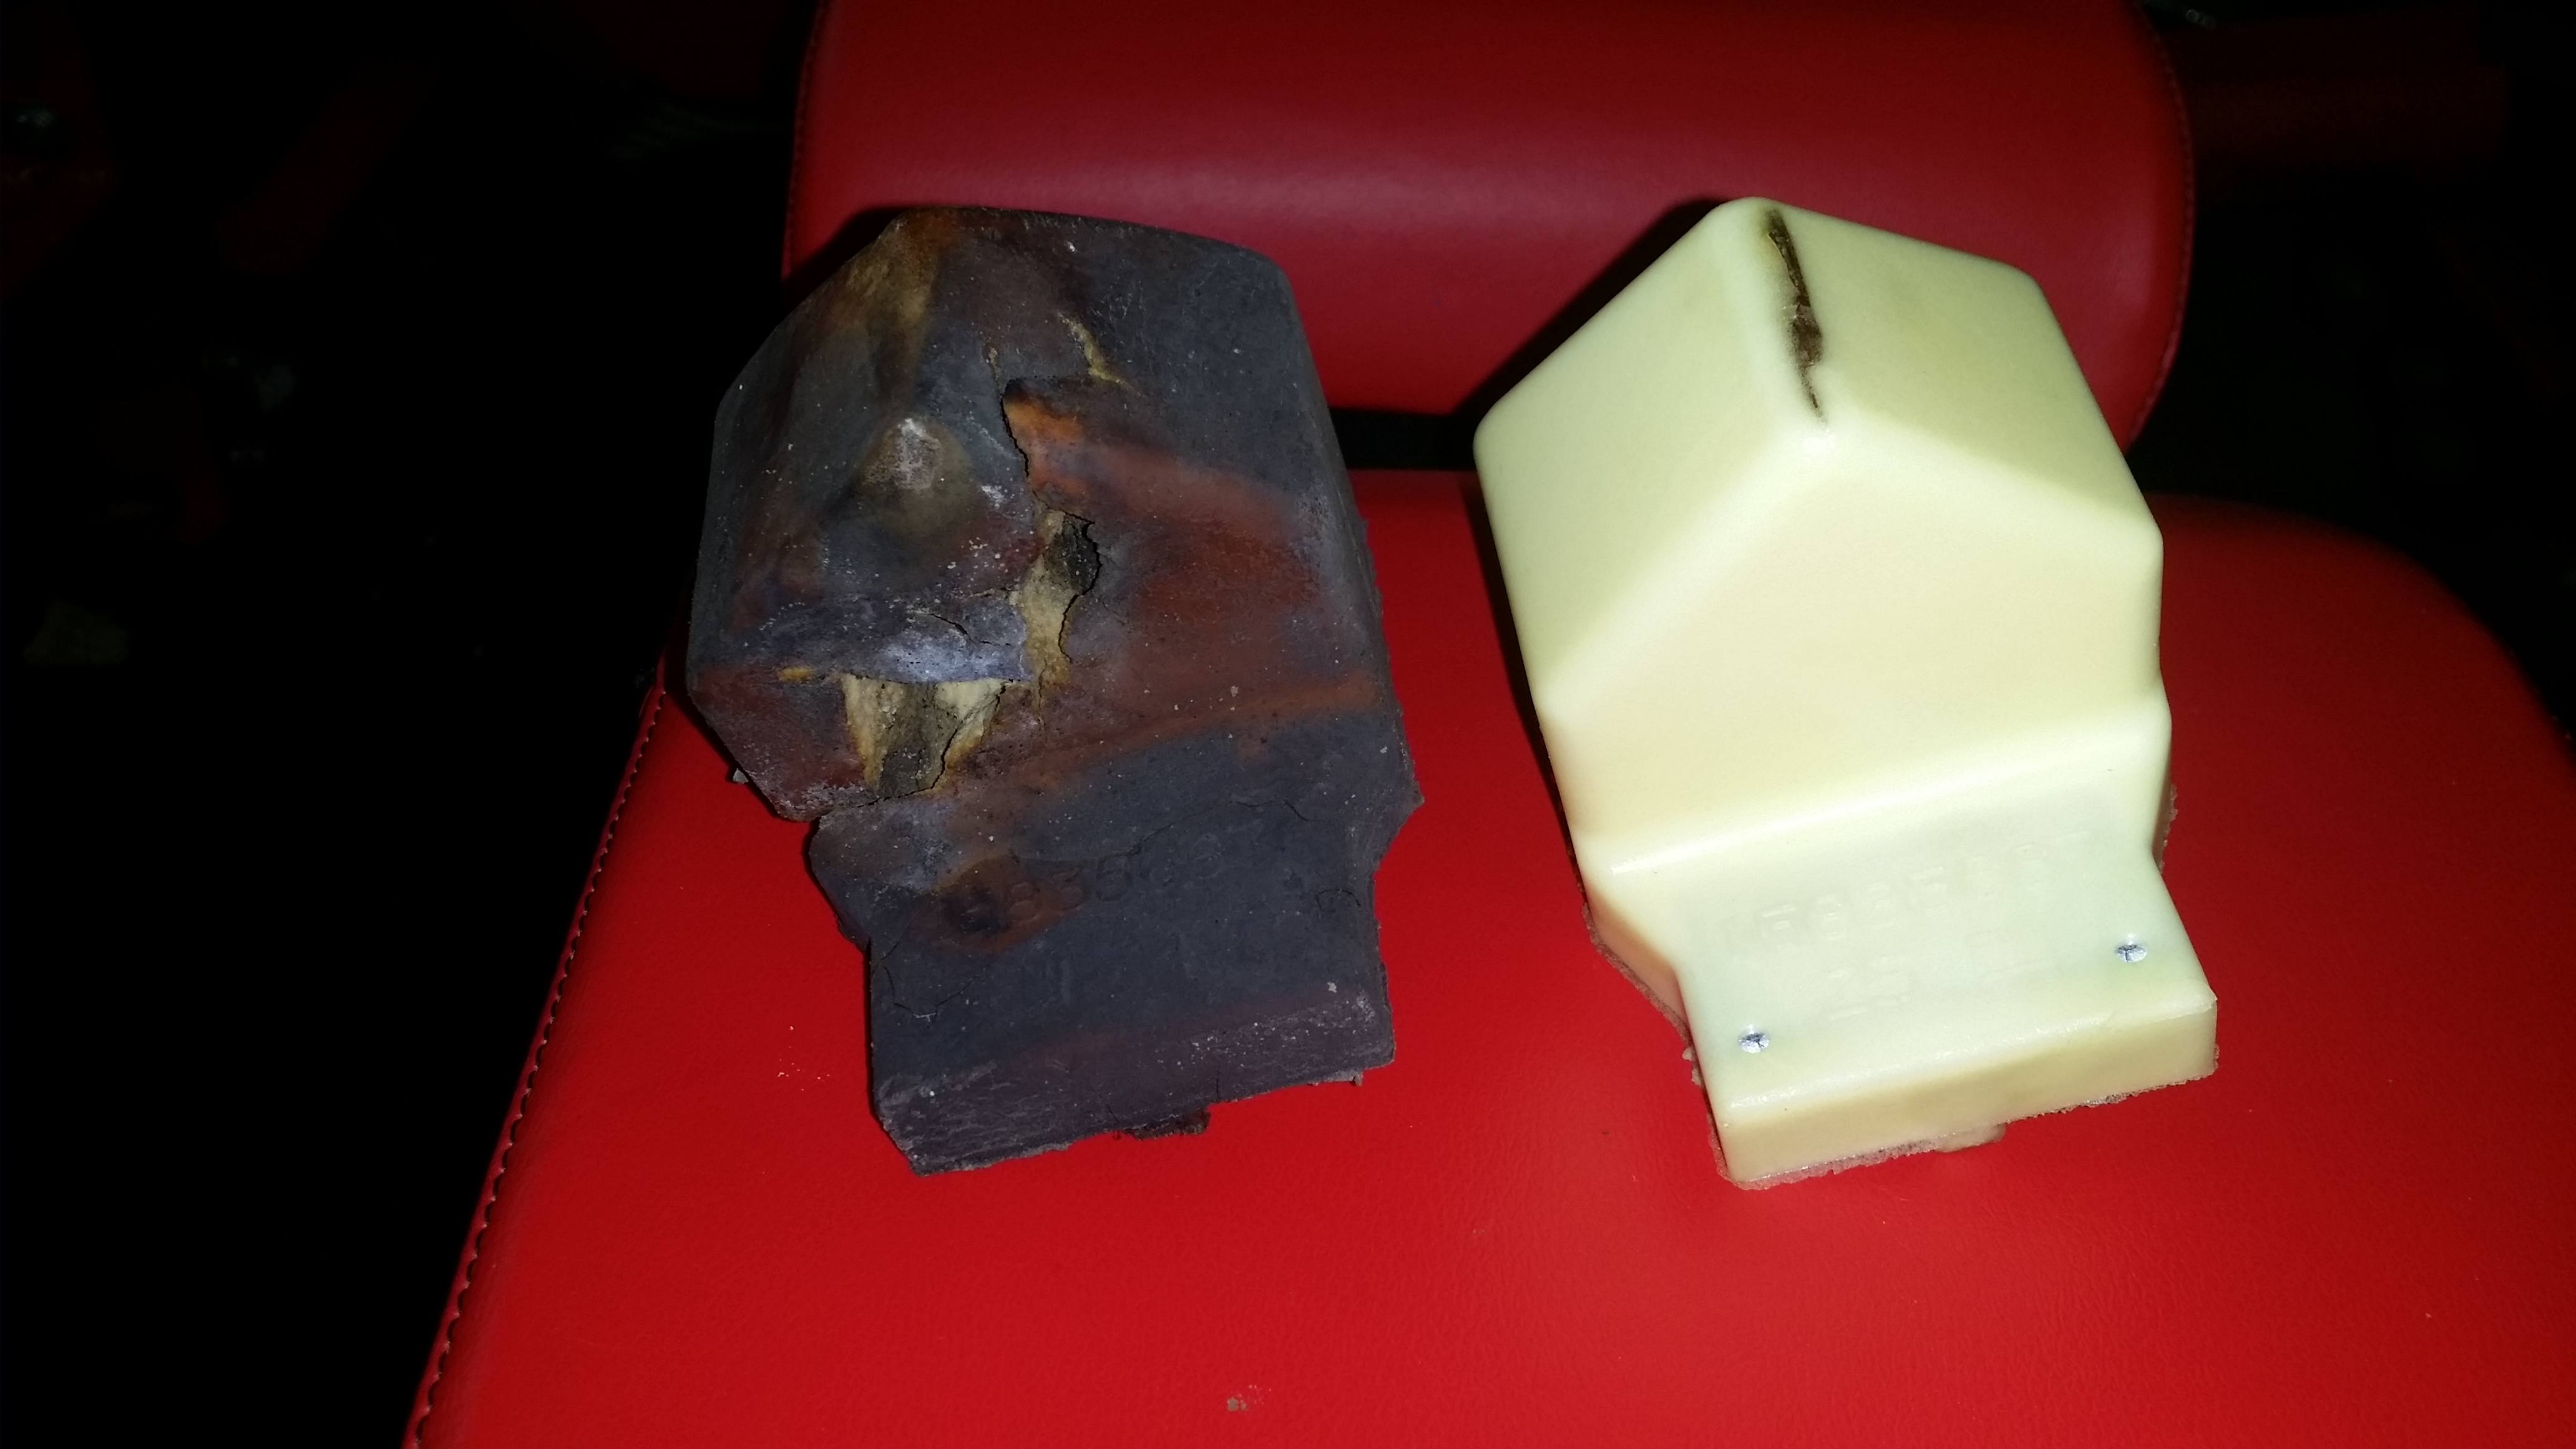
Here is the passenger side was not dry rotted, but it has suffered irreversible compression.
As you can see, there's a few reasons to replace these.
So, is it worth the time & $40 for the bump stops?
YES!
The change in ride quality was amazing. My steering wheel vibrates less, the plate below my feet has all but entirely stopped vibrating as well. Bumps are much less noticeable & I feel more planted on the road.
Required Tools:
Jack
Jackstand(s)
Socket Wrench
Socket extension (10" seems to work best)
15mm socket
Loctite Thread Locker (Blue 242)
2x Bump Stop: part number 15835667
Directions:
1. Turn on the engine & turn the wheel to expose the rear portion of the lower control arm for easy access.
2. Lift the vehichle w/ the jack & use a jackstand or 2 like I did. Can't be careful enough. Remember to give the tire a shove to make sure the vehicle is stable.
3. Locate the nut that secures the bumpstop & loosen it. This does not require a breaker bar.
4. Remove the nut & bumpstop. Clean the threading on the nut.
5. Replace the bump stop. There is a small metal tab across from the threaded bolt. This doing into a small hole & prevents the bump stop from turning.
6. Place the nut back & use the socket to secure the location. Once the threaded bolt is inserted, use the extension to thread the nut to the bolt by hand. This is much easier than using the socket wrench. Once you cannot turn the nut by hand, finish tightening the nut with the wrench. Remember to always apply pressure to the bump stop tightening it to keep that metal tab it's slot. If you don't, it will move around & you'll have to loosen the nut & start over.
The torque spec is 22 lb-ft.
7. Jack up the vehicle, remove the jackstand & lower it. You'll notice how the bumpstop sits against the lower control are while at rest.
Here's a picture diagram.
The picture w/ the mounting location pictured without the bump stop is from the driver's side. That's why it looks reversed compared to the rest of the pictures.
You may want to check your bump stops.
Both of mine were bad for difference reasons.
Here's the driver's side bump stop. It's clearly dry rotted.
Here is the passenger side was not dry rotted, but it has suffered irreversible compression.
As you can see, there's a few reasons to replace these.
So, is it worth the time & $40 for the bump stops?
YES!
The change in ride quality was amazing. My steering wheel vibrates less, the plate below my feet has all but entirely stopped vibrating as well. Bumps are much less noticeable & I feel more planted on the road.
Last edited by Synthetickiller; Mar 24, 2015 at 10:57 PM.

Thread Starter
|
Senior Member
Joined: Sep 2014
Posts: 813
I believe they are. To my knowledge, GM has two, this firmer, but progressive style vs their old, rounded ones. I know these are on the Z71 & H2s.
The part number is 15835667. It says left, but they fit on both sides.Ebay Link
You can get two for under $40. Save a few bucks.


Senior Member
Joined: Mar 2014
Posts: 356
From: Belwood,Ontario , Canada
Thanks for posting. Threads like this should be posted as sticky's. Then they would always be there when you need them. Never have much luck with the search engines on forums. Would also reduce the weekly re-posts.

Member
Joined: Sep 2014
Posts: 64
While I was under my truck chasing a noise I noticed my bump stop on the drivers side looks much like yours. I just ordered a set from your eBay link. Are they supposed to sit directly on the LCA or should there be some space? Mine are right on the LCA. In your after pics it looks like yours are as well. It was my understanding there should be some space. Please correct me if I am wrong. I'm looking at new shocks too as these look original at 104000 miles. I am trying to prep my truck so my wife and daughter can drive to NY and back this summer. I will be in Dubai so I am trying to replace everything I can think it may need as PM at this mileage.
Thread Starter
|
Senior Member
Joined: Sep 2014
Posts: 813
Yes, the bump stops rest on the LCA.
Not sure why they were designed this way, but it makes me think replacement needs to be sooner than 100k miles if you want the ride quality to stay the same.
As for shocks, 99 out of 100 here will push bilstien. I, being the only one, won't because of very bad (extremely low quality) experiences with them.
Are you going to be offroading or just on the street?
Member
Joined: Sep 2014
Posts: 64
Mainly street with some beach days. We have a stretch of 60 miles of natural beach that requires a four wheel drive vehicle. Sand gets deep but I haven't had to put it in four low yet. Unfortunately we don't have any hills around here. The car is mainly my daughters transportation to school. I drive it when I'm in town and don't feel like getting the Camaro dirty.
Last edited by mp51998; Apr 5, 2015 at 08:40 PM.


Thread Starter
|
Senior Member
Joined: Sep 2014
Posts: 813
Thanks guys.
To my knowledge, the rears just pop out, so you just rip em out, pop in new ones (not sure how much force that requires) & go.
I doubt it's worth even writing up a tutorial, if I ever replace them.
To my knowledge, the rears just pop out, so you just rip em out, pop in new ones (not sure how much force that requires) & go.
I doubt it's worth even writing up a tutorial, if I ever replace them.