problem with ac climate control need some help..


#54
 11-03-2013, 04:28 AM

first,from earlier,
a simple mod lets you shift out of park with no batt,no key, no brake ,just shift like the old days. then if you're stuck dead you can move. jfwiw.
just kill the shift solenoid at the shifter. like stuck in garage with dead batt,or worse, on the rr tracks!
now my q?,
was this fixed in 08/09 or might I need it in my 09 at some point?
btw #2, there are two motors, left and right heat! I guess you could get fancy and make dual controls! let the girls have all the heat they want huh. actually the 3rd motor is mode control.
btw,as I look at the wiring,this problem would affect the "mode" control position as well. anybody notice a shift in the mode control? b4 you fixed this?
It helps to shift to Low. However leaving the key on will drive you nuts so after removing the dash piece I put it back in park.
Disconnecting the battery would of course shut the dinger bell off. So I would recommend that and you can leave it in low to have more room, now that we know this did fix it. (fingers crossed
Disconnecting the battery would of course shut the dinger bell off. So I would recommend that and you can leave it in low to have more room, now that we know this did fix it. (fingers crossed
just kill the shift solenoid at the shifter. like stuck in garage with dead batt,or worse, on the rr tracks!
now my q?,
was this fixed in 08/09 or might I need it in my 09 at some point?
btw #2, there are two motors, left and right heat! I guess you could get fancy and make dual controls! let the girls have all the heat they want huh. actually the 3rd motor is mode control.
btw,as I look at the wiring,this problem would affect the "mode" control position as well. anybody notice a shift in the mode control? b4 you fixed this?
Last edited by happythree; 11-03-2013 at 05:08 AM.
#55
11-03-2013, 08:18 AM

#56
11-08-2013, 10:31 AM

Your post of this is the first time I saw the resistor fix. I guess I never saw or was not interested whenever it was first posted.
I would like to thank you for posting it recently. It seems to be happening more often to more people. It happened to me and I did the fix.
Since I see people asking about it I thought I would post how I did it to help those needing more info. It's great to have people with a common interest getting together to fix things.
The procedure here is the HUNNER method of installing it. Proceed at your own risk.
- I did not disconnect the battery as I wanted to confirm this resistor fixed it instead of by some fluke disconnecting the battery did.
- Set the parking brake. Turn the key on.
- It helps to shift to Low. However leaving the key on will drive you nuts so after removing the dash piece I put it back in park.
- Disconnecting the battery would of course shut the dinger bell off. So I would recommend that and you can leave it in low to have more room, now that we know this did fix it. (fingers crossed)
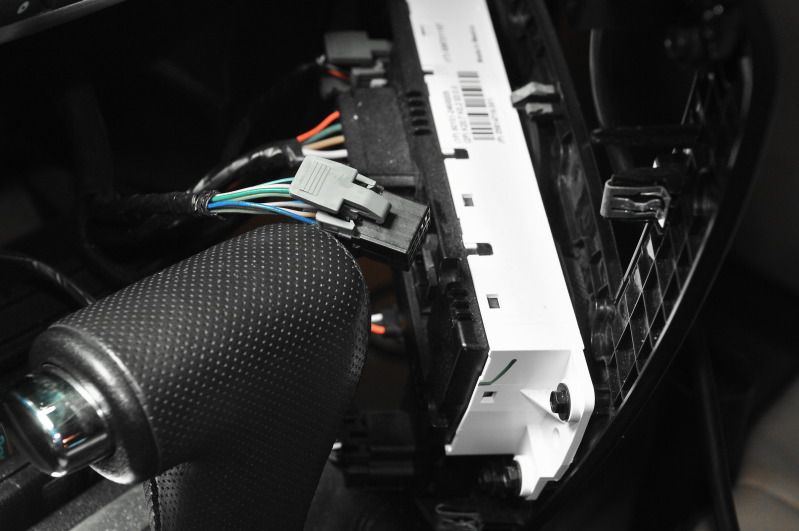
- First you have to do the stick your fingers in the DC sockets and pull up and out.
- I cut me a piece of cardboard for a work surface in case solder dropped.
- I disconnected the plug from the back of the switch to get more room to work
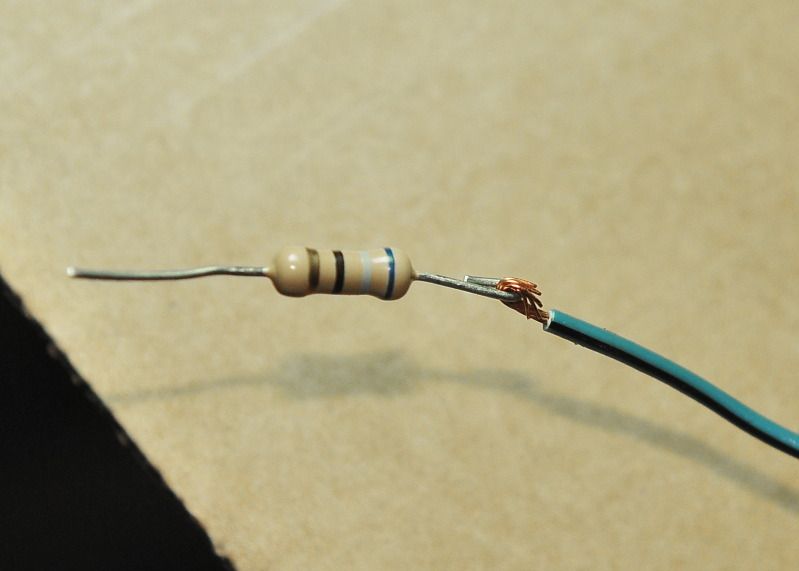
- Find the light blue wire with black stripe. I peeled back the high quality gooey sticky black electrical tape GM chose to use far enough to expose the wire back into the loom so I could slide on some shrink wrap long enough to cover the splice.
- Call me old school, I'm old and went to school, but just as in my battery thread I make a physical connection first then solder.
- I used some forceps for a heat sink.
- I used a Radio Shack 68 ohm 1/2 watt resistor. They come 5 to a pack for $1.30 or $.26 a piece.
- If you don't know, use a low wattage iron so as not to fry the insulation on each end. Heat the wire until it pulls some solder as you feed it.
- Use some fine solder, Radio Shack still has that!
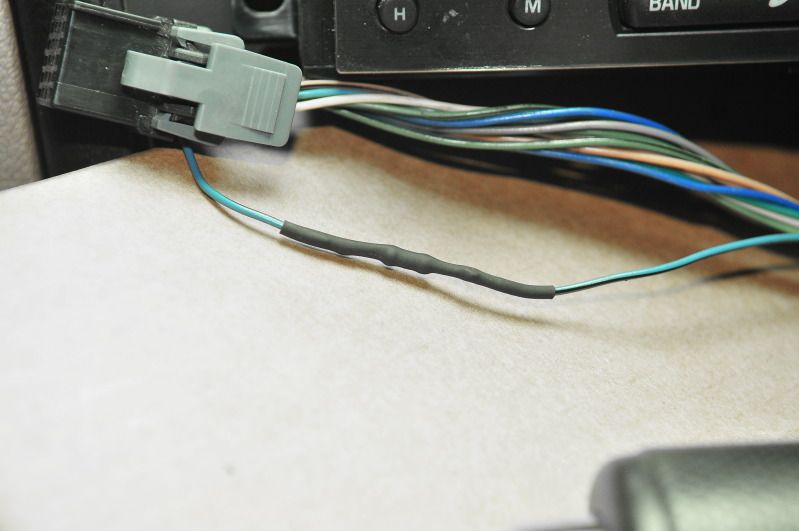
- Grabbed a short piece of shrink wrap I keep around. After the solder area cools slide the shrink wrap you remembered to slide on BEFORE you soldered over the entire splice. Use a heat gun carefully to shrink the wrap and secure and insulate your splice. I did not re-tape it at this time as I wanted to test it first. I will use a high grade of black electrical tape or some loom.

#58
11-13-2013, 07:55 PM

Just bought an 08 alpha. And discovered that it had this problem. Took it back to the dealer and they replaced the control unit. Sounds like there is something in the Portugal units that is weak and is popping with regular use and a battery disconnect / reconnect can also damage it. The resistor trick or replacing the unit with a Mexico unit seems to correct the problem.

#60
10-18-2014, 02:22 PM

This fix worked for me too.
For those that never took off console before (and to make it clearer for 1st timers)...
Put fingers in 2 outlets and pull up and out
If will feel like there are clips above the radio - there isnt
but the ac vents are sleeves that slide into a duct
so once you get the bottom disconnected, pinch a vent slot thing and pull forward
then disconnect wires as needed