


My new lights


Senior Member
Joined: Jan 2007
Posts: 321
From:
 RE: My new lights
ORIGINAL: importkiller
give me till tomorrow....I'm going to see if I can get an even group rate for my hummer forum brothers and sisters
one thing I will say...they make aftermarket wire harnesses...basically a thicker gauge wire and the plastic plug is higher temp resistant to withstand the higher wattage of any aftermarket bulb. I would definately look into these...they are only like $6 at most autozones or you can find them online. That said they are hard to find for the H13 that the h3's use. I was told by an engineer at Streetglow that they are hard to find for H13's because the H13's are newer and the stock wires and harness can withstand the additional heat with no problems. I would keep an eye (or hand) on the harness for a few minutes when the lights are first turned on to be sure. I had no problems with my truck and Rich hasn't had any either but I like to be safe. Also the gauge of the wire has a direct effect on the amount of juice getting to the light...upgrading to a thicker gauge will DRAMATICALLY increase the amount of lumins the light puts out.
give me till tomorrow....I'm going to see if I can get an even group rate for my hummer forum brothers and sisters
one thing I will say...they make aftermarket wire harnesses...basically a thicker gauge wire and the plastic plug is higher temp resistant to withstand the higher wattage of any aftermarket bulb. I would definately look into these...they are only like $6 at most autozones or you can find them online. That said they are hard to find for the H13 that the h3's use. I was told by an engineer at Streetglow that they are hard to find for H13's because the H13's are newer and the stock wires and harness can withstand the additional heat with no problems. I would keep an eye (or hand) on the harness for a few minutes when the lights are first turned on to be sure. I had no problems with my truck and Rich hasn't had any either but I like to be safe. Also the gauge of the wire has a direct effect on the amount of juice getting to the light...upgrading to a thicker gauge will DRAMATICALLY increase the amount of lumins the light puts out.
thanks again! if your talking a few bucks discount..please dont refund me! keep it, go get a coffee. lol. times are getting rough, and im not here to rip anyone off for a couple bucks!

Thread Starter
|
Senior Member
Joined: Oct 2007
Posts: 4,547
From: Delaware, Ohio GO BUCKS!
RE: My new lights
ORIGINAL: JeepeaterH3
btw, rhill.....
I LOVE YOUR TRUCK! AND I WANT A TACTICAL BADGE! lmao
btw, rhill.....
I LOVE YOUR TRUCK! AND I WANT A TACTICAL BADGE! lmao

Senior Member
Joined: Jan 2007
Posts: 321
From:
RE: My new lights
i have an issue..lol
how do i level my lights? i ready lifted it, and i get these reactions from other people: The bird, flashing lights, rednecks scream out the window, people tilt their mirrors up, well u know.. lol
so how do i fix it.?
how do i level my lights? i ready lifted it, and i get these reactions from other people: The bird, flashing lights, rednecks scream out the window, people tilt their mirrors up, well u know.. lol
so how do i fix it.?

Joined: Apr 2006
Posts: 7,253
From:
RE: My new lights
ok, so these are for your headlights then...the H13 size?
The discount will be minimal if anything...I got yelled at for selling them so cheap already...LOL.
They will ship tomorrow from the streetglow warehouse in NJ by UPS.
THANKS!!!!
I got a trick for all you guys that change your headlights.....ANY and ALL bulbs will will fail prematurely from any oil from your hands that get on the bulb...SO...in case you get some oil on the bulb without knowing....take your stock bulbs and put them into the plastic container that the SG bulbs come in. Tape the cover back on and throw it in your glove box...this way if a bulb does go out on you..you can make a simple 2 minute switch and never be stuck in the middle of some dark country road with one headlight
and here is the package you will be recieving..(different size of course)
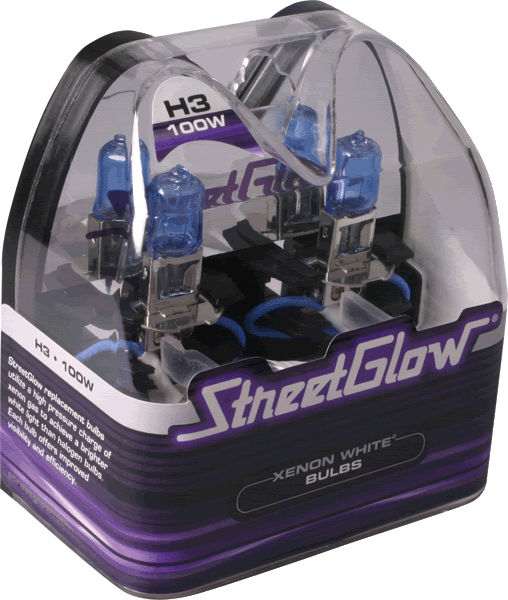
The discount will be minimal if anything...I got yelled at for selling them so cheap already...LOL.
They will ship tomorrow from the streetglow warehouse in NJ by UPS.
THANKS!!!!
I got a trick for all you guys that change your headlights.....ANY and ALL bulbs will will fail prematurely from any oil from your hands that get on the bulb...SO...in case you get some oil on the bulb without knowing....take your stock bulbs and put them into the plastic container that the SG bulbs come in. Tape the cover back on and throw it in your glove box...this way if a bulb does go out on you..you can make a simple 2 minute switch and never be stuck in the middle of some dark country road with one headlight
and here is the package you will be recieving..(different size of course)
Joined: Apr 2006
Posts: 7,253
From:
RE: My new lights
leveling is easy...I can tae pics tomorrow...but there is an adjustment screw under or over the light (I forget now..been awhile) I think I remember it bieng a torq head screw....just turn that and the light goes up or down...depending what direction you turn it
Thread Starter
|
Senior Member
Joined: Oct 2007
Posts: 4,547
From: Delaware, Ohio GO BUCKS!
RE: My new lights
There is an adjustment HEX (I think) screw on the top of the assembly under the hood. I put the wife's in the garage and marked where they hit the wall with a pencil then pulled mine in and lined them up.
OR:
Park so that both the left and right headlights are precisely 25 feet from the wall.
Using your tape measure, find the exact middle of both the windshield & rear window and mark them with strips of tape, creating vertical center lines, front & rear.
Standing behind the car, now sight along those center lines, as if you were lining up sights on a rifle in a carnival shooting gallery. When center lines are aligned, you can locate the headlight centerline on the wall. Mark this with another strip of tape.
Now measure the distance between the headlight lenses, center to center. Divide this distance in half and measure that distance to the right of the centerline on the wall. Mark it with a vertical strip of tape. Do the same on the left side.
Finally, measure the distance from the ground to the center of each headlight lens; mark that distance on the wall with a horizontal strip of tape.
You should now have two crosses on the wall, with centers that correspond exactly to the center of each headlight lens.
Testing Your Beams:
Turn your headlights on low beam. The left edge of the bright spots on the wall should just touch the vertical bars of the crosses in the lower right quadrants. The top edge should just touch the horizontal bars.
OR:
Park so that both the left and right headlights are precisely 25 feet from the wall.
Using your tape measure, find the exact middle of both the windshield & rear window and mark them with strips of tape, creating vertical center lines, front & rear.
Standing behind the car, now sight along those center lines, as if you were lining up sights on a rifle in a carnival shooting gallery. When center lines are aligned, you can locate the headlight centerline on the wall. Mark this with another strip of tape.
Now measure the distance between the headlight lenses, center to center. Divide this distance in half and measure that distance to the right of the centerline on the wall. Mark it with a vertical strip of tape. Do the same on the left side.
Finally, measure the distance from the ground to the center of each headlight lens; mark that distance on the wall with a horizontal strip of tape.
You should now have two crosses on the wall, with centers that correspond exactly to the center of each headlight lens.
Testing Your Beams:
Turn your headlights on low beam. The left edge of the bright spots on the wall should just touch the vertical bars of the crosses in the lower right quadrants. The top edge should just touch the horizontal bars.
Joined: Apr 2006
Posts: 7,253
From:
RE: My new lights
wow...that's like.....technical! I drive around the block...turn the screw a turn or two...drive around the block...turn the screw a turn or two...repeat process until I like where the lights are hittingIf I had used the technical method I could of saved $25 in gas!
If I had used the technical method I could of saved $25 in gas!