
P0017 Help


Senior Member
Joined: Jul 2012
Posts: 9,024
From: C-Town
I just replaced the head on my 2006 Hummer H3 and I too have been haunted by the P0017 code. I replaced a lot of components, starter, water pump, thermostat, timing gears & chain, etc. It is good to learn that it could be a CKP Variation Learn. I will double check the wiring harness to make sure there isn't any worn spots.

Junior Member
Joined: Jan 2020
Posts: 5
Currently I am not experiencing any rattling noises coming from the engine. So far the only time the P0017 appears is at start up. I clear the code and it does not re-appear until after I turn it off and re-start it. Sometimes at start up other codes appear P0446, P0013, B1004. They do not appear consistently. What is consistent is the P0017. In spite of the codes the vehicles runs and sounds better than it ever has.
The P0017 code has me left me a little baffled. That's why this thread with the relearn possibility sparked my hopeful response.
The P0017 code has me left me a little baffled. That's why this thread with the relearn possibility sparked my hopeful response.
Senior Member
Joined: Jul 2012
Posts: 9,024
From: C-Town

Last edited by hummerz; Apr 26, 2020 at 08:05 PM.
Junior Member
Joined: Jan 2020
Posts: 5
Hummerz I appreciate your feedback!
After reconnecting the battery the P0017 came back on. Is it a matter of the computer relearning all of the new components or is there something else I need to be looking for. I have not noticed any unusual wear spots on the wiring harness that I can see.
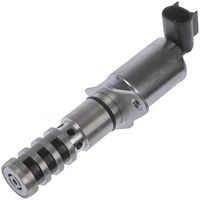
I have tested the VVT Solenoid separately and it opened and closed when I connected the +/- demonstrating that it is functional. I also tested the connector for the VVT and it is receiving 12 volts. With that being said when I tested the connector when it is installed onto the VVT I do not get a reading of 12 volts it gave me a Zero reading on the Voltmeter. Electrical is not my thing so I am not sure why I would get 12 volts when the connector was disconnected and zero volts when connected. Does that have anything to do with when the VVT opens and/or closes?
After reconnecting the battery the P0017 came back on. Is it a matter of the computer relearning all of the new components or is there something else I need to be looking for. I have not noticed any unusual wear spots on the wiring harness that I can see.
I have tested the VVT Solenoid separately and it opened and closed when I connected the +/- demonstrating that it is functional. I also tested the connector for the VVT and it is receiving 12 volts. With that being said when I tested the connector when it is installed onto the VVT I do not get a reading of 12 volts it gave me a Zero reading on the Voltmeter. Electrical is not my thing so I am not sure why I would get 12 volts when the connector was disconnected and zero volts when connected. Does that have anything to do with when the VVT opens and/or closes?
Senior Member
Joined: Jul 2012
Posts: 9,024
From: C-Town
hummerz i appreciate your feedback!
After reconnecting the battery the p0017 came back on. Is it a matter of the computer relearning all of the new components or is there something else i need to be looking for. I have not noticed any unusual wear spots on the wiring harness that i can see.
I have tested the vvt solenoid separately and it opened and closed when i connected the +/- demonstrating that it is functional. I also tested the connector for the vvt and it is receiving 12 volts. With that being said when i tested the connector when it is installed onto the vvt i do not get a reading of 12 volts it gave me a zero reading on the voltmeter. Electrical is not my thing so i am not sure why i would get 12 volts when the connector was disconnected and zero volts when connected. Does that have anything to do with when the vvt opens and/or closes?
 Variable Valve Timing is the only term I have used for this part. I apologize if the VVT abbreviation caused confusion.
Senior Member
Joined: Jul 2012
Posts: 9,024
From: C-Town
#PIP4945B
Due to the varied amount of concerns that can cause a p0017 code and number of PIs and TSBs
for a DTC P0017, this document was created to cumulate all that information for those times
when normal published diagnostics does not lead to a repair. Some of these include; the
technician may have performed repairs for a secondary or non-related concern such as a cylinder
head or front cover replacement and then has a DTC p0017, or still has a DTC P0017 after
performing repairs according to published diagnostics. Remember, a DTC p0017 DTC sets when
CMP sensor pulse is greater than 16.31 degrees out of sequence with the corresponding crank
sensor pulse; as stated in service information.
Note: This document is not intended as a short cut to diagnostics listed in SI.
A P0017 code may set for any of the following reasons:
1. The engine is timed incorrectly. See current version of TSB 06-06-01-017 (RPO’s L52, LK5),
See current version of 07-06-01-019 (RPO’s LLR, LLV) See current version of 07-06-01-018
(RPO LL8) Use these documents to check timing. The technician should follow the procedures
to set the engine to #1 TDC then place the straight edge on the cam flats and:
1.1. If one cam flat has excessive clearance as noted in the TSB that cam is one tooth off.
1.2. If both are cams flats have excessive clearance as noted in the TSB in the same direction
the timing is off at the crank gear.
2. 2. The crank timing gear has a loose fit to the crank. See current version of PIP4581, The
concern could be:
2.1. The crank key or keyway has excessive clearance
2.2. The crank bolt is loose.
3. The Crank end play is excessive.
4. The cam actuator solenoid is restricted or screens are missing. See current version of PIP3694
5. The cam actuator is sticking. See current version of PIP4913
6. Low oil pressure or oil contamination. See current version of PIP4913
Please follow this diagnostic or repair process thoroughly and complete each step. If the condition
exhibited is resolved without completing every step, the remaining steps do not need to be
performed.

Thread Starter
|
Junior Member
Joined: Sep 2019
Posts: 6
From: El Paso, TX | Juarez, MEX
So after several months I did try all external testing without any problem: All sensors replaced (Crankshaft position sensor, both camshaft position sensors and crankshaft position actuator solenoid), made all wiring tests and oil has been good since truck bought but still having the p0017 code 
So it looks like an internal cam-related issue, perhaps cam reluctor ring is a bit loose and the cam sensor is reading wrong and sending this misinformation to PMC.
Then I need to open timing cover to check and will take advantage of this to replace all with a new timing kit. Hope this reluctor isn't too loose don't break up before installing this new kit.