H2 sun visor removal
#11
 12-27-2010, 06:18 AM


Hi I'm searching a pair of 2003 to 2007 Hummer H2 OEM Right Sunshade Visor (Gray) left and right side my Hummer H2 is my 2003 and vin is 5GRGN23U83H119817
Please can you also check for shipping price to Italy? If is a problem to ship in Italy I have some friends in Usa who can help me
Best Regards
Vittorio Zanini
Please can you also check for shipping price to Italy? If is a problem to ship in Italy I have some friends in Usa who can help me
Best Regards
Vittorio Zanini


#15
02-16-2017, 09:02 PM
Same here. This dang visor setup is just stupid period. So frustrated here. Went through the sunroof to replace the clamp on my sunroof drain.
#16
02-17-2017, 07:51 AM

LOL yeah, the by far, most maddening and stupid visor mounting I have ever personally encountered. I had to remove mine. I ended up using a rubber mallet to get the elbow to push in which did work but I still ended up breaking some of the crap up inside of the mounting.
My passenger side one now has a single screw to keep it in place which actually works great and is barely visible. It takes a pretty long screw too - I think its about 2-1/2" long. I drilled a tiny hole first. On removing the pass side the whole mount eventually started spinning and it shredded the headliner around the hole. Really not a big deal though since on mine the entire headliner needs replacing anyways which I plan on doing in the next couple of months and having the screw in the one does make that one much easier to remove. I'll be doing the same to the drivers side one but I'm going to try the rubber mallet on that one first to see if I can get it to budge. With the mallet give it a bit of a tap right on the corner of the elbow and it should push in. I discovered that trying to push it up/in by hand was an exercise in futility on mine.
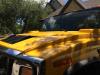
Even with the ting completely out I cannot really figure how it would ever remove "nicely". Here is a pic of where I drilled and installed a screw in mine. When I redo the headliner (it was already hanging down in places) I'll paint the screw to match a bit better and will probably get a lower profile screw to use. I just grabbed what I had handy at the moment I put it back up. Of course when drilling (or if using a self drilling screw) make sure to not use a bit or screw that is so long that you drill through the roof! There is a secondary metal sheet spaced an inch or so from the actual roof right where I put the screw which is what you are drilling into. Its holds fine too. On removing the visor some of the plastic bits up above that retain it in place simply broke off so it was this or spend a ton an a replacement visor.
My passenger side one now has a single screw to keep it in place which actually works great and is barely visible. It takes a pretty long screw too - I think its about 2-1/2" long. I drilled a tiny hole first. On removing the pass side the whole mount eventually started spinning and it shredded the headliner around the hole.
Really not a big deal though since on mine the entire headliner needs replacing anyways which I plan on doing in the next couple of months and having the screw in the one does make that one much easier to remove. I'll be doing the same to the drivers side one but I'm going to try the rubber mallet on that one first to see if I can get it to budge. With the mallet give it a bit of a tap right on the corner of the elbow and it should push in. I discovered that trying to push it up/in by hand was an exercise in futility on mine.Even with the ting completely out I cannot really figure how it would ever remove "nicely". Here is a pic of where I drilled and installed a screw in mine. When I redo the headliner (it was already hanging down in places) I'll paint the screw to match a bit better and will probably get a lower profile screw to use. I just grabbed what I had handy at the moment I put it back up. Of course when drilling (or if using a self drilling screw) make sure to not use a bit or screw that is so long that you drill through the roof! There is a secondary metal sheet spaced an inch or so from the actual roof right where I put the screw which is what you are drilling into. Its holds fine too. On removing the visor some of the plastic bits up above that retain it in place simply broke off so it was this or spend a ton an a replacement visor.

#18
02-20-2017, 11:35 AM
Had I not mangled the plastic on that one it would look near stock with the single mounting screw. I'm going to do the drivers side one the same way. I also got a couple of lower profile automotive style trim screws to use instead of the larger head stainless screw with the ring for the head shown in that pic. Of course the mangled headliner does not help but as I mentioned, that needs replacing anyways. There are other spots in the headliner from the prior owner that are worse.
#19
02-20-2017, 11:17 PM
Had I not mangled the plastic on that one it would look near stock with the single mounting screw. I'm going to do the drivers side one the same way. I also got a couple of lower profile automotive style trim screws to use instead of the larger head stainless screw with the ring for the head shown in that pic. Of course the mangled headliner does not help but as I mentioned, that needs replacing anyways. There are other spots in the headliner from the prior owner that are worse.
#20
02-22-2017, 10:55 PM
If you can work with it then once out, you can put a drop of fine machine oil on each tab to suppress those tabs in advance of the re-install. Then push visor in firmly back in to the roof while pulling the elbow back out of housing will allow the clips to spring back and install correctly.

Thread
Thread Starter
Forum
Replies
Last Post
mlofgren
PRIVATE For Sale / Trade Classifieds
1
12-13-2017 01:14 AM
guruerror
PRIVATE For Sale / Trade Classifieds
0
01-31-2011 07:45 PM