rear right turn signal bulb replacement
#1
 09-23-2009, 12:12 PM


Can anyone advise how to change the right rear turn signal bulb on an H3? From outside? or from inside? what is the procedure?
#2
09-27-2009, 09:37 AM

Open gate,there are two phillips head screws to remove from plastic housing. next pull housing to the rear,there are two steel pins that have to be popped out from the retainers in the fender. sometimes you may have to use a plastic wedge inserted between plastic housing and fender to pop it loose. Be sure to grease the steel pins before popping it back in place.
#3
08-05-2011, 10:39 AM

As of January 2008, the 2 steel bolts for rear lamp casing have been replaced with plastic ones, at least for European spec cars. So warning, to avoid the case in which you will have to replace the whole casing because of broken pins. Be as gentle as possible when you pull the casing out!

#5
08-05-2011, 03:17 PM
I just remove the two phillips screws and pull straight back. Then locate the bulb that isn't working, replace it and test before you put it back together. If ok, line up the outside platic tabs and push back into place. Secure w/ the two phillips screws. I took pics since I see this coming up alot lately.
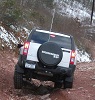
The Right Rear Tail Light Assembly

Remove Top Screw with a Phillips Head Screwdriver

Remove Bottom Screw with a Phillips Head Screwdriver

with both removed, pull taillight assembly straight back to remove top & bottom clips, pic of top clip

pic of bottom clip/pin

taillight removed


One of the easiest things you can do. Hope this helps some of those posting questions in regards.
The Right Rear Tail Light Assembly
Remove Top Screw with a Phillips Head Screwdriver
Remove Bottom Screw with a Phillips Head Screwdriver
with both removed, pull taillight assembly straight back to remove top & bottom clips, pic of top clip
pic of bottom clip/pin
taillight removed
One of the easiest things you can do. Hope this helps some of those posting questions in regards.
Last edited by Mr. Fancy Pants; 08-05-2011 at 03:44 PM.
#6
08-05-2011, 04:49 PM
wow,,,
, so the detail guy just left huh!! man your ride looks factory fresh!!
great pix. things like the two different pins amaze me. just where along the design process did that decision get made ?!!
knowing where they are will help prevent "first time" breaking,,,i hope,if i remember down the road.
thanks much
2007 H3 Adventure
great pix. things like the two different pins amaze me. just where along the design process did that decision get made ?!!
knowing where they are will help prevent "first time" breaking,,,i hope,if i remember down the road.
thanks much
#7
08-05-2011, 04:56 PM
Yeah, I'm pretty **** when if comes to my stuff. If you look closely, even my driveway is spotless lol. The rust 2" ball on the back drives me nuts but I need it hahaha.
#8
08-05-2011, 05:14 PM


#9
08-05-2011, 05:26 PM
hey the "rust ball" doesnt count,it comes off!!,,checked out your camera, great unit,zoooom!
and,
now we got "smarty pants!!" im still letting the locator/retainer soak in. good info. i never wooda thunk it!
and,
The bottom pin is the 'locator' pin. It sets up the 'up' 'down' positioning of the light assembly, as well as fastens. The top clip is a retainer. This is the way a feature can be located in the exact position, and still be attached even if the mating holes/slots are not precisely matched to it. You'll find this type of setup used throughout the vehicle for mating parts.
