My STARR HID installation guide with pics
#1
 01-26-2015, 04:25 PM


Hey everyone,
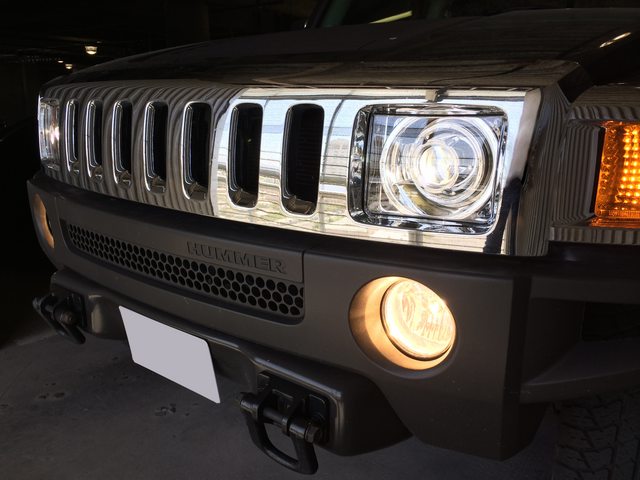
I installed STARR HIDs from Headlight Revolution. I ordered the 4300K bulbs "OEM White" as per their website and the 55w ballast upgrade (+$39.00). I couldn't be happier. Best mod I've ever made to my H3 and completely worth every penny.
View full album on Imgur:
http://imgur.com/a/0DDJY#0
Here's my installation:
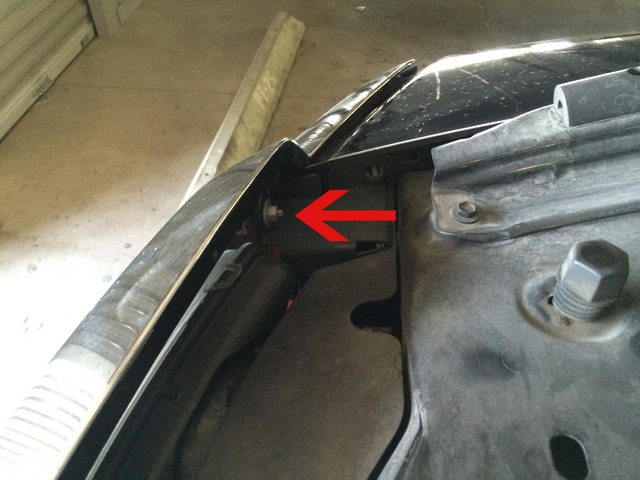
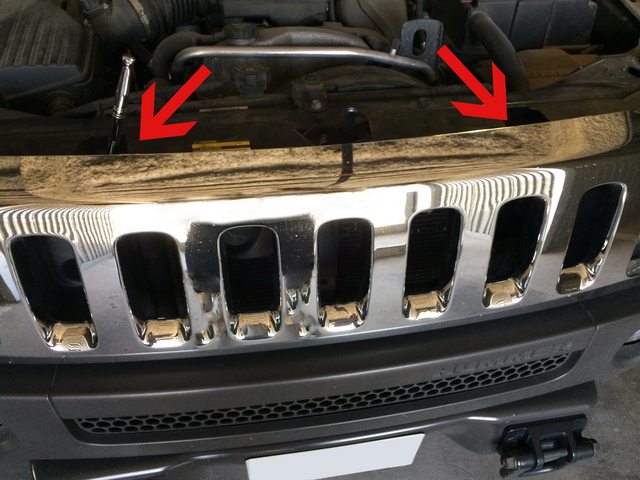
Step 1.) Remove front grill. Standard practice. To do so, remove 4, 10mm, bolts as seen.
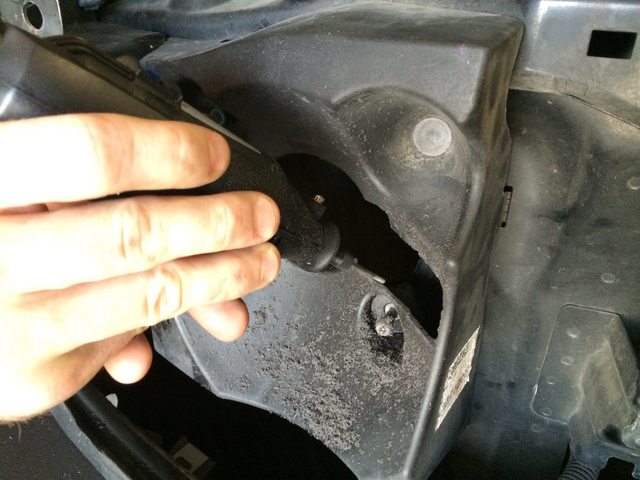
Step 2.) Remove OEM headlights. This is simple, but was tough. One headlight came out no problem - just grab firm and pull straight out. However, the other headlight just would not pull straight now. One of the mounting brackets broke off (each headlight has 3 mounting brackets) while trying to pop it out of the sockets. No big deal if you aren't planning on reselling them on eBay.
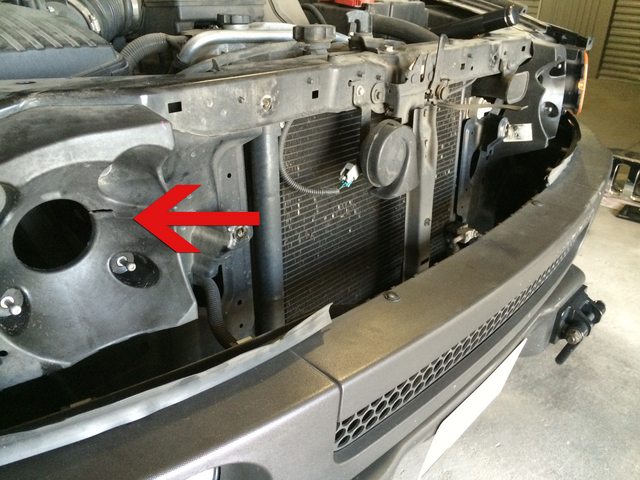
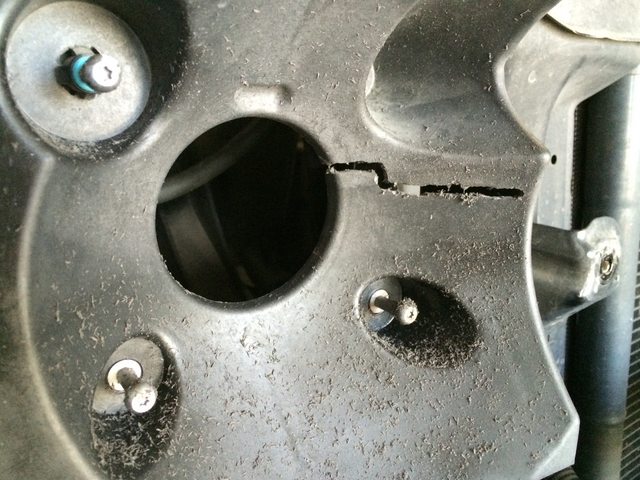
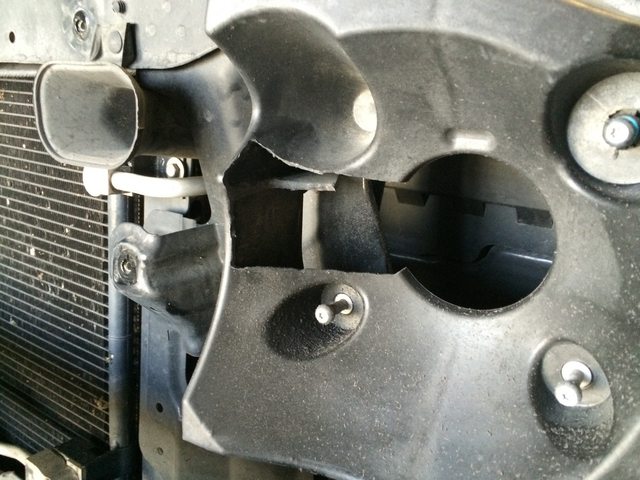
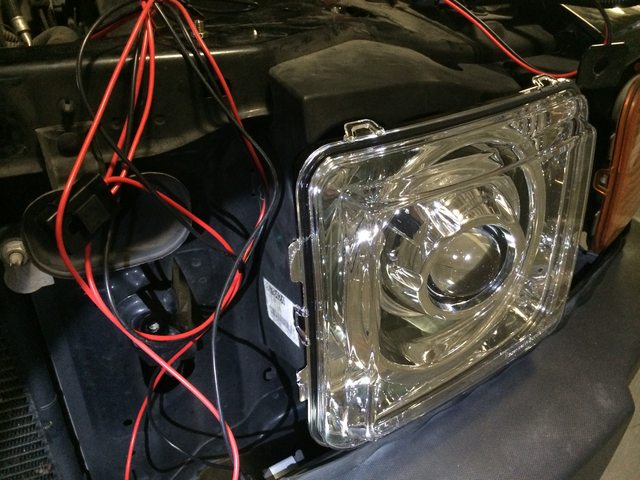
Step 3.) Notch the headlight housing to allow the new headlights to fit. You will just have to line it up and take it slow with a Dremel tool. I used a universal bit that worked like a charm. It cut right through the thick hardened plastic like a hot knife through butter.
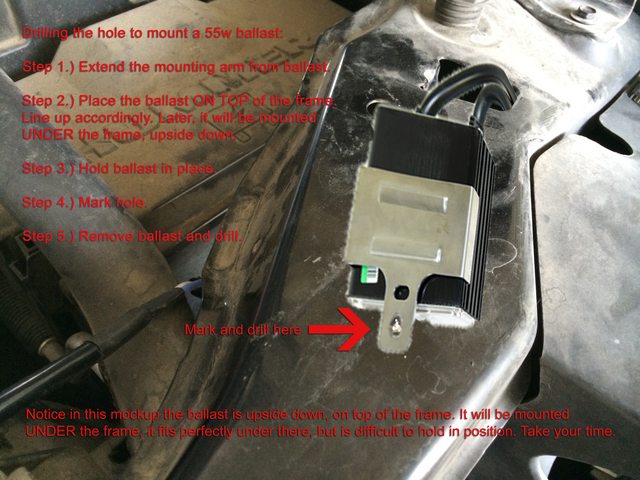
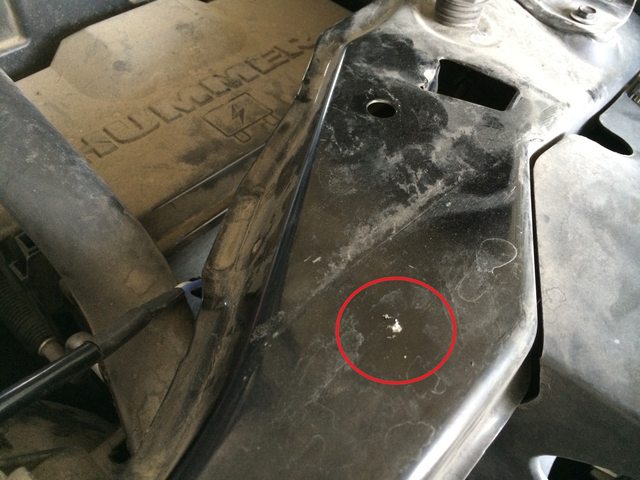
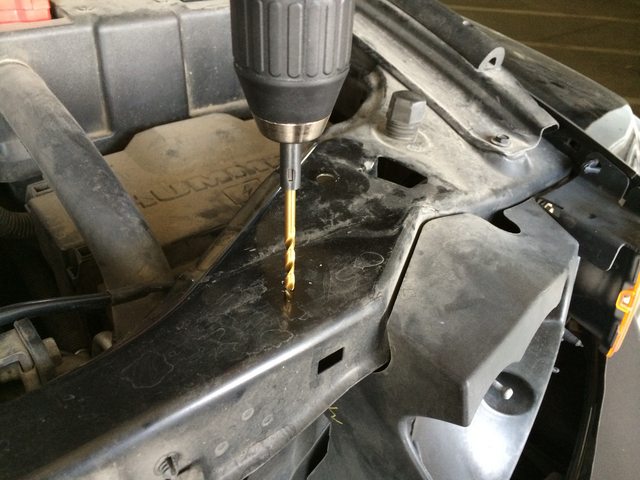
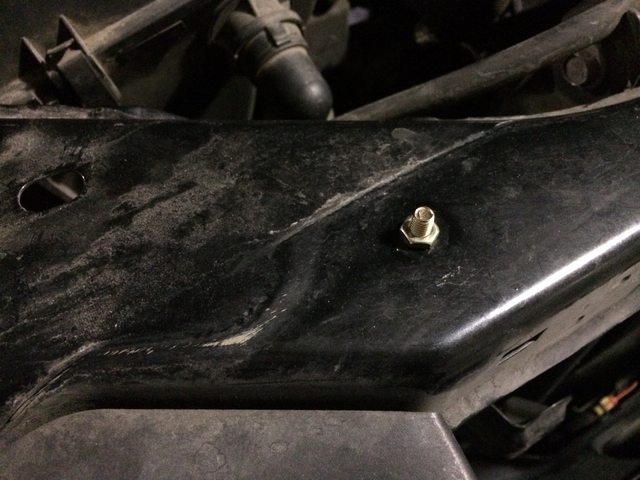
Step 4.) Drill holes for mounting the ballasts. I decided to mount them to the underside of the front frame. Place the ballast, mark the hole, remove ballast, drill. Once hole is drilled, hold the ballast under the frame, in position, then mount with included hardware. Note: STARR's instructions mention use of 3M mounting tape. No 3M tape was included, just nuts and bolts to mount the ballast.

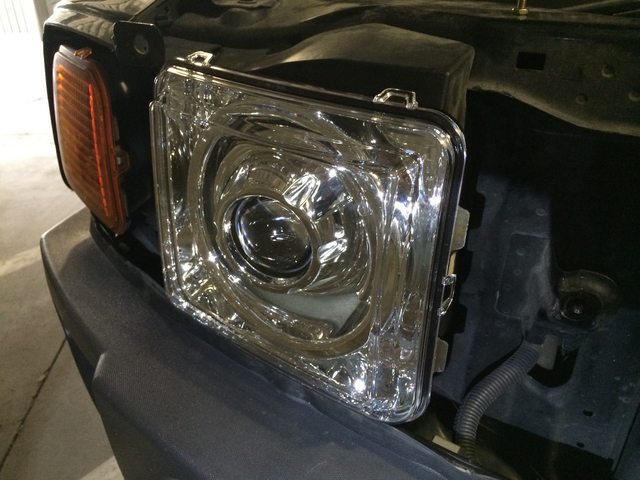
Step 5.) Install new STARR headlights. Just line up the mounting posts and pop them in place by pushing straight in. They will hold firm.
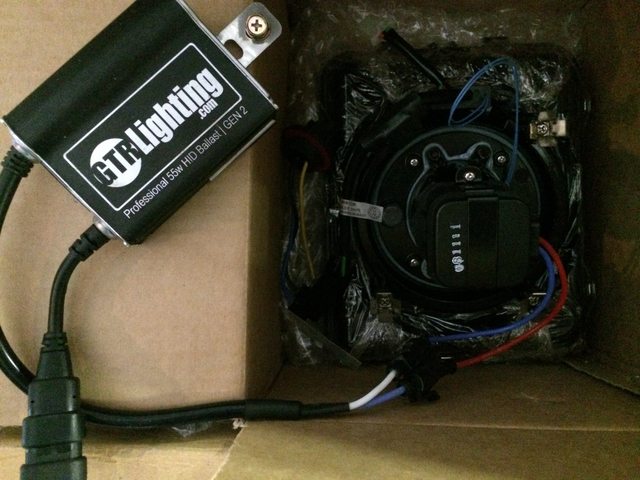
Step 6.) Connect headlight harnesses and igniting cables to ballast. Before reaching this step, I realized that the adapters did not match up. Headlight Revolution accidentally shipped the wrong harness cables. One email (quick response) and I was rush delivered a new wiring harnesses.
BELOW IS AN IMAGE OF THE WRONG ADAPTERS:
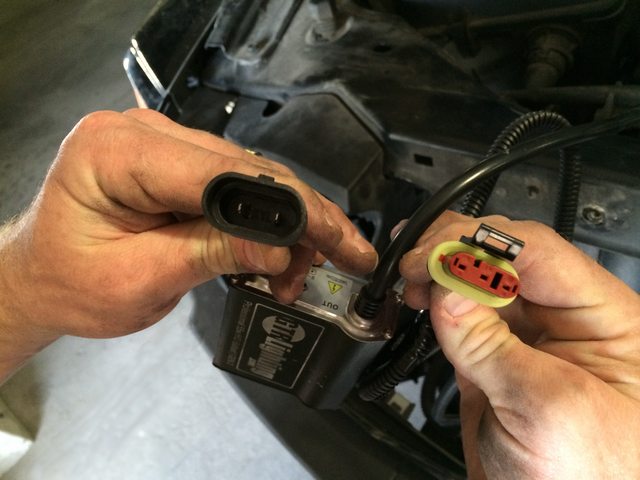
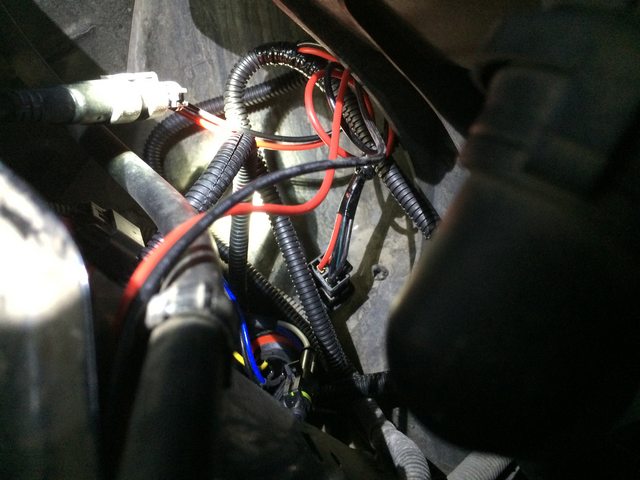
Step 7.) Route cables and relays to appropriate positions. Cable management is important here. This photo is in the process of doing so, not the final result of my cable management. The STARR instruction manual instructs you to mount the relays using self tapping screws. However, I didn't mount the relays to anything. It's a PITA because the space is so small behind the headlights (2nd image below, dead center is the relay). They are very lightweight and barely move around - if at all. Attach power cables to battery leads.

Step 8.) Reinstall front grille. Carefully line it up and pop it back into place. Reattach the 4, 10mm, bolts.
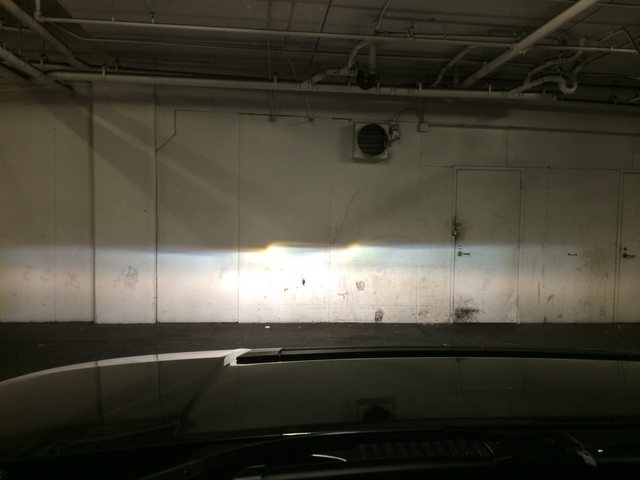
Step 9.) Aim headlights against a wall. Note: there is no option for left to right alignment. This is because the new headlights use the factory OEM mounting posts. You won't need to align left/right at all. You will only need to align them up/down via the OEM adjustment screw. This step is very important in your headlights not blinding others and lighting the road properly. Use a measuring tape and some painters/masking tape against a wall to mark the pattern. The pattern provided by STARR in their instruction manual is pretty obvious when you drive up to the wall with your lights on. You will need to be ~1ft. away from the wall to begin. Mark the pattern, back straight up, adjust, you're done. Follow the instructions and you're set.
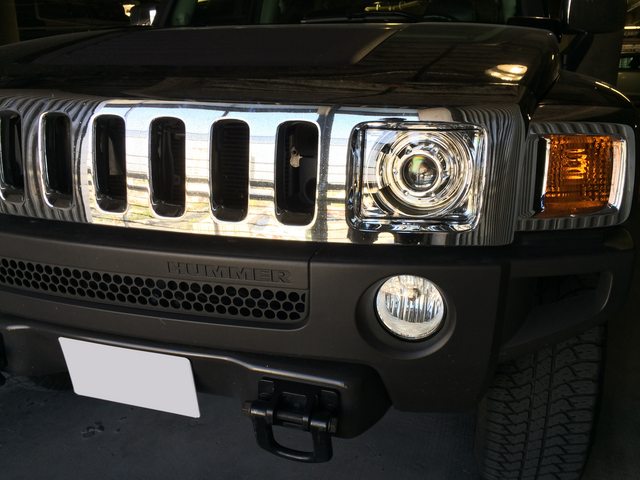
Step 10.) Enjoy.
Here is a link to STARR's installation manual (PDF) for reference.
I installed STARR HIDs from Headlight Revolution. I ordered the 4300K bulbs "OEM White" as per their website and the 55w ballast upgrade (+$39.00). I couldn't be happier. Best mod I've ever made to my H3 and completely worth every penny.
View full album on Imgur:
http://imgur.com/a/0DDJY#0
Here's my installation:
Step 1.) Remove front grill. Standard practice. To do so, remove 4, 10mm, bolts as seen.
Step 2.) Remove OEM headlights. This is simple, but was tough. One headlight came out no problem - just grab firm and pull straight out. However, the other headlight just would not pull straight now. One of the mounting brackets broke off (each headlight has 3 mounting brackets) while trying to pop it out of the sockets. No big deal if you aren't planning on reselling them on eBay.
Step 3.) Notch the headlight housing to allow the new headlights to fit. You will just have to line it up and take it slow with a Dremel tool. I used a universal bit that worked like a charm. It cut right through the thick hardened plastic like a hot knife through butter.
Step 4.) Drill holes for mounting the ballasts. I decided to mount them to the underside of the front frame. Place the ballast, mark the hole, remove ballast, drill. Once hole is drilled, hold the ballast under the frame, in position, then mount with included hardware. Note: STARR's instructions mention use of 3M mounting tape. No 3M tape was included, just nuts and bolts to mount the ballast.
Step 5.) Install new STARR headlights. Just line up the mounting posts and pop them in place by pushing straight in. They will hold firm.
Step 6.) Connect headlight harnesses and igniting cables to ballast. Before reaching this step, I realized that the adapters did not match up. Headlight Revolution accidentally shipped the wrong harness cables. One email (quick response) and I was rush delivered a new wiring harnesses.
BELOW IS AN IMAGE OF THE WRONG ADAPTERS:
Step 7.) Route cables and relays to appropriate positions. Cable management is important here. This photo is in the process of doing so, not the final result of my cable management. The STARR instruction manual instructs you to mount the relays using self tapping screws. However, I didn't mount the relays to anything. It's a PITA because the space is so small behind the headlights (2nd image below, dead center is the relay). They are very lightweight and barely move around - if at all. Attach power cables to battery leads.
Step 8.) Reinstall front grille. Carefully line it up and pop it back into place. Reattach the 4, 10mm, bolts.
Step 9.) Aim headlights against a wall. Note: there is no option for left to right alignment. This is because the new headlights use the factory OEM mounting posts. You won't need to align left/right at all. You will only need to align them up/down via the OEM adjustment screw. This step is very important in your headlights not blinding others and lighting the road properly. Use a measuring tape and some painters/masking tape against a wall to mark the pattern. The pattern provided by STARR in their instruction manual is pretty obvious when you drive up to the wall with your lights on. You will need to be ~1ft. away from the wall to begin. Mark the pattern, back straight up, adjust, you're done. Follow the instructions and you're set.
Step 10.) Enjoy.
Here is a link to STARR's installation manual (PDF) for reference.
#3
01-26-2015, 11:00 PM
LoJac,
Not a bad idea! Do you have LEDs in your fog lights? If so, which ones? Link?
One of the fog light bulbs is destined to burn out soon as I run them constantly and have never changed either side (in years). When a bulb burns out, I usually replace both sides and save the good one as a quick backup for the future.
Let me know.
#4
01-26-2015, 11:41 PM

Awesome!
Link: Starr HID Bi-Xenon Projector Headlights for the Hummer H3 - Black Version
My next mod hopefully
Thanks for your detailed review & much appreciated
Link: Starr HID Bi-Xenon Projector Headlights for the Hummer H3 - Black Version
My next mod hopefully
Thanks for your detailed review & much appreciated
Last edited by H3Ray; 01-26-2015 at 11:46 PM.
#5
01-27-2015, 01:11 AM
Thank you. I didn't prefer the black version (as seen in your link) as they look less-OEM. I opted for the chrome version because they are much cleaner and they match all of the chrome I have (mirrors, nerf bars, rims, etc.). The chrome version looks extremely close to OEM - except that "cat eye" lens which stands out nicely.
#6
01-27-2015, 04:07 AM
I'm not knowledgeable on the H3 stock mounts for those lower lights.
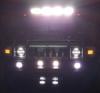
What I did on my 2 was install LED work lights that fit perfectly in the opening after the mounting bosses were cut off with a die grinder. Then I used threaded rods and lock nuts to bolt everything in. Uses the stock mounting holes and hooks into the factory wiring.
You may be able to do something similar with the 3. LED work lights are dirt cheap on ebay and amazon. I don't even think I spent $40 on mine shipped for the pair.

#10
01-28-2015, 08:34 PM
I have build threads on all the other forums but I'll post a few pics here:
Mounting bosses cut off:
Threaded rods and lock nuts:

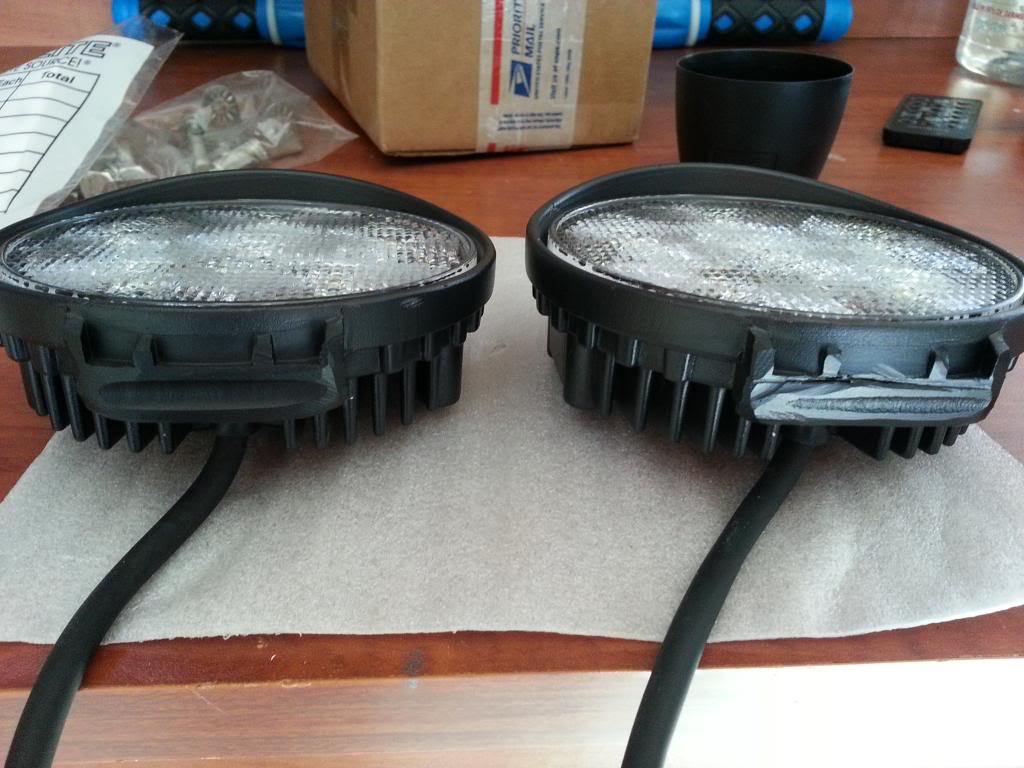
Difference from stock housing with LED bulb on left and the LED work light on the right.

Mounting bosses cut off:
Threaded rods and lock nuts:
Difference from stock housing with LED bulb on left and the LED work light on the right.