Finished up my LED lightbar(s) install
#1
 01-17-2016, 10:10 PM

Thought I'd share.
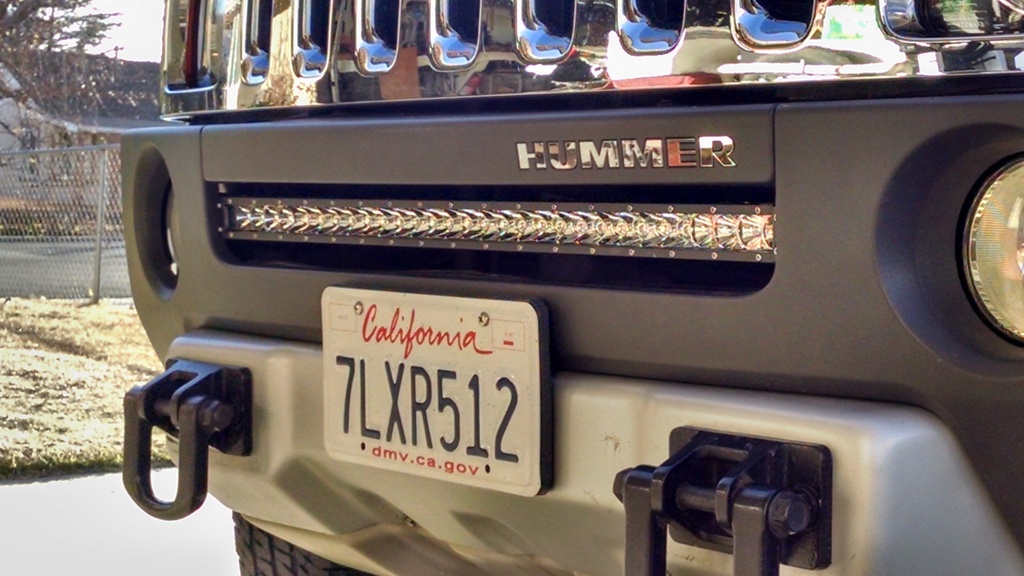
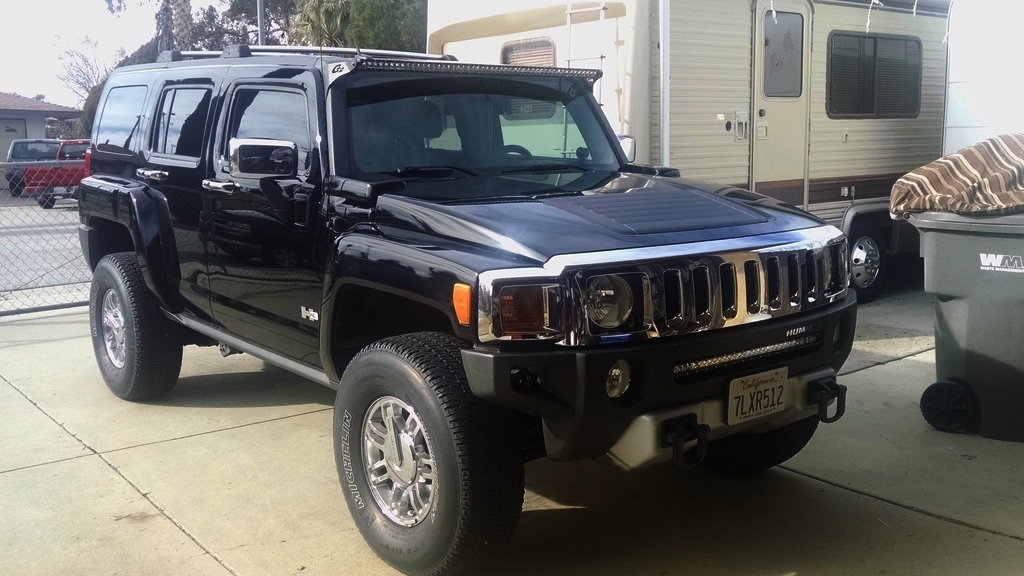
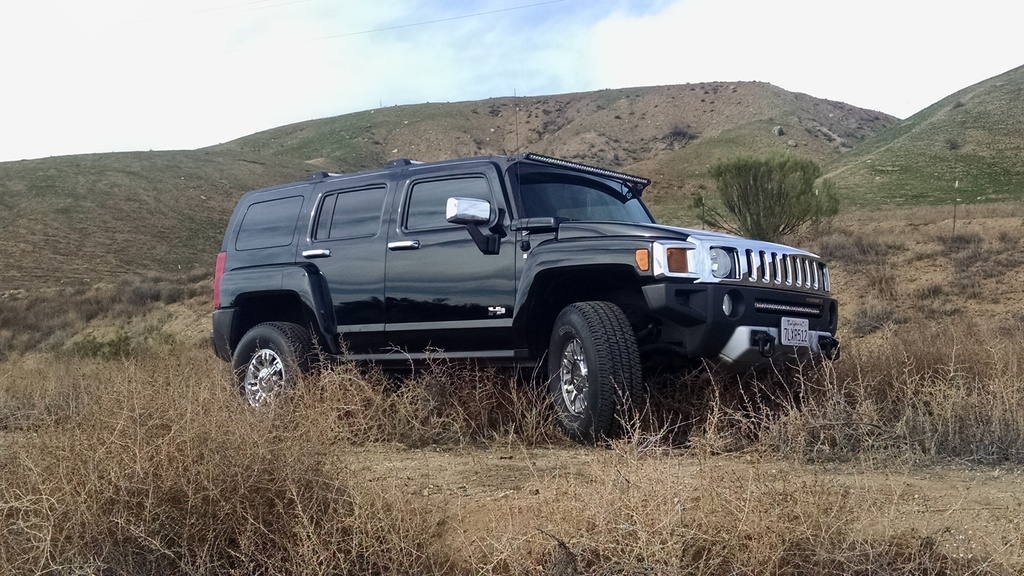
In the lower grille: MICTUNING 30” single row (5W Cree’s, 150W, 6000k, 14,800 Lumens).
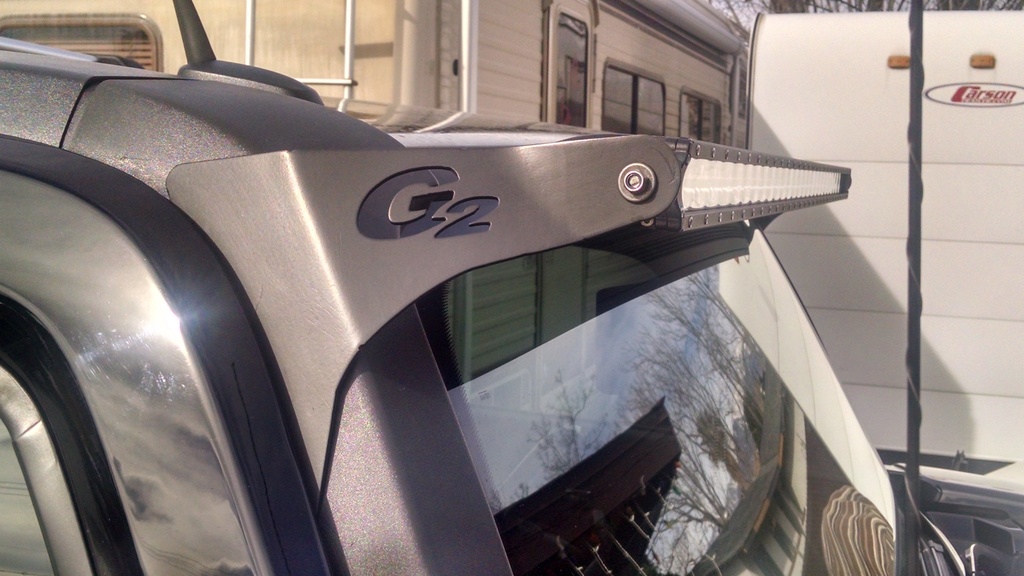
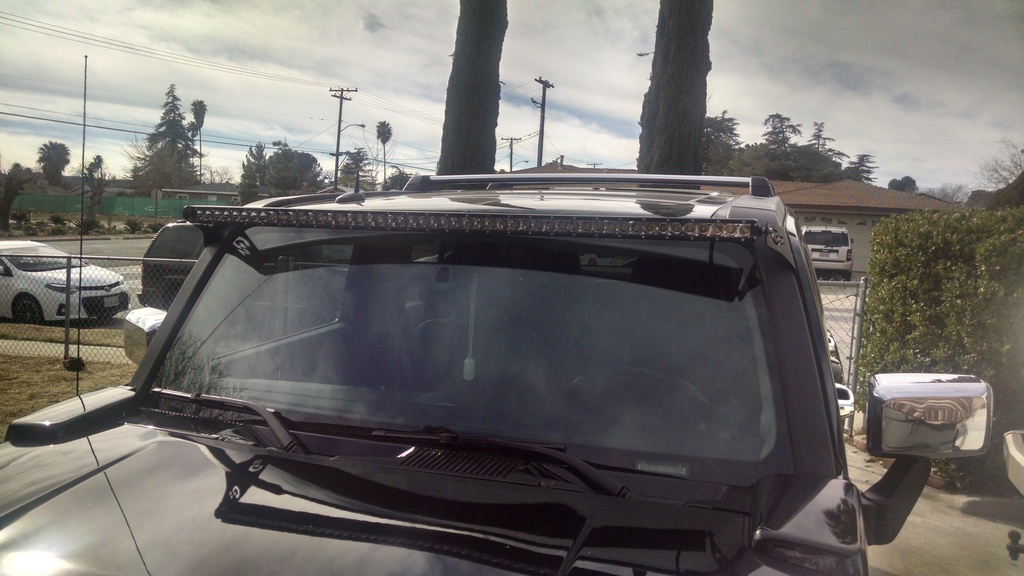
At the roofline (w/G2 brackets): MICTUNING 50” single row (5W Cree’s, 250W, 6000k, 24,600 Lumens).
Installation:
In my case, the removal of the front bumper (8 bolts and 4 clips) was required for the grille mounted lightbar. After the removal of the stock grille insert, the brackets (supplied with the lightbar) on each end were then bent and twisted to match the location and angle of the bumper supports inside the bumper on each side of the lower grille section, and bolted into place. I also had to cut two grooves in the shroud that my Alpha has in front of the radiator in order for the lightbar to fit.
Roof installation was pretty straightforward, as has been documented on this site more than once (2 screws and 3 clips per side for the A-pillar mouldings). I did drill new bottom holes in the G2 brackets, about 3/4” above the standard ones, lowering the mounting position of the lightbar and bringing the top of it about even with the top of the roofline. A half-circle was trimmed into the A-pillar moulding for the wiring to pass through.
Wiring:
Here’s how I decided to wire the lightbars; and the reasons behind it.
I ran a 10AWG wire directly from the battery, split into two 12AWG inline fuse holders, one to each relay, and then out to the lightbars, using 14AWG (matching harness already on the lightbars). I also installed a waterproof connector on the harness for the bumper lightbar to allow front bumper removal (if needed) by simply unplugging the lightbar. I didn’t bother with a similar connector on the roof lightbar since the roof cannot be removed anyway.
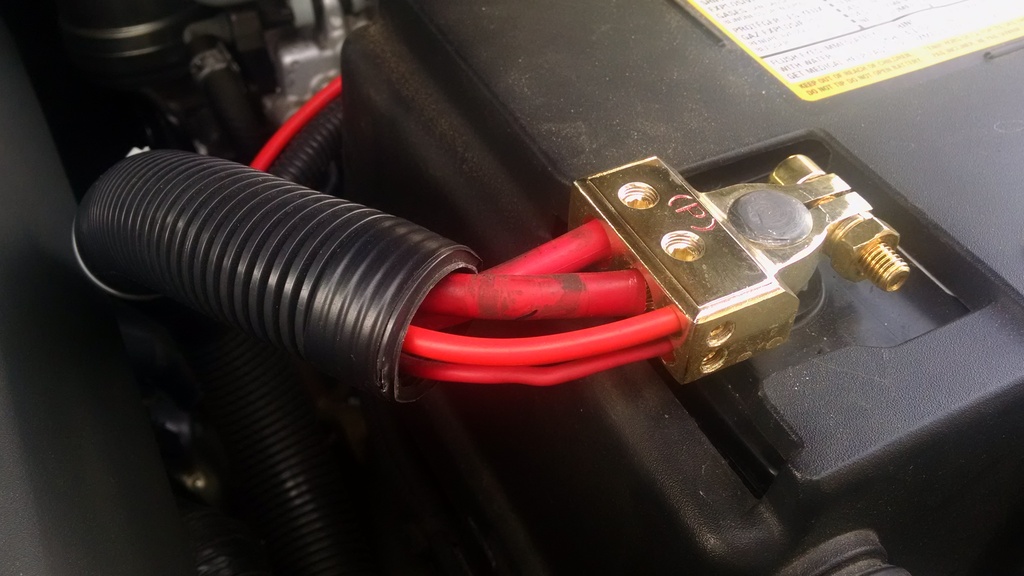
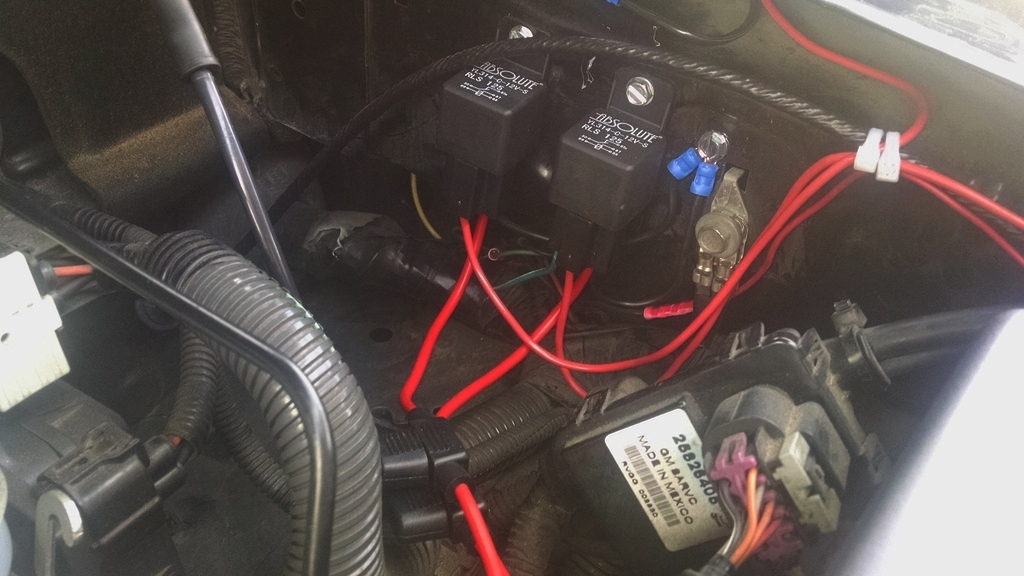
For the control coils on each relay, I tapped into fuse #10 (SPO ACCY) in the OEM fusebox, which is switched and only hot when the key is on. I considered using either #2 or #4, which are always hot (and are specifically for grille and roof lights), but these lightbars take a lot of current, and although I may change my mind at some point, right now I decided to have the engine running when using them. Using the switched #10 position prevents the lights from being turned or left on when the vehicle is off/parked.
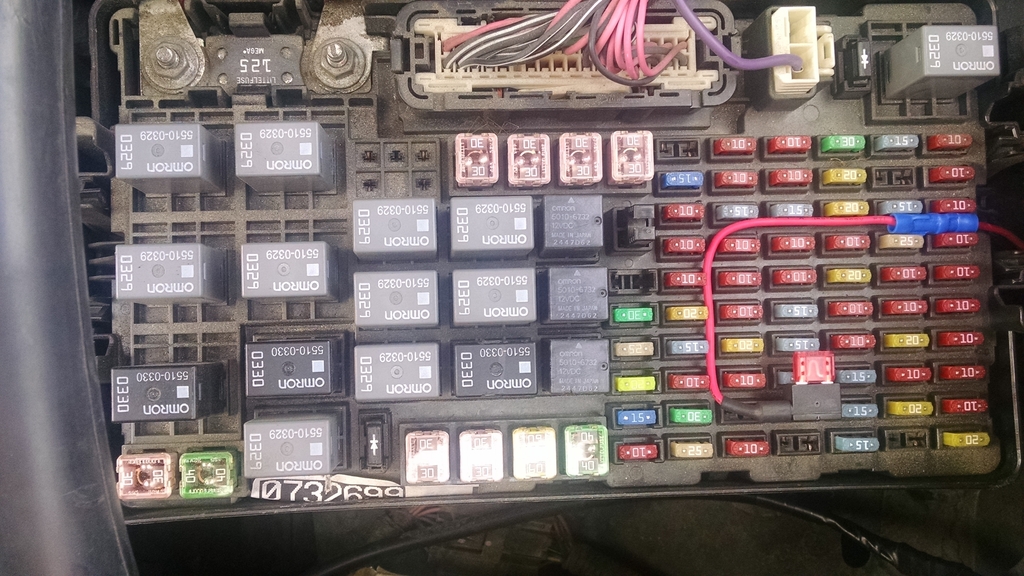
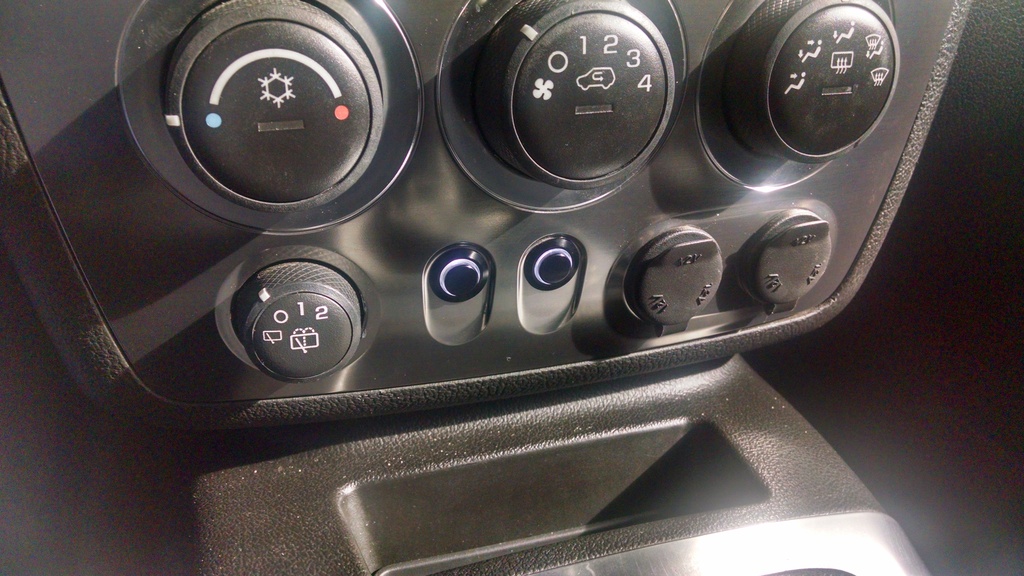
From the fusebox, I used 3 of the 4 blunt cut wires that Hummer provides through the firewall, one to power the switches and then 2 returning (one from each switch). My pushbutton switches each have a white LED halo indicator, and I decided to wire those into the dash illumination circuit so that they are always illuminated with the dash lights rather than just when the switches are “on” (I think it will be pretty obvious that the lightbars are on; no need for an inside “indicator”). The halos are a bit bright; I may add a resistor in the circuit to dim them down a bit. All 5 wires at the switches were run through a single 6-wy connector, to allow removal of the center dash panel.
Finished Product!:
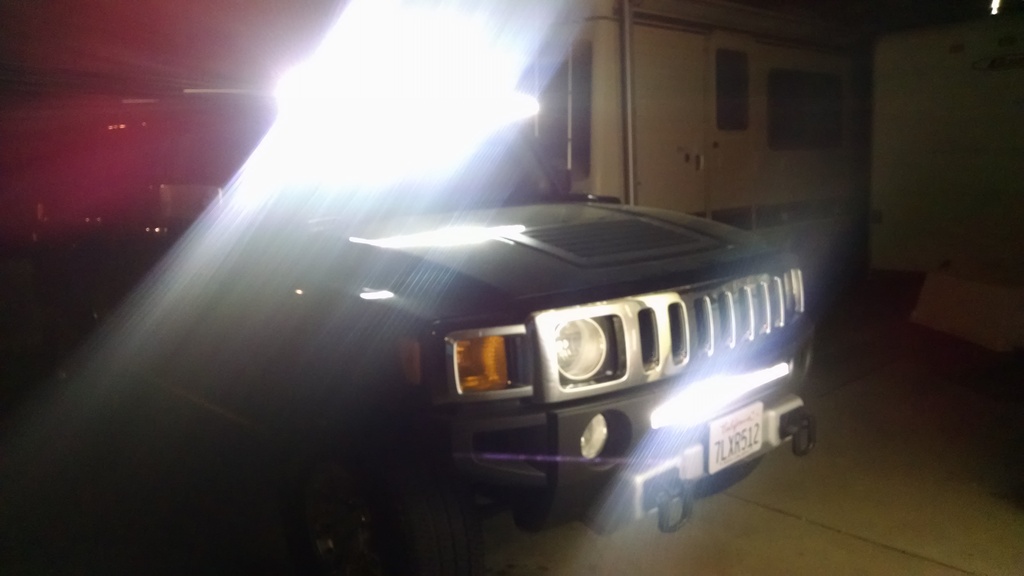
Even though these are single row, the fact that they use 5W Cree LEDs rather than the more common 3W (or less), means that the light output is still unbelievable! They are both combo units (spot & flood), and I aimed the lower bar down a bit, while leaving the upper bar aimed higher for more distance.
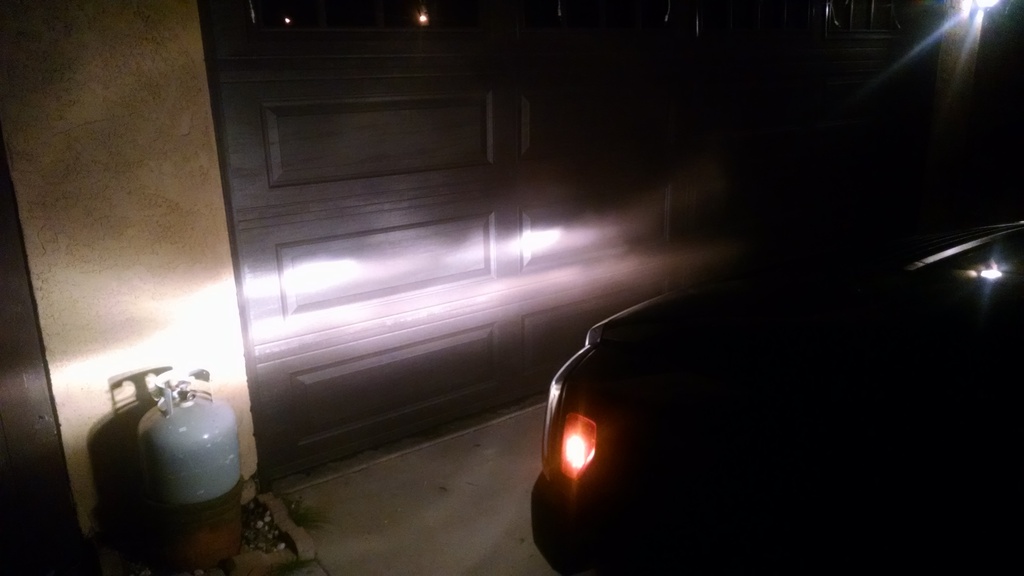
Here’s headlights & foglights without the lightbars:
Now with the lightbars turned on:
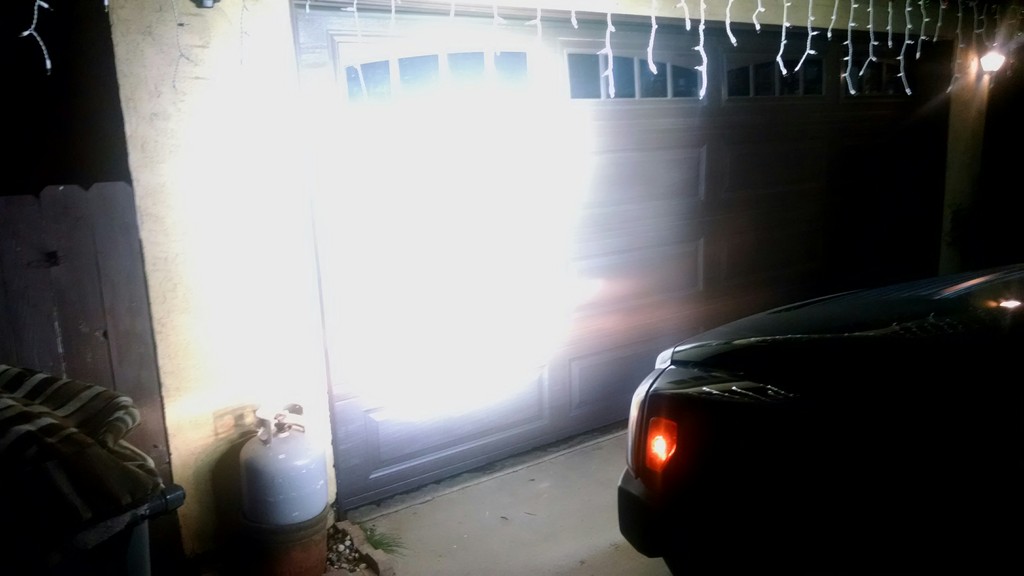
The single row configuration also has a few other advantages; it still leaves at least half of the lower grille area open for airflow to the radiator, and the lower profile at the roofline “should” have less effect on gas mileage. I do have a bit of whistle at speed; starts at about 45mph, but doesn’t seem to get any louder with speed. I’ll be working on adding some trim or something to the offending fins to quiet that noise (many youtube videos about it).
In the lower grille: MICTUNING 30” single row (5W Cree’s, 150W, 6000k, 14,800 Lumens).
At the roofline (w/G2 brackets): MICTUNING 50” single row (5W Cree’s, 250W, 6000k, 24,600 Lumens).
Installation:
In my case, the removal of the front bumper (8 bolts and 4 clips) was required for the grille mounted lightbar. After the removal of the stock grille insert, the brackets (supplied with the lightbar) on each end were then bent and twisted to match the location and angle of the bumper supports inside the bumper on each side of the lower grille section, and bolted into place. I also had to cut two grooves in the shroud that my Alpha has in front of the radiator in order for the lightbar to fit.

Roof installation was pretty straightforward, as has been documented on this site more than once (2 screws and 3 clips per side for the A-pillar mouldings). I did drill new bottom holes in the G2 brackets, about 3/4” above the standard ones, lowering the mounting position of the lightbar and bringing the top of it about even with the top of the roofline. A half-circle was trimmed into the A-pillar moulding for the wiring to pass through.


Wiring:
Here’s how I decided to wire the lightbars; and the reasons behind it.
I ran a 10AWG wire directly from the battery, split into two 12AWG inline fuse holders, one to each relay, and then out to the lightbars, using 14AWG (matching harness already on the lightbars). I also installed a waterproof connector on the harness for the bumper lightbar to allow front bumper removal (if needed) by simply unplugging the lightbar. I didn’t bother with a similar connector on the roof lightbar since the roof cannot be removed anyway.


For the control coils on each relay, I tapped into fuse #10 (SPO ACCY) in the OEM fusebox, which is switched and only hot when the key is on. I considered using either #2 or #4, which are always hot (and are specifically for grille and roof lights), but these lightbars take a lot of current, and although I may change my mind at some point, right now I decided to have the engine running when using them. Using the switched #10 position prevents the lights from being turned or left on when the vehicle is off/parked.

From the fusebox, I used 3 of the 4 blunt cut wires that Hummer provides through the firewall, one to power the switches and then 2 returning (one from each switch). My pushbutton switches each have a white LED halo indicator, and I decided to wire those into the dash illumination circuit so that they are always illuminated with the dash lights rather than just when the switches are “on” (I think it will be pretty obvious that the lightbars are on; no need for an inside “indicator”). The halos are a bit bright; I may add a resistor in the circuit to dim them down a bit. All 5 wires at the switches were run through a single 6-wy connector, to allow removal of the center dash panel.


Finished Product!:


Even though these are single row, the fact that they use 5W Cree LEDs rather than the more common 3W (or less), means that the light output is still unbelievable! They are both combo units (spot & flood), and I aimed the lower bar down a bit, while leaving the upper bar aimed higher for more distance.

Here’s headlights & foglights without the lightbars:

Now with the lightbars turned on:

The single row configuration also has a few other advantages; it still leaves at least half of the lower grille area open for airflow to the radiator, and the lower profile at the roofline “should” have less effect on gas mileage. I do have a bit of whistle at speed; starts at about 45mph, but doesn’t seem to get any louder with speed. I’ll be working on adding some trim or something to the offending fins to quiet that noise (many youtube videos about it).
Last edited by 650Hawk; 01-17-2016 at 10:41 PM.

#3
01-18-2016, 09:38 PM

Really nice job Hawk! Tell me, how hard is it to install the two switches in the center panel? Does that lower panel come out on its own, or do you have to remove the radio, etc?
#4
01-19-2016, 08:50 AM
The center panel pops out easily; it's held in with clips only. Put your shifter in low (to get it out of the way), then put your two fingers in the 12V outlets at the bottom. Lift/pull, and it pops loose. Then just carefully pull the whole panel back.


#8
01-20-2016, 08:54 AM
I'm getting a little whistle at speed; beginning at about 45mph, but it doesn't get any louder as speed increases. At 80mph, I also get a bit of wind buffet noise, but just barely, and H3's aren't exactly known for their quietness at those speeds anyway. There are numerous videos on you-tube about lightbar noise/whistle; I'm going to use some electrical tape (temporary) to try to find the offending fins, and then add some door edge trim to those fins to break up the wind and hopefully get rid of the whistle. In any case, it isn't very loud, and can't be heard over the stereo at a comfortable volume.
The outer LEDs (4 on each side of the lower bar, 8 on each side of the upper bar) are flood, and the remaining inner LEDs (22 on the lower, 34 on the upper) are spot. I'll try to get some pics looking down the road and post them when I get a chance.
The outer LEDs (4 on each side of the lower bar, 8 on each side of the upper bar) are flood, and the remaining inner LEDs (22 on the lower, 34 on the upper) are spot. I'll try to get some pics looking down the road and post them when I get a chance.
Last edited by 650Hawk; 01-20-2016 at 09:05 AM.
