SUT Tonneau Cover Install - Instructions and Photos
#1
 02-03-2009, 08:40 AM


I decided to put the Tonneau Cover (PN 12499433) on my SUT even though many had said "Take it to the dealer".
I ran into one issue and diverted from the Instructions. I thought it would be a better job than the way they said to to do. This involves installing some weatherproofing behind the Sail panels (See Do First 1). They have you pull back the Sails at the bottom, and try to work blindly with just your fingertips. So I just removed the Sails and put the weatherproofing on while the parts were in my lap. Below are the instructions followed by some install photos. It took me 4-5 hours to put it on, but could do another one much quicker, after learning what I was doing. I have been pleased with the outcome.
I purchased the Tonneau Cover from an Online dealer for right at $1,000 delivered to my doorstep. Shipping costs a bit, as it is about the size of a twin size mattress while it is in the box. The Retainer Clips (PN 11588882), that are needed if you pull the Sail Panel completely off I also got online for about $50 delivered.
Here are the instructions:
Do First 1
Do First 2
Install 1
Install 2
Install 3
Install 4
Install 5
Install 6
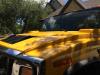
Ok, Here are the Photos starting with a shot of the bed without it.

More Pictures after the break.
I ran into one issue and diverted from the Instructions. I thought it would be a better job than the way they said to to do. This involves installing some weatherproofing behind the Sail panels (See Do First 1). They have you pull back the Sails at the bottom, and try to work blindly with just your fingertips. So I just removed the Sails and put the weatherproofing on while the parts were in my lap. Below are the instructions followed by some install photos. It took me 4-5 hours to put it on, but could do another one much quicker, after learning what I was doing. I have been pleased with the outcome.
I purchased the Tonneau Cover from an Online dealer for right at $1,000 delivered to my doorstep. Shipping costs a bit, as it is about the size of a twin size mattress while it is in the box. The Retainer Clips (PN 11588882), that are needed if you pull the Sail Panel completely off I also got online for about $50 delivered.
Here are the instructions:
Do First 1
Do First 2
Install 1
Install 2
Install 3
Install 4
Install 5
Install 6
Ok, Here are the Photos starting with a shot of the bed without it.
More Pictures after the break.
#2
02-03-2009, 08:48 AM
Remove The Torx Screw.

Remove The Torx Screw.

At this point the instructions have you pull the Sail back and install the weatherproofing. See Do First 1. If you do as I did, you will need to remove the top Torx and Marker Light.

Remove Light.

Remove light mount.

Move the Light and mount out of the way so you can take the Sail Panel Off.
If you move it back very far it will break the retainer clips. I went ahead and removed it so I broke all 7 retainer clips and replaced them with new ones that I had ordered.

Here is one of the broken retainer clips.

Sail Panel removed and retainer clip holes exposed.

Backside of the Sail Panel with new 3M Tape and new Retainer Clips installed. Also the weatherproofing has been installed. Very easy to install the weatherproofing with it off.

More Pictures after the break.
Remove The Torx Screw.
At this point the instructions have you pull the Sail back and install the weatherproofing. See Do First 1. If you do as I did, you will need to remove the top Torx and Marker Light.
Remove Light.
Remove light mount.
Move the Light and mount out of the way so you can take the Sail Panel Off.
If you move it back very far it will break the retainer clips. I went ahead and removed it so I broke all 7 retainer clips and replaced them with new ones that I had ordered.
Here is one of the broken retainer clips.
Sail Panel removed and retainer clip holes exposed.
Backside of the Sail Panel with new 3M Tape and new Retainer Clips installed. Also the weatherproofing has been installed. Very easy to install the weatherproofing with it off.
More Pictures after the break.
Last edited by Wendell; 02-03-2009 at 09:13 AM.
#3
02-03-2009, 08:58 AM
Sail Panel in position to POP in using the new clips.

The Driver side with the Sail Panel removed and the broke retainer clips exposed.

Rail - Panel Brackets being laid out.

Panel Brackets Mounted to Rail.

Hatch Pin mounted to Rail.

Install Rail pieces to both sides and set Cover in place. Then tighten the 6 bolts and nuts holding it down.

Install the Hydraulic Shocks

Here is the Tailgate Latch Stop.

Hatch Pin Installed.

More Pictures after the break.
The Driver side with the Sail Panel removed and the broke retainer clips exposed.
Rail - Panel Brackets being laid out.
Panel Brackets Mounted to Rail.
Hatch Pin mounted to Rail.
Install Rail pieces to both sides and set Cover in place. Then tighten the 6 bolts and nuts holding it down.
Install the Hydraulic Shocks
Here is the Tailgate Latch Stop.
Hatch Pin Installed.
More Pictures after the break.
#4
02-03-2009, 09:06 AM
Cover Catch/Release.

Vertical Seal (Installed earlier)

Other Vertical Seal.

All Done shown with Cover up.

Another completed shot.

Last One.

As you go along, most all bolts are only finger tight until you get it almost completed so you can get the alignment correct. You will also need to make some adjustments to the Latch Pin up and down so it shuts all the way. And, Yes, I would do it over again.
BTW, it you buy a used one, you will not be getting the weatherproof gaskets. There is just no way to get them off without messing them up. They are also somewhat custom so you will be hard pressed to get something similar. So you will have leaks.
But if that is not a concern and the cover itself and rail mounts are in good shape, then go for it.
Vertical Seal (Installed earlier)
Other Vertical Seal.
All Done shown with Cover up.
Another completed shot.
Last One.
As you go along, most all bolts are only finger tight until you get it almost completed so you can get the alignment correct. You will also need to make some adjustments to the Latch Pin up and down so it shuts all the way. And, Yes, I would do it over again.
BTW, it you buy a used one, you will not be getting the weatherproof gaskets. There is just no way to get them off without messing them up. They are also somewhat custom so you will be hard pressed to get something similar. So you will have leaks.
But if that is not a concern and the cover itself and rail mounts are in good shape, then go for it.
Last edited by Wendell; 02-03-2009 at 09:18 AM.

#6
11-12-2015, 10:13 AM

I also need instructions on installing the tonnoue cover for my 05 H2 SUT. Any help would be greatly appreciated.


#10
06-01-2017, 06:50 PM

The pdf links are not working for the instructions. Was anyone able to get a hold of the instructions?