EBay Ram Offroad brush guard.
#1
 06-26-2012, 12:19 PM


Haven't been here much in the recent past. I'm back to post a review for those who might be interested.
Bought my 2006 with 22K miles in fall of 2009. It now has 39K miles. I have a company car so the H2 is only used for fun and towing RV...hence low miles. My H2 came with the smaller simple OEM brush guard.
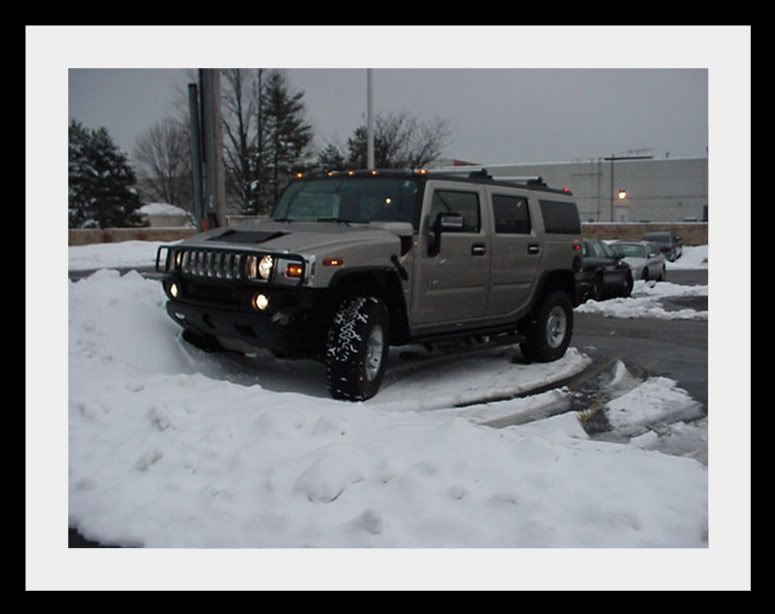
I have been on a quest to rid my beloved H2 of all chrome In my opinion the H2 is truck that should be truck-like, not bling-y.
Well, I've searched and searched for a brush guard more robust and tough since I first got my H2. Have looked at Road Armor, RubberDuck, etc, etc. The issue is I do mild off roading compared to some. I just couldn't justify the $2000 for a brush guard.
I have hemmed and hawed over the Ebay $500 brush guard below for a couple years. How tough could it be? Will it be thin metal tubing that bends while being installed?
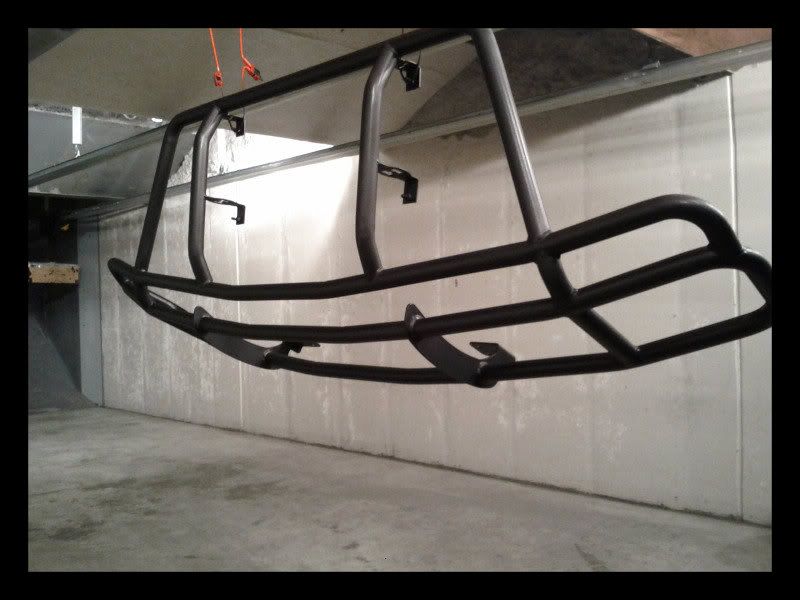
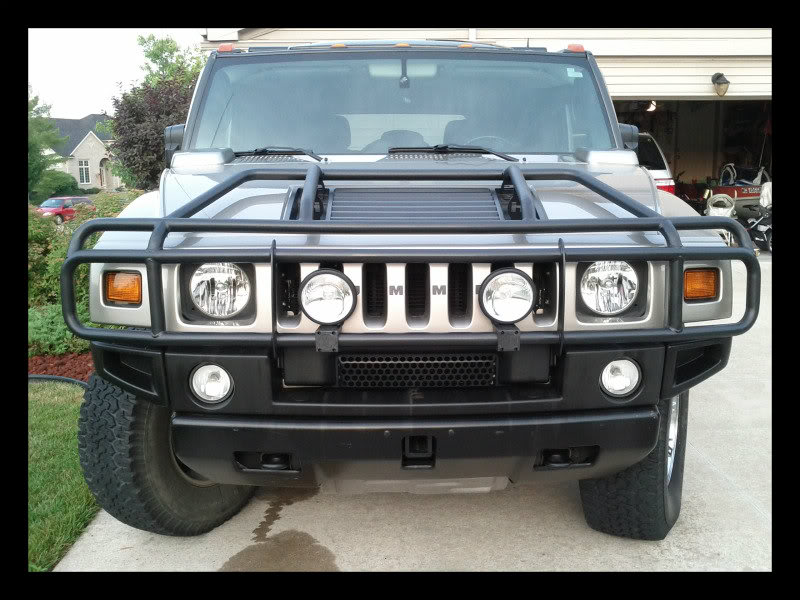
MASSIVE BLACK FRONT BRUSH GRILLE GUARD HUMMER H2 USA | eBay
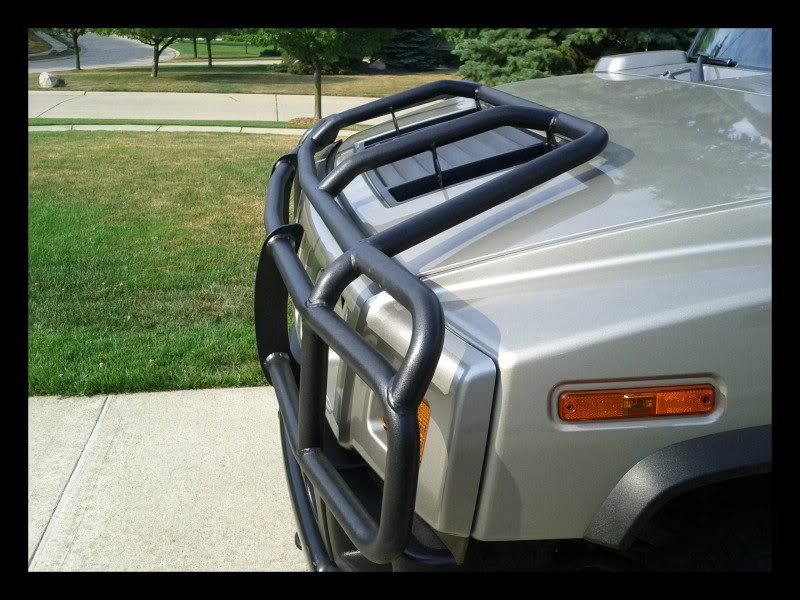
I finally took the plung and bought one. It came in a massive cardboard package and was very well packaged/protected for shipping. Design replaces the hood handles. There is a nice detail of the "H" and "2" in the hood attachment brackets....
First impressions are it is more robust that I expected. When placed on the ground in an inverted "V" my brother stood on it to test the welds. He is 220# and bounced up and down for a bit. Zero movement from the guard. The tubing feels atleast as thick as the OEM guard.
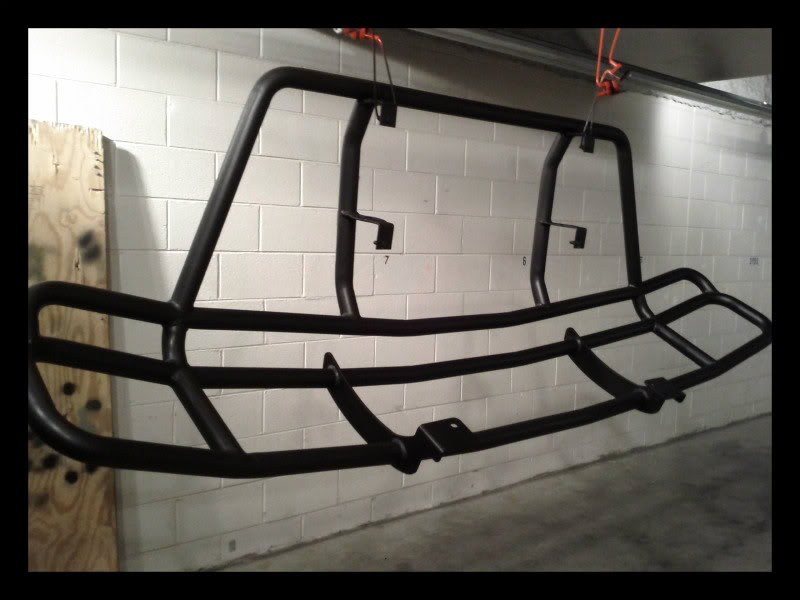
One thing I didn't like was the finish. It came in semi-gloss black. Too shiny for me. I took it downstair at work and scotchbrite-d the entire surface. Wiped with min spirits to remove dust and finger prints/oils. Then rattle can sprayed it with textured Satin Black Rustoleum. Several coats. Took two cans. Looks and feels like the OEM guard finish.
Welds look pretty good.

Carrying this thing around, it is LARGE. And feels VERY durable.
Up to the level of RubberDuck? No way. I wouldn't want to push over a 3" sapling. I have no illusions about my new brush guard. It is for brush. In that regard I feel it will fulfill the VAST majority of H2 owners end use.
How often do you expect to be plowing thru the open forest? And you know that factory OEM brush guard won't do what many think it will. It is also for brush, not pushing vehicles out of the way or knocking down trees...
If you're looking for something to attach a recovery strap to, this ain't it. If you're looking for a tough looking brush guard that is at least as robust as the OEM brush guard, this is a good option. And its MADE IN USA.
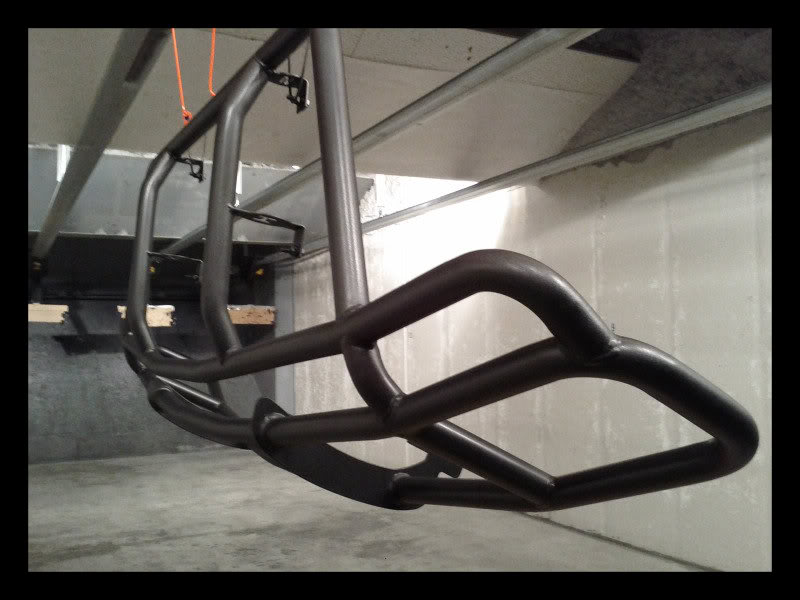
I will post pics of the install. For now only pics of the painting process.
Cheers,
easysixonezero
**********UPDATE/EDIT***********
OK. Got it painted and gave it plenty of time to cure.
Pleased with the final finish.
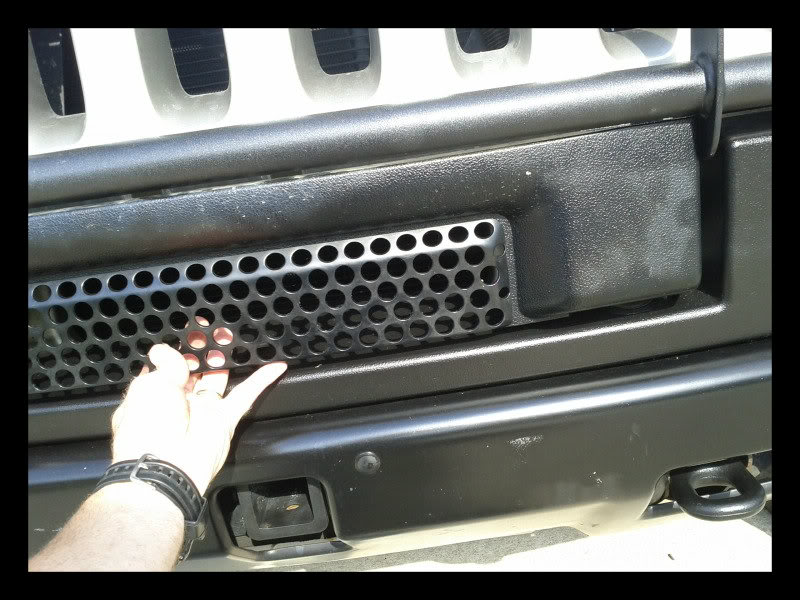
Prior to install I popped off the front valance cover that covers the OEM brush guard bolts and the area below the grill. It is simply popped on with four "snap" clips. Be careful pulling it off, it can crack and may be brittle. I opened the hood and "helped" the clips with a squirt of WD40 and needle nose pliers, pinching the clips and pressing them partially out from behind. Once you check it out you'll know what I mean...simple.
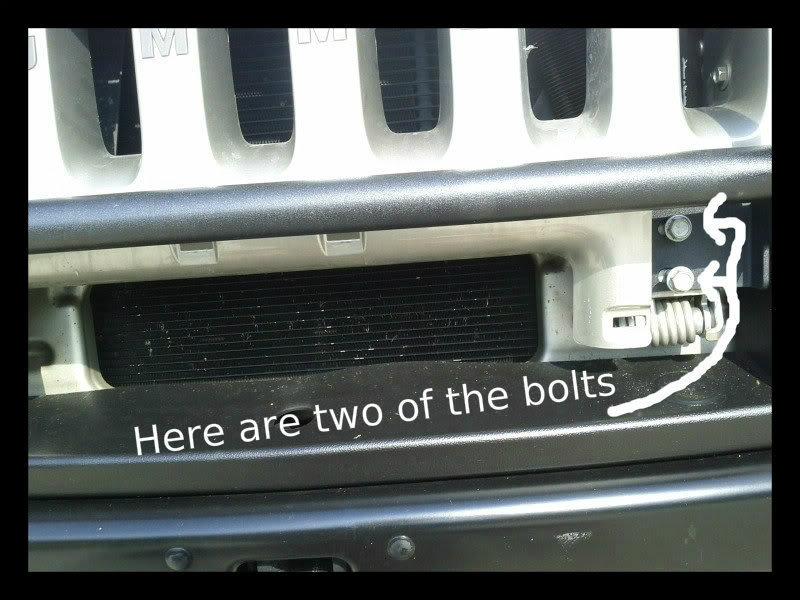
Then there are four bolts that, if you have the OEM brush guard, are all that's holding the brush guard onto the vehicle. They are a simple removal.
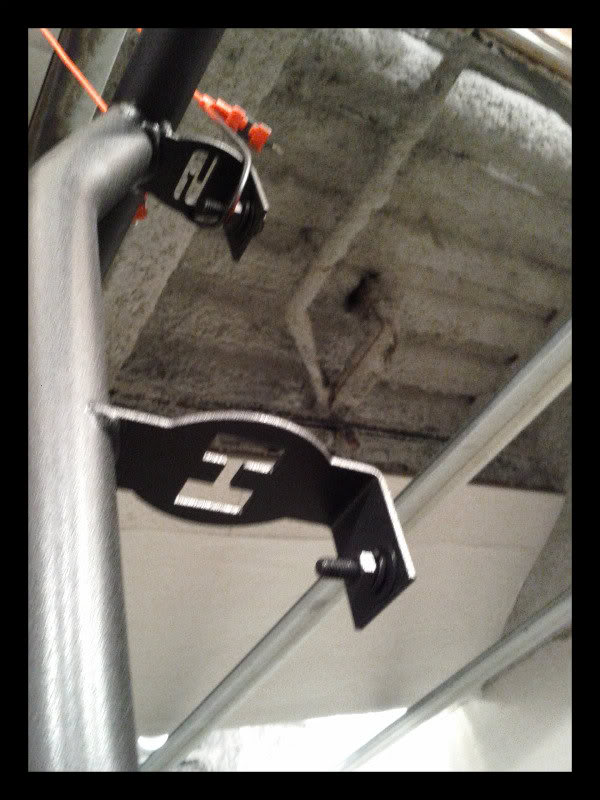
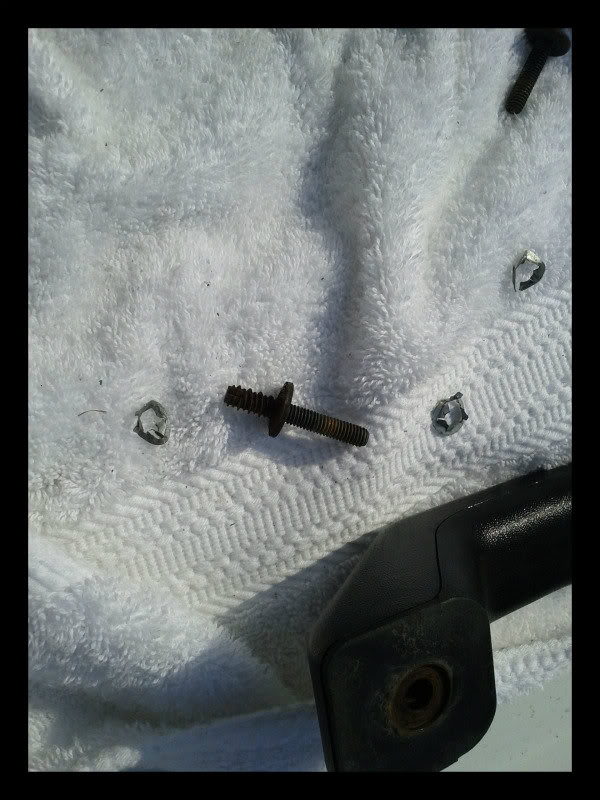
Then onto the hood louvers and hood handles. Open the hood and you'll see four nuts on the underside of the hood. Remove those four nuts and the louver section and hood handles come off altogether as a unit.

You'll need to separate the hood handles from the louver "pan" (That’s what I call it...). The handles will be replaced by the brush guard, but the louver pan will go back on the hood. The hood handles are held in place by 1/2 screw - 1/2 bolt. Bolted to the hood (see pic above) and screwed into the handle (see pic below)
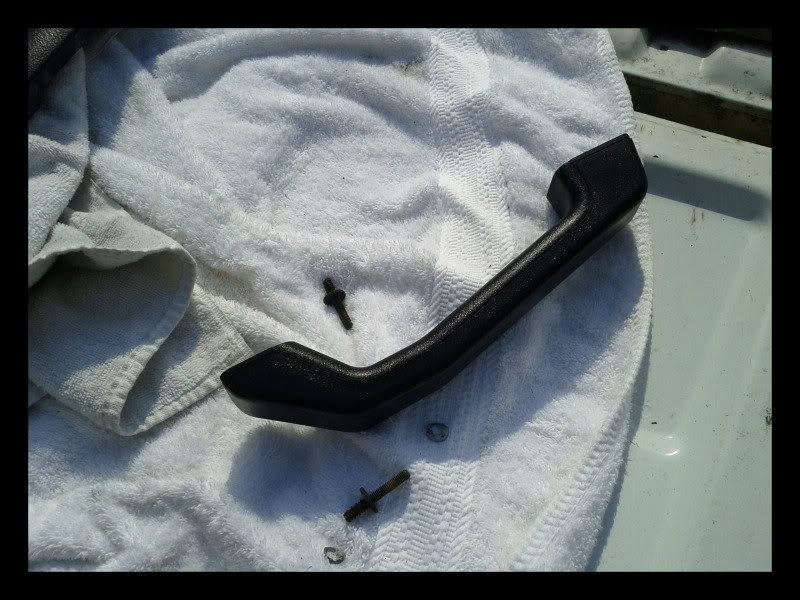
OK. Now you got the louver pan down to the basics with no handles.
Place the louver pan back on the hood, have someone help you place/fit test the brush guard making sure all eight holes line up. My 13 year old helped me with little issue. He is pretty tough...!
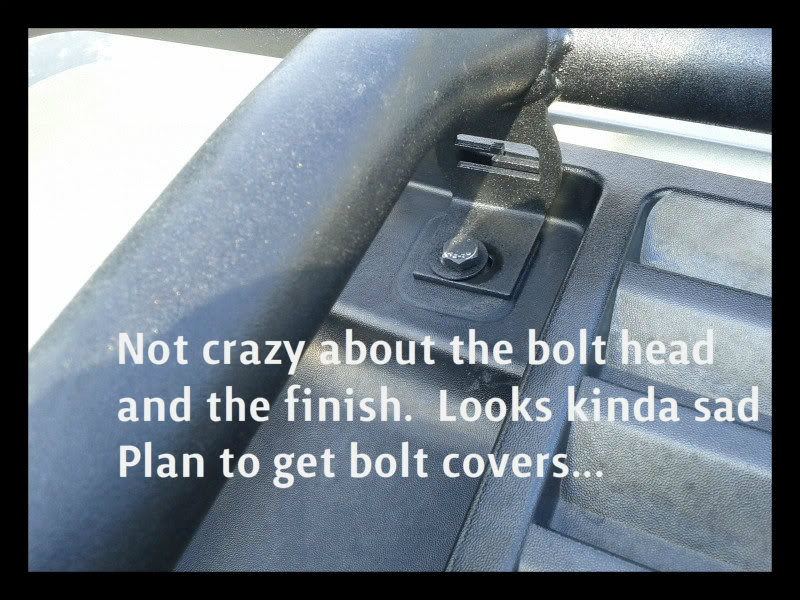
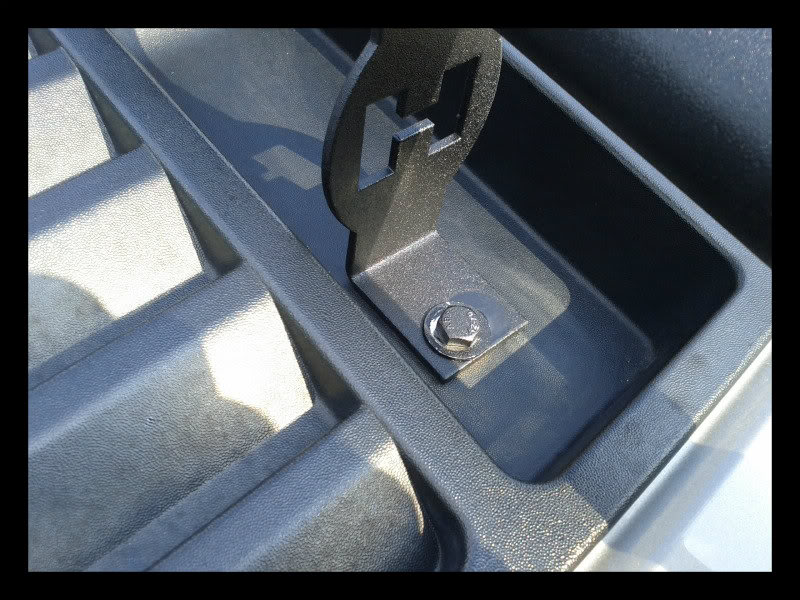
I then started the four large bolts in front first to hold the weight. Then lined up the holes through the brush guard, through the lover pan and then slipped the bolts that came with the guard through the hood and finger tightened the nuts onto the bolts where the handles used to be.
Once everything was finger tight I checked for any issues - guard touching anywhere, bolts binding from not lining up well. ZERO fitment issues. JOY IN MUDVILLE!
FIrst tightened the four large front bolts then the four through the hood. Again, you need another person to hold a wrench on the bolt head on the outside of the hood as you tightened underneath.
Really a VERY simple install. Writing this took almost as much time as actual install...
And after installing new KC Hilite Apollo 6" lights...TADA! The final product.
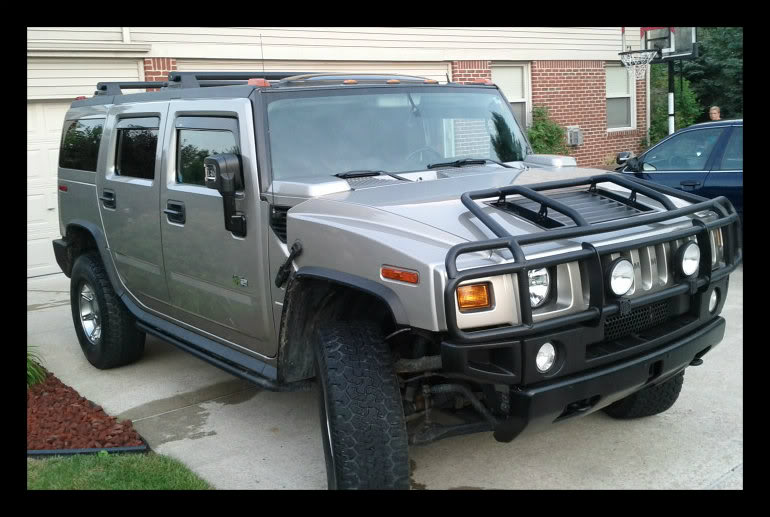
Looks like it is off center...it was me taking the pic, not the guard. Its is withint 1/4" of being totally equal on both sides...
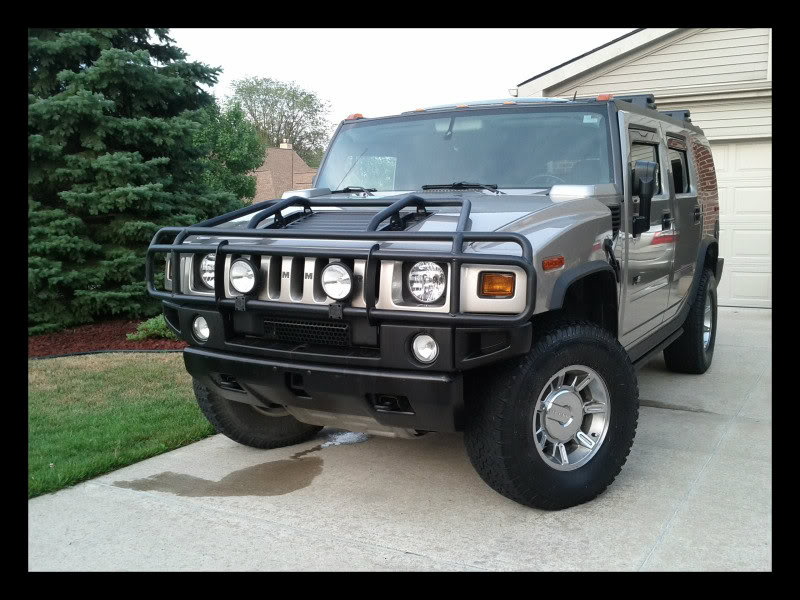
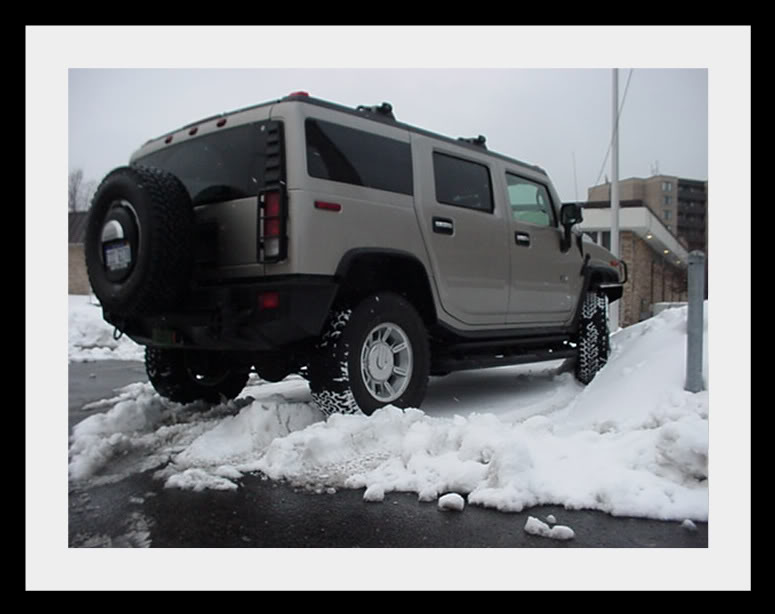
Side pic before installing the driving lights..but it gives you a good shot of how far up the hood it goes...
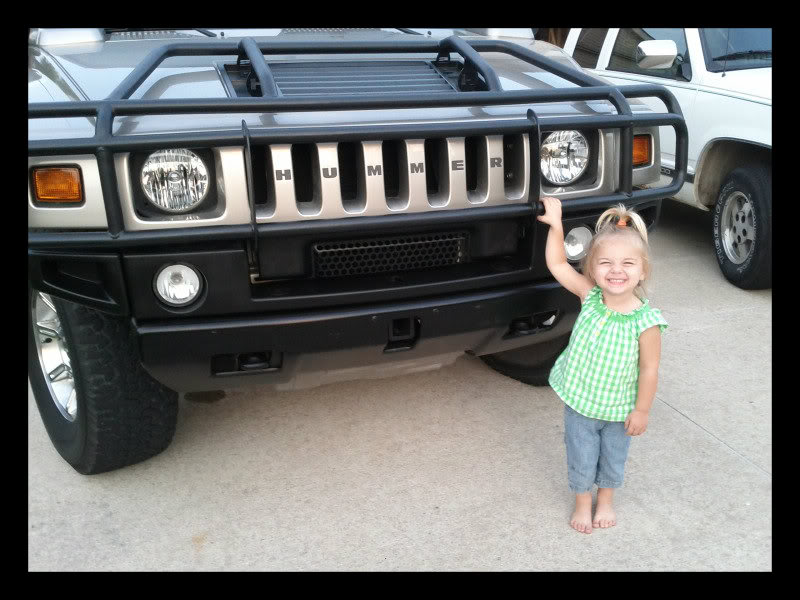
Pic of youngest and prior to extra light install…she LOVES the HUMMER.
“Dats my HUMMMUR…” she says…
Feels ROCK solid, like I could climb on it...but I don't plan to!
No movement what so ever.
Overall VERY pleased.
Cheers,
easysixonezero
Bought my 2006 with 22K miles in fall of 2009. It now has 39K miles. I have a company car so the H2 is only used for fun and towing RV...hence low miles. My H2 came with the smaller simple OEM brush guard.
I have been on a quest to rid my beloved H2 of all chrome In my opinion the H2 is truck that should be truck-like, not bling-y.
Well, I've searched and searched for a brush guard more robust and tough since I first got my H2. Have looked at Road Armor, RubberDuck, etc, etc. The issue is I do mild off roading compared to some. I just couldn't justify the $2000 for a brush guard.
I have hemmed and hawed over the Ebay $500 brush guard below for a couple years. How tough could it be? Will it be thin metal tubing that bends while being installed?
MASSIVE BLACK FRONT BRUSH GRILLE GUARD HUMMER H2 USA | eBay
I finally took the plung and bought one. It came in a massive cardboard package and was very well packaged/protected for shipping. Design replaces the hood handles. There is a nice detail of the "H" and "2" in the hood attachment brackets....
First impressions are it is more robust that I expected. When placed on the ground in an inverted "V" my brother stood on it to test the welds. He is 220# and bounced up and down for a bit. Zero movement from the guard. The tubing feels atleast as thick as the OEM guard.
One thing I didn't like was the finish. It came in semi-gloss black. Too shiny for me. I took it downstair at work and scotchbrite-d the entire surface. Wiped with min spirits to remove dust and finger prints/oils. Then rattle can sprayed it with textured Satin Black Rustoleum. Several coats. Took two cans. Looks and feels like the OEM guard finish.
Welds look pretty good.
Carrying this thing around, it is LARGE. And feels VERY durable.
Up to the level of RubberDuck? No way. I wouldn't want to push over a 3" sapling. I have no illusions about my new brush guard. It is for brush. In that regard I feel it will fulfill the VAST majority of H2 owners end use.
How often do you expect to be plowing thru the open forest? And you know that factory OEM brush guard won't do what many think it will. It is also for brush, not pushing vehicles out of the way or knocking down trees...
If you're looking for something to attach a recovery strap to, this ain't it. If you're looking for a tough looking brush guard that is at least as robust as the OEM brush guard, this is a good option. And its MADE IN USA.
I will post pics of the install. For now only pics of the painting process.
Cheers,
easysixonezero
**********UPDATE/EDIT***********
OK. Got it painted and gave it plenty of time to cure.
Pleased with the final finish.
Prior to install I popped off the front valance cover that covers the OEM brush guard bolts and the area below the grill. It is simply popped on with four "snap" clips. Be careful pulling it off, it can crack and may be brittle. I opened the hood and "helped" the clips with a squirt of WD40 and needle nose pliers, pinching the clips and pressing them partially out from behind. Once you check it out you'll know what I mean...simple.
Then there are four bolts that, if you have the OEM brush guard, are all that's holding the brush guard onto the vehicle. They are a simple removal.
Then onto the hood louvers and hood handles. Open the hood and you'll see four nuts on the underside of the hood. Remove those four nuts and the louver section and hood handles come off altogether as a unit.
You'll need to separate the hood handles from the louver "pan" (That’s what I call it...). The handles will be replaced by the brush guard, but the louver pan will go back on the hood. The hood handles are held in place by 1/2 screw - 1/2 bolt. Bolted to the hood (see pic above) and screwed into the handle (see pic below)
OK. Now you got the louver pan down to the basics with no handles.
Place the louver pan back on the hood, have someone help you place/fit test the brush guard making sure all eight holes line up. My 13 year old helped me with little issue. He is pretty tough...!
I then started the four large bolts in front first to hold the weight. Then lined up the holes through the brush guard, through the lover pan and then slipped the bolts that came with the guard through the hood and finger tightened the nuts onto the bolts where the handles used to be.
Once everything was finger tight I checked for any issues - guard touching anywhere, bolts binding from not lining up well. ZERO fitment issues. JOY IN MUDVILLE!
FIrst tightened the four large front bolts then the four through the hood. Again, you need another person to hold a wrench on the bolt head on the outside of the hood as you tightened underneath.
Really a VERY simple install. Writing this took almost as much time as actual install...
And after installing new KC Hilite Apollo 6" lights...TADA! The final product.
Looks like it is off center...it was me taking the pic, not the guard. Its is withint 1/4" of being totally equal on both sides...
Side pic before installing the driving lights..but it gives you a good shot of how far up the hood it goes...
Pic of youngest and prior to extra light install…she LOVES the HUMMER.
“Dats my HUMMMUR…” she says…
Feels ROCK solid, like I could climb on it...but I don't plan to!
No movement what so ever.
Overall VERY pleased.
Cheers,
easysixonezero
Last edited by easy610; 07-04-2012 at 01:35 PM.

#3
06-27-2012, 07:43 PM

Thanks for the review! I will be in the market for one soon, this will probably be the one i get!
steve
steve
#4
06-28-2012, 03:49 AM

Very interesting review, I have also looked at this brush guard for a long time. I actually don't care for the H2 in the brackets nor do I care for the double tier look on the front. All the guy did was weld on some extra tubes to a stocker guard.
However I don't mind it, I almost hit the buy it now button many times. I was going with Road Armor but can't justify that kind of money for the Dakar and Atlas II. Now my plans are Rubberduck treehugger guard and warn winch bumper.
Good write up!
However I don't mind it, I almost hit the buy it now button many times. I was going with Road Armor but can't justify that kind of money for the Dakar and Atlas II. Now my plans are Rubberduck treehugger guard and warn winch bumper.
Good write up!
#5
06-28-2012, 01:27 PM
Update - Multiple coats of paint and clear-coat done. Now just letting it sit and cure.
I've been hasty in the past handling, installing items too soon after paint. Now, being older, hopefully more wise and with MUCH more patience, I know waiting an extra day or two or three is advisable before messing with the fresh painted item!
Install should be Monday July 2 or Tuesday July 3...depending on my workload. I will take pics of my H2 before during and after.
This should go very quick and I expect about 20-30 minutes to install....
Cheers,
easysixonezero
PS - One of the reasons I'm writing about this guard is I have looked at it for years, literally, and have searched and searched for ANY information on it...all to no avail. Now others will have some record of my thoughts and opinions on it. Which are worth exactly what you're paying for them!
Last edited by easy610; 06-28-2012 at 01:31 PM.
#7
07-05-2012, 11:45 AM
That guard has been on my 'watched' list on Ebay for quite some time. Thanks for the review! I am pleased to hear it getting a high review; this guard will be next on my list (after I repair my blend door actuator issues).


Thread
Thread Starter
Forum
Replies
Last Post
garrettrawlings
PRIVATE For Sale / Trade Classifieds
1
06-05-2014 01:23 PM
pcmommy
PRIVATE For Sale / Trade Classifieds
11
04-13-2007 02:57 AM